
Fabricating a 63 Classic Wagon Gas Tank
written by Frank Swygert 03-08-2026
When I discovered a leak in my gas tank in 2006 I used a POR-15 kit to seal it. For whatever reason that didn’t work well! The kit had either been on the shelf too long, the gas tank wasn’t as clean as it needed to be (I’m pretty sure it was though), or it just didn’t fully cover the inside (which could be my fault). In any case, the POR-15 liner came loose inside the tank. I don’t like this thick urethane liner for this very reason — it’s possible for it to lose adhesion to the inside of the tank (usually due to user/installer error, I’ll admit!) and leave you with a “balloon” inside a leaking tank. Thinner liners such as Bill Hirsch products, which I’ve used many times with no issues, I like much better! So why did ?I use the Por-15 kit? Well, a friend who had been a dealer was retiring and gave me the last kit he had in inventory. That’s why I mentioned that it may have been expired, as it does have a shelf life. I just don’t remember if I even checked that…
So I had a couple options at this point. The first would have been to cut a large hole or two in the top of the tank and remove the old lining then repair the tank. I could have sent it to a Gas Tank Renu dealer to be repaired. I could replace it with a Mustang or Chevy II tank. Or I could make my own…
So how hard could it be to make a gas tank? It’s nothing but a sealed metal box, right? I have to mention that I was a USAF Structural Specialist, and we were trained in all aspects of erecting a building made from any material (steel, wood, concrete block, etc.). Sheet metal, steel fabrication, and HVAC duct work are also covered. I had been an instructor for two years covering buildings, and another two years covering welding/fabrication/duct work. So I had some experience in making “metal boxes”.
I was friends with a local hot rod shop at this time – Ram’s Rod Shop (owner Mosher Ramsey passed in 2022, age 75). He allowed me to use his sheet metal brake and shear for this project, which helped a lot! I was still in the USAF stationed at Dover AFB, Delaware, so I didn’t have a shop to work in like I do now.
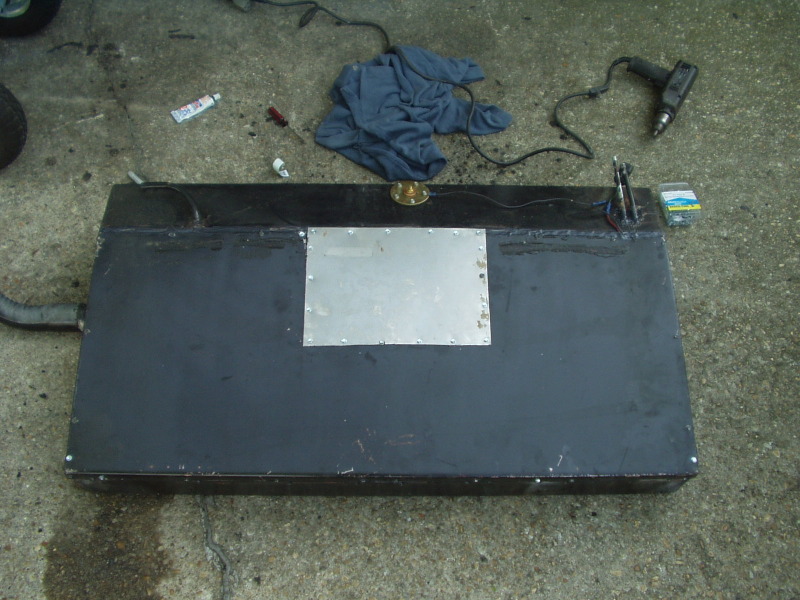
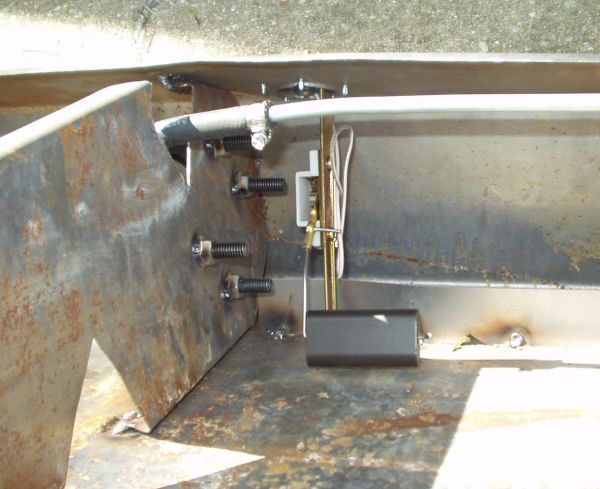
My hot rod shop friend ordered a 3’x10′ sheet of 18 gauge steel for the project. He’d keep any I had left over. That runs about $150-160 today. I designed the tank with a sloped front to clear the floor. This would make installing a sending unit easier and keep electrical connections clear of the floor. The new tank is slightly larger than the old, about 22 gallons. The filler neck is a length of 2″ muffler pipe. It extends 2-3″ into the tank and is welded inside to the floor at the end. A baffle with large cutouts was used in the center to stiffen the tank. I also mounted the fuel pump on the baffle with two large u-bolts. The universal sending unit was mounted in a hole on the slanted front. A length of 1/2″ tubing was used to make an air vent in the top left corner above the filler. On the opposite end two 5/16″ tubes were welded in for a fuel feed and return line (I am running a 1988 Renix EFI system 4.0L from a Comanche).
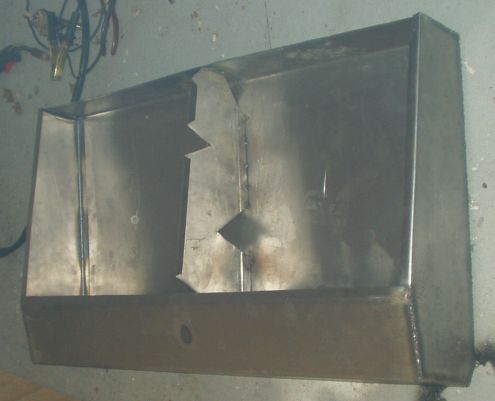
My original idea was to make the entire top of the tank removable for inside access. Well, that didn’t work! There are several “fuel resistant” sealers on the market, but no readily available fuel PROOF sealers (there are some expensive aviation sealers that would have worked…). The area is to large for an effective gasket. So after a couple weeks running the tank leaked around the top. Luckily it only leaked a little as fuel sloshed around, more when full and fuel was nearest the top. This was annoying to say the least! The tank had to come out and be thoroughly cleaned and aired out so the top could be welded on after an access panel for the fuel pump was cut and the perimeter reinforced. At least the removable top made cleaning and airing out easy, which made welding after use safe.
The first pic in the article is the finished tank with fuel pump access panel. The panel is sealed with a rubberized cork gasket cut from a sheet of gasket material.
Assembled tank.
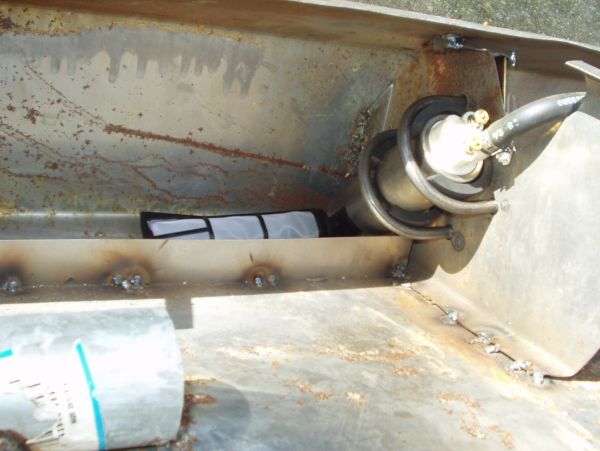
Fuel pump mounted. I installed a short baffle to keep fuel from “running away” from the pick-up on acceleration when fuel is low. I should have put another near the end of the fuel filter “sock” to prevent losing fuel on right turns when low. The baffle helps on left turns, but there is a notch on the front lower corner. If level is low and I make a hard turn I might get a stumble… at which time I better be looking for fuel! I have about a two gallon reserve at that point, when the level is reading empty anyway.
Universal sending unit installed. It reads down to empty just fine, I intentionally have about a two gallon reserve when it’s reading empty. It won’t read full though — the gauge only goes up to about 3/4 full. It doesn’t hit the fuel line to the pump, it just couldn’t be adjusted to read the entire range. As noted, I just need to know when I need more fuel!
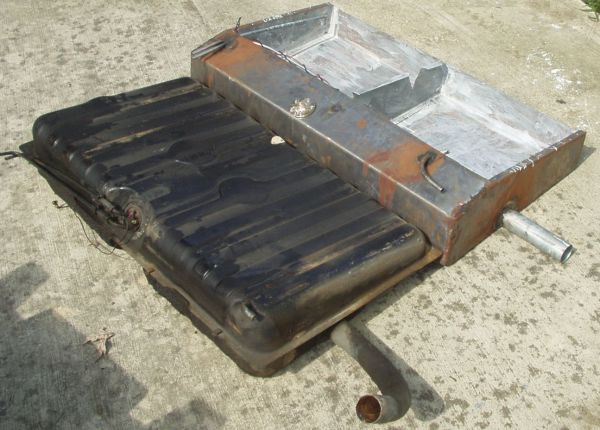
Here is the original and new tanks for a size comparison. The new one is slightly taller, giving about a 22 gallon capacity. Original is 20 gallon.
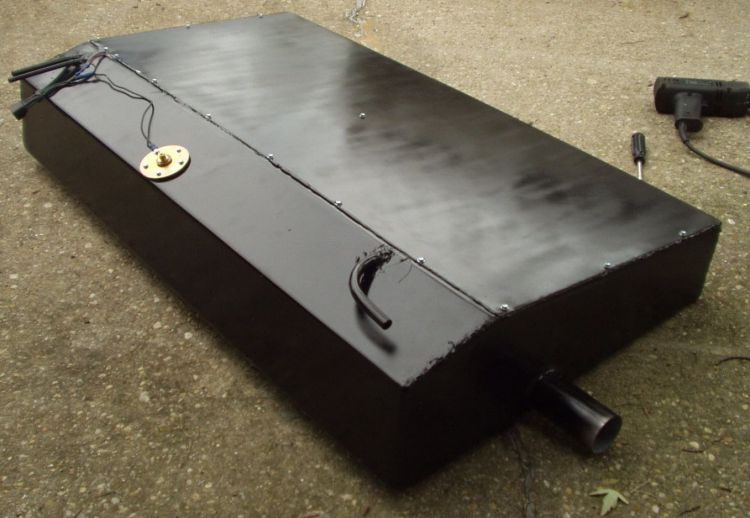
As originally finished with removable top. This took the better part of a day to make. Not that hard — a 36″ x36″ piece makes up the front bottom, and back. Sides and baffles were then made, leaving a 36″ x 18″ top.
Deprecated: File Theme without comments.php is deprecated since version 3.0.0 with no alternative available. Please include a comments.php template in your theme. in /home3/amcmagc1/public_html/wp-includes/functions.php on line 6170
Leave a Reply