
Re-lining fuzzy rigid window guides
The roll-up windows run in lined metal channels. The rear edge and top are a press-in rubber channel (older models use a flexible metal lined channel, but easily replaced with the newer style rubber channel) available by the foot and are easily replaced, but the rigid, front, guide that serves as backstop for the vent window is another story. They are mechanically complex enough to want to leave alone. Straight
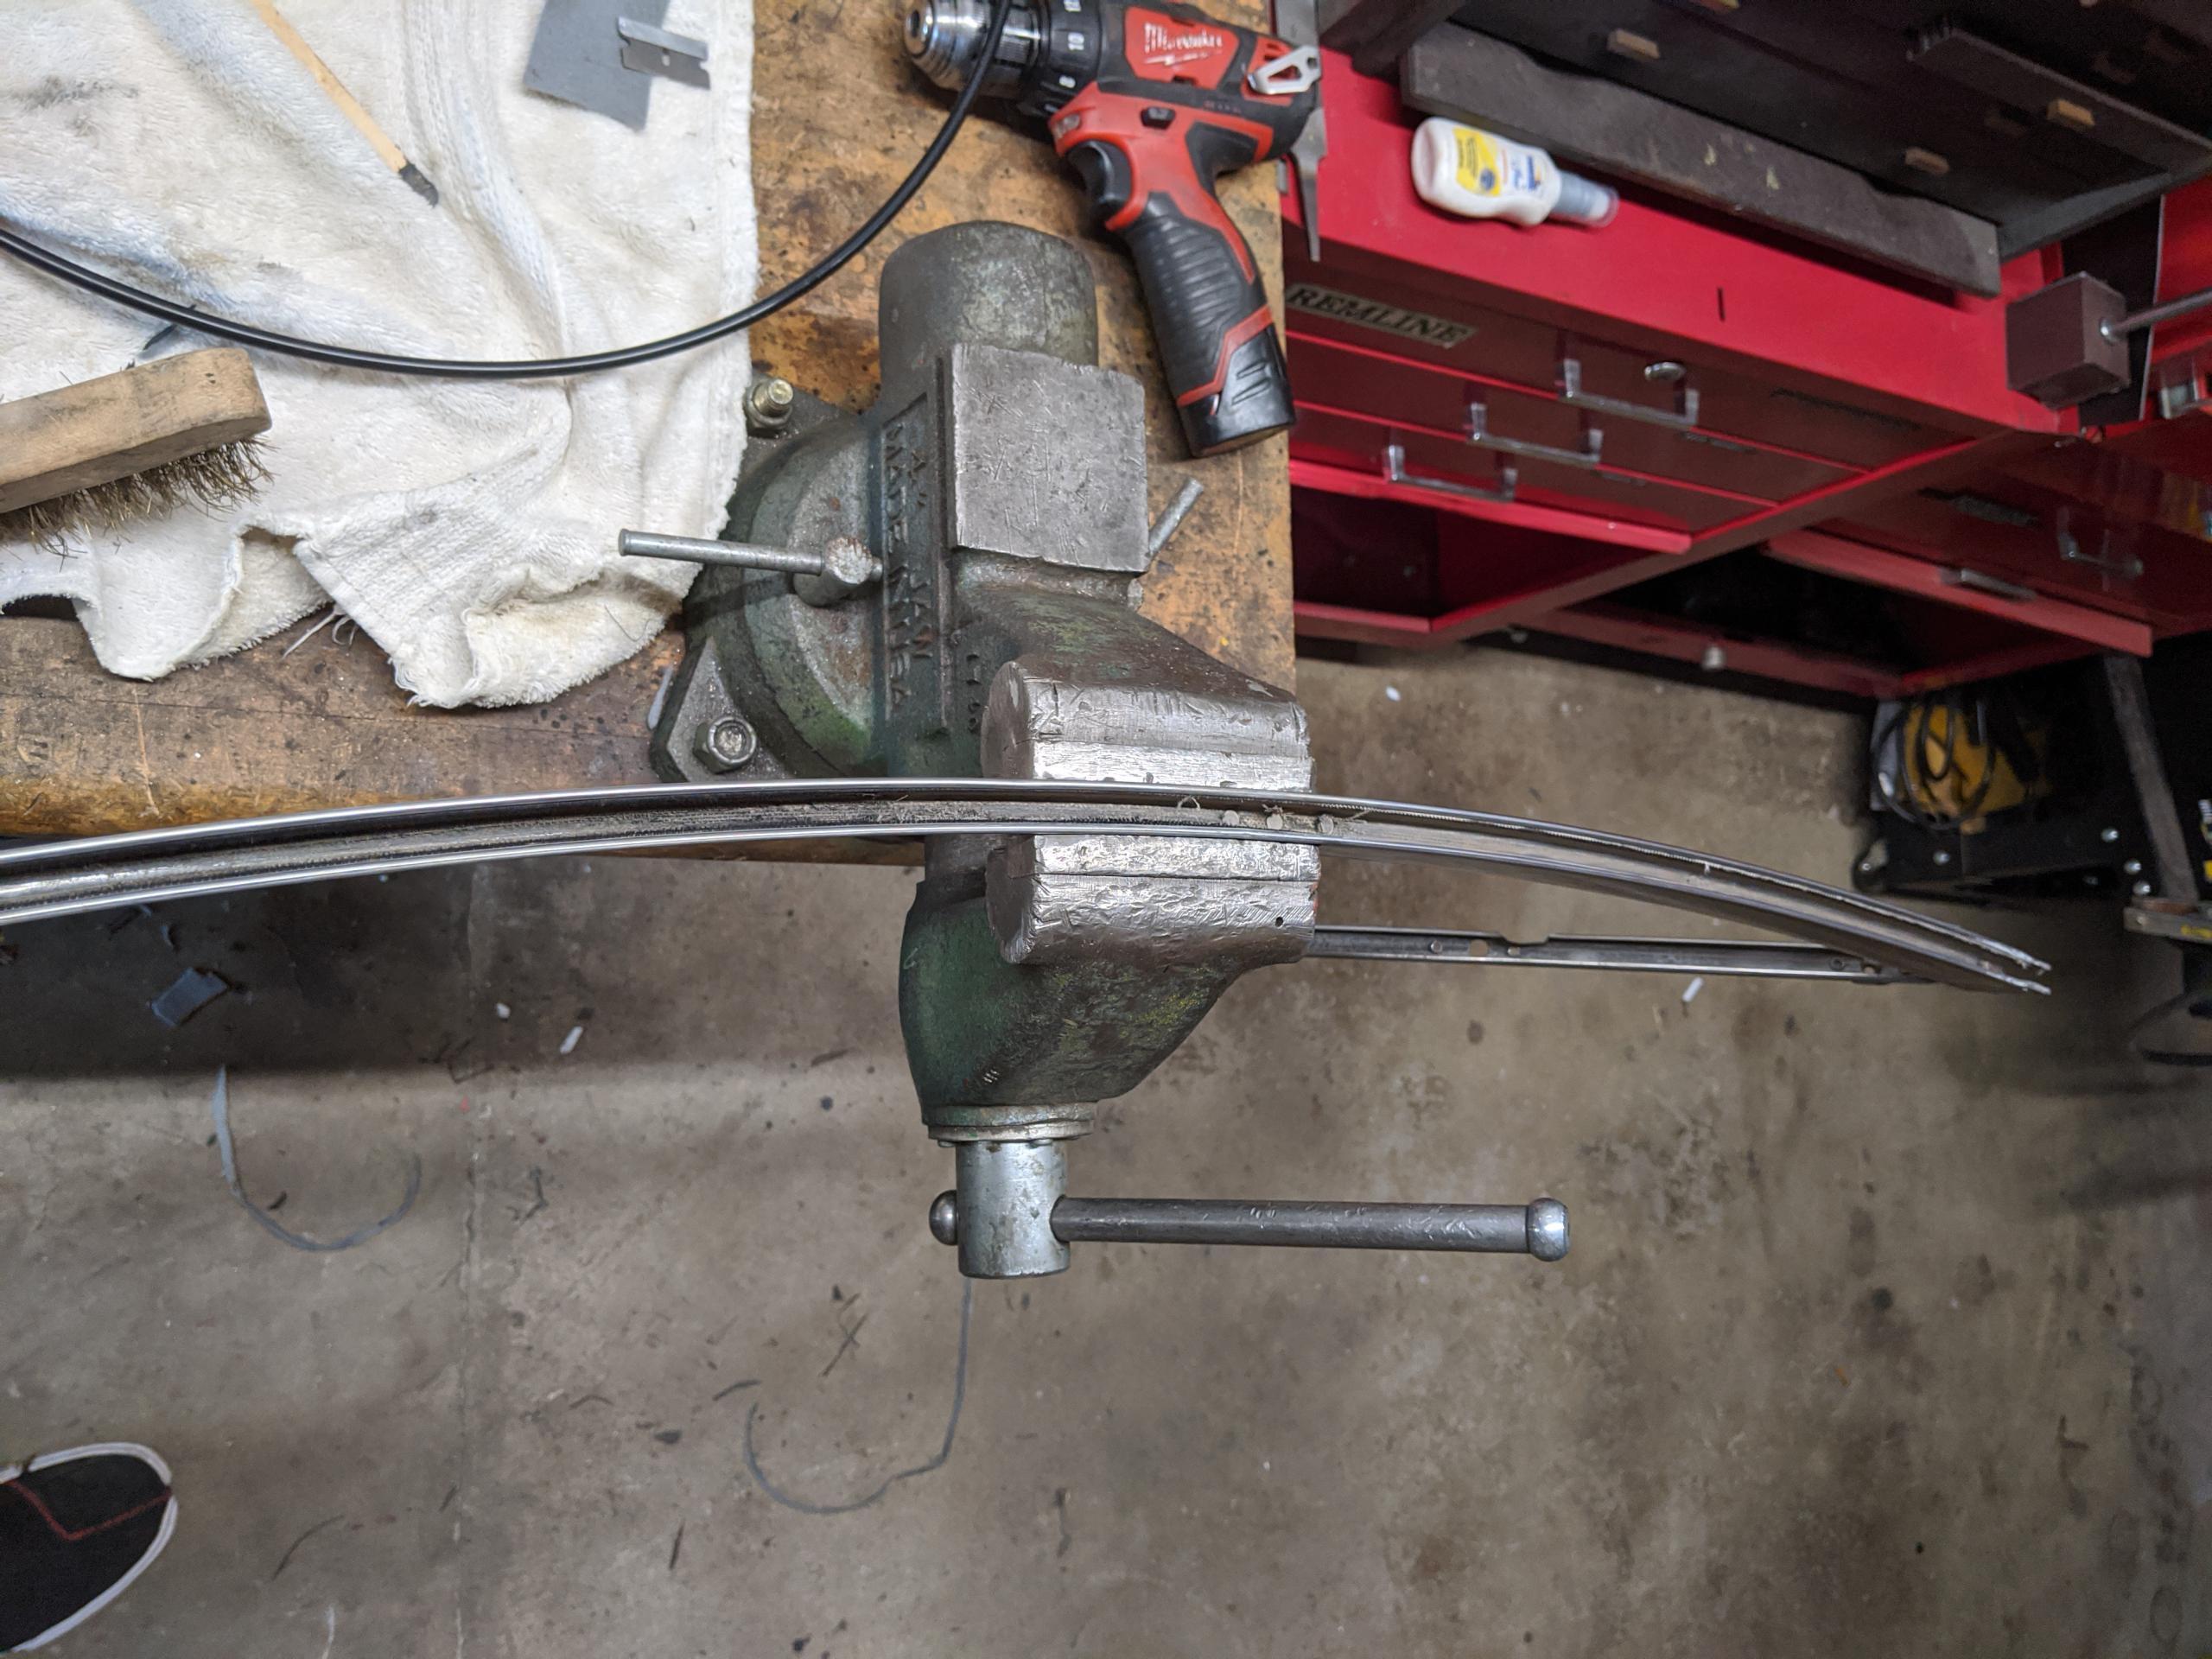
lengths of rigid, stainless steel beaded lined guide are available by the foot, but no fun to work with. And in the 1960’s these guides were curved.
This is much easier, and nearly as good. The one flaw is that the resulting channel for the glass is 1/32″ or so too wide, so the glass isn’t as tight as the “correct” part, but it is not worn-loose and not sloppy.
The magic chemical here is Permatex Ultra Black or Ultra Gray. It is not ordinary cheap hardware store (or auto store) silicone. It costs more and is worth every cent. Don’t by the cheap jelly-like crap.
This requires two full curing times for the Permatex. It’s easy, but you have to wait. Hurry it and you will have an unsatisfying mess.
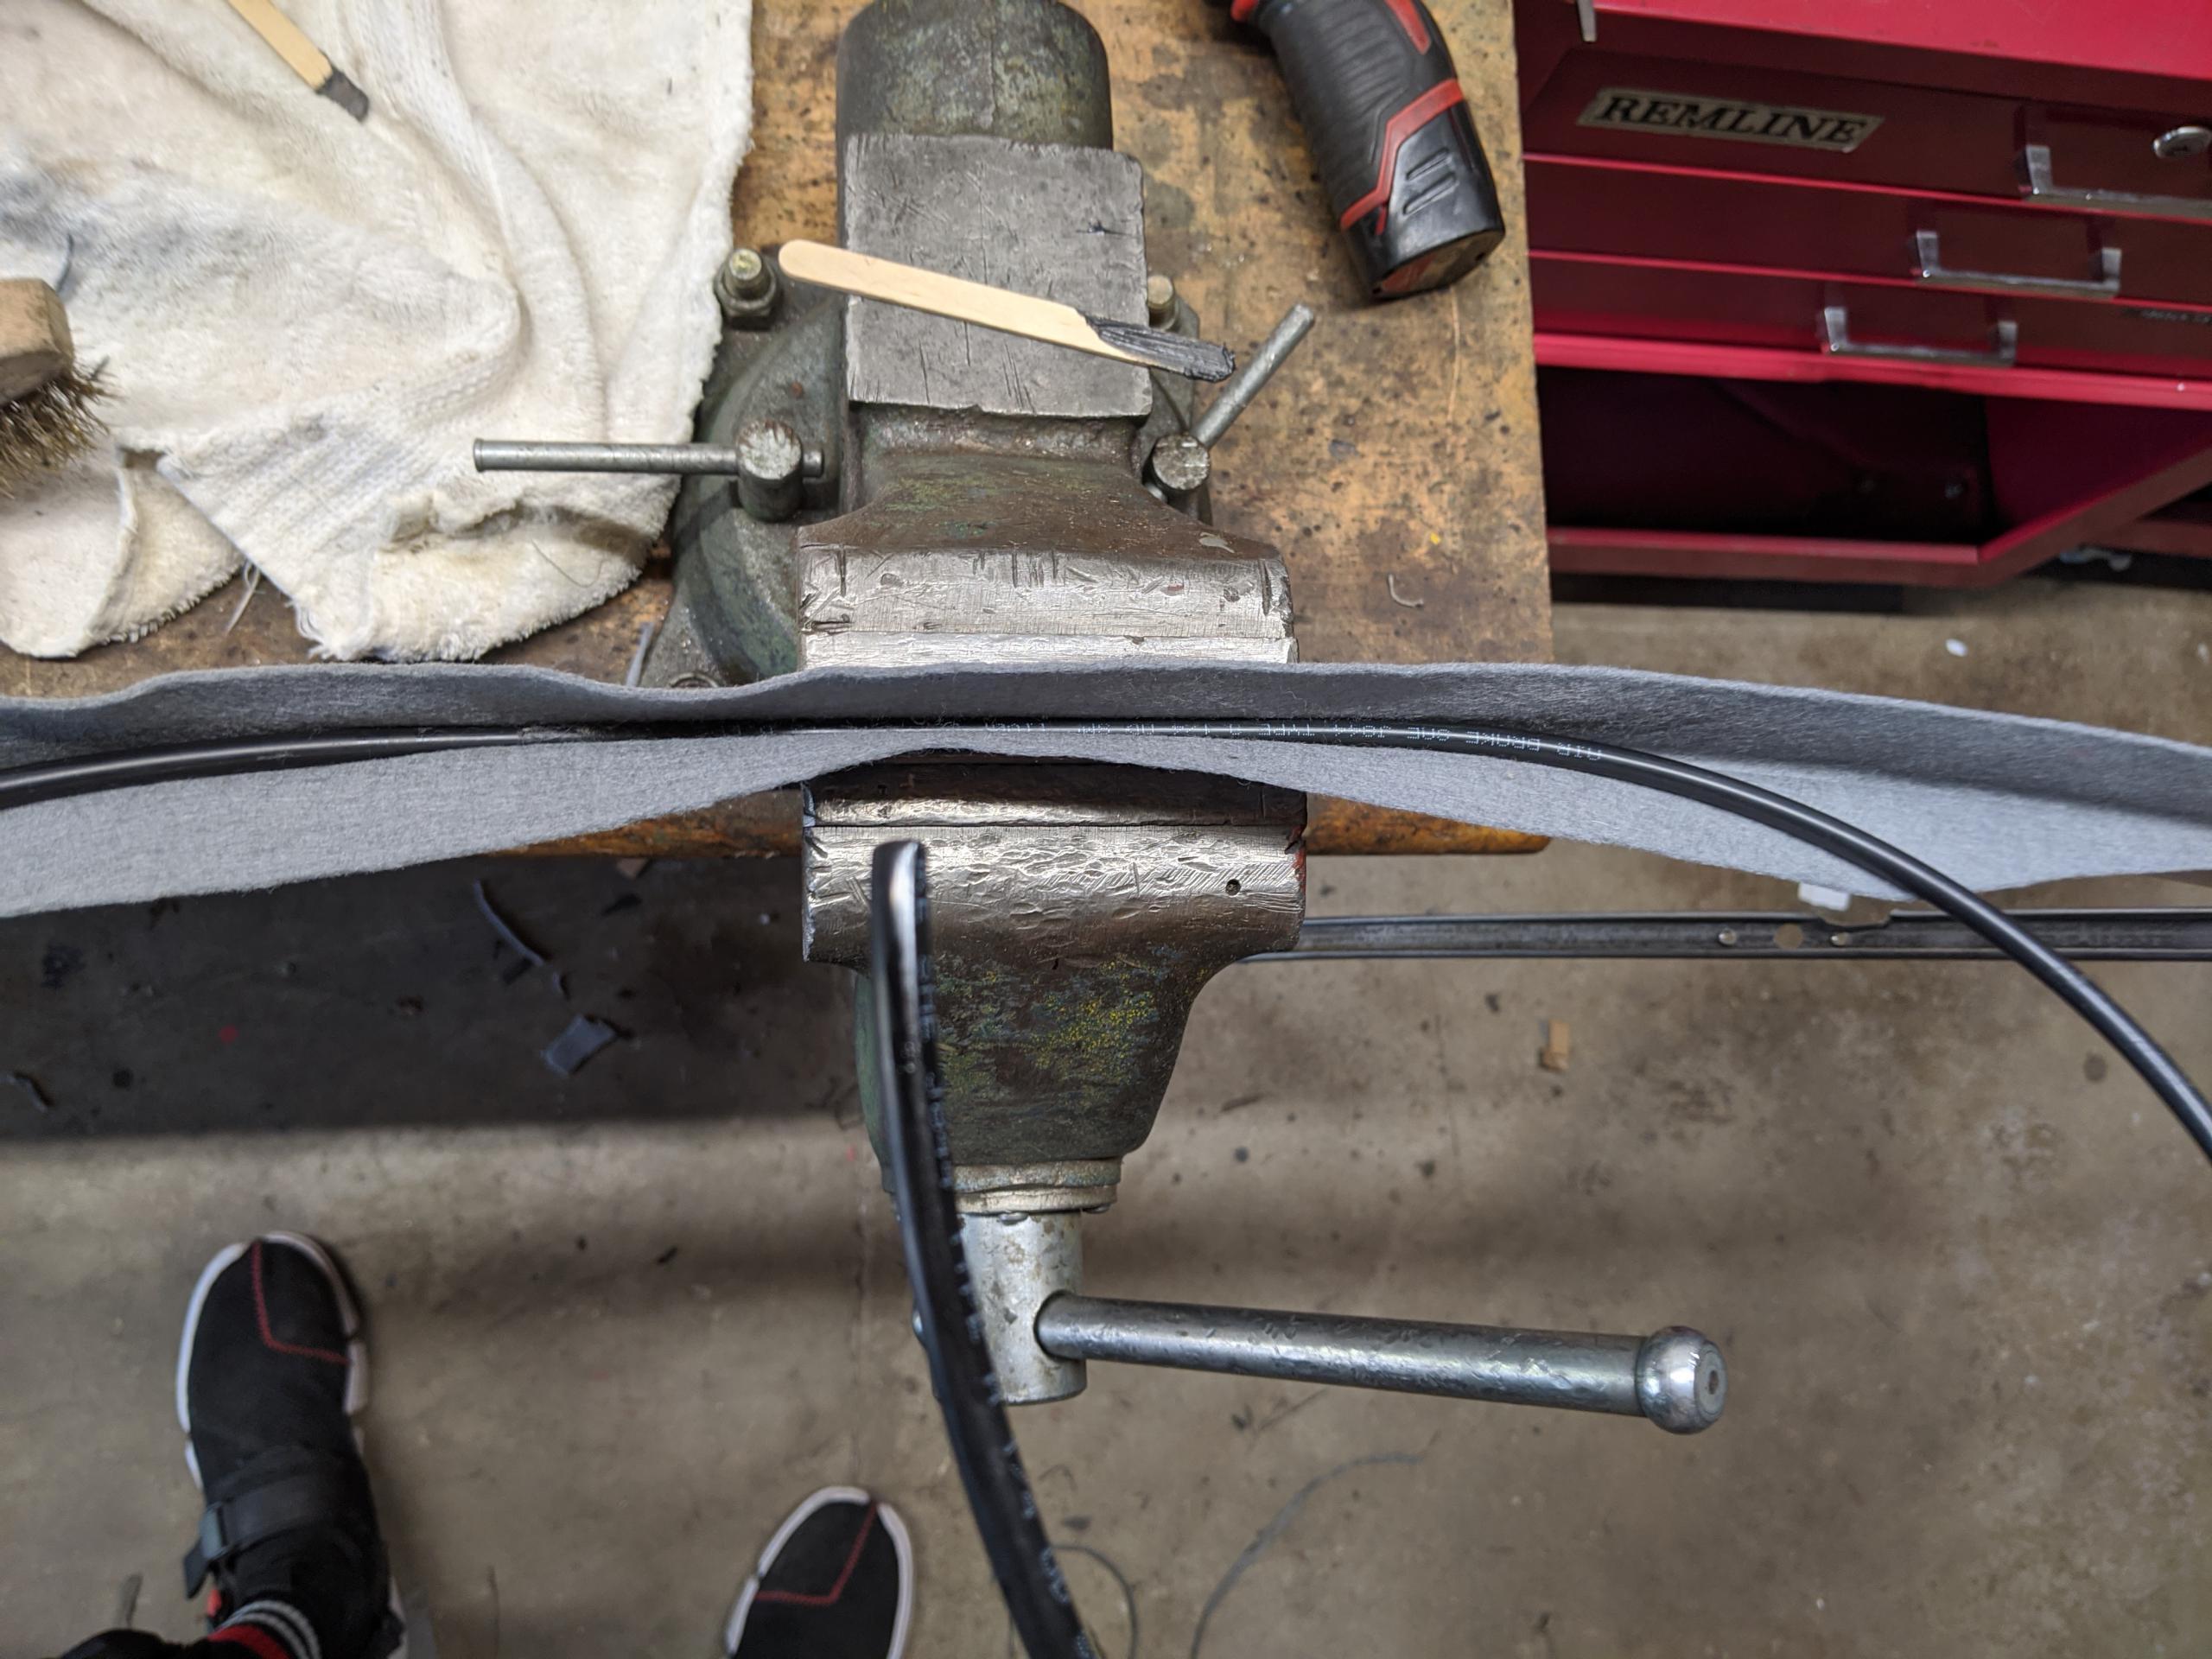
I mounted it loosely in a vise for simplicity.
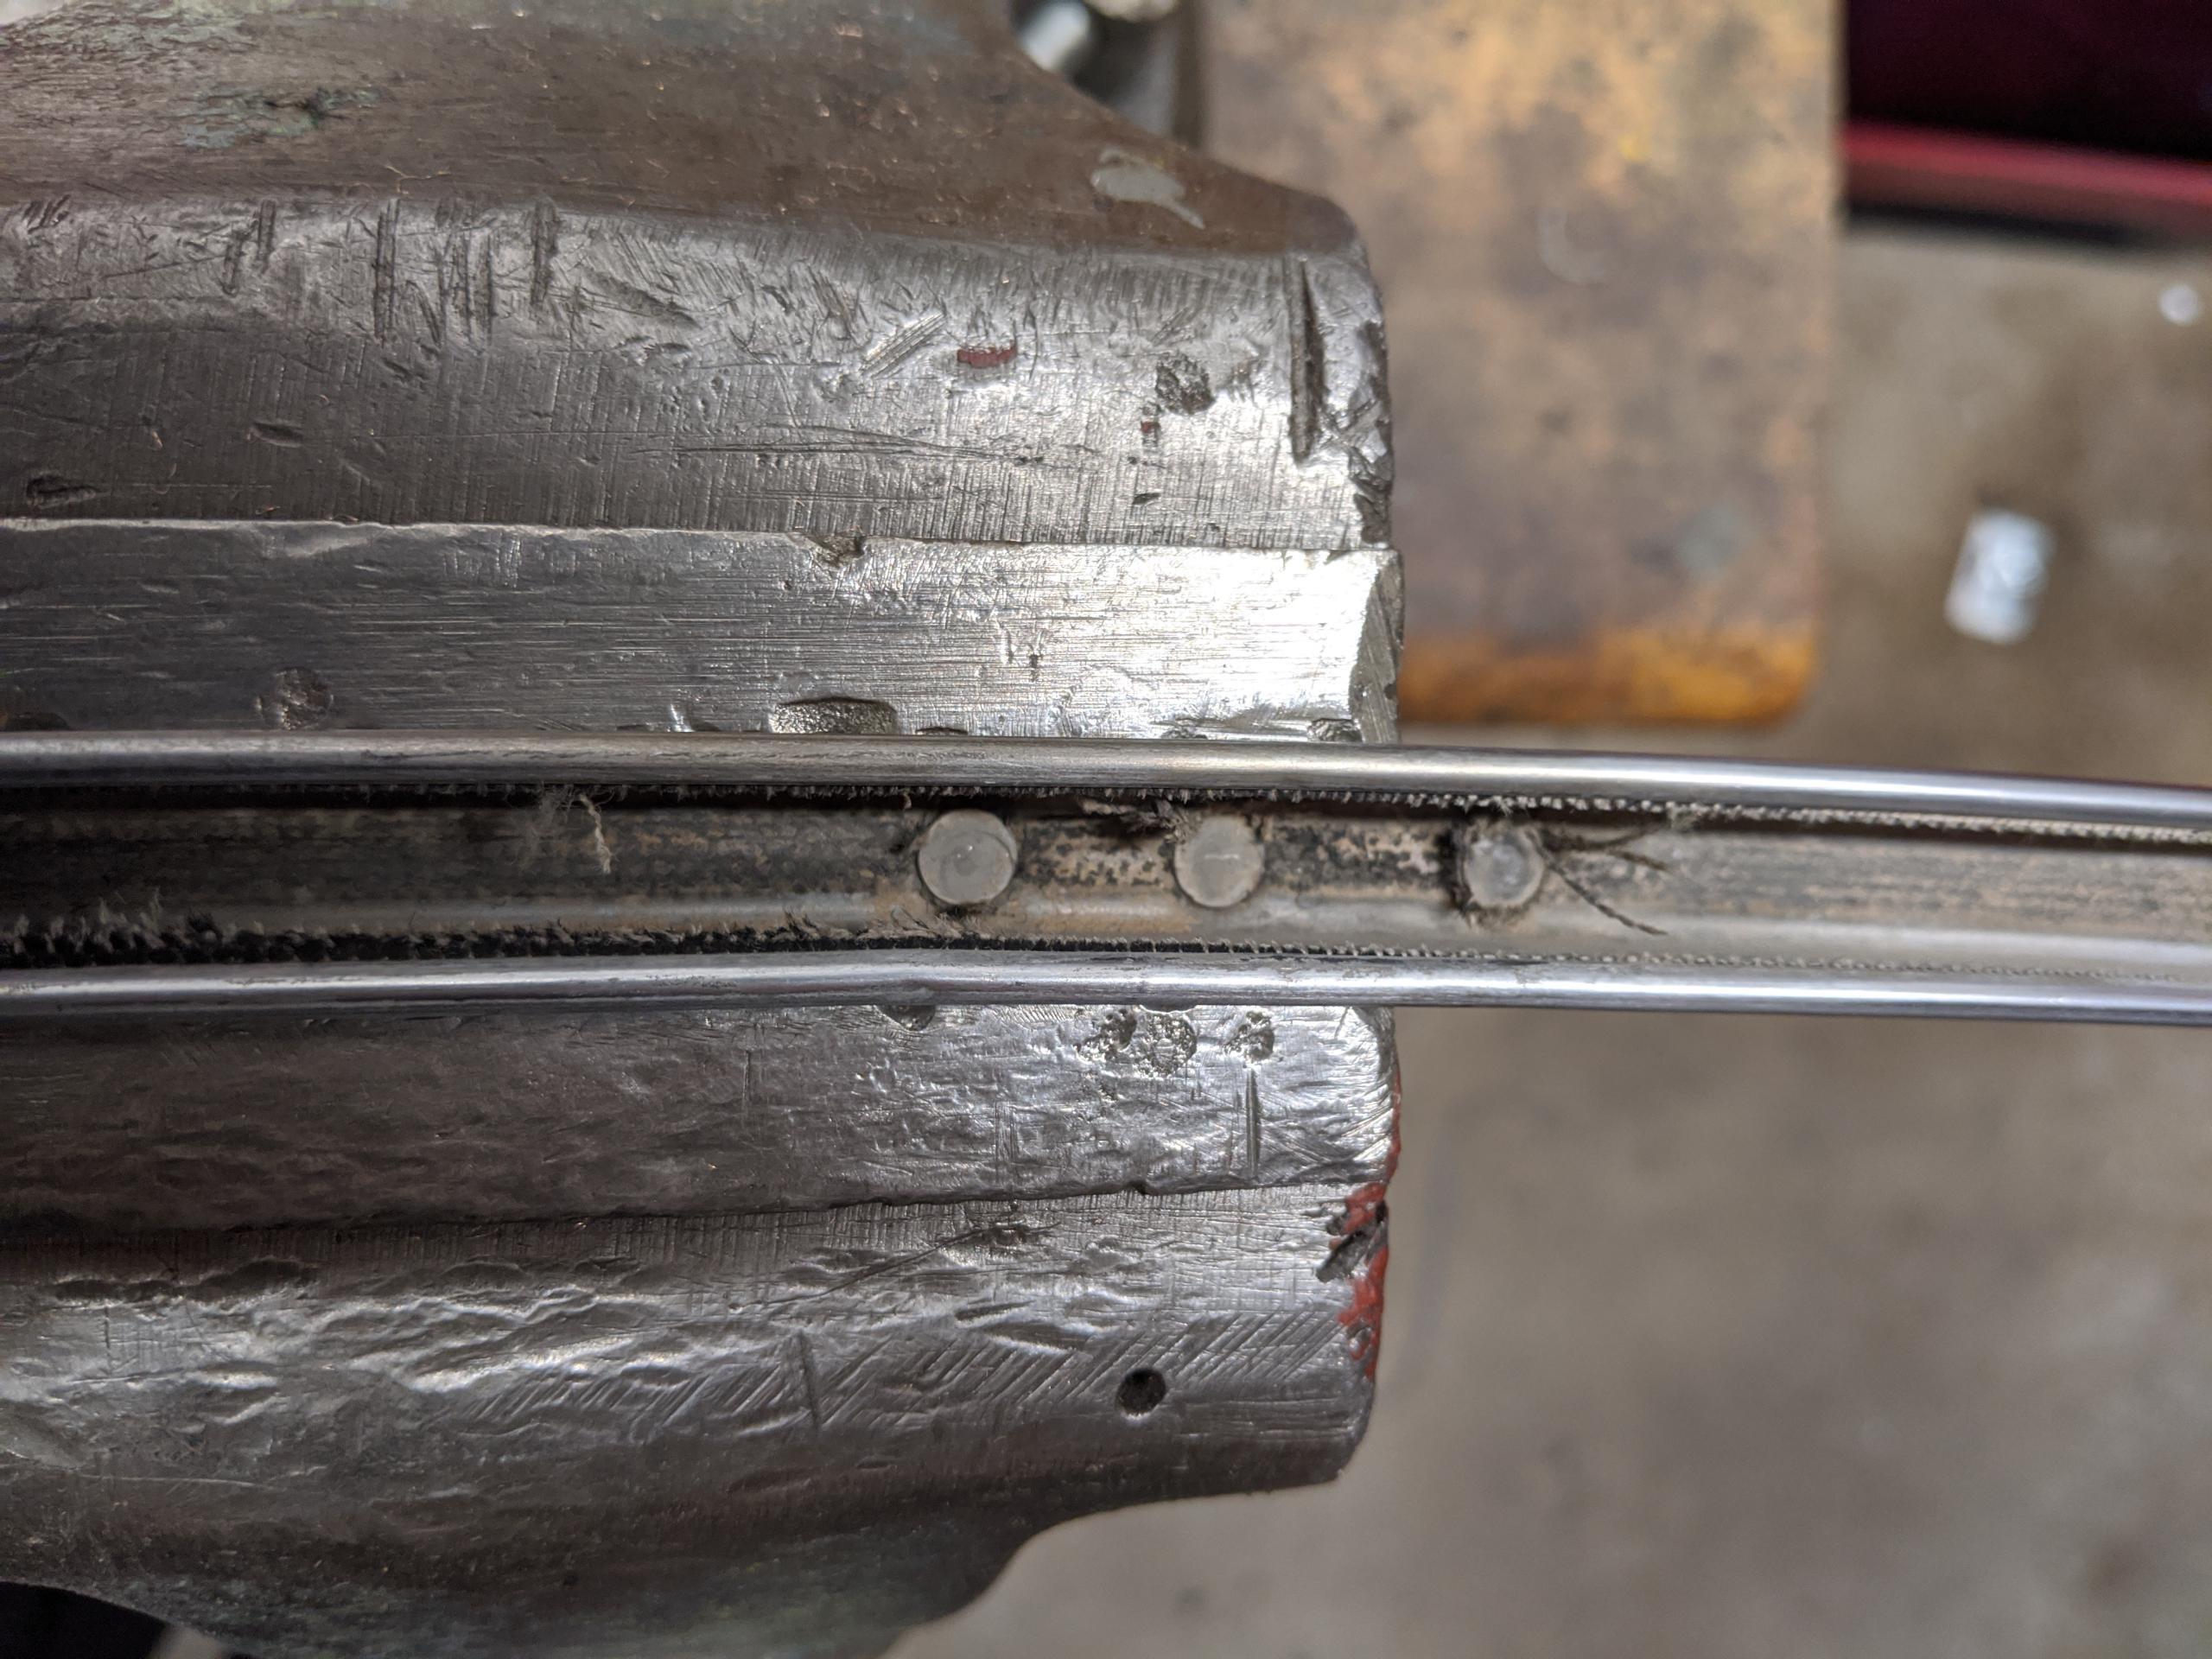
Get all this crap out. Wirebrush, pick it out, wash in soapy water, let dry. There’s decades of dust etc. in there.
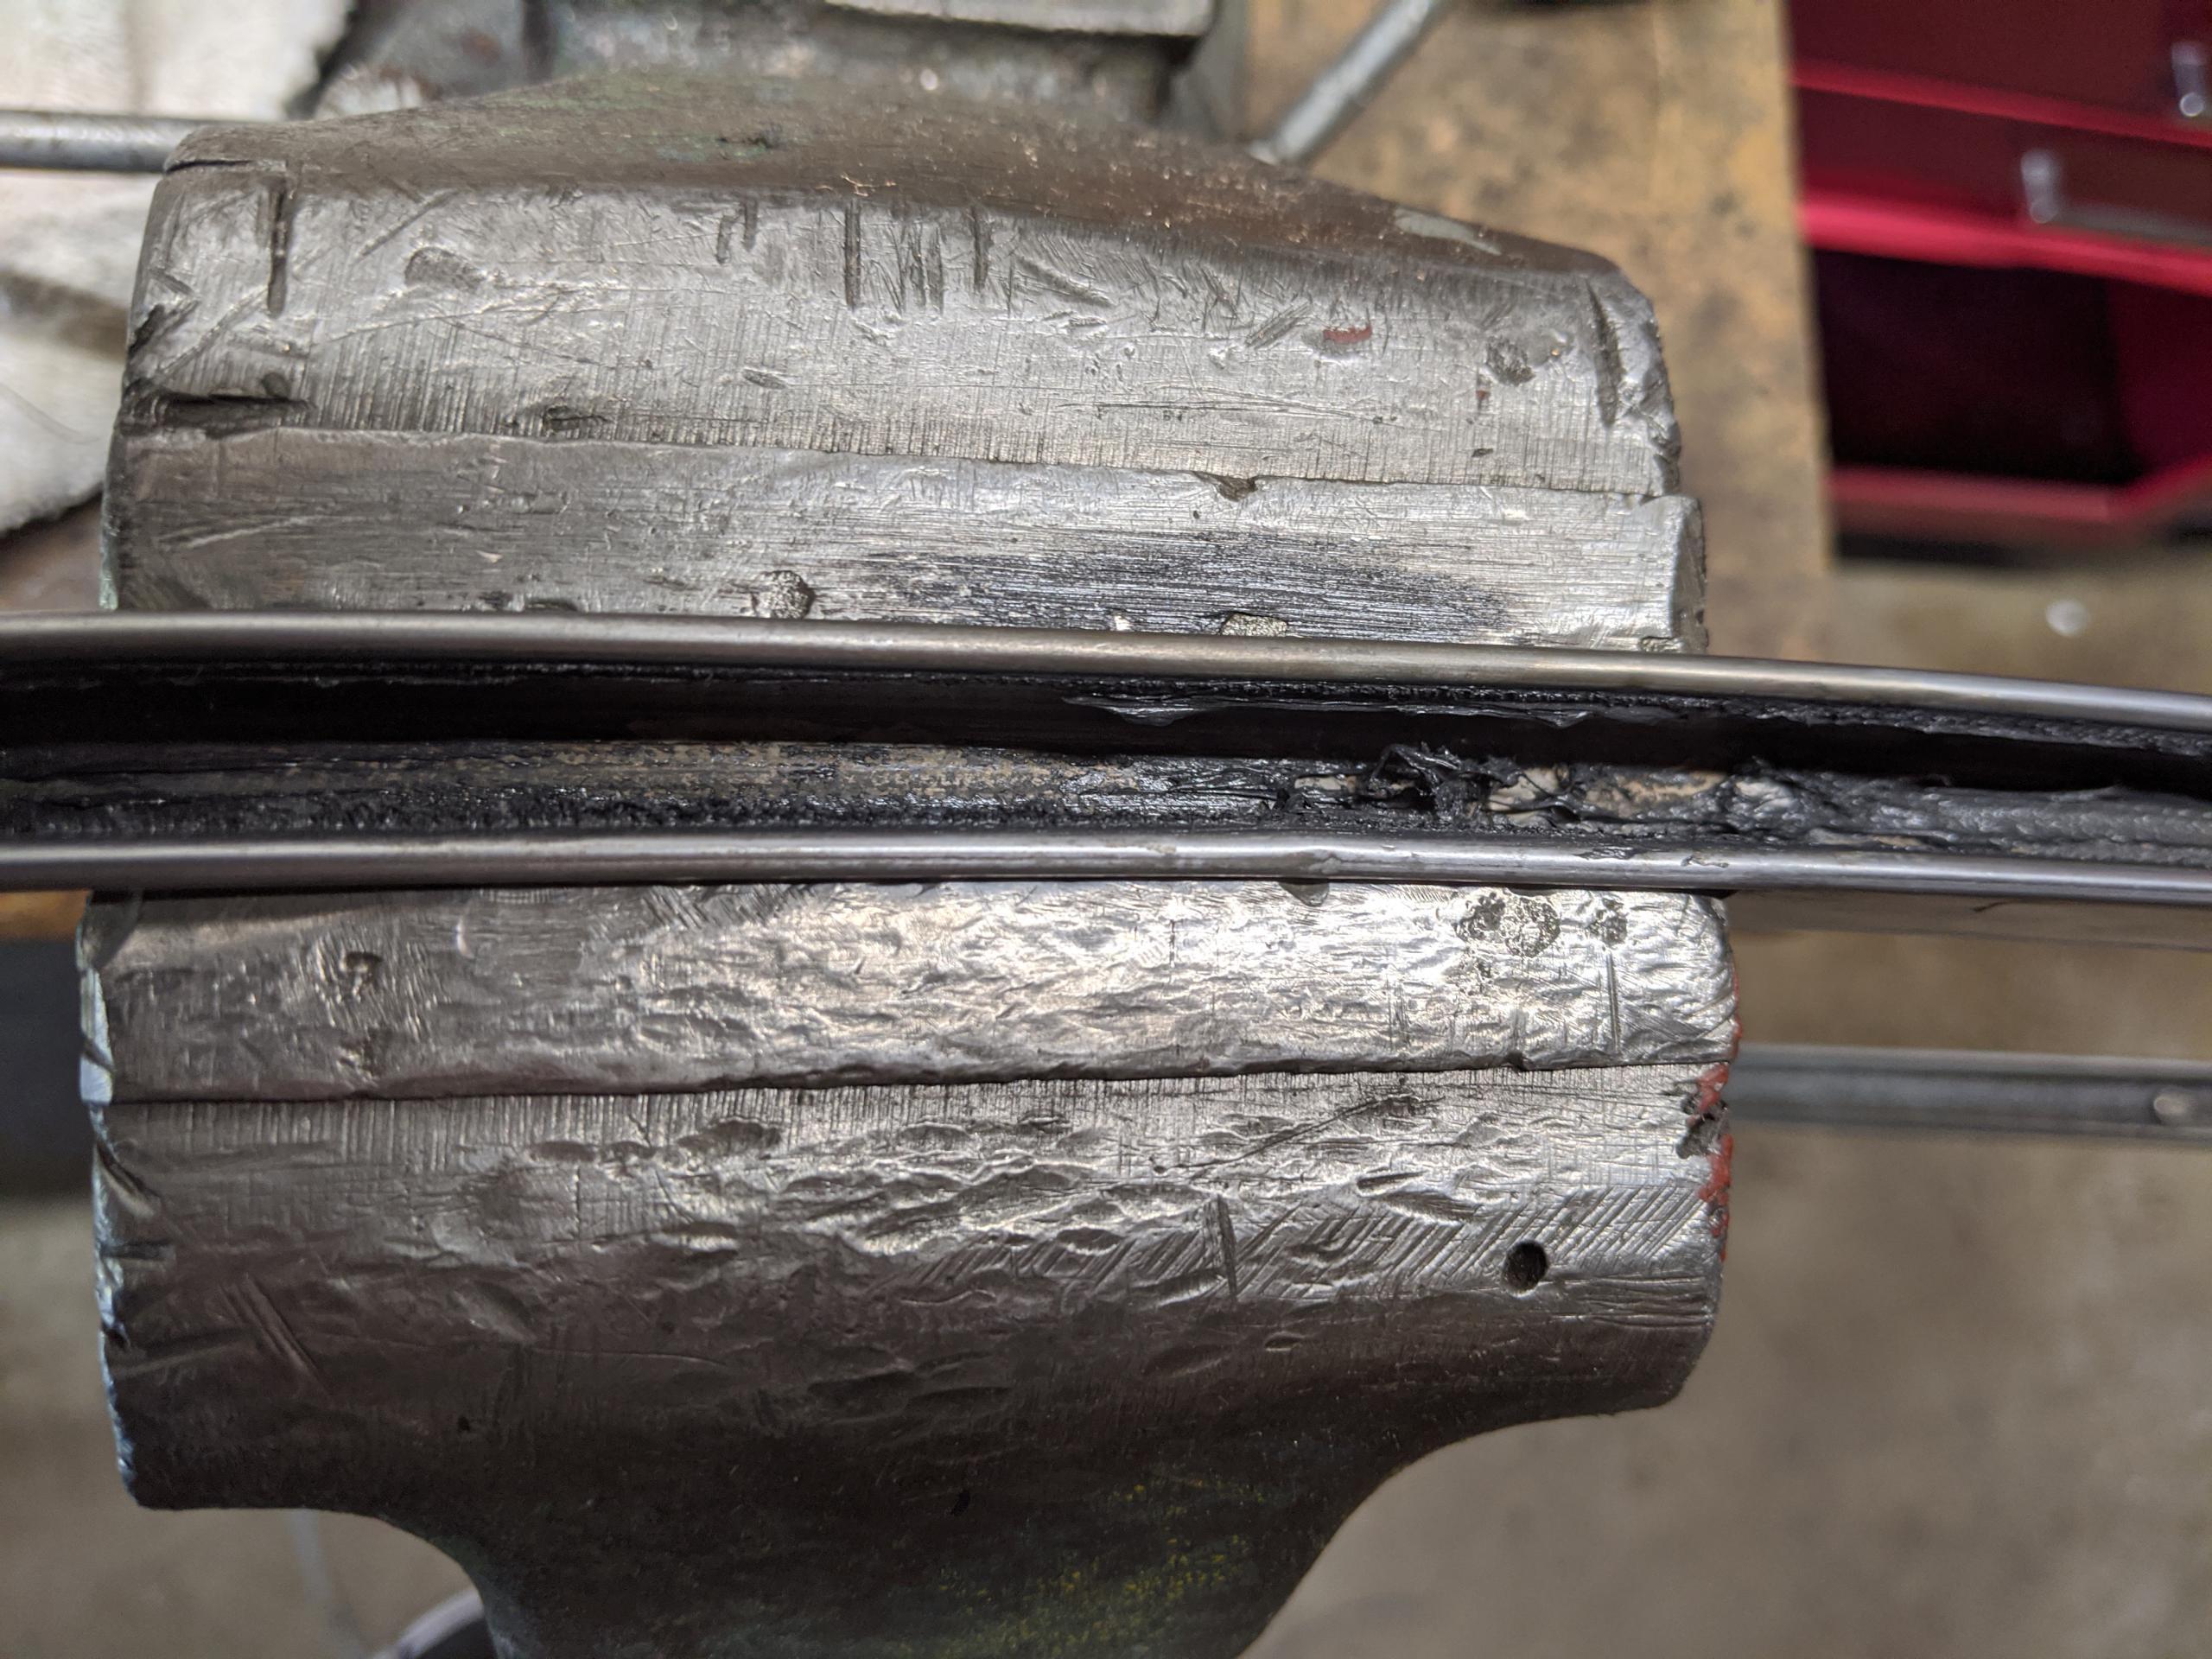
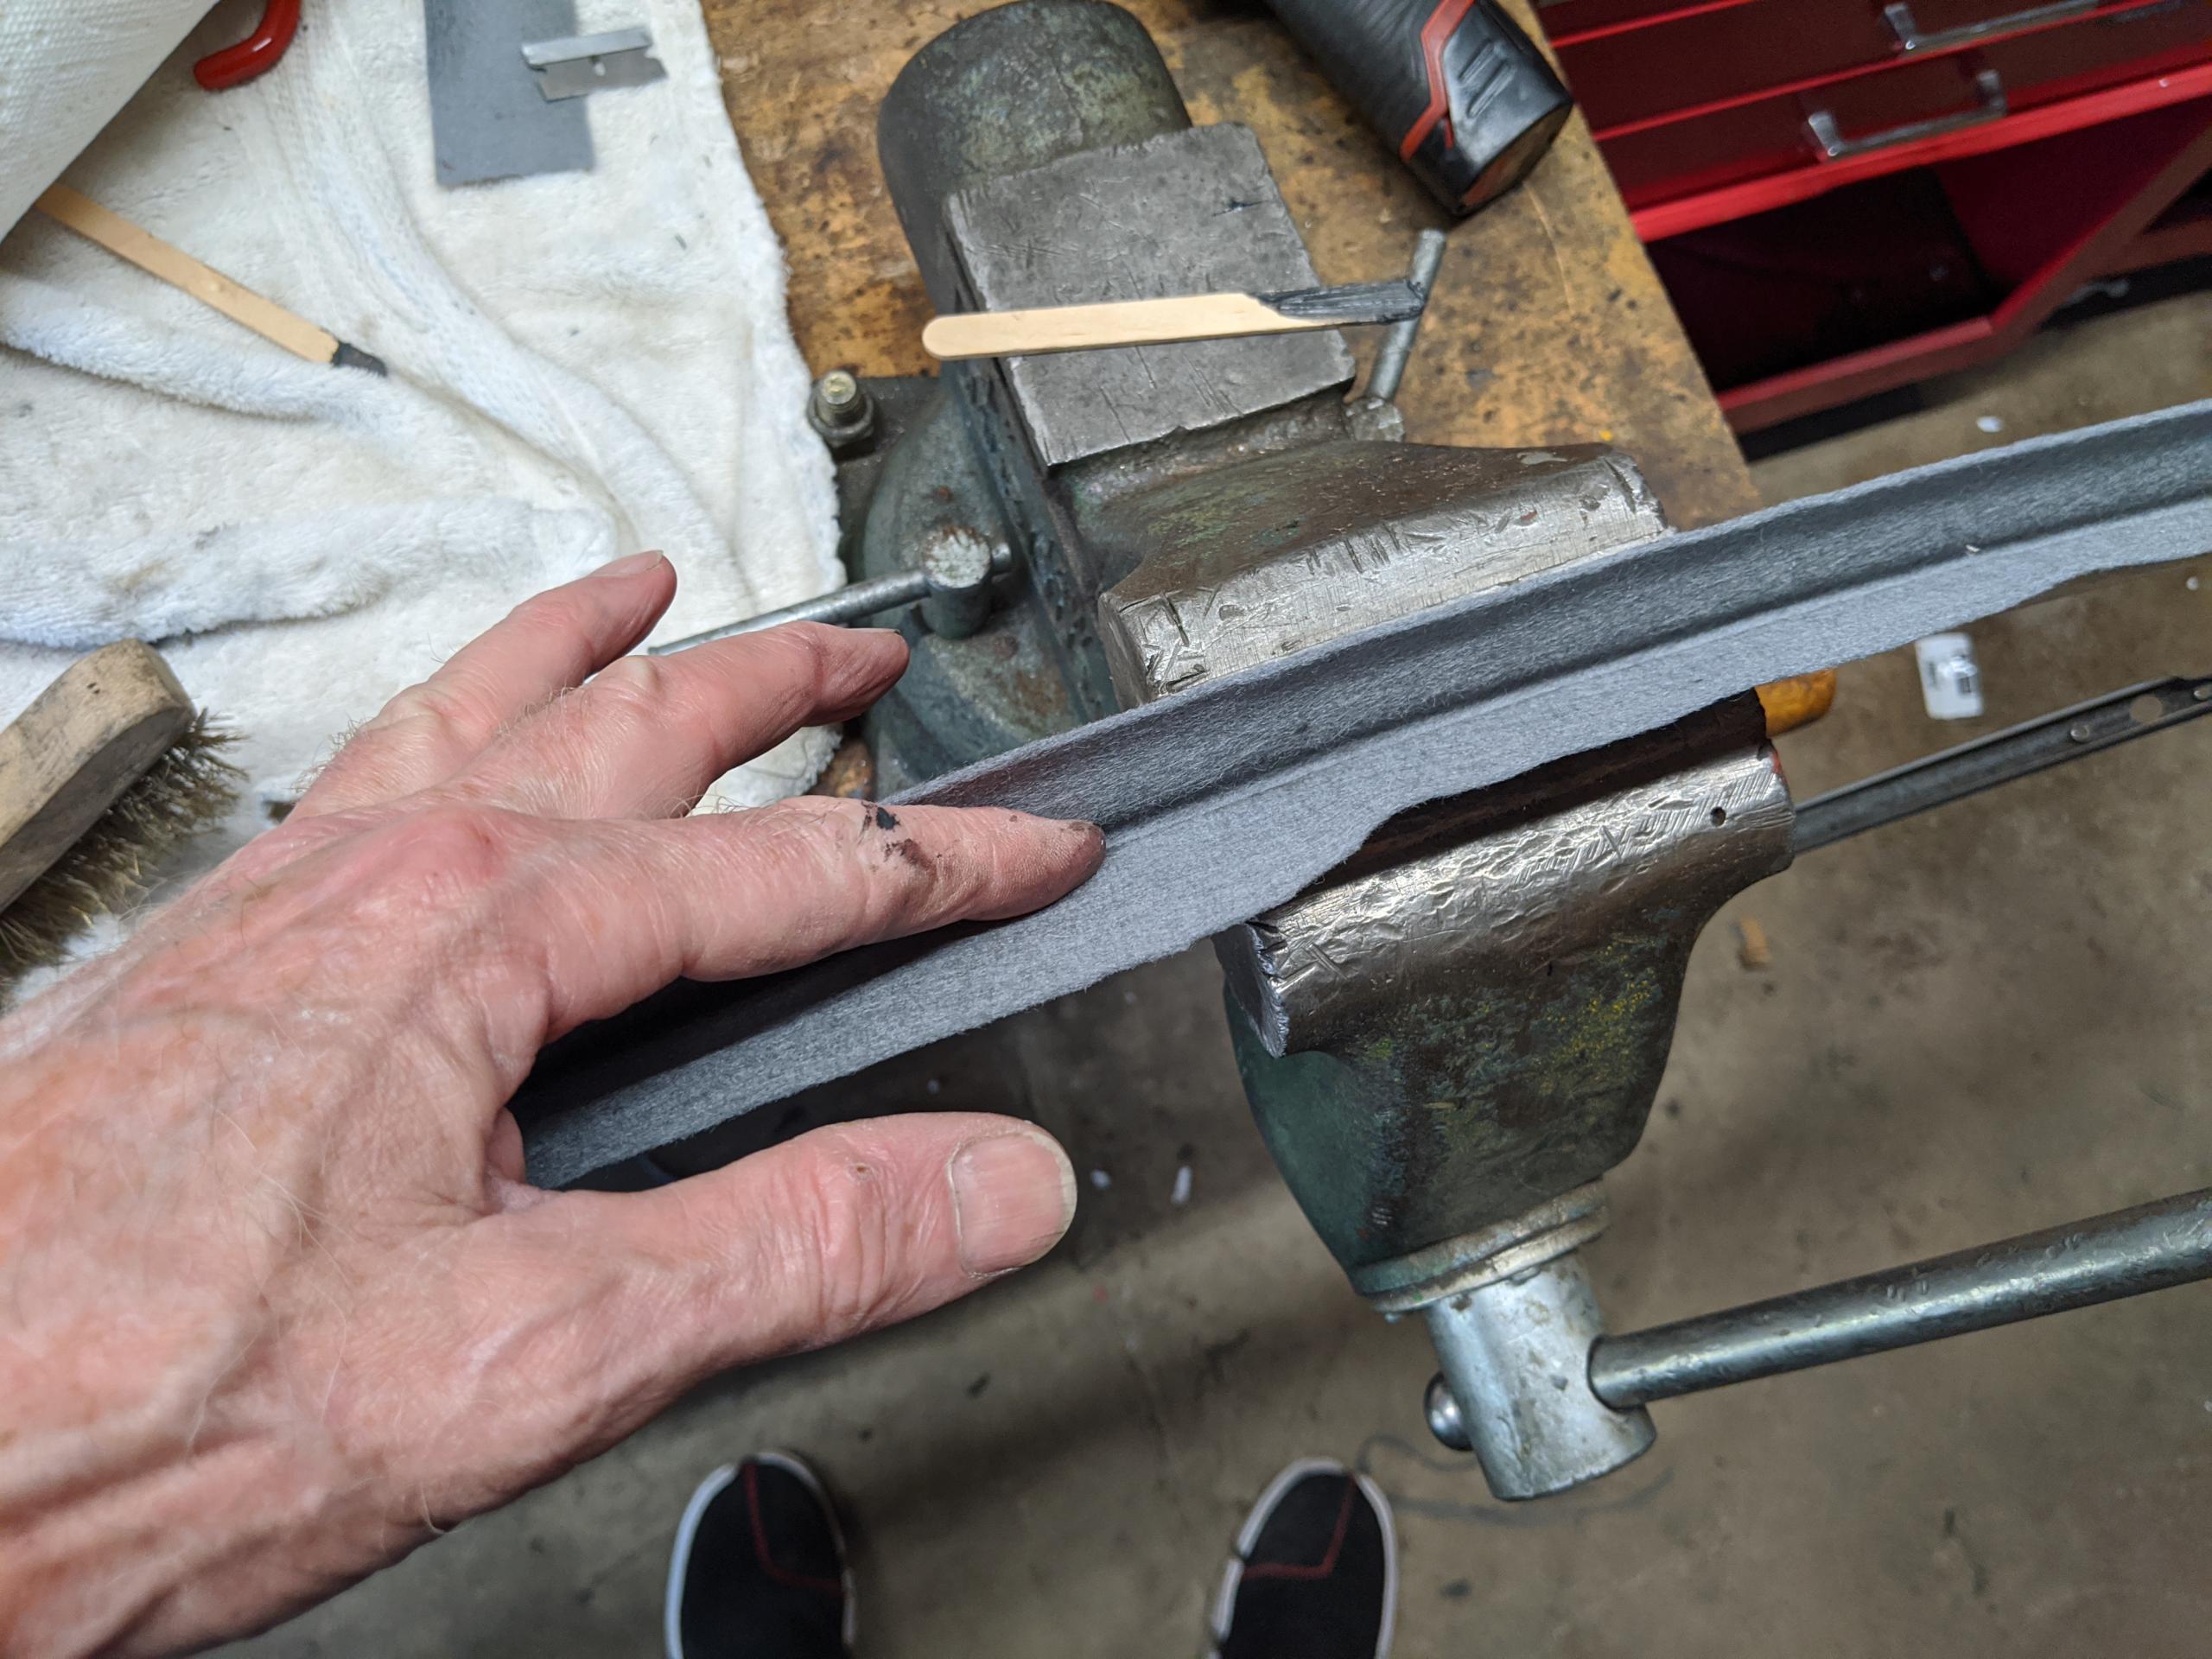
Using a popsicle stick or something similar, paste a very thin layer of Permatex Ultra Black into the guide. This should be a thin layer. The felt won’t be going anywhere, you don’t need to fasten it down.
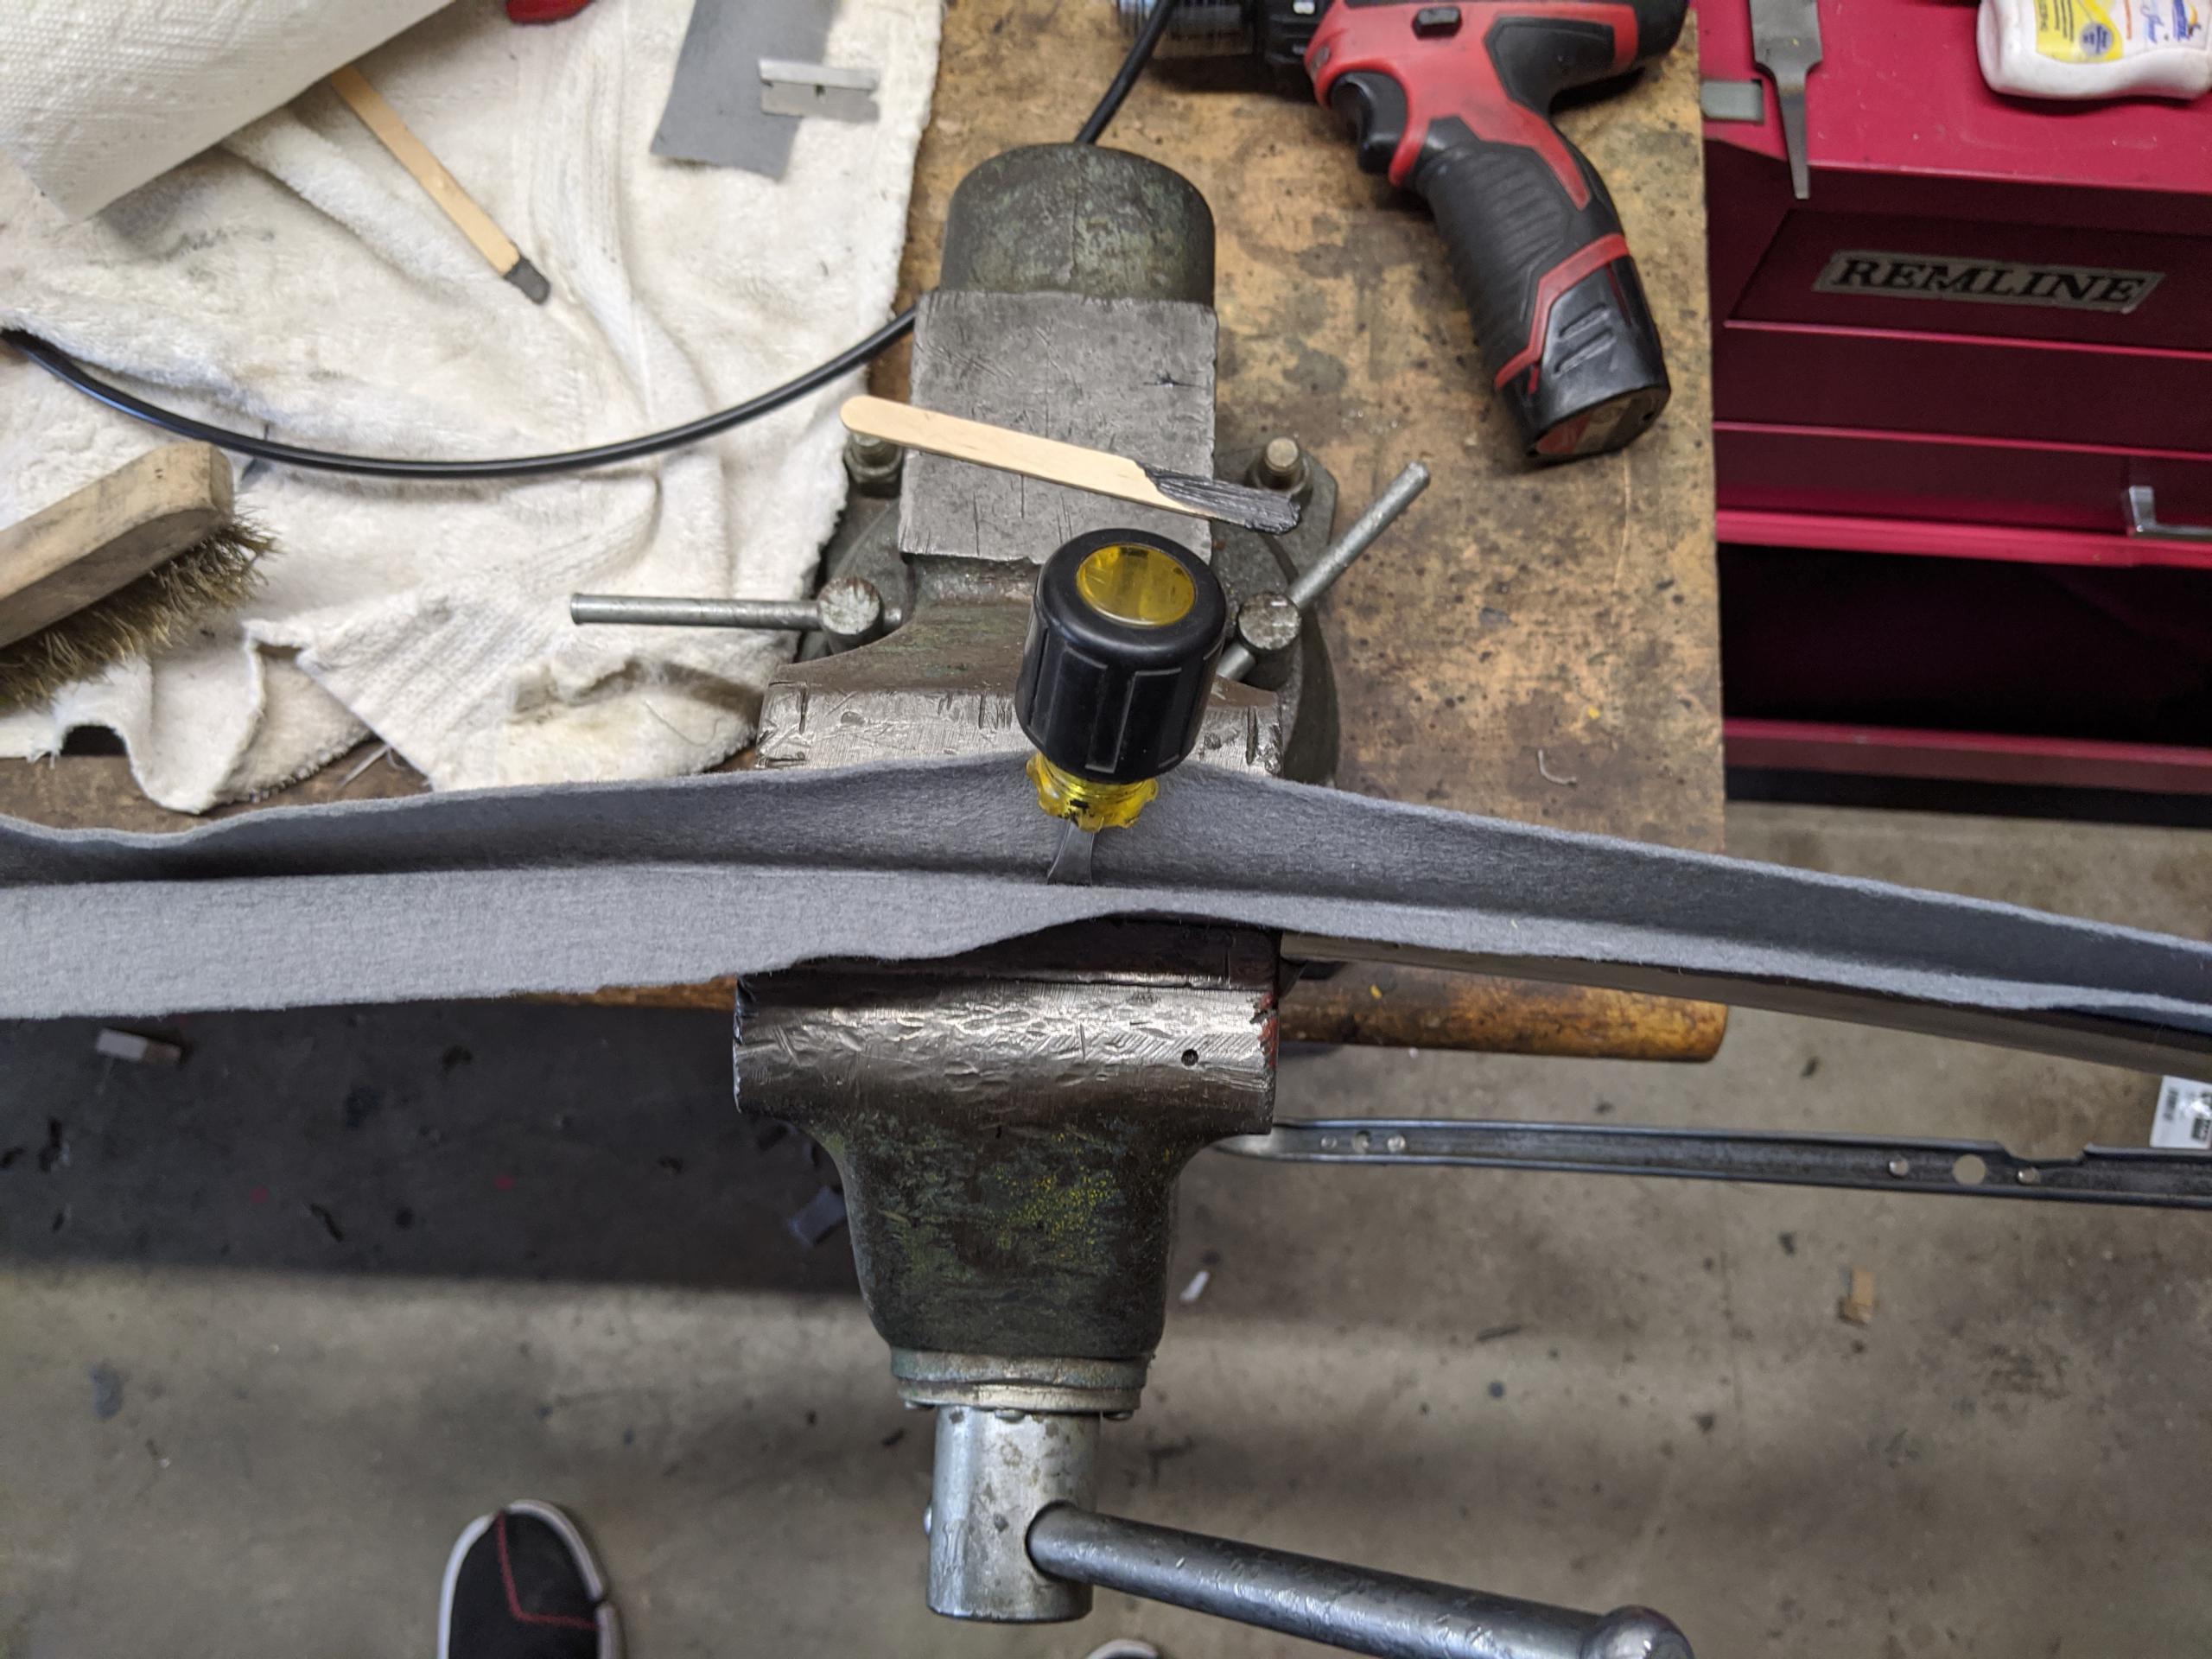
Tuck the felt into the channel. I had some 1/4″ hard plastic air line that was perfect for holding it into place. Doesn’t matter. Follow this with smoothing passes of a tiny screwdriver to tuck it into the channel. You don’t want baggy or loose spots.
Let the silicone cure, preferably overnight. The channel is now complete. The remaining steps finish the visible outer edge.
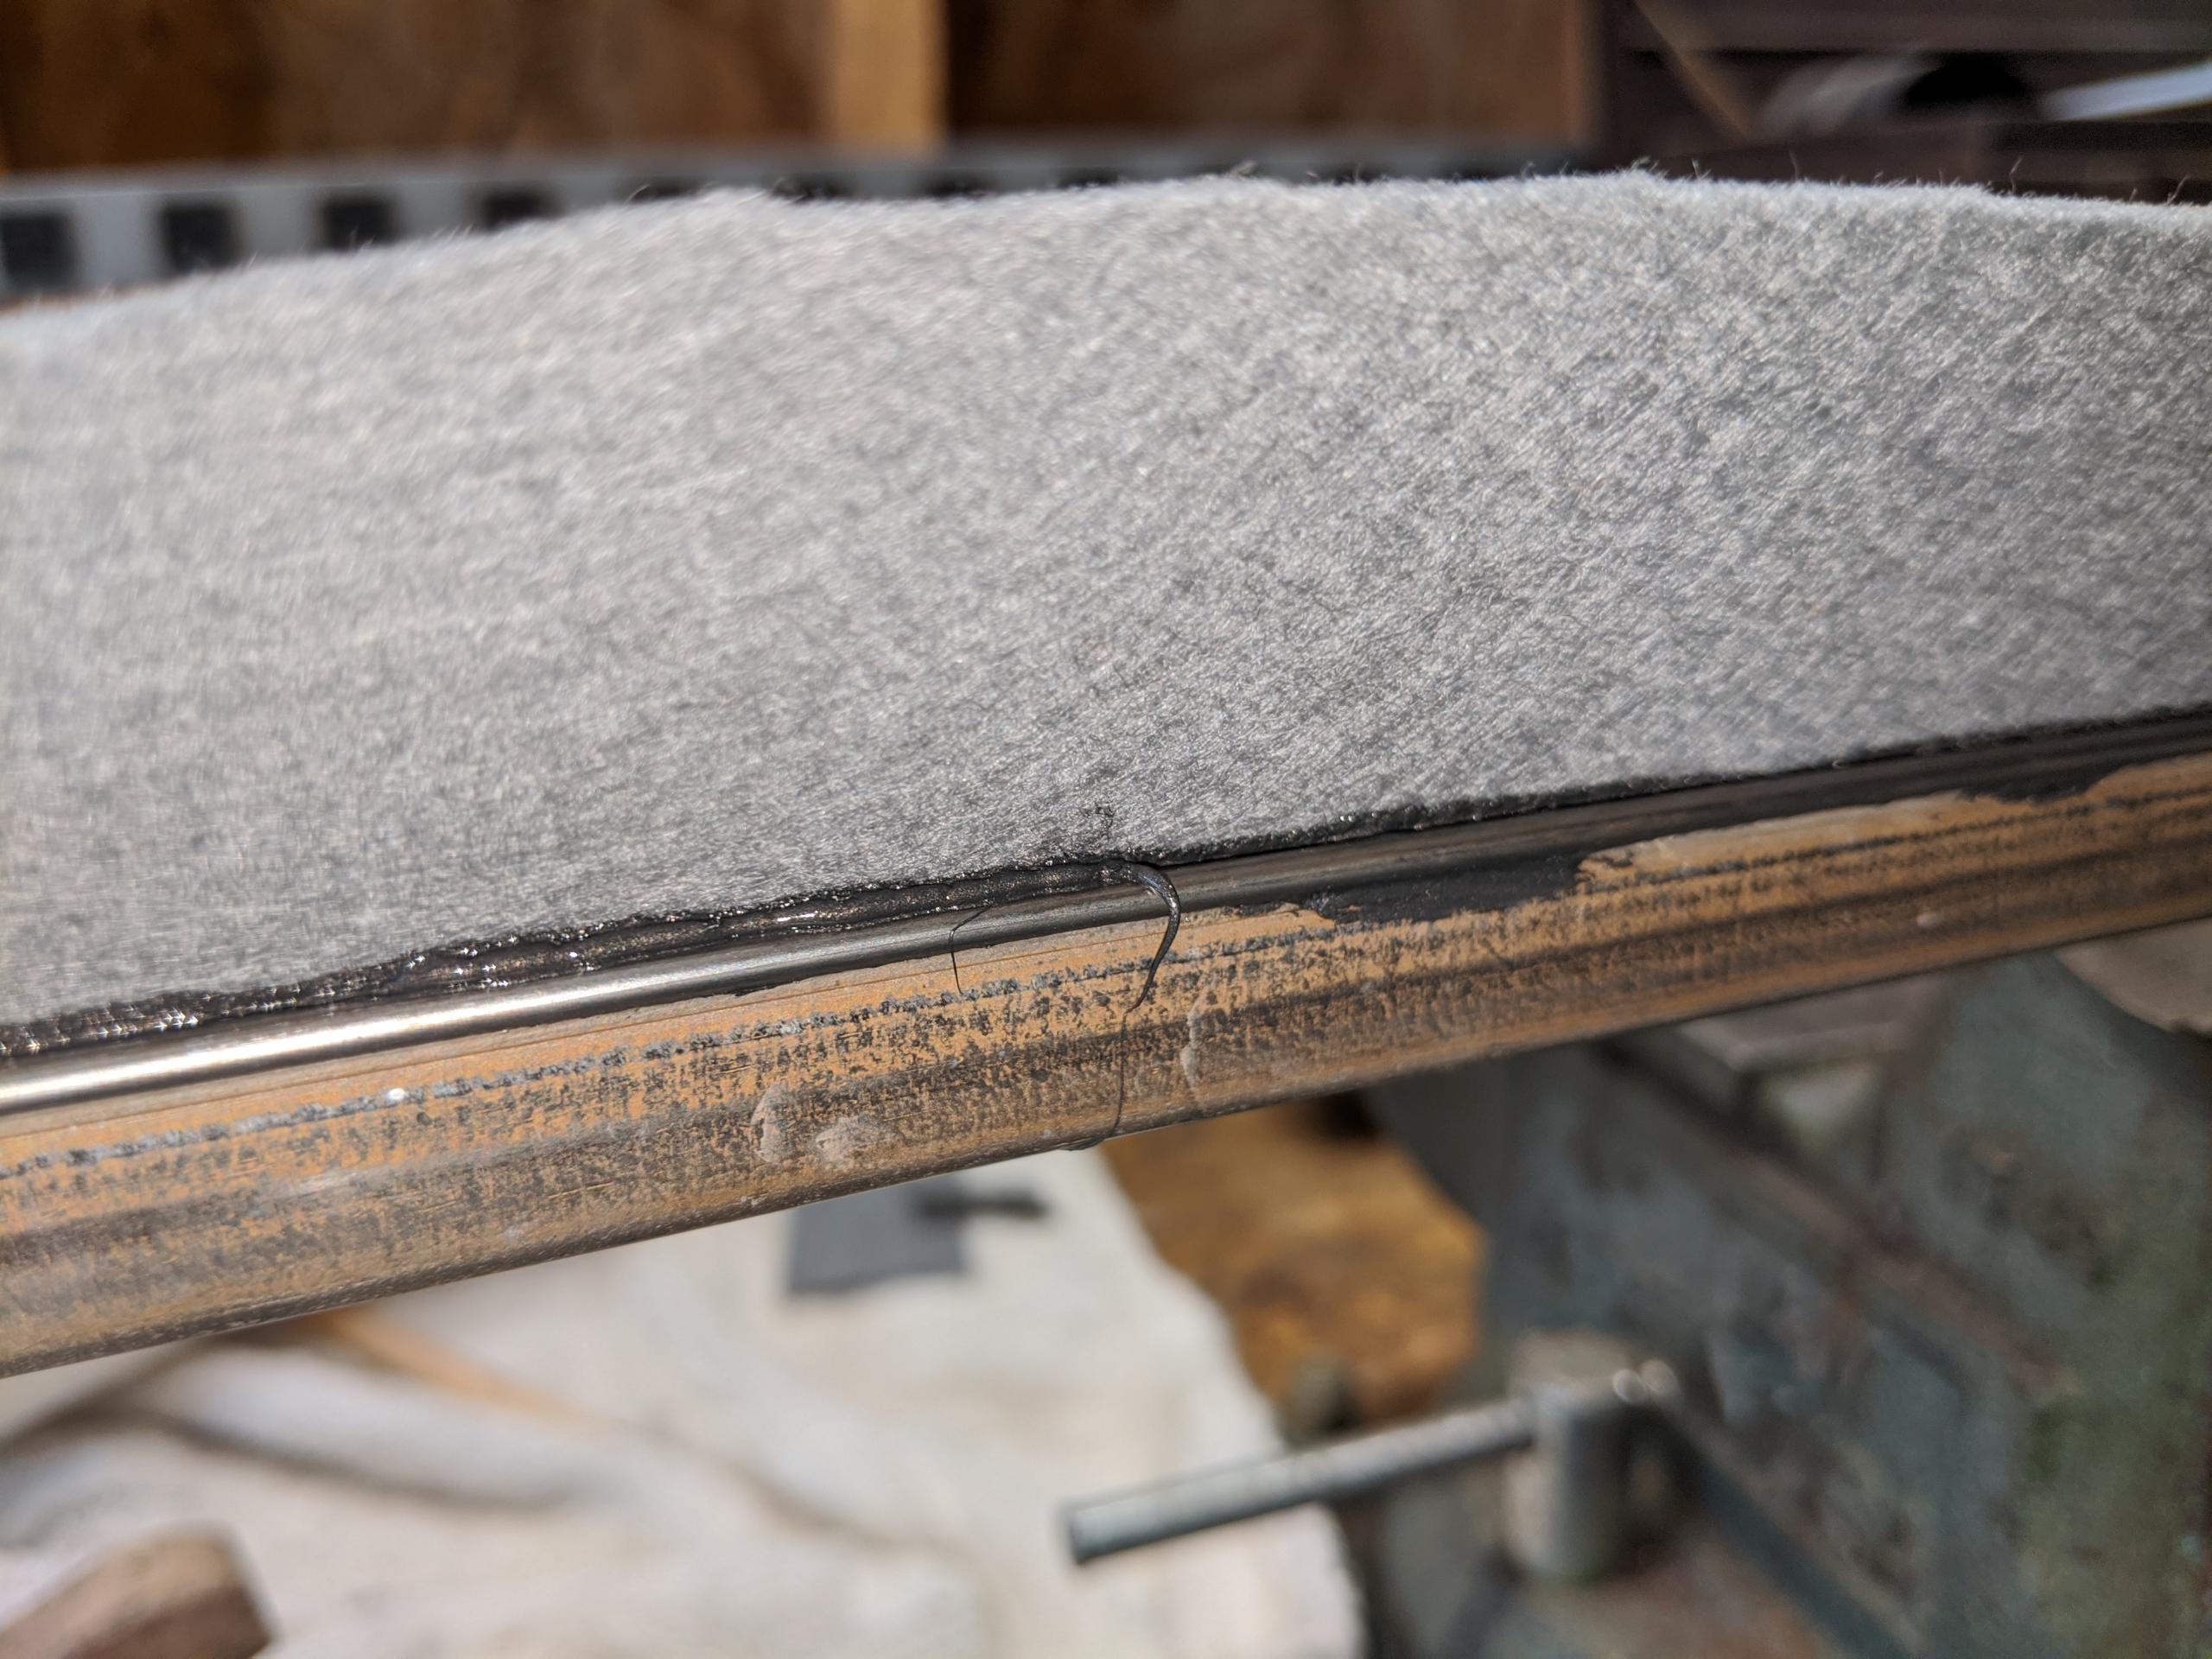
Using the smallest nozzle, apply a thin bead of goo between the top of the stainless bead and the felt. This was the hardest part — it’s hard to get a thin even bead, but perfection isn’t required; but you don’t want gaps. A bit extra won’t hurt. Resist the attempt to clean up the edges while uncured, you’ll only make a mess.
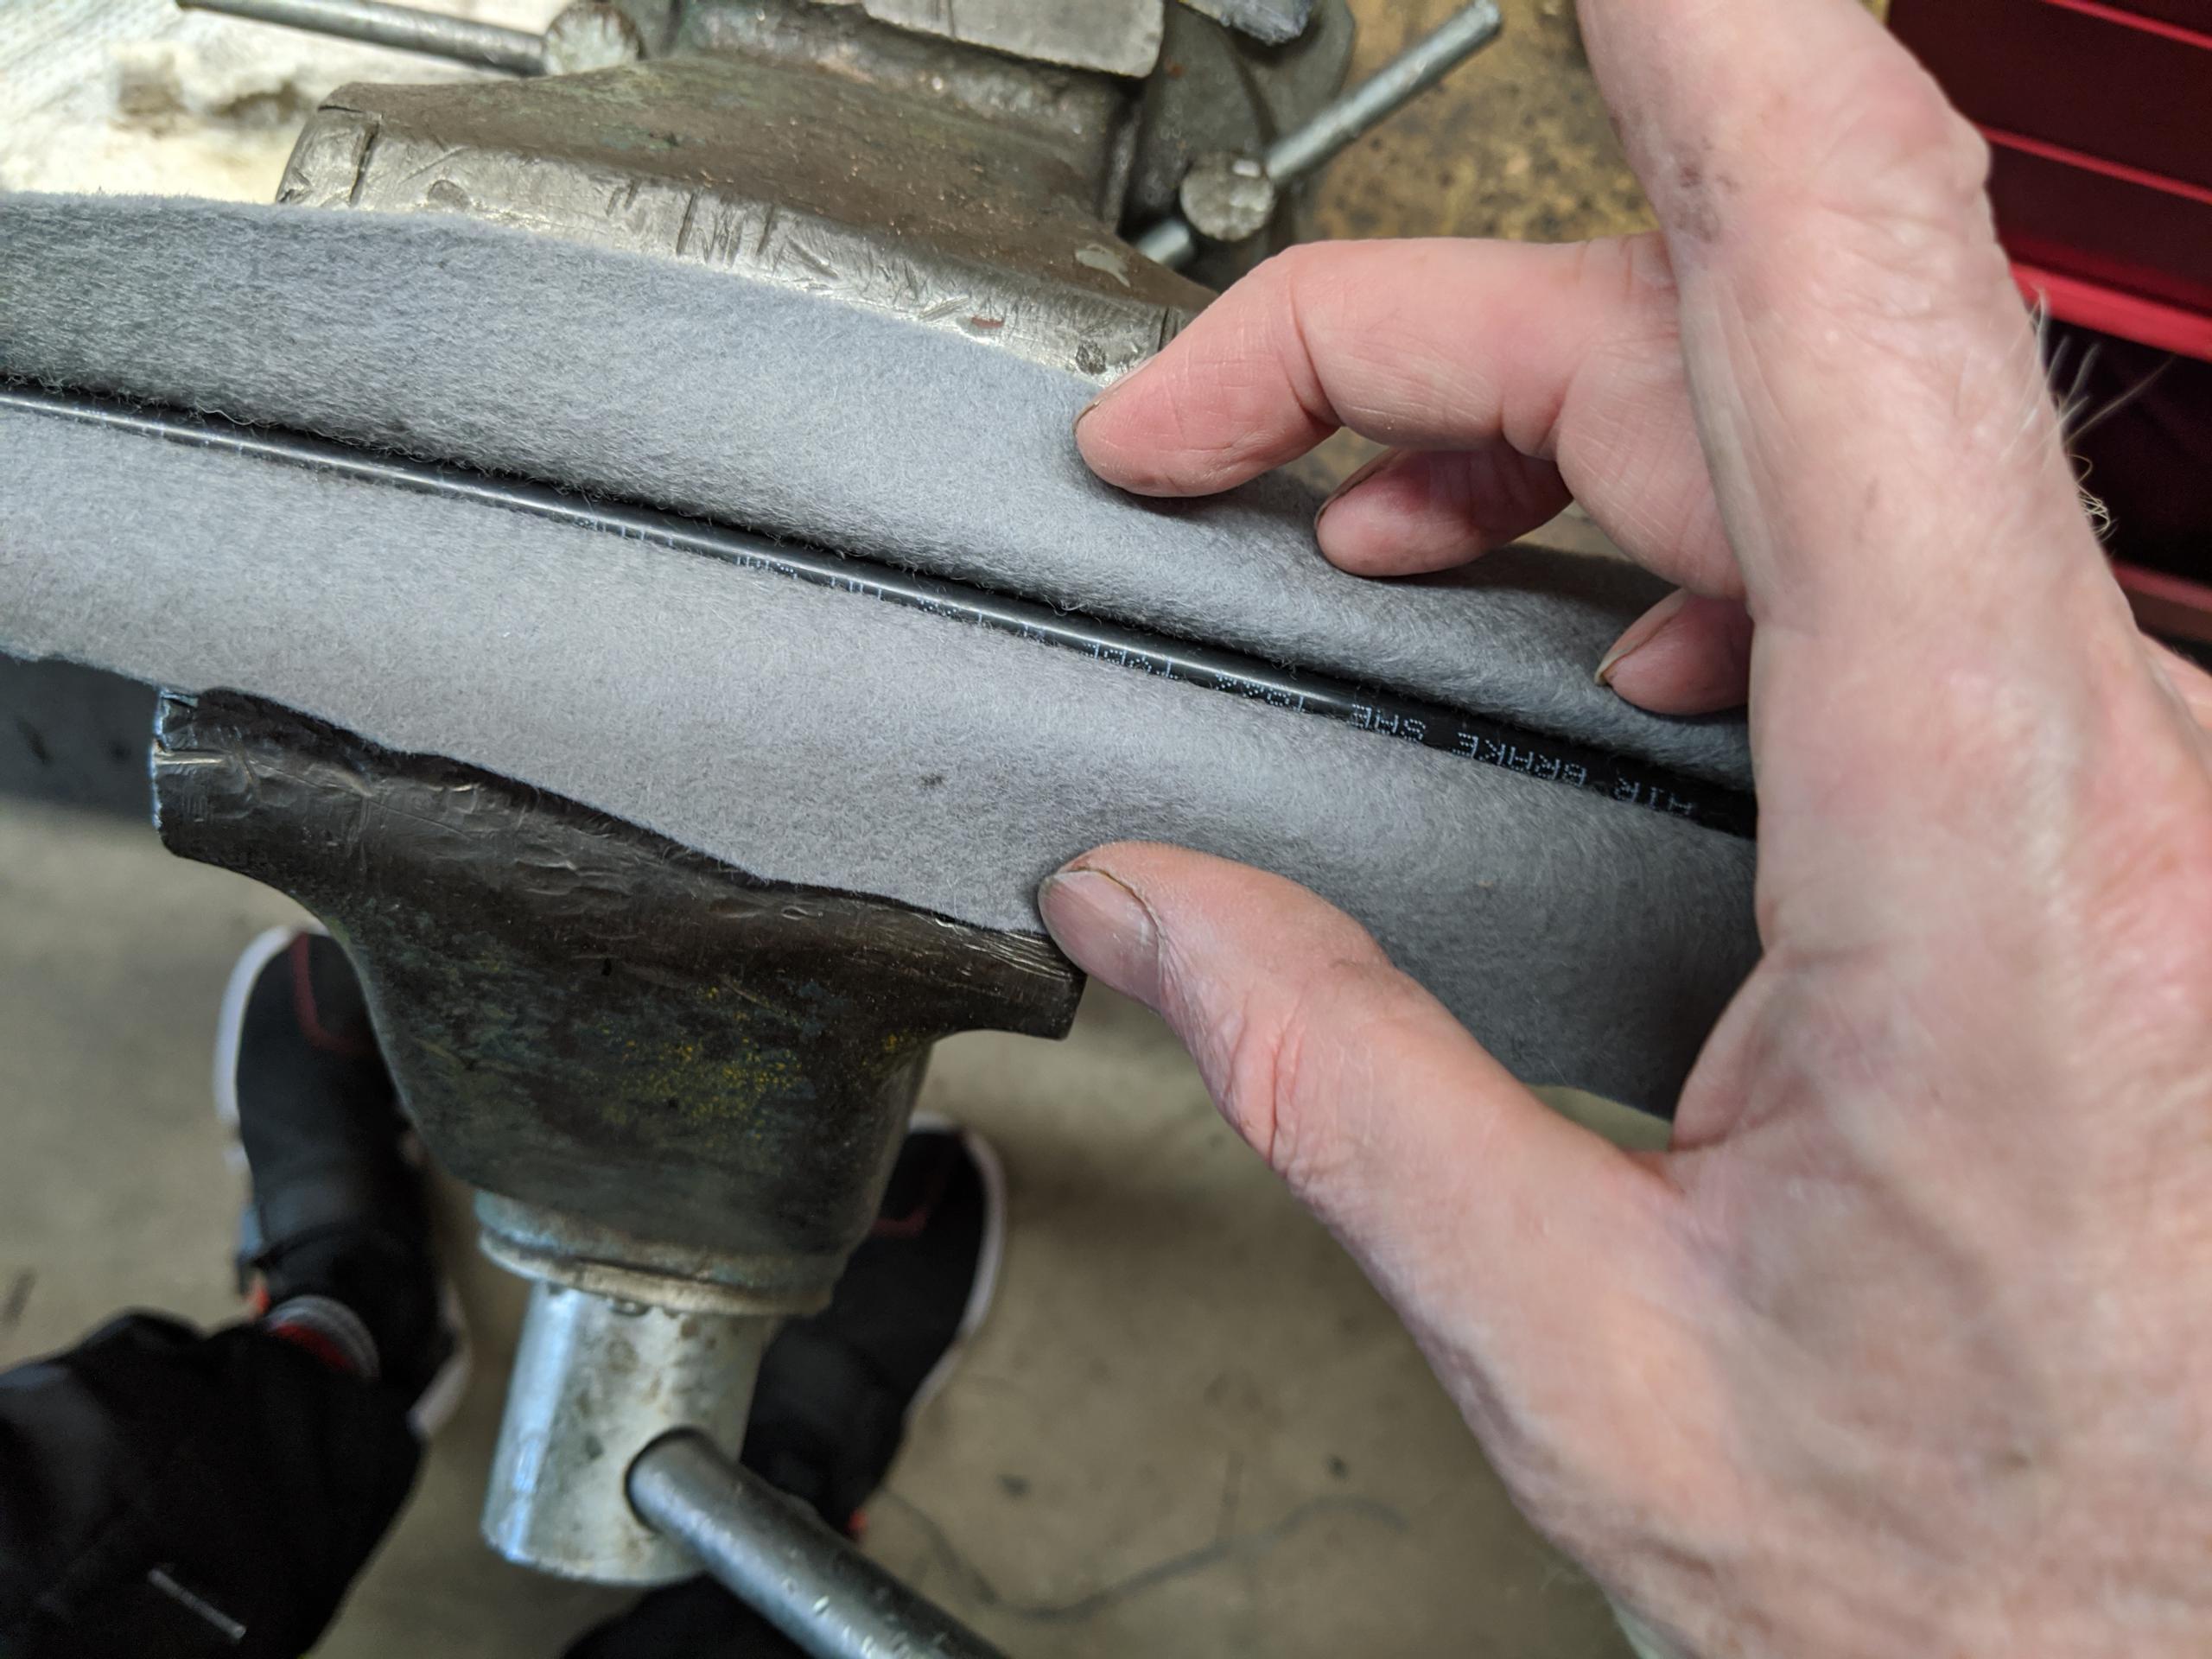
Gently run your finger down the groove to press the felt, lightly, down onto the beads.
This is what it should look like if you look where the felt contacts the bead.
Once again, let it cure in this position overnight.
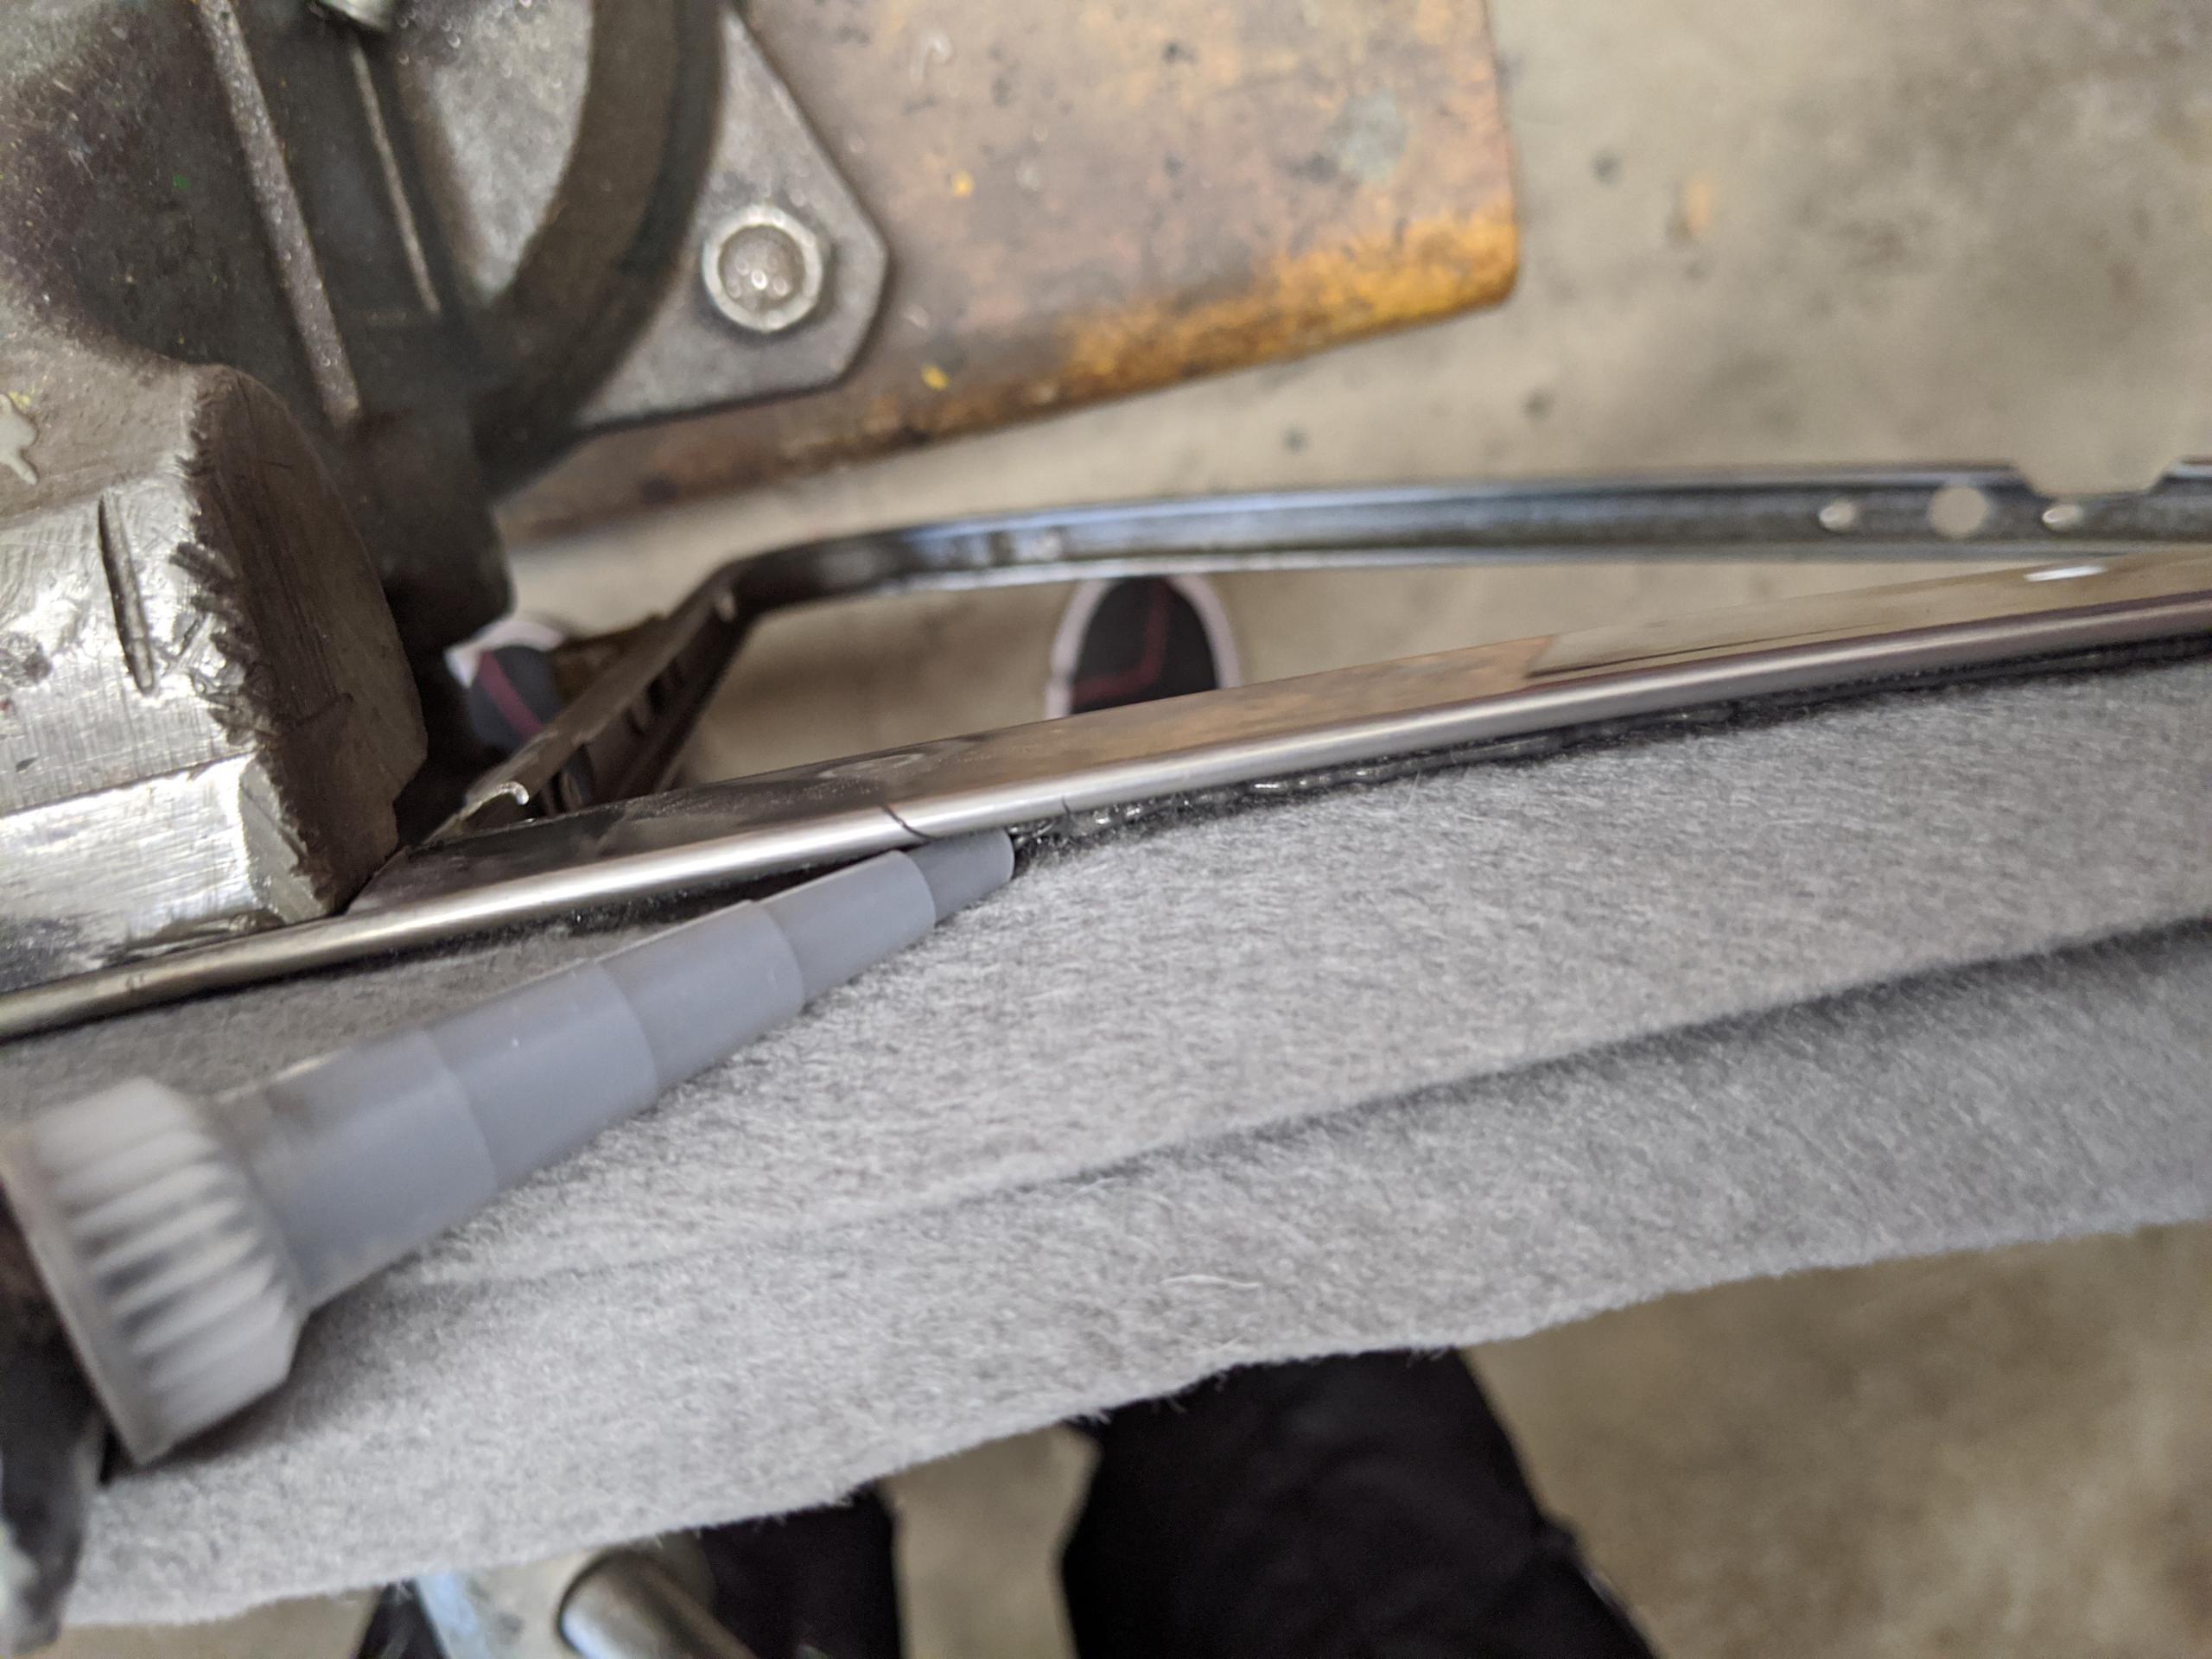
With a brand new single edge razor shave the excess felt off each bead. Tilt the blade into the channel somewhat to make a bevel. Go slow and shear the felt between blade and bead.
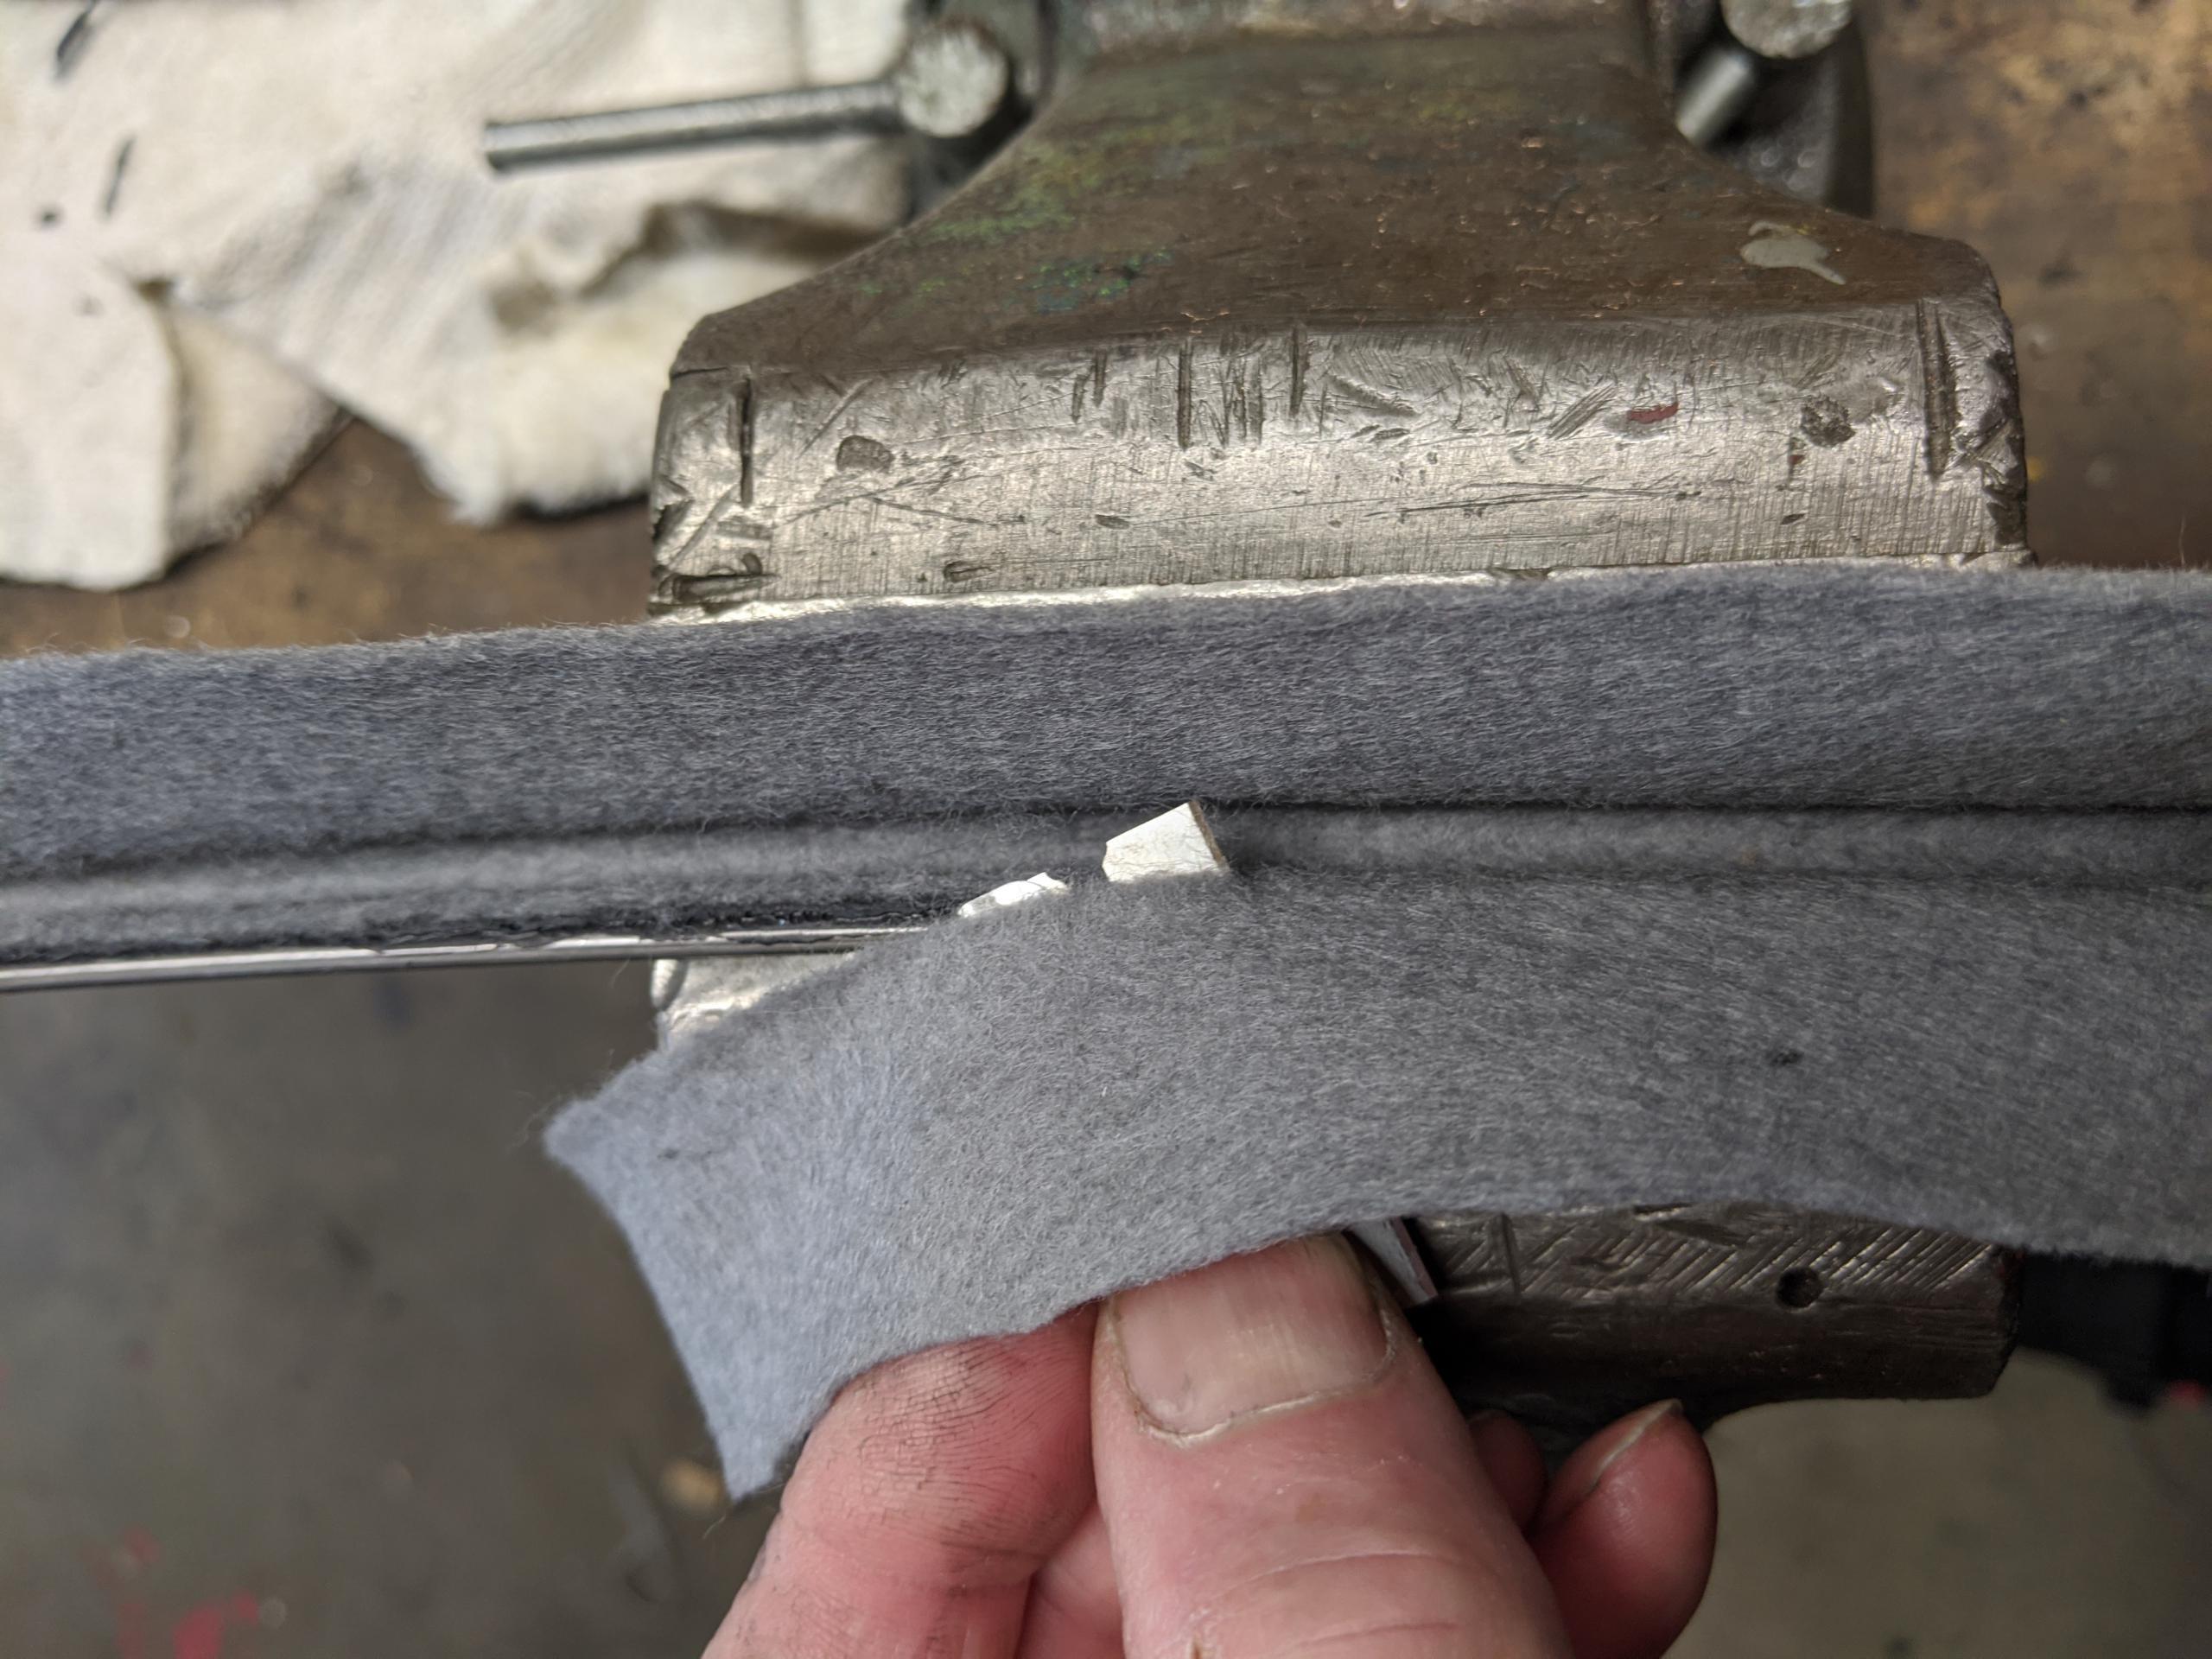
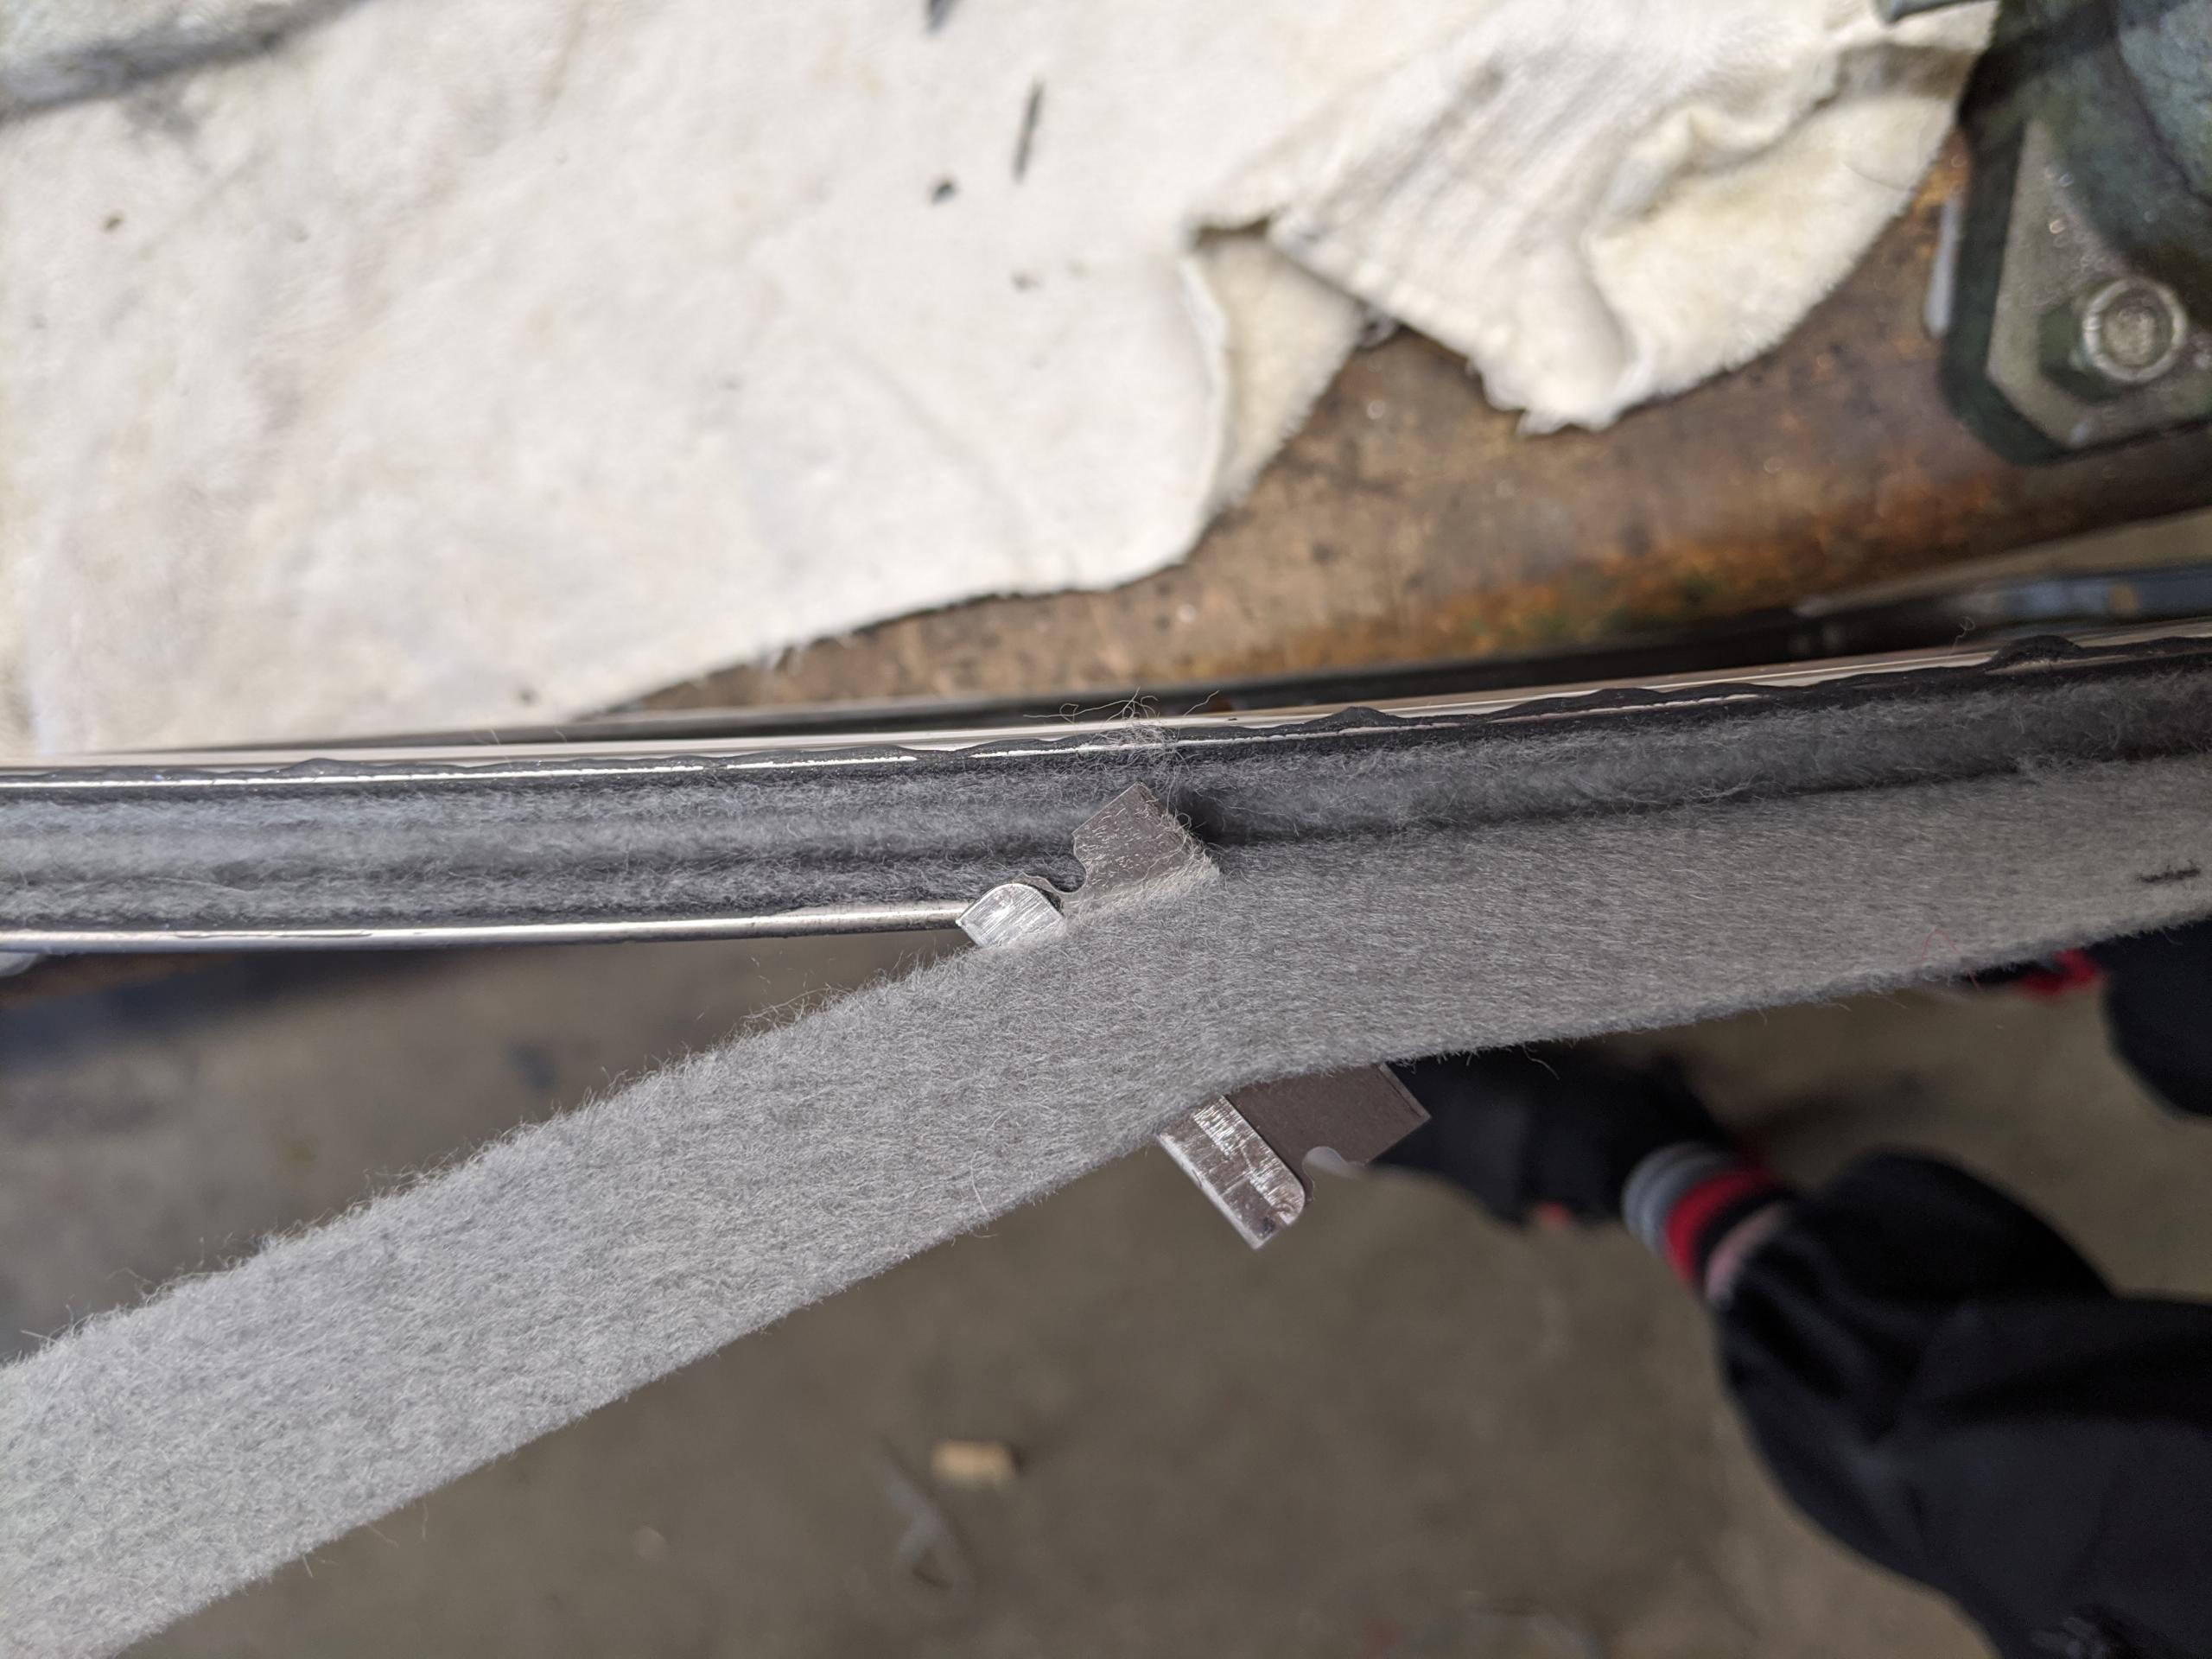
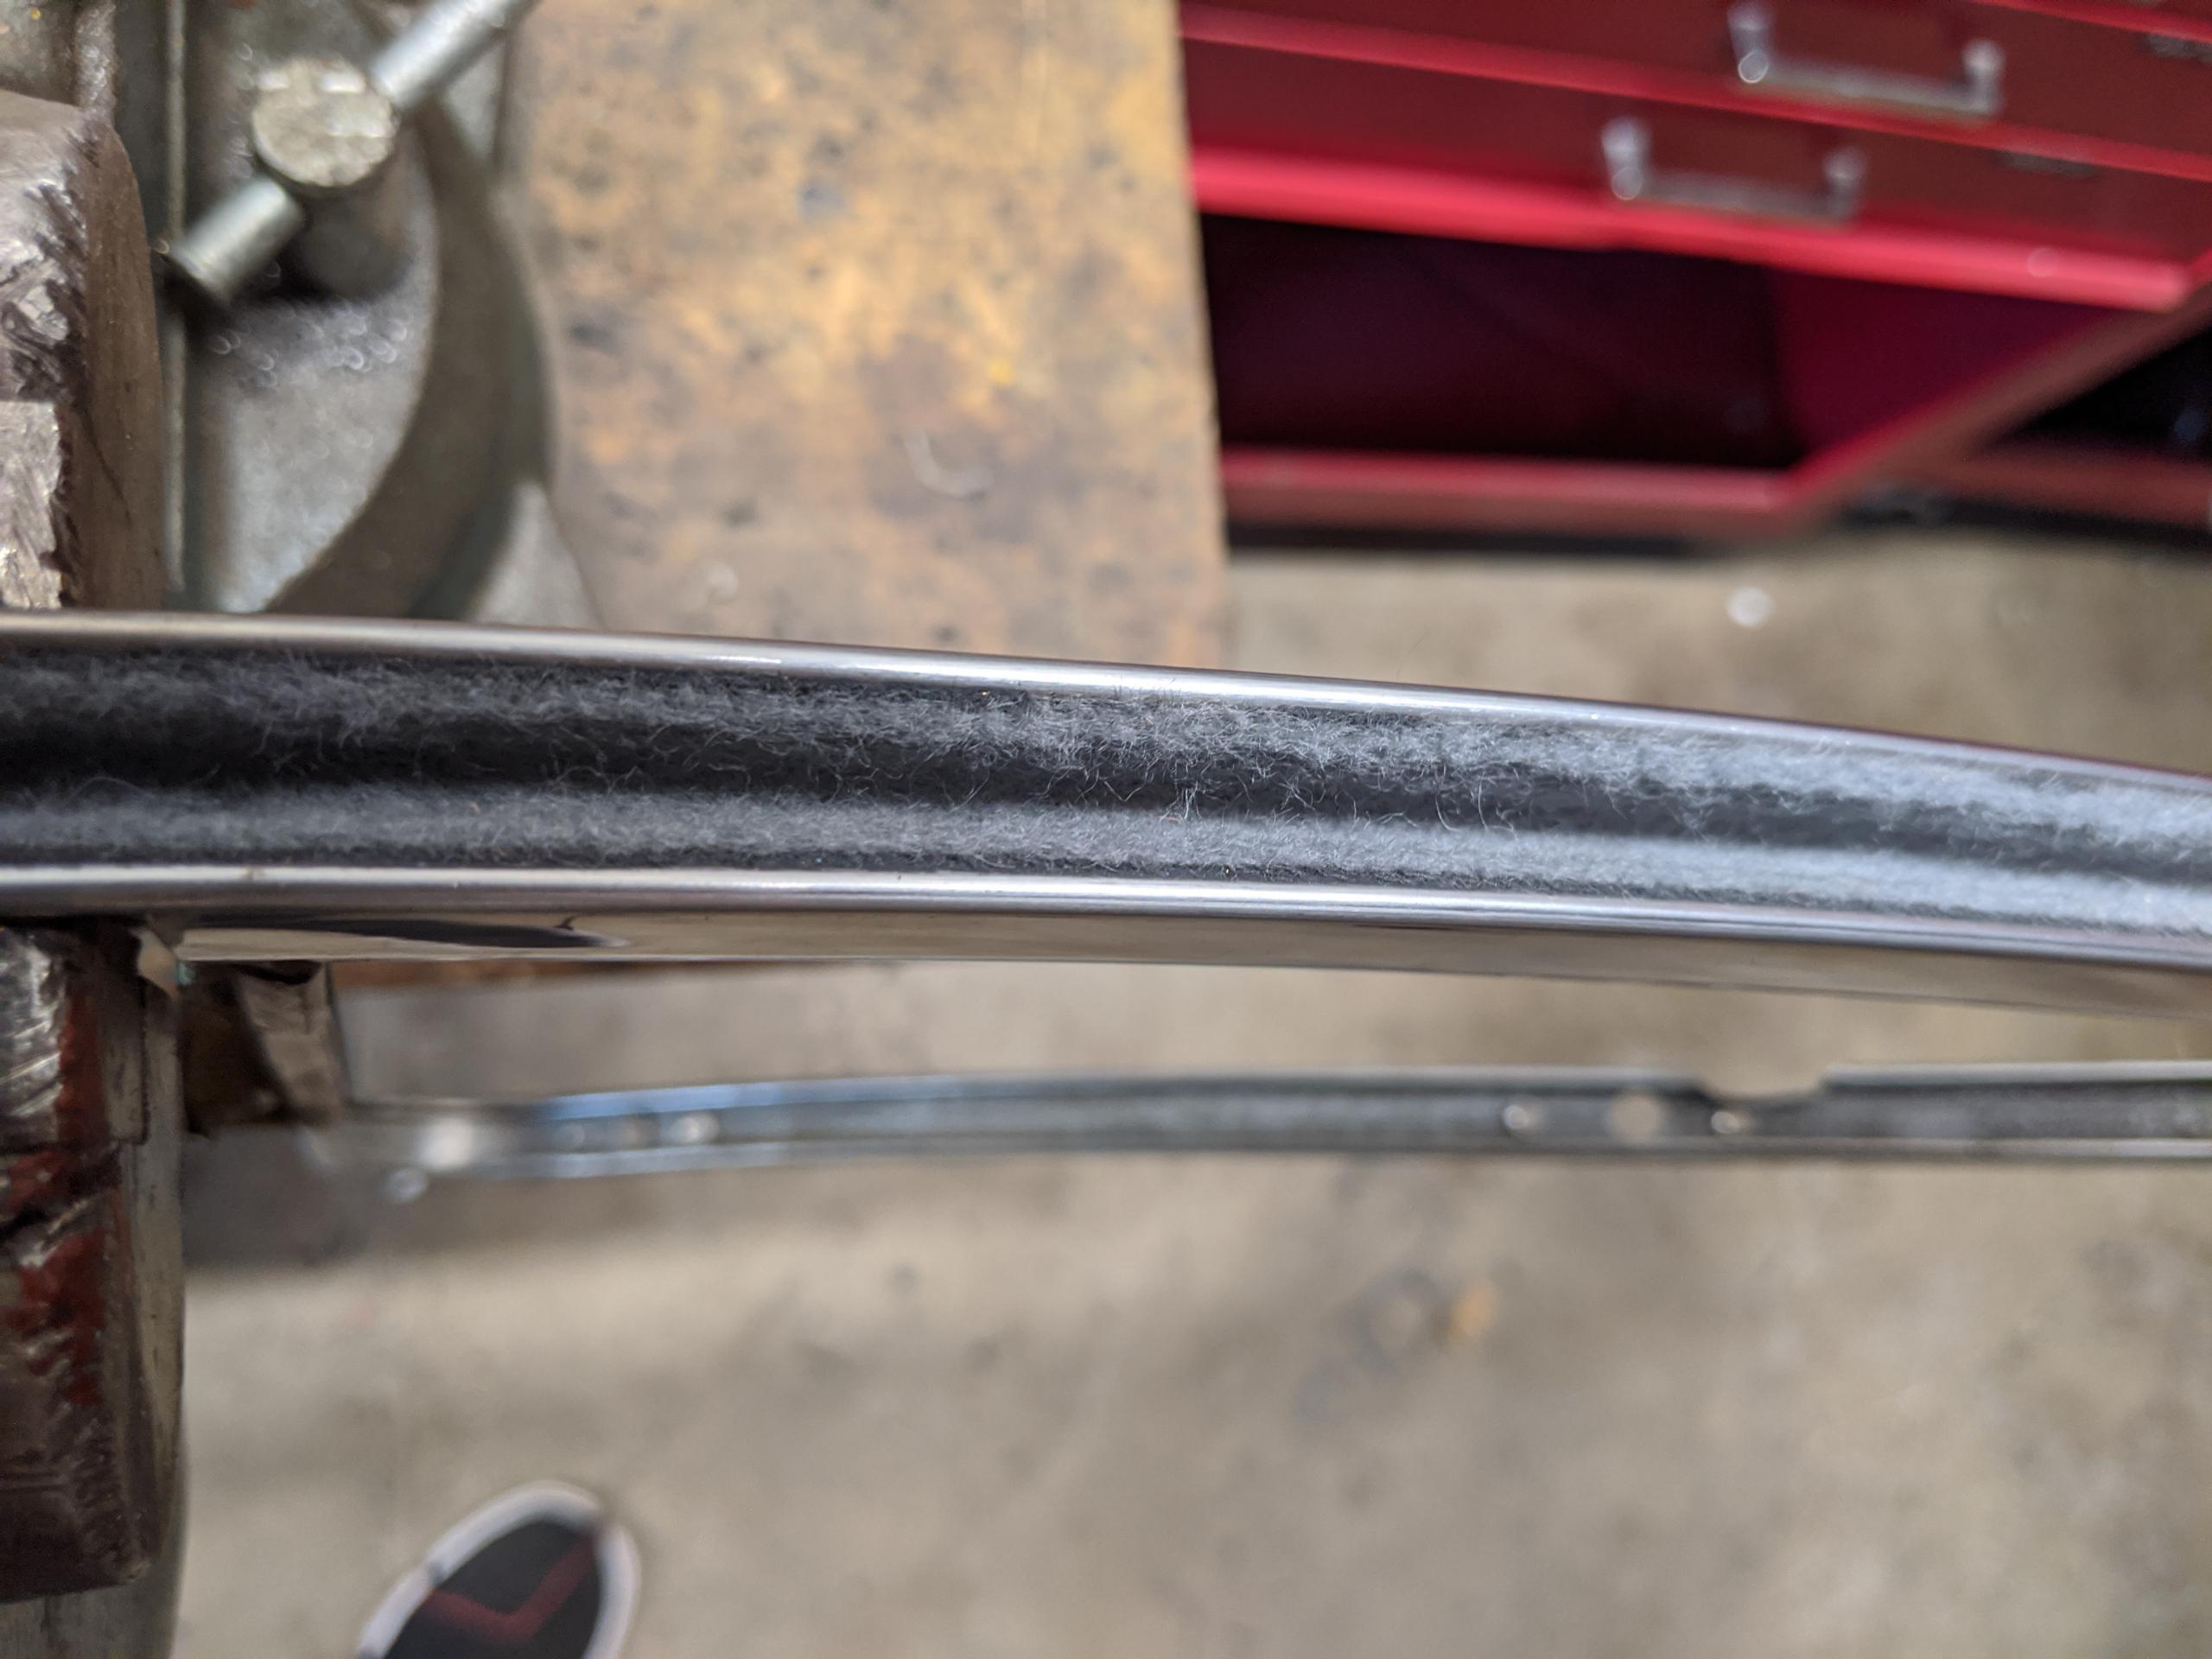
Done! The shearing leaves bits and films of silicone on the stainless, which are easily removed with a bit of brass wool, but you will get most of the cured silicone off when shearing.
Deprecated: File Theme without comments.php is deprecated since version 3.0.0 with no alternative available. Please include a comments.php template in your theme. in /home3/amcmagc1/public_html/wp-includes/functions.php on line 6114
Leave a Reply