Section Index
Induction/Carburetors
Cylinder Head (valves, rockers, head gasket, springs)
Block and Accessories (block, crankshaft, pistons, rods, covers, pan, balancer)
Camshaft and Timing Gears (camshaft, tappets, timing gears and chain)
Lubrication System
Cooling System
Ignition System
Crankcase Ventilation (PCV)
Introduction
This section is mostly documentation of information Tom Jennings collected and work he’s done on the Rambler 195.6ci OHV inline six engine. Tom’s info has been added to by Frank Swygert in some areas. Much of it will apply to the flat-head version also. These pages cover analysis and modifications to make these engines more reliable than they were in their day. This isn’t to say they were bad, but can be improved due to lessons learned over the years. Mainly there are cooling system engineering issues not addressed by AMC until the engine’s final years. These pages cover modifications and analysis well beyond repairs.
Keep in mind that considered from the present era this isn’t an “American Motors” engine, this is a Nash engine, with Nash part numbers and is based on a motor designed from a clean sheet in the mid to late 1930s for the 1941 model year Nash Ambassador 600 as a 172.6 cid Flat-head (L-head). AMC added a hastily-designed overhead valve head to the 195.6 flat-head six (172, 184, then 195.6 cubic inches) in 1956 to squeeze a bit more power and a few more product years out of it. The 195.6 is decidedly not modern. Drive it like it was 1956 and it will be reliable. Drive in modern traffic like you would a newer car and you can run into problems unless you address some of the issues presented here.
The year 1965 and it’s lower standards of reliability, when an 80,000-100,000 mile engine was considered worn out, are far in the past. These engines are also now 50 – 60 years old. Parts and expertise are scarce and expensive. We personally expect more reliability from cars today, too. 100,000 miles is just good broken in for a modern engine! And finally, modern technology and tools have removed most of the mystery from longevity.
There are suggested modifications to the engine throughout these pages. The goal of most of these is endurance, longevity, and reliability, not increased power. If flat-out horsepower is your goal, this isn’t the motor for that.
The modifications vary from simple to invasive. With the more invasive mods I can (and do) run this engine at sustained 3000 to 3500 rpm, more or less full power, up twisting mountain/desert roads in 100F ambient weather, for hours at a time without a break, and have absolutely nothing go wrong. Doesn’t matter how fast it is if it ain’t running!
The simplest of the modifications and knowledge will prevent failure in street cars in daily-driver service and require no permanent change to the basic motor, but will increase longevity and reliability.
Engineering changes over the years (overview)
Nash and AMC made continuous small and sometimes large engineering changes, often without changing the part or casting number. As per standards of the era, options and features came and went and some have been mostly forgotten (E-Stick clutch, various incarnations of “heavy duty”, etc. …). Repair shops swapped and modified parts to keep customer cars on the road, and it is common to find the engine over bored and with undersized bearings. All of this combines to make precise parts identification difficult. Luckily, blocks and most parts interchange with only minor warnings and issues, the ones I know about are documented on this site.
195.6 engines are short, with only four main bearings. Cylinders are siamesed in pairs (no water jacket between cylinder pairs) leaving a very narrow block deck surface that challenges head gasket sealing and requires care in block deck and head machining.
The OHV block retains the old flat-head side valve adjustment access covers but there’s nothing behind them but a view of the pushrods. The head bolt pattern sucks. Some of the head bolts draw up from vertical walls and some from horizontal webbing. The bolt pattern and block deck issues make for head sealing issues. The pattern was necessary due to the conversion from the flat-head design. This isn’t just a new head, the upper right portion of the block (where the flat-head valves were) above those side covers was changed. As much of the flat-head block was retained as possible so that as many parts as possible could be retained. This was done to reduce cost of the “new” engine. Back then crankshafts and rods were all forged as the techniques to cast a reliable crank or rods hadn’t been invented yet (all crankshafts and rods before about 1962 are forged, all makes). Not having to purchase new forging dies greatly decreased costs. This also made it easy to reintroduce the 195.6 flat-head for the 1958 American, itself a reintroduced 1955 Nash Rambler.
The cooling system is just adequate, but has one very serious flaw: thermostat location. Refer to the COOLING section below for more than most people care to know. It is imperative that some intervention be done on any running motor, even Sunday annual parade cars. These interventions vary from minor to machining-required.
The camshaft is a typical pushrod configuration, chain drive, under a cover on the front of block. The crank damper is typical enough with pulley groove. If original it has already, or is about to, fail, and needs rebuilding (new cast-in rubber). The fuel pump is driven off a camshaft lobe. Mushroom cam followers install from the bottom, requiring engine removal and inversion for access (camshaft must be removed). The cam follower’s very small diameter limits cam profile regrinding, as does the camshaft’s very small base circle, but they can be re-ground for some performance improvement. The typical helical gear on the camshaft drives both oil pump and distributor, but each has it’s own shaft and driven gear — specifically the distributor does not drive the oil pump as it does on the flat-head. All OHV blocks are drilled for the flat-head’s distributor location on the right side of the engine, filled with a welch plug. The flat-head distributor can’t be used in that position due to the exhaust manifold. Relocating the distributor is one reason the block had to be changed in the valve area.
Timing components (crankshaft sprocket, chain, camshaft sprocket) interchange back to 1941, with two variants, 3/4″ wide or 1″ wide changes and sprocket teeth. I am still researching which was installed when and where.
The cam bearing size was the same from 1941 to 1961, changed in 1961 and 1962, then in 1963 “metered top end oiling” was added (reduces top-end oil) by additional block passages, a slot on the camshaft front journal, additional holes in the front cam bearing, and a second steel line. (The American Interstate highway system came into existence as this engine was getting old, and it wasn’t quite up to the task.)
In 1964 the oil pump system changed from by-pass partial filtering to full-flow filtering, on a new pump design. The old system is adequate of you change the oil as recommended – every 3000 miles. Fellow AMCer Joe Fulton’s research found that all of the engine oil passes through the bypass filter in 10 – 30 minutes, depending on rpm.
The rocker shaft is lubricated by an external 3/16″ steel tube fed from the main gallery, into a hole in the head that feeds the front shaft pedestal (recall this was originally a flat-head engine). In 1958 this received full flow directly off the main gallery. In 1963 the valve train oil feed was from a new casting boss off the camshaft front journal just above the main gallery. The camshaft itself was modified; the front journal had a flat that with each rotation allowed a squirt of oil of approximately 30% of the cam’s rotation, to limit total oil to the head. Refer to the oiling section section for details. This was done because higher highway sustained speeds possible by 1963 led to too much oil pumped up into the head. This caused leaks at the rear of the valve cover as the oil level could rise above the edge of the head.
Crankcase ventilation was a simple road draft tube in the early years. PCV was first required in California then national in 1962 (I believe). The draft source (road or PCV) draws from front valve/pushrod access side cover. Air is taken in via the long crankcase oil filler tube dipstick vented cap, and many engines have stamped vents in the valve cover, depending on year and carburetor model. The 1964 and 1965 models have non-vented valve covers and non-vented oil filler neck caps. See the PCV section for details.
Connecting rods remain unchanged from the 1940’s through the end of the engine series — so part numbers would lead you to believe. Unfortunately there are different mass (weight) rods. I personally have had sets with 100 gram differences — the six rods in the engine were all close, but two different engines had 100 gram differences. Don’t assume — measure. All rods in an engine should be within +/- 10 grams — 100 is way to big a difference!
Another don’t-assume-measure item is valve springs. The OHV engine and the flat-head engine valve springs look alike, but the OHV springs are 80 pounds of force on the seat, while the flat-head is only 40 pounds. Every single spring needs to be checked, I’ve found mixed springs in engines and once bought new 80 lb springs from Kanter’s and received 40 lbs when checked.
Thanks, Frank!
Frank Swygert has been a fan and expert and source of knowledge for this motor (and much of AMC) long before me. His knowledge on the old AMC-list, and now the The AMC Forum kept a lot of motors running, and a large part of the reason I persisted with this thing. So the writing here is mine (except where attributed, and edited by Frank on his site) but one way or another it’s rooted in his earlier work.
Why 195.6 and not 196?
Nash engine nomenclature included the decimal, I would guess as part of some long-forgotten “Nash Precision” marketing trope, otherwise, it’s sort of annoying. AMC continued it, and that is what appears in service manuals and most internet search results, although enough people call this engine “the 196” to confound searches and identification. Annoying or not, it’s what all documentation uses so I continue it here. It is sometimes confused with the much more modern design 199.
Brief history
This section by Frank Swygert:
Nash’s economy L-head (flat-head) six was fitted with an overhead valve head for the 1956 model year. No L-heads were sold for 1956 or 1957, but it reappeared again in 1958 and was available through the 1965 model year. The 1956 model of the OHV still had the side mount water pump of the L-head. The front mount pump came in 57. L-head refers to the fact that the combustion chamber (which extends over the valves) and bore form an inverted “L” when viewed from the front. OHV of course means “over head valve” – valves are over the top of the cylinders.
The original L-head was a 172.6 designed in the mid to late 1930s specifically for the first unit-body Nash, the 1941 Ambassador 600. This increased to 184 inches in 1950 for the larger and heavier Nash Statesman, and the new Nash Rambler got the 172.6. The 195.6 came in 1952, again for the Statesman. The Rambler got the 184 in 1953, but Dual-Range Hydramatic equipped Ramblers got the 195.6 (small wonder — the Hydramatic was heavy and took a lot of power!). 1952 was the last year for the 172.6, 1954 the last year for the 184. All three engines used the same 3.125″ bore with different strokes (3.75″, 4.00″, 4.25″ respectively). This was unusual since the crank and rods were forged — the usual practice was to keep the expensive forgings the same and alter the cheaper to change block casting. I guess pennies didn’t need to be pinched as much then as after the “merger” with Hudson.
AMC factory Technical Service Manual
if you are going to work on these motors you really need to have a legible copy of the factory repair manual, called the Technical Service Manual (TSM) by Nash and AMC. A Haynes, Chilton’s or Motors manual is no substitute. The TSM has detailed information you simply won’t find elsewhere. If you’re a novice mechanic it’s still not enough. The TSM assumes you’re a seasoned mechanic and at least know the basic well. If you need more assistance pick up an old auto mechanic text book. A good source is https://www.thriftbooks.com. Search for “Auto Mechanics” and try to find one published no more than 20 years newer than your car (1980 for a 1960 Rambler). “Auto Mechanics Fundamentals” by Martin W. Stockel is a good choice (1970 edition). You need one a few years newer than your car for everything to be covered well, at least five years newer (1965 for a 1960 car). Much closer to the year of your car and there may be some technology changes not covered. This is especially true as you get into the 1970s, but that’s of no concern with the 195.6 OHV — last made in 1965.
I have a nice paper copy of the 1965 manual which I’ve found most useful overall, even for earlier engines. Mainly the differences will be in the oil pump area. For that detail refer to the 1961 manual. The differences from 1958 are quite minimal and for pre-1960, AMC documentation is quite skimpy.
| 1965 Technical Service Manual |
| Relevant 1961 TSM engine pages |
TSMs can often be found on E-bay and from several automotive literature vendors. Faxon Auto Literature (www.faxonautoliterature.com) has some original TSMs and all as new reprints (they are licensed to reprint by Chrysler). They have some years available in digital format on CD-ROM or USB sticks. Another good source for used original TSMs is www.nashparts.com. Both have some additional Nash/Rambler/AMC literature.
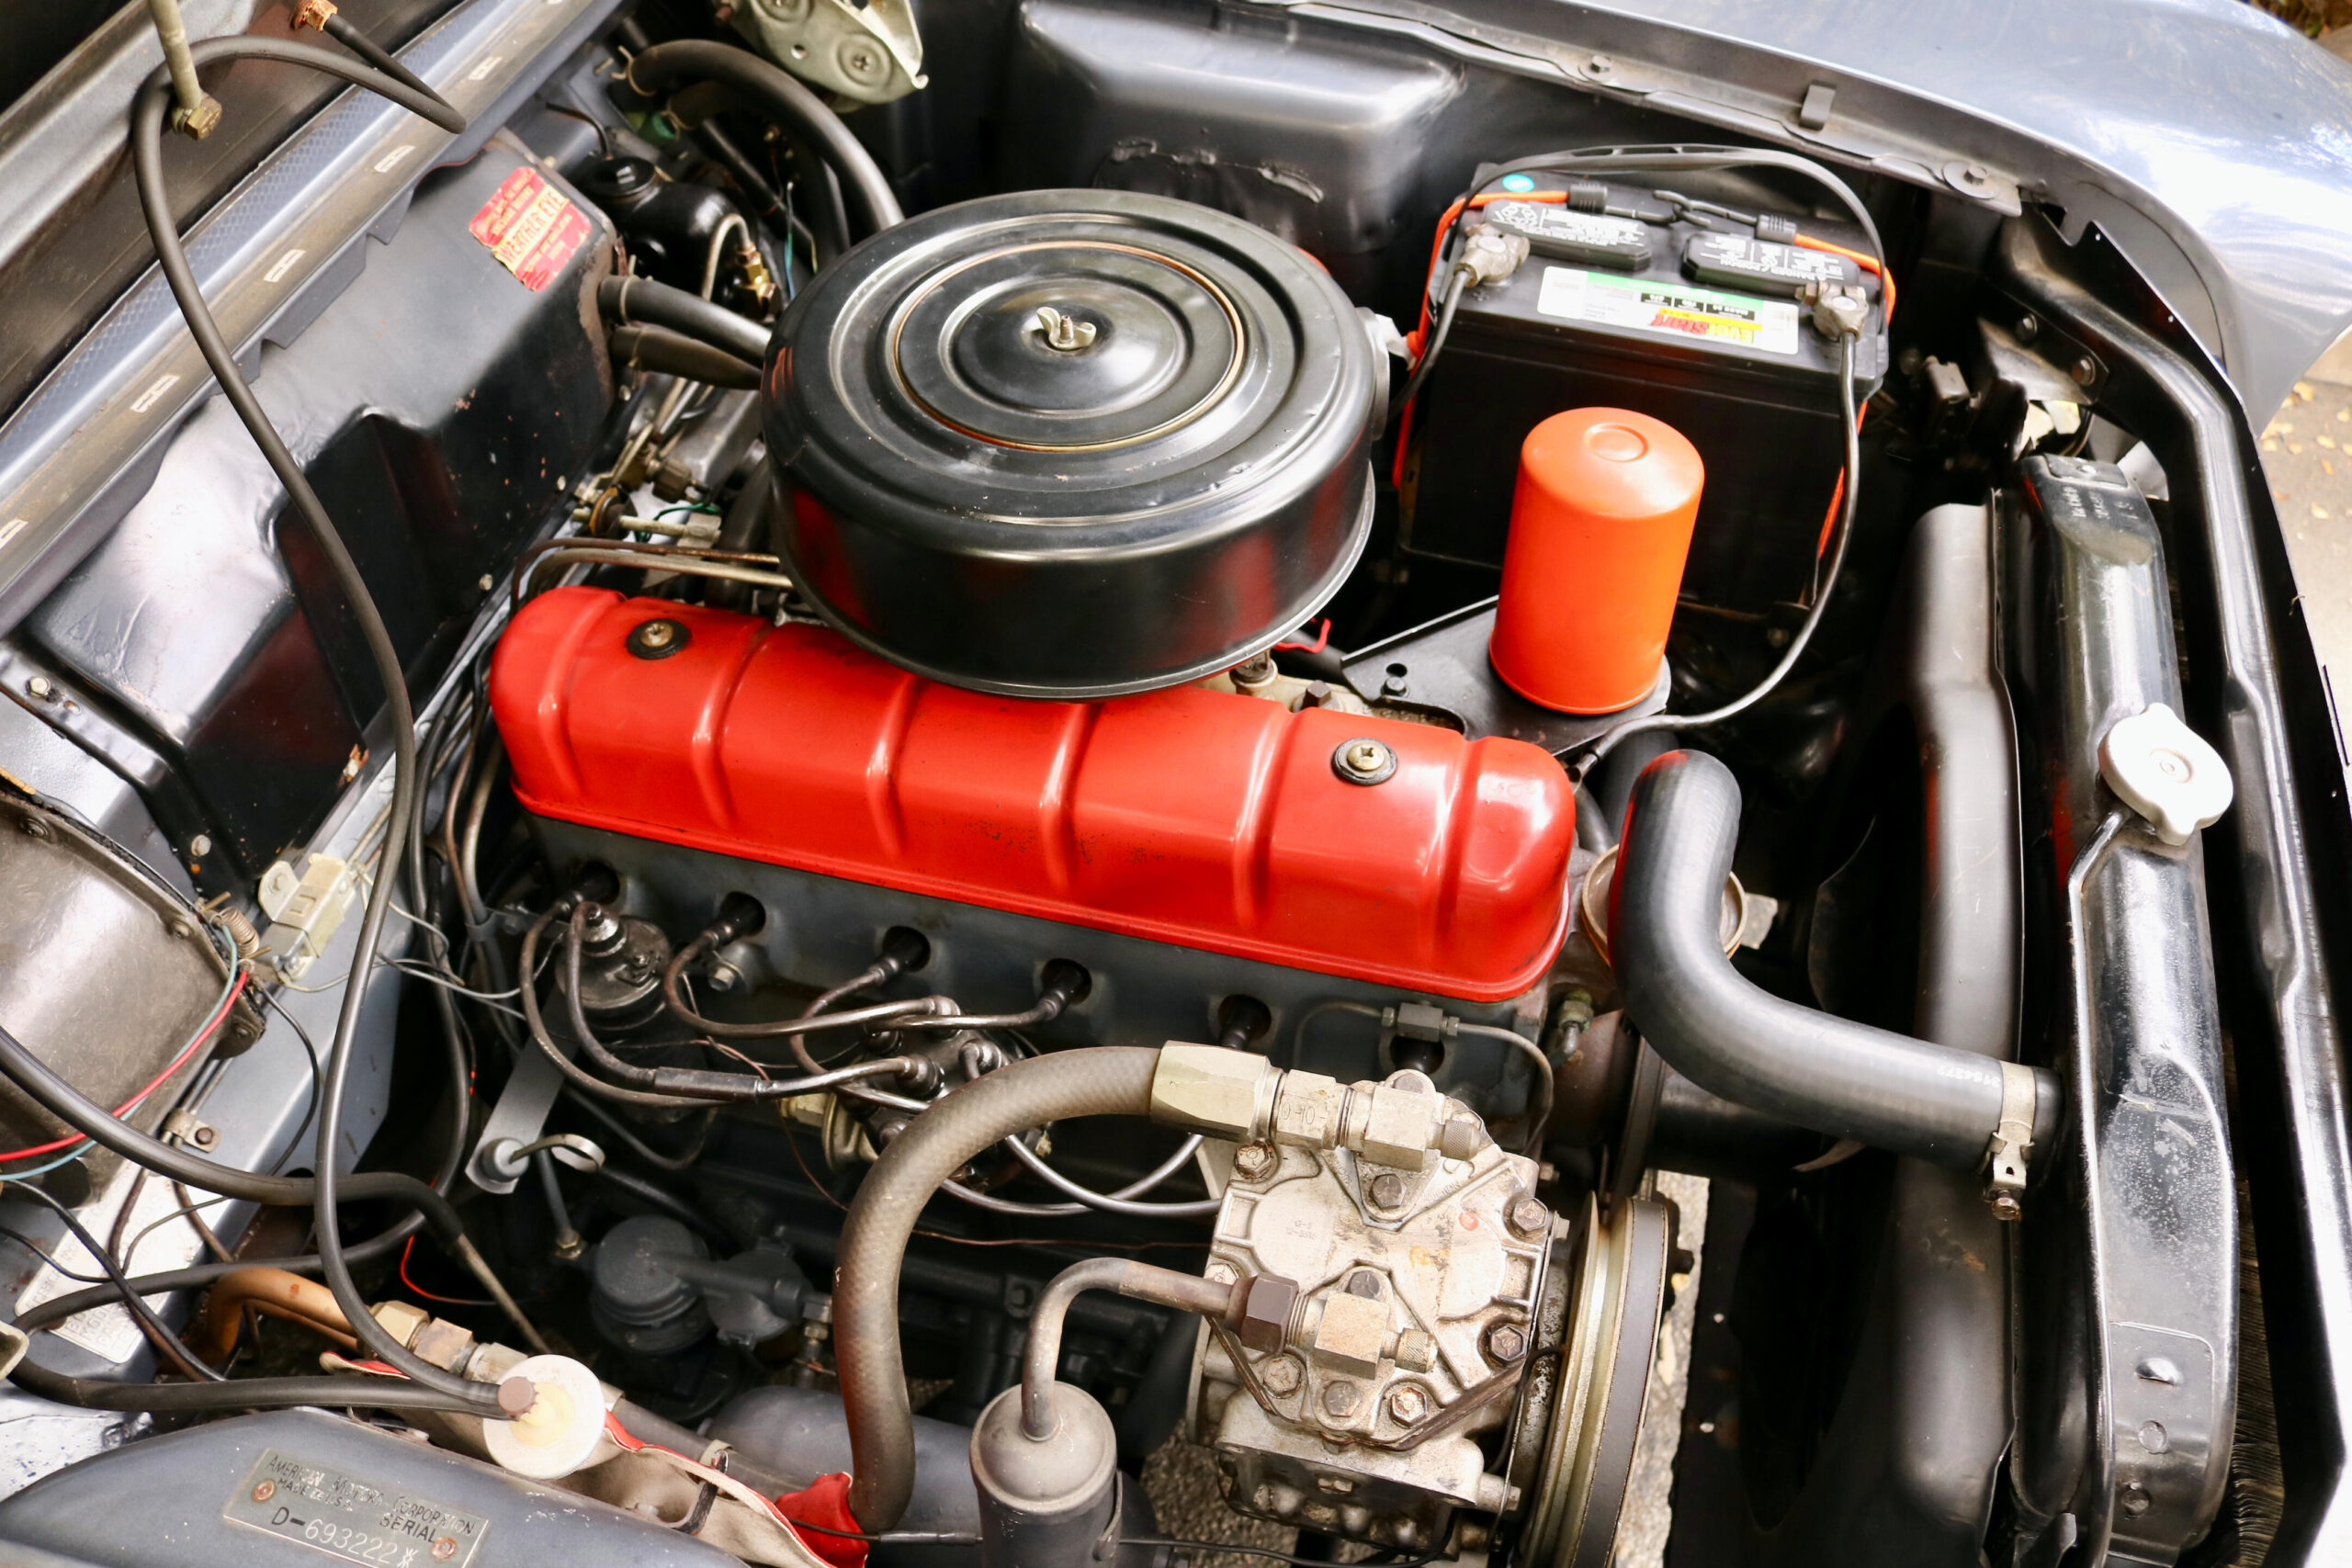
Tom’s roadster’s high-performance 195.6 OHV
Okay, the term “high performance” is relative to the original power ratings. Frank got about 170-175 hp (gross) from his, Tom has about the same but has modifications that make it much more reliable and more capable of sustained “high” rpm (3000-3500) operation.
The engine in Tom’s roadster is not ordinary. It was his ongoing test bed for several years. It has some modifications that make little sense for a street car but in places I’ve pushed this engine to the breaking point (literally) and got endurance-performance from it that would easily destroy a stock engine. In late 2023 (the year I sold it) this engine was still working great. The lessons learned on the roadster’s engine definitely apply to a street motor.
This particular engine has been rebuilt at least three times, twice by me. When this engine was in my 1963 Rambler American 440 Twin Stick hardtop (2005) I got it had an older commercially rebuilt engine in it with a .030″ overbore. Within a year I rebuilt the cylinder head due to sticking valves (old gasoline, foolish mistake).
In 2010 the engine was pulled and I did what I thought at that time was a careful rebuild. Many of the successful modifications I made to this engine were done at this time. On this site I refer to this as the “2010 build”. In 2014 I again removed the engine, did a cosmetic freshen then installed it in the current chassis, my rambler roadster. In august 2016 I drove the roadster in the LeMons Hell on Wheels ’16 Rally, very hard driving in very hot weather, with steep grades in Death Valley, which did some unpleasant things to the bottom end. When I got home the engine was once again removed, torn down, and this time, after careful diagnosis of it’s various shortcomings and problems, I completed what I call here the “2017 build”, by professional engine builder Pete Fleming in Los Angeles. That turned out to be a great (if expensive) decision as his machine work is impeccable, finding and fixing problems previous machinists either neglected or couldn’t see. You get what you pay for.
RELIABILITY ISSUES, especially for stock, unmodified engines
Here is a brief summary of things that you can do to greatly increase reliability of even the most modest 195.6 OHV (and in some cases the flat-head). Some are easy, some invasive, but the most critical issues, all cooling-system related, are fairly easy.
Cooling system
Absolutely never let this engine overheat, ever. By “overheat” I mean 215 degrees or more. This is a far lower number than the factory TSM suggests is acceptable. I do not let my engines exceed thermostat temperature — 195 degrees — by more than 5 degrees or so. (this is probably a bit aggressive… running it occasionally up to 225-230 during adverse conditions won’t hurt, but it shouldn’t run that high all the time or for very long periods. Frank)
1963 was a long time ago, and the operating manual’s suggestion that it’s OK to operate this motor at the high end of the gauge, 235 degrees — it actually says that, in ink on paper. I think that was bullshit marketing to make people think this engine was competitive in the market. I have measured these things. This engine overheats the oil at sustained RPMs over 3000 or so (as low as 60 mph depending on the axle) and that radiator is simply too small even new.
When 195.6’s die it is nearly always from overheating, acutely or accumulation of years of prior abuse or neglect. Most often it’s due to a cracked head. This engine has engineering shortcomings that require attention for modern driving. It is an inarguable fact that when these engines die, it is from running too hot. It’s a 1940s motor run on 1960s roads and freeways. Put-put down the road at 50mph and this motor is working harder than you’d like to think, but will survive. Run it 55-60 for sustained periods and it’s working much harder than it was designed to.
Cooling fixes
- If engine temperature climbs to the high end of the gauge, stop driving or slow to 30-40 mph/light load to let it cool down.
- The correct coolant temperature for this engine is 190 or 195F, as stated in the TSM. Running without a thermostat is foolish and harmful, and low (160F – 180F) thermostats will worsen, not improve, cooling operation.
- Use antifreeze, premixed, or a 50/50 solution with distilled or deionized water. Standard advice in any engine.
- An engineering flaw in engines made before 1965 is mostly overcome by drilling a 1/8″ hole in the edge of the thermostat, so that a tiny bit of coolant flows through it when the engine is cold and warming up. This also allows trapped air to collect in the radiator reservoir. AMC made a change to the cylinder head and water pump in 1965 that not only eliminated the flaw but brought the engine up to more modern levels of reliability. Detailed technical discussion is in the cooling system page.
- No contest, the best and cheapest upgrade/improvement you can make is to install a modern, inexpensive, aluminum radiator and a nylon flex fan. Champion sells Rambler and AMC specific radiators, 58-78. Flex-a-Lite brand nylon fans are light weight and come in 14-18″ sizes. My cars don’t overheat in Southern California stop and go or desert and mountain highway driving. Two rows of 50-60 year old brass tube is not adequate. At the very least have the original radiator professionally cleaned — assuming you can find a radiator shop that still does this kind of work. Note that nearly all AMC cars use the same radiator core size (width and height). The main difference between models is the mounting flanges. A later model radiator (say 1970s Hornet or Javelin) easily fits an early Rambler. You will most likely need to drill new mounting holes in the radiator flanges to match the original bolt holes, and you may need spacers to alter the distance between the fan and radiator. It is possible to modify the mounts for a late model plastic tank aluminum radiator. A 95 Ford Explorer radiator has been used by an AMC Forum member. Note that such an installation will need mounts fabricated and custom hoses, but might be a good choice for a driver. Electric fans sound like a good idea, but there is not enough room between the engine and radiator in the 58-63 American body for a “puller” fan, and not enough room between the grille and radiator for “pusher” fans.
Lubrication fixes
This old low-output engine paradoxically puts great demand on lubricating oil. Daily driver service today makes this old design engine work very hard, and in the extreme service of the roadster engine, when run at high loads consistently above 3000 rpm, engine oil temperature rises alarmingly, and that engine has a very large engine oil cooler. lubrication section.
- Run the best quality oil you can find. Oil (and chemicals in general) is a not a place to save money. In 2020 any brand-name oil is superior to the best available when this engine was new; all exceed requirements. Based upon this experience I am now using O’Reilly Auto Parts’ house brand full synthetic 10W-40 and changing it every 2000 miles. Problem solved.
- A high zinc oil IS NOT required, though it certainly won’t hurt. Enough zinc and other high pressure lubricants are in modern oil for flat tappet engines. There is NOT ENOUGH for race engines. According to oil engineers at Warren Oil Company the only time you need added zinc oil is when the valve spring pressure is over 300 pounds. The 195.6 OHV uses an 80 pound spring, so no issues. Frank runs a 270 pound spring in his hopped up 4.0L built in 2009 and uses a standard synthetic oil.
- While on the subject of synthetics, they are safe to use in older vehicles. High mileage vehicles may lose (burn and leak) more oil when using a synthetic, but that is due to age and wear, not the oil itself. A rebuilt engine should have no issues with synthetic or regular oil. Stay with the recommended weight (usually 10W30).
- positive crankcase ventilation replaced road-draft tubes in the early 1960’s. It’s a worthy upgrade, both for your engine, the under-chassis, the air and roadway/earth. Your oil will last longer too. The biggest hassle will be finding a PCV side cover. This can be fixed by removing the road draft tube, welding a plug over the hole, and a 1/2″ piece of tubing in the center of the plug. When getting a PCV valve make sure it’s designed for horizontal mounting. The original PCV for the 195.6 was mounted horizontally on the left side (driver’s side) of the engine. Many PCV valves are designed to be mounted vertically. It matters!
Carburetion
I spent a lot of (foolish but fun) time working out carburetion and EFI solutions. For my fairly heavily modified roadster motor a larger carburetor is indeed an improvement, but otherwise, a small stock-type is perfectly fine, and larger/more will make it run worse. Rebuilding an original is perfectly adequate, assuming you can find a good used carburetor, which is no small feat today. The castings themselves go bad and many old carbs are not rebuildable. There are new Chinese made Carter YF carburetors that work well, most of the time. Quality seems to be hit and miss. Daytona Parts Company (https://daytonaparts.com/) sells a high quality YF replacement (their UN2 universal). The only issue is it is manual choke. Their CHV is another good choice, a Holley style 1V carb. The Universal 2 bbl should be a good candidate to replace a worn Carted WCD 2V, but I don’t know anyone who has tried it. Again, all of the Daytona carbs are manual choke.
Head bolt torque
My research tells me that the peculiar head bolt re-torque requirement for this engine is due to the head-cooling engineering issue. The 1/8″ hole in the thermostat, or anything that causes slight coolant flow during cold engine start up, should be sufficient to eliminate the need to re-torque, but check it every 8-10K miles when you adjust the valves anyway. Eventually they loosen to the point that the head gasket leaks, and the first sign of that is usually the engine overheating, which can lead to a cracked head. Refer to the cylinder head section.
Torque-checking each time you adjust the valves is not difficult. It does require a torque wrench. Just set it to 60 ft/lbs, pull gently. If the tool clicks (or otherwise indicates torque) you’re done. The issue isn’t whether it’s 58 or 60 or or 62 or whatever ft/lbs; it’s whether the bolt has backed out from temperature cycling. If they are all 55 ft/lbs, that’s fine. Headgaskets leak and engines fail when some head bolts become actually loose. Overheating the engine multiplies this problem hugely. Most don’t realize the head bolts have loosened until the engine overheats — too late! You don’t have to worry about tightening in sequence unless the head has been off or all bolts have been loosened. When checking torque a few bolts will click right away, a few will move a little. Rarely will one move more than 1/4 turn, but don’t be alarmed if one or two do. While Tom’s recommended cooling improvements should alleviate the need to do this, the valve cover has to come off to adjust the valves every 10,000 miles or so anyway. It’s cheap insurance to check head bolt torque while it’s off. Good heads are naturally very hard to find for this engine.
Ignition
The distributors available are all old and worn. New replacements are not available. At these RPMs contact points are fine. I’m always surprised by how crappy and loose people let the wires on the coil get (coil + and -). You should be able to tug hard on those wires. Absolutely crimp them with a real crimp tool, not pliers.
It’s hard to find quality points and condensors for old cars today, that’s the primary reason for an electronic conversion like the popular Pertronix. Not having to worry about adjusting dwell and gapping/cleaning points every 3000 or so miles (less if the system isn’t up to par!) is a big plus also.
Advice for rebuilding
When I (Tom) build a 195.6 OHV engine for a daily driver this is what I do:
- Use a machine shop that will mill or grind, not belt-sand, the block deck and head mating surfaces. Ask to see their mill/grinding machine. This is the one operation you need to pay extra for. Less-fussy engines seem fine with the big old head/block sander. This engine has terrible head sealing issues. It must be flat. It is not a convenient requirement. You might be able to get by without this, but you’ve just spent a lot of money to rebuild it — you don’t want to have to tear it back down!
- Do not use resurfaced cam followers/tappets. These are surface hardened parts, resurfacing removes that hardness, they will fail. I’m a little upset they’re even offered for sale. A welding shop might be able to harden the surface (case harden) — I haven’t tried it.
- Buy a new oil pump pressure relief valve spring, or at least check the one you have. I bought a new one from Kanter’s and it failed — collapsed, reduced system pressure to 40’s PSI, and I melted all the crank bearings. Contact Tom (see www.ramblerlore.com), he has them, new manufacture (as of Oct. 2025).
- Check height and tension (lbs) of each and every valve spring. Besides the usual issues of wear, OHV and L-head springs appear identical and interchange, but OHV springs are 80 lbs at the seat, and L-head springs 40 lbs at the seat. Kanter’s sent me mixed springs — check them even when coming from a reliable supplier!
- Buy a new oil pump if possible, and at a minimum, check gear wear and clearance. See the lubrication section. The old ones always “look fine” (OK sometimes they don’t).
- Assemble the engine with Permatex Right Stuff and ditch most of the incidental gaskets (required: head gasket, oil pump – no Permatex there!). The engines I built this way do not leak oil. All of the engines with traditional gaskets and sealer begin seeping oil two years later.
- Use a sealer on the head gasket. New manufacture head gaskets say “no sealer required” but in my experience (Frank) the narrow sealing surfaces need a little help. DO NOT use something like RTV! What you want is a spray copper or aluminum sealer like Permatex “Copper Spray-A-Gasket” (#80697) or a thin brush on like Permatex “Indian Head Gasket Shellac” (#20539) sealer. Just a thin coat is all that’s needed.
- Use the absolute best engine assembly lube, and procedures, when first starting a new engine. Absolutely must pack the oil pump with vaseline (or equiv) before start up; this engine’s oil pump will not prime by drawing from the pan. Packing the oil pump for initial startup is critical! Alternately you can remove one of the plugs in the main oil gallery and fill the pump, but the openings are small and it will take a while.
- My recommended break-in procedure, a collection of the most conservative practices I could find from people who have done them:
- First crankcase oil fill can be any good-quality 10W-30 non-synthetic, It won’t be in there long. Start engine and run at 2000 rpm for 20 to 30 minutes. This is crucial for breaking in a new camshaft. ABSOLUTELY DO NOT LET THE ENGINE OVERHEAT.
- Drain, change filter. Fill with your intended oil. Allow engine to cool.
- After initial break-in, and allowed to cool, re-check head bolt torque. That first good long “heat soak” of block, head, oil, bolts, gaskets, etc. seems to affect bolt stretch.
- Begin driving the car. For the first 500 miles keep loads and RPM low and varied. No sustained highway speeds. Watch for complicating issues such as overheating, weird pinging, and the other things that can happen when you first put together a new engine.
- At 500 to 1000 miles, retorque head bolts one last time, change oil and filter. After this begin your normal driving regime.
- Additional suggestion: check the torque on the six head bolts/studs that pass through the aluminum trough cover plate in the next 500-1000 miles! These are easy to check, (two may require lifting the carb up). The trough cover has it’s own, thicker, softer gasket that squishes, and it’s aluminum and expands/contracts at a different rate than the iron head. My most recent engine developed a coolant leak here that bubbled up the head bolt hole, and ultimately required removing the head and replacing the head gasket to stop the leaks.
It was suggested to me that one of those oil changes isn’t necessary. My answer is, oil’s cheaper than motors. It is settled science that new-engine break in produces wear components that need to be removed ASAP. Break-in is not a place to save money! Save $50 on a new engine? After 1000 or 2000 miles, the engine will feel “looser” (sliding surface roughness scraped off into the oil) and you’ll need to re-do carb idle. ABSOLUTELY DO NOT LET ENGINE OVERHEAT DURING WARMUP!
Website contents, unless otherwise specified, © 2026 by Tom Jennings and Frank Swygert. Permission is granted for personal use with no remuneration. Corporations or any legal organization or their agents (employees or consultants or other relationships) expressly prohibited without written permission.