
Repairing Rambler American door hinges (1958-63)
Written by Tom Jennings 09-20-2022, edited by Frank Swygert 02-23-2026

Sagging, klunking, rattling and leaking doors and doors that require slamming to latch closed are one of those things that make an old car crappy to own and drive. All of the ones I care about are now 60 years old, and rarely are the door hinges not worn out, especially drivers side front. This eventually ruins strikers, crack B-pillars, won’t stay latched, and seriously degrade the total experience, and it is a safety issue.
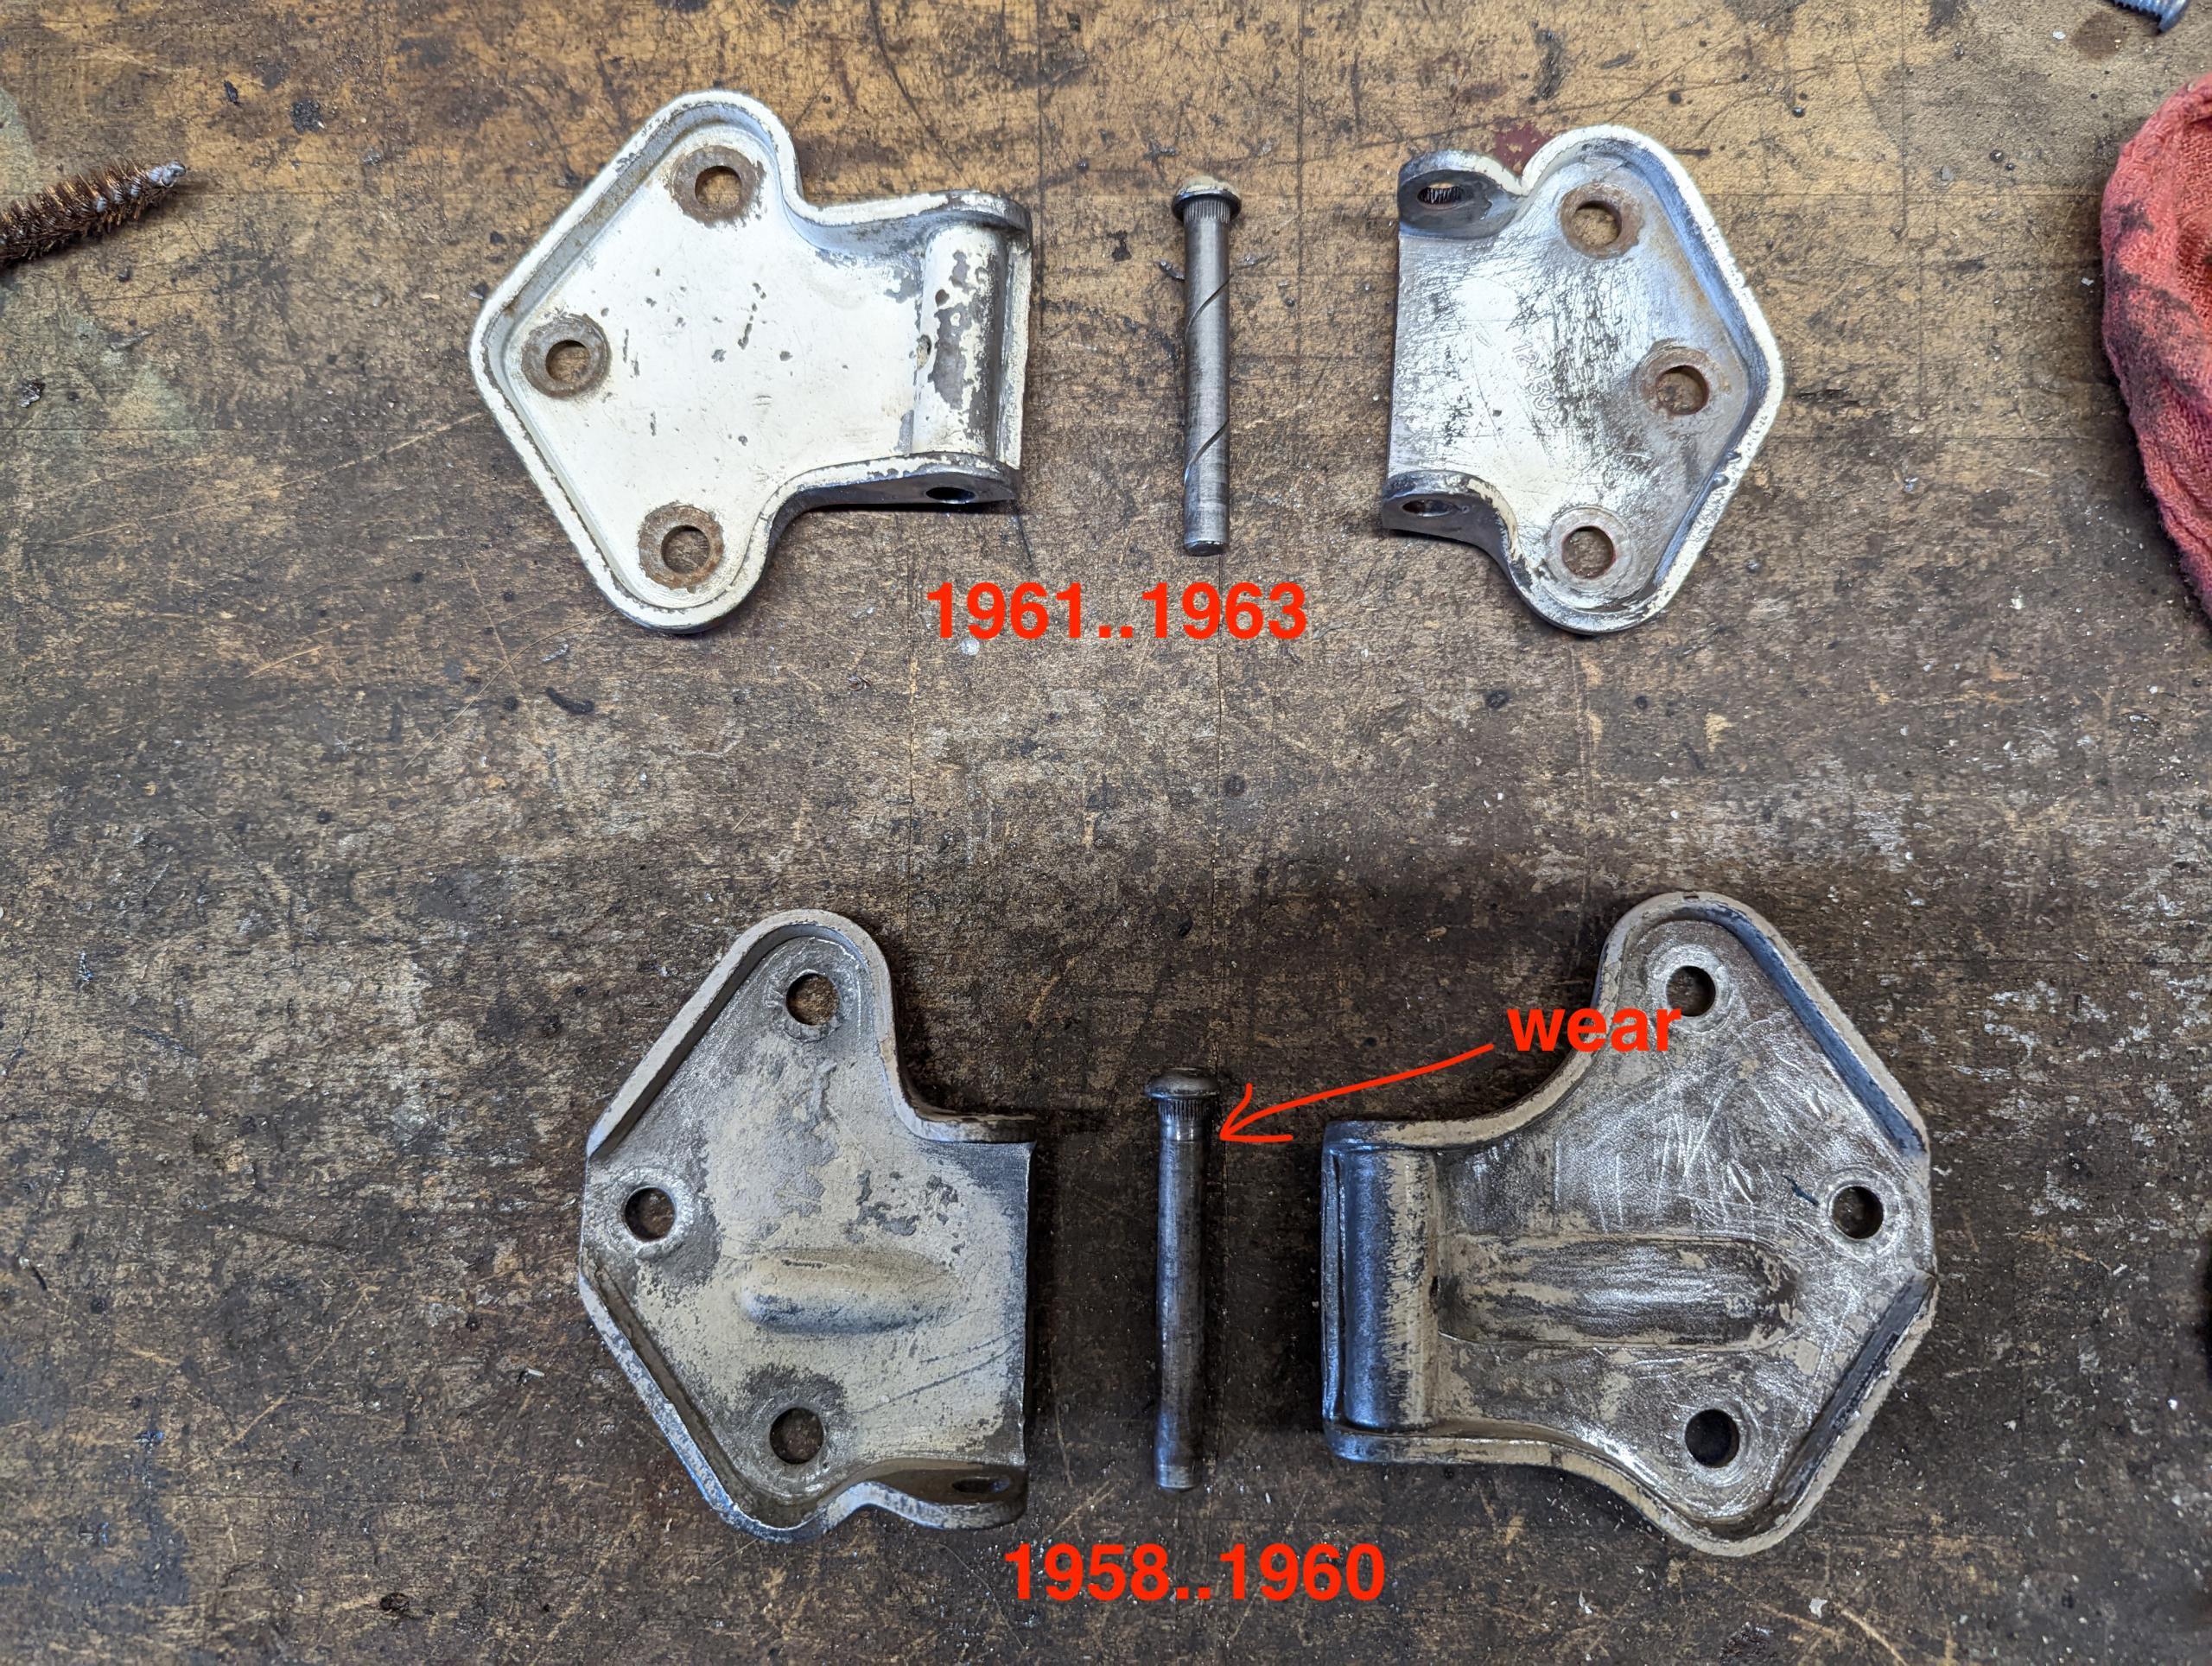
The older AMC cars that inherited all that good Nash DNA, have pretty great hinges — they last longer and are much easier to repair than 70’s cars, with the terrible GM-type bronze insert that seems to last a few years before needing replacing again (at least they aren’t terribly hard to replace!). The two “generations” of early American door hinges (1958-60 and 1961-63) are not interchangeable, but are very similar, and use the same pin.
Frank: The big cars use a totally different hinge, but some of the techniques here should apply.
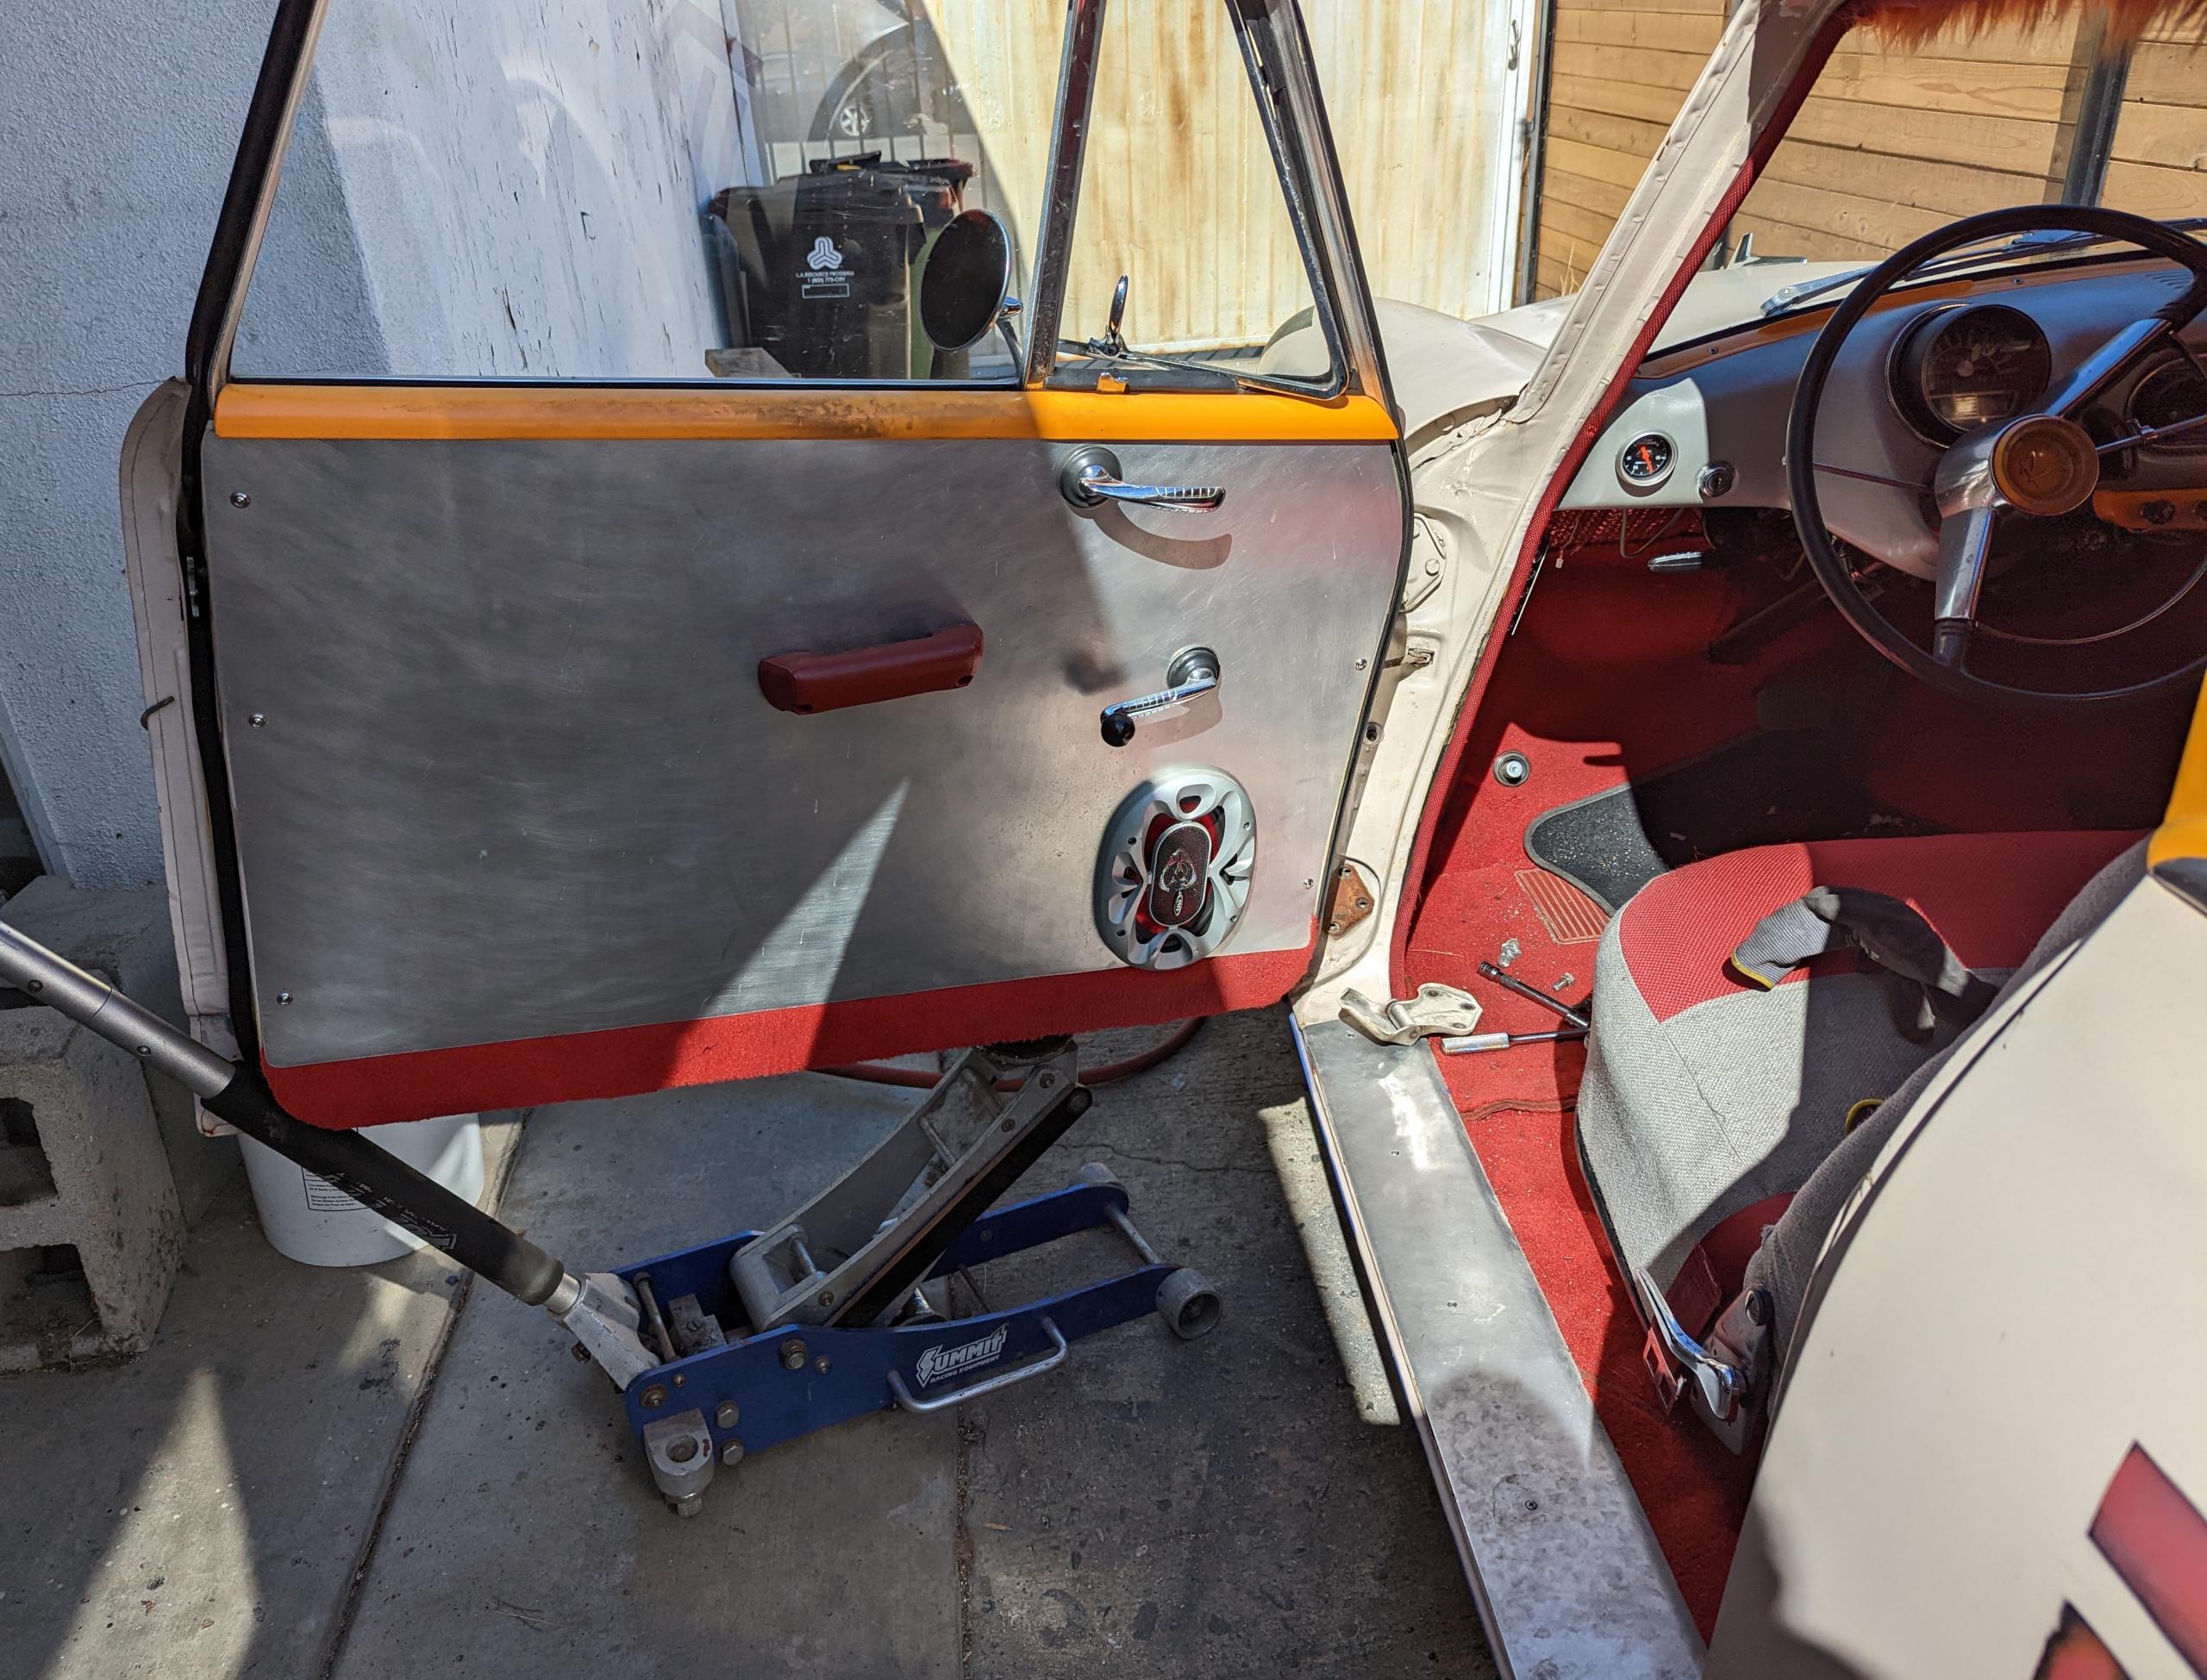
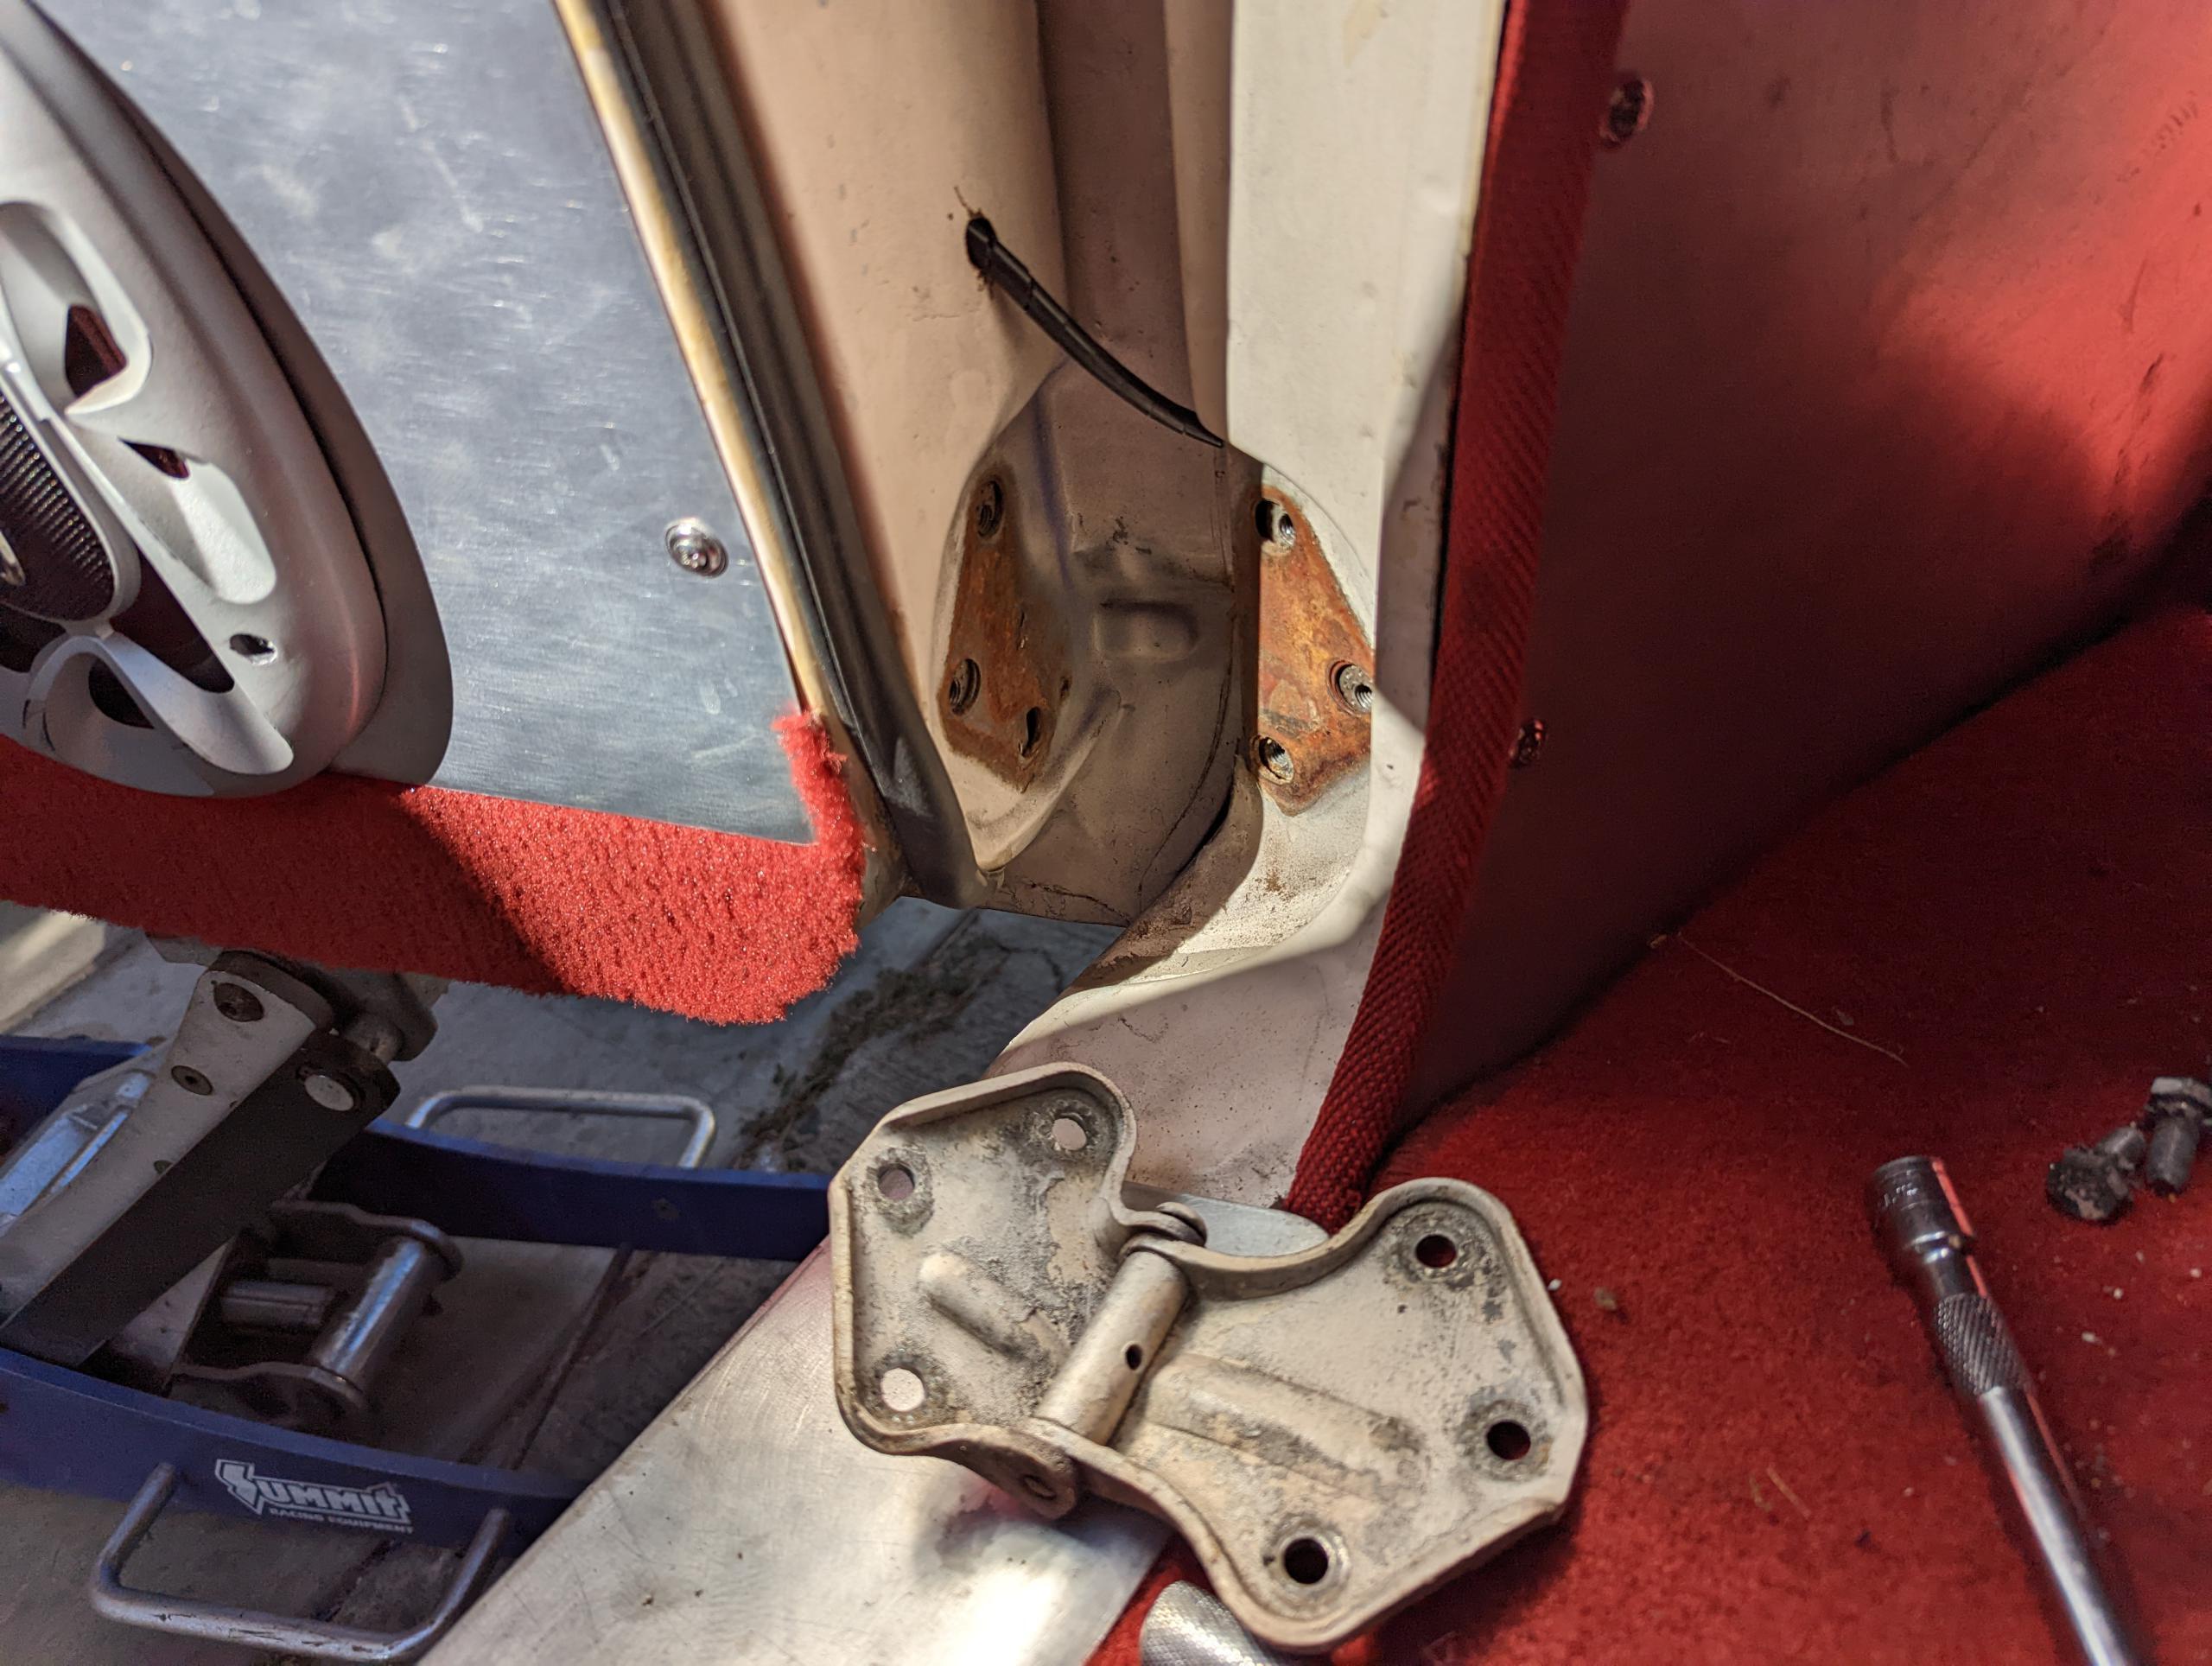
On my 1960 American wagon I used a bungee cord from door edge to front fender to hold the door open, and used a garage floor jack to lift the outer edge of the door just enough to take the weight off the hinges. (The photo shows where I jacked for the lower hinge; for the upper hinge I moved the jack to the outer edge of the door.) Then I removed and repaired one hinge at a time. This made remove and repair easy. Some care is required, you certainly don’t want the door unsupported, the door weight would damage the door or A-pillar area if it fell over. It’s not hard however.
Frank: You can always remove the door for hinge repair, but it takes two people to line the door back up to get the bolts started. If you do this take the bolts loose from the A pillar (or B for back doors). If you’ve never had the front fenders off now would be a good time — the front door has to come off to get to a couple of the front fender bolts. The “troughs” under the front fenders are prime rust areas. My 61 convertible was a “rust free” car — until I took the fenders off. One the 58-63 Americans (and 56-62 big cars) the “troughs” have a welded on cover. 2/3 of that cover was rusted away! There were also some rust through in the A pillar (back of the fender). I looked that car over and verified it was rust free before I bought it, but you can’t see that area! If you plan on keeping the car long term take the fenders off and check! There are some pics of the rust in “Our Cars”, “Frank’s 61 Convertible Resto-Mod”.
Once off the car and apart on the bench, the wear was as expected, though surprisingly minimal. The two hinge halves put a lot of pressure on a relatively small area of the fixed pin; this abrades and becomes smaller, increasing clearance, and the door slowly sags. The wear effect is exaggerated by the length of the door; 10 thousandths of an inch of slop in the hinge is substantial at the latch.
Hinge pin wear
I did have a set of passenger-side hinges — always less worn than driver’s side — from a (probable) 1963 car, and these hinge pins were in far better shape. Pins are .3125″ diameter, with a knurled portion at the top that is supposed to lock the pin into the hinge (see below). My original pins had .003″ of wear (bottom) and .007″ of wear (top). The donor had .003″ worst case, the other much less.
Even without replacement pins, you can reinstall the original pins rotated 180 degrees, to put the worn area “inside” the hinge. The door swings in an arc, and wears only the back, inside portion of the pin. What I did was grind a mark on the pin head to indicate the good spot, figured out where the weight is on the hinge, and drove the pin indexed to the good spot.
Lubrication
The 1961-63 hinges have improved pins, with a spiral oil groove. Maybe this helps, hard to tell. My old top hinge had oil and rust inside; I actually oil mine annually so I know it had gone dry, got wet, rusted, etc. when I added oil. My bottom hinge was completely free of lubricant, but had plenty of rust.
The lubrication system is haphazard. Not a complaint; what’s product life, 5, 10 years? Here it is 62 years later. But some engineer attempted improvements, probably from dealer feedback, so there you go.
Repair
Thorough cleaning of course, all loose rust, lube, most of the chipped paint. If you can’t see it you can’t fix it.
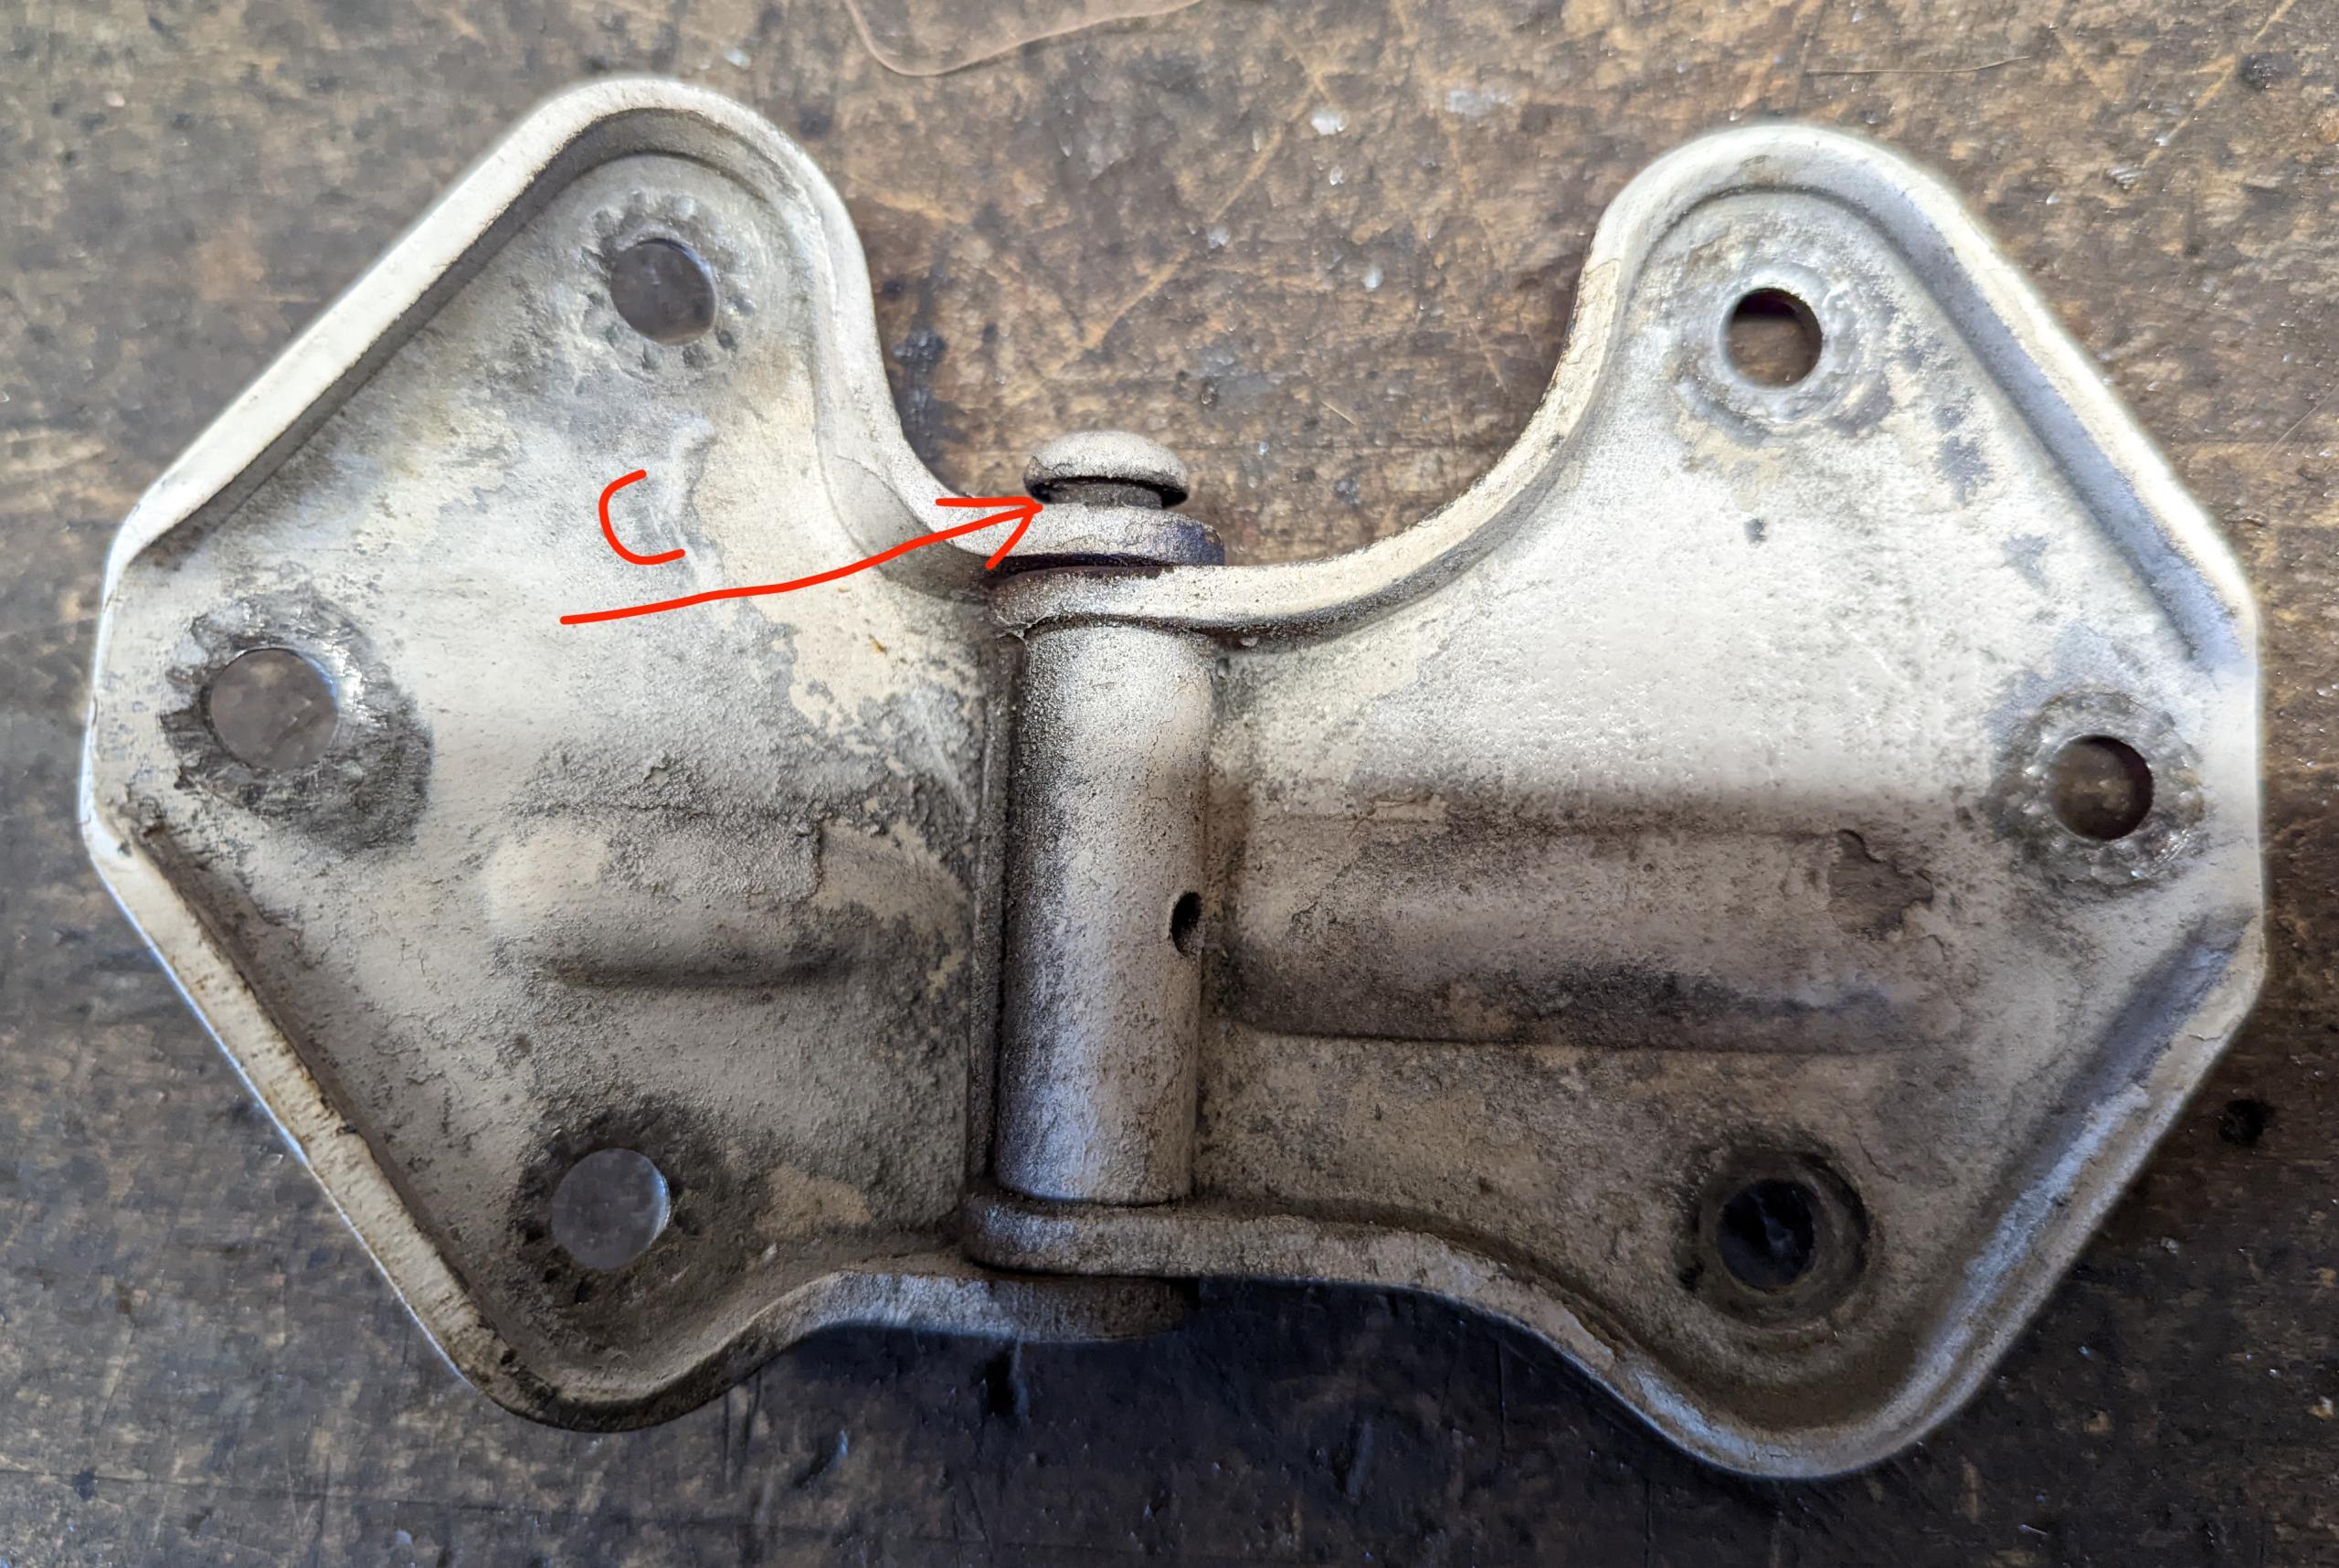
I fit the pins individually into each hinge half to see where the slop was. The holes in the moving part were slightly ovalled as expected. There is a sleeve insert, with the cross-drilled hole for oiling; surprisingly this part is not welded to to the hinge strap, at least one of mine was loose. Maybe it’s supposed to be crimped in. Wasn’t. Welded one of them (A, but the other hinge not shown). This has the advantage (I hope…) of allowing the entire sleeve to bear load and not just the metal in the hole in the strap end.
The lower hole on the fixed-pin half was ovalled; I made the hole smaller with judicious flattening of the area, but later realized the tack-weld to stop pin retraction solves that also.
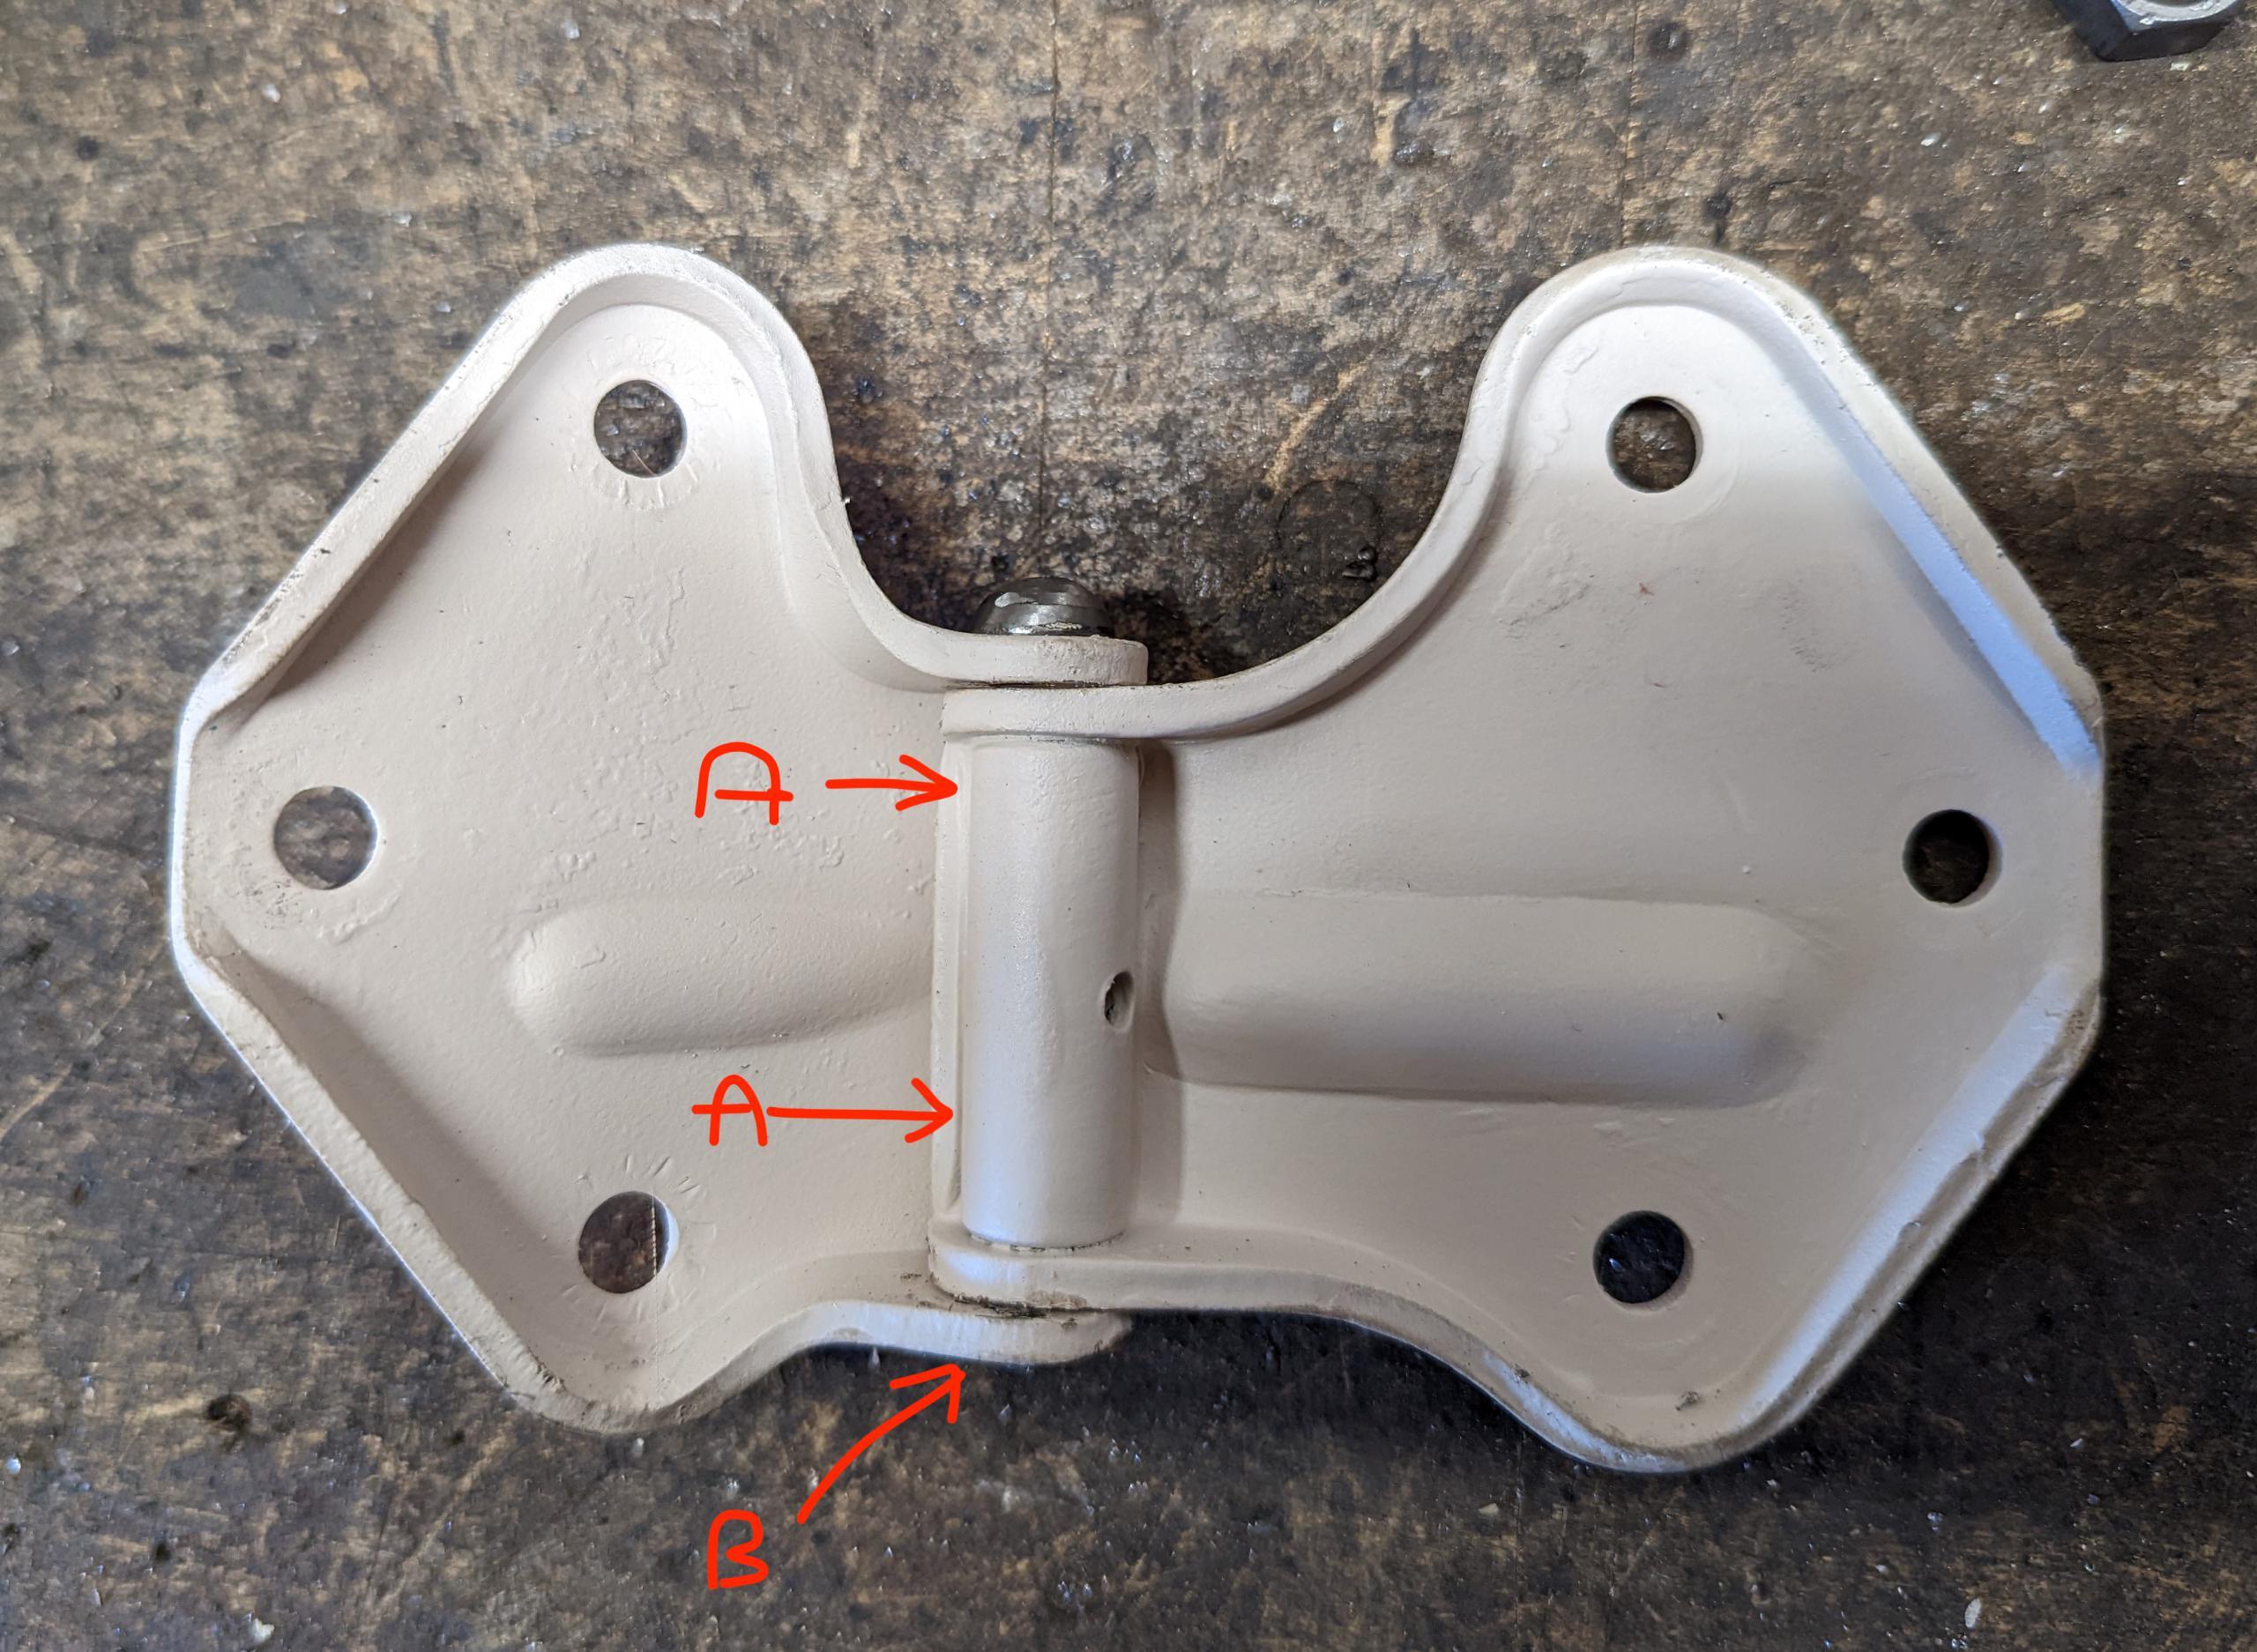
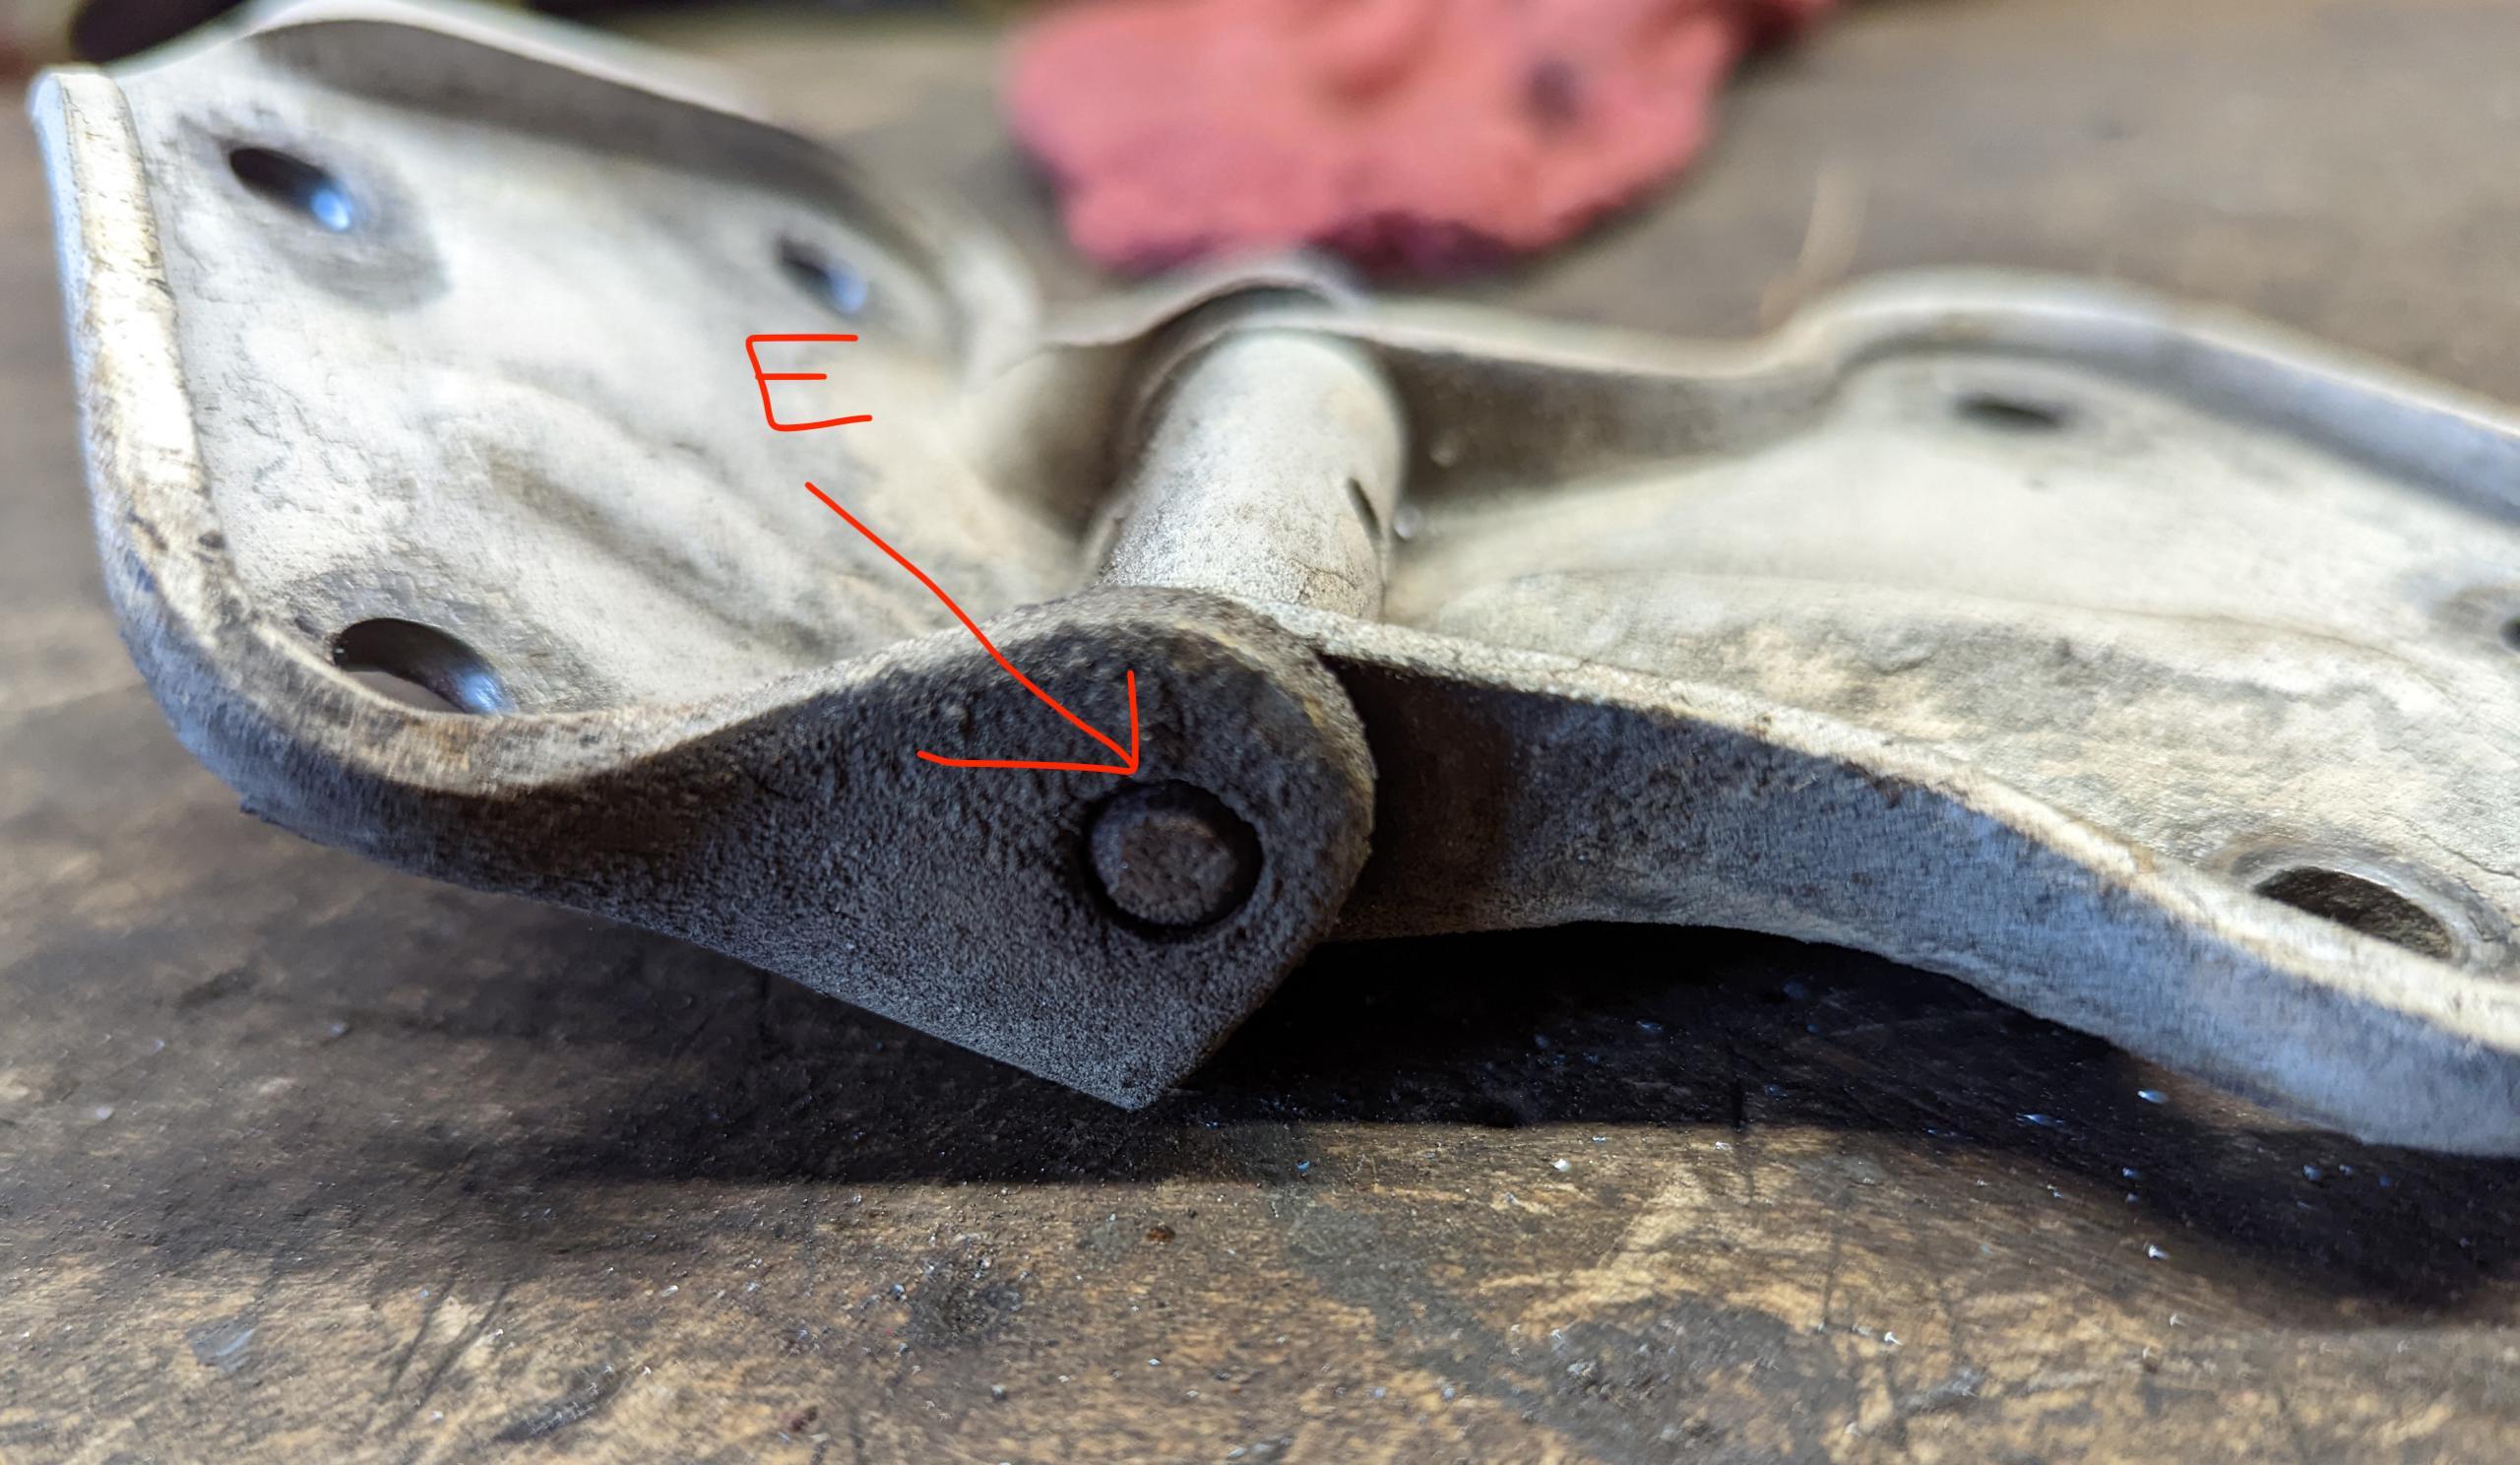
Note also the red arrow (C) showing the pin head not flush with the hinge strap. This was true on the car, on one of the donor hinges, and I swear I’ve seen it on other cars. The pin has a knurled section under the head that is driven into the hinge strap, but doesn’t seem to stay put (maybe just works up after unforeseeable decades… or maybe right away). To fix this, after complete assembly, I tack welded a spot of the pin underneath, where it would be easy to grind off should I ever need to go in here again. (E) shows the bottom of the pin; it was clear that this added some play to the hinge.
I ran a gun brush into the sleeve, got out the loose rust, then rolled up some 150 grit wet or dry and reamed it clean. One hinge I actually used a real reamer, 8mm, and that one came out nice inside without increased clearance.
The hinge pin was cleaned to bare metal, and the groove, such as it is, scraped out good. I pre-oiled the sleeve with a Q-tip and lubed the pin before assembly.
Frank: I’d use spray white lithium grease for this as it will stay longer. Regular wheel bearing grease would work, but may be a bit thick.
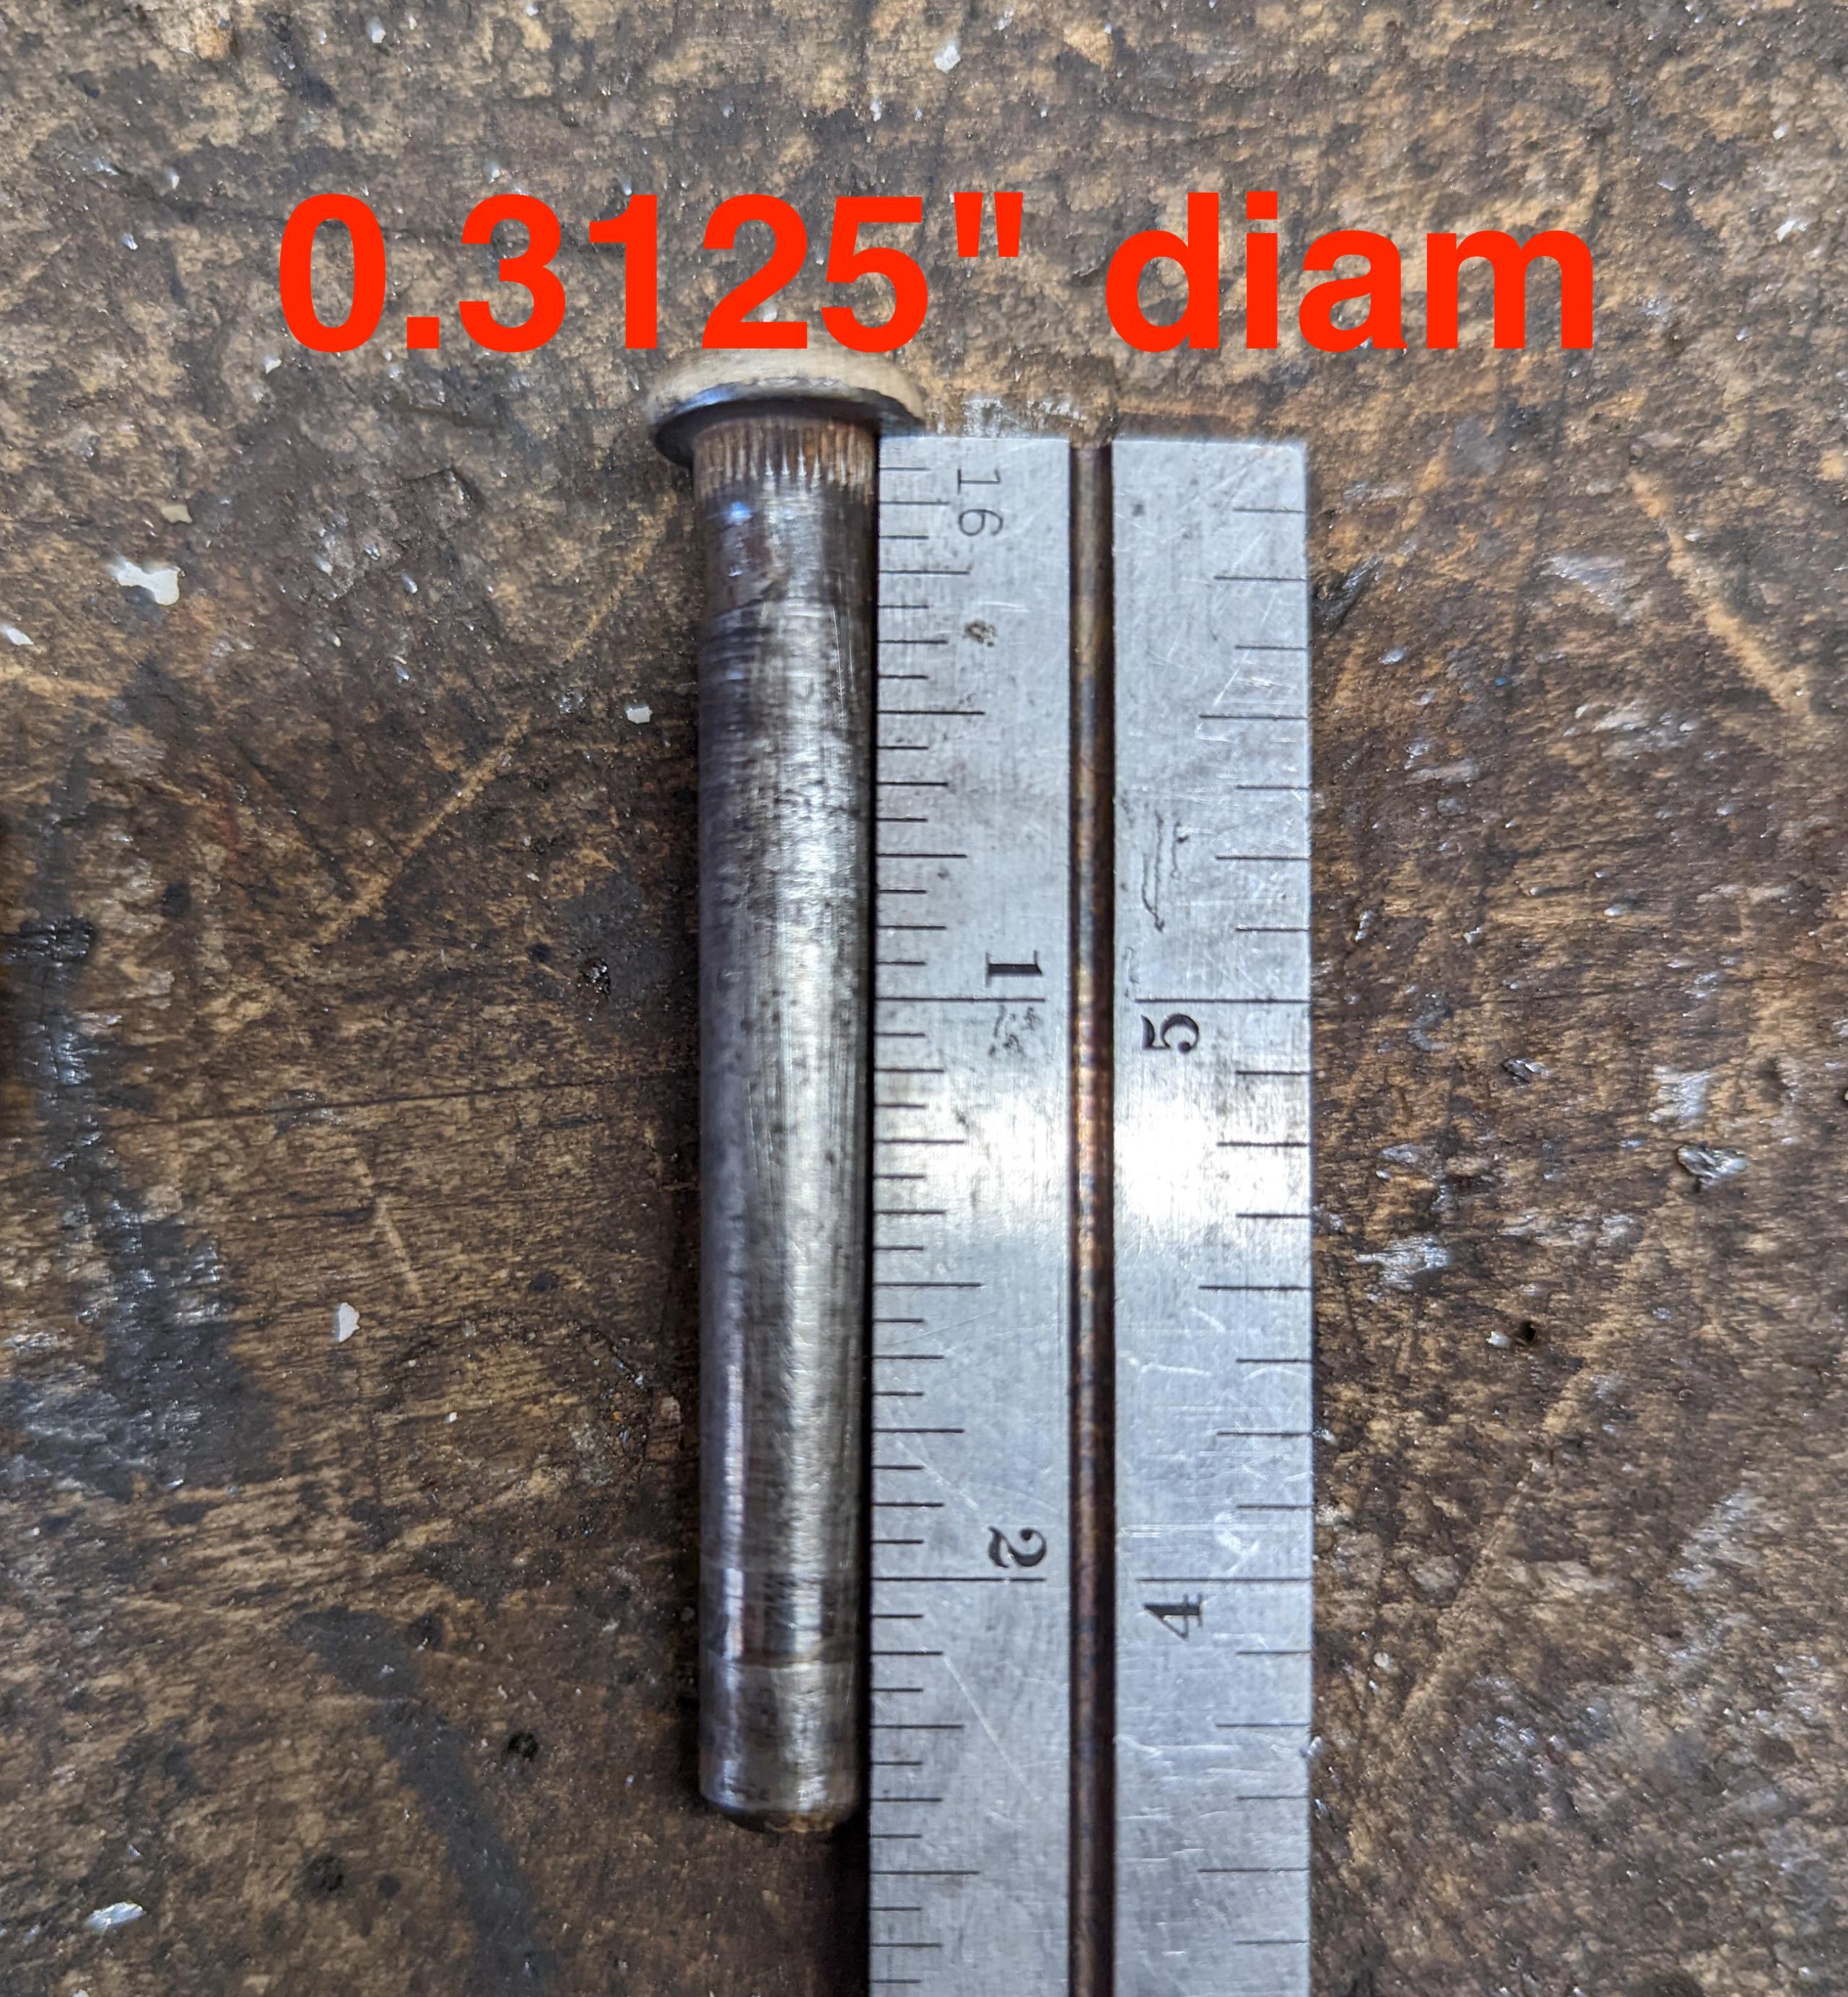
Frank: You can also make a new pin out of 0.3125 (5/16″) stock rod. Don’t use hardware store rod, use a hardened rod. W1 0.3125″ Tool Steel Rod is available from Grainger in 36″ lengths for $10-15 (plus shipping if no warehouse nearby, Feb 2026). Other on-line sources are less. These won’t have a head, but if you’re tack welding the pin in that won’t matter. Otherwise weld a nut or washer to the top and make the pin slightly longer than the original so it sticks out the bottom at least 1/8″. There should be no problem with the pin working out, gravity should do it’s job…
Deprecated: File Theme without comments.php is deprecated since version 3.0.0 with no alternative available. Please include a comments.php template in your theme. in /home3/amcmagc1/public_html/wp-includes/functions.php on line 6170
Leave a Reply