
1963 Rambler American Scarebird disc brakes
Written by Tom Jennings, 01-07-2020, edited by Frank Swygert 12-20-2025
June-July 2012
D’OH! This all applies to a Scarebird kit no longer shipped! The bracket sold now (July 2012) might not have the trunnion problem. The new brackets are flat and don’t need the seal spacer. They use an AMC brake drum hub with the drum removed or one of their CNC hubs. The old style shown here used a Ford Ranger rotor that required a seal adapter, the new style uses a Toyota Previa rotor that doesn’t need the seal adapter. Still, these are the issues to look for. No matter, really, this is a document of my particular experiences.
Note that the stuff below applies to all Nash-based cars; all of the pre-1963 Rambler Classic/Ambassador and pre-1964 Rambler Americans, and 1950-1955 Nash Ramblers. Though I will further note that nothing is “done” until it is done! And driven a week without repair and adjustment. That said, the Scarebird AMC bracket does seem to work for all Nash/Rambler cars from around 1950 through 1983 (all two wheel drive passenger cars).
I probably didn’t need to do this, the hot-rodded drum brakes were working fine, but I dunno. it seems modernish or something, moving up to 1990’s technology seemed sexy at the time. So I bought a Scarebird AMC kit and figured I could make it work. I did, but it took a mild amount of adjustment.
The short answer is, the Scarebird kit was made for cars with lower ball joints. Cars with lower trunnions (pre-1964 Americans, Nashes) interfere. They do bolt on, but unless you check for lock-to-lock clearances you might not notice that it’s bending suspension parts when you turn the steering wheel more than a turn or two.
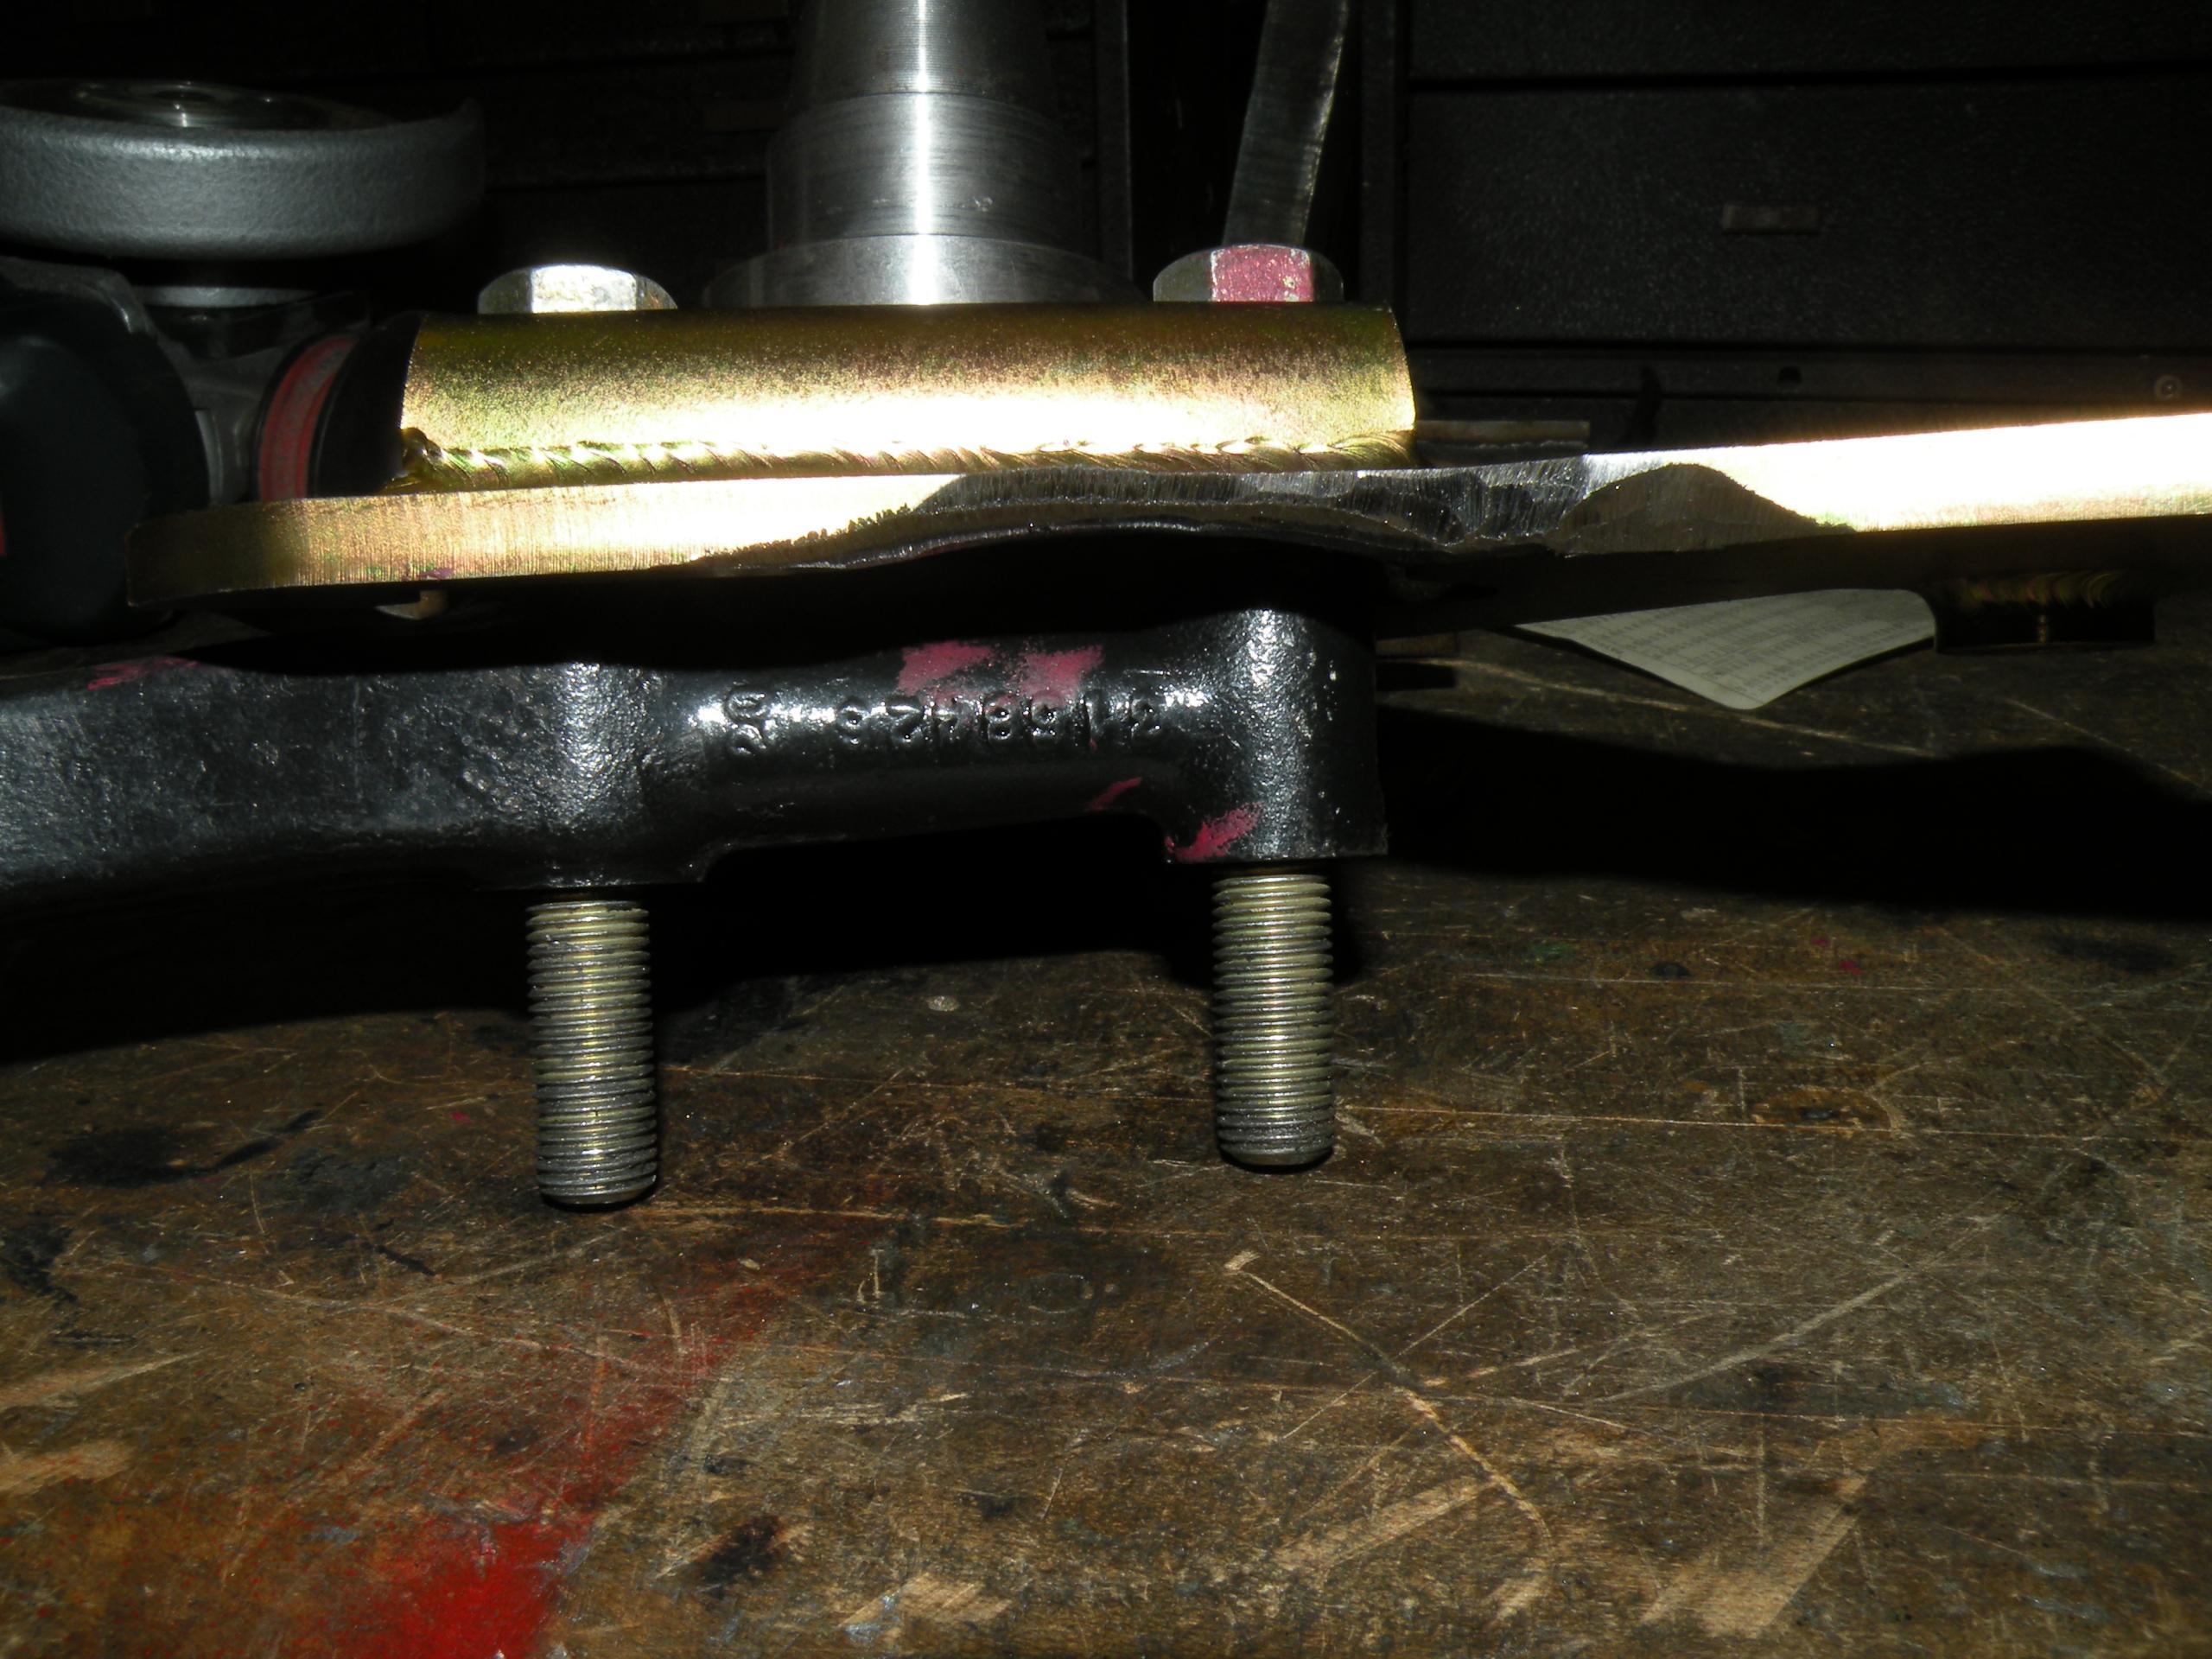
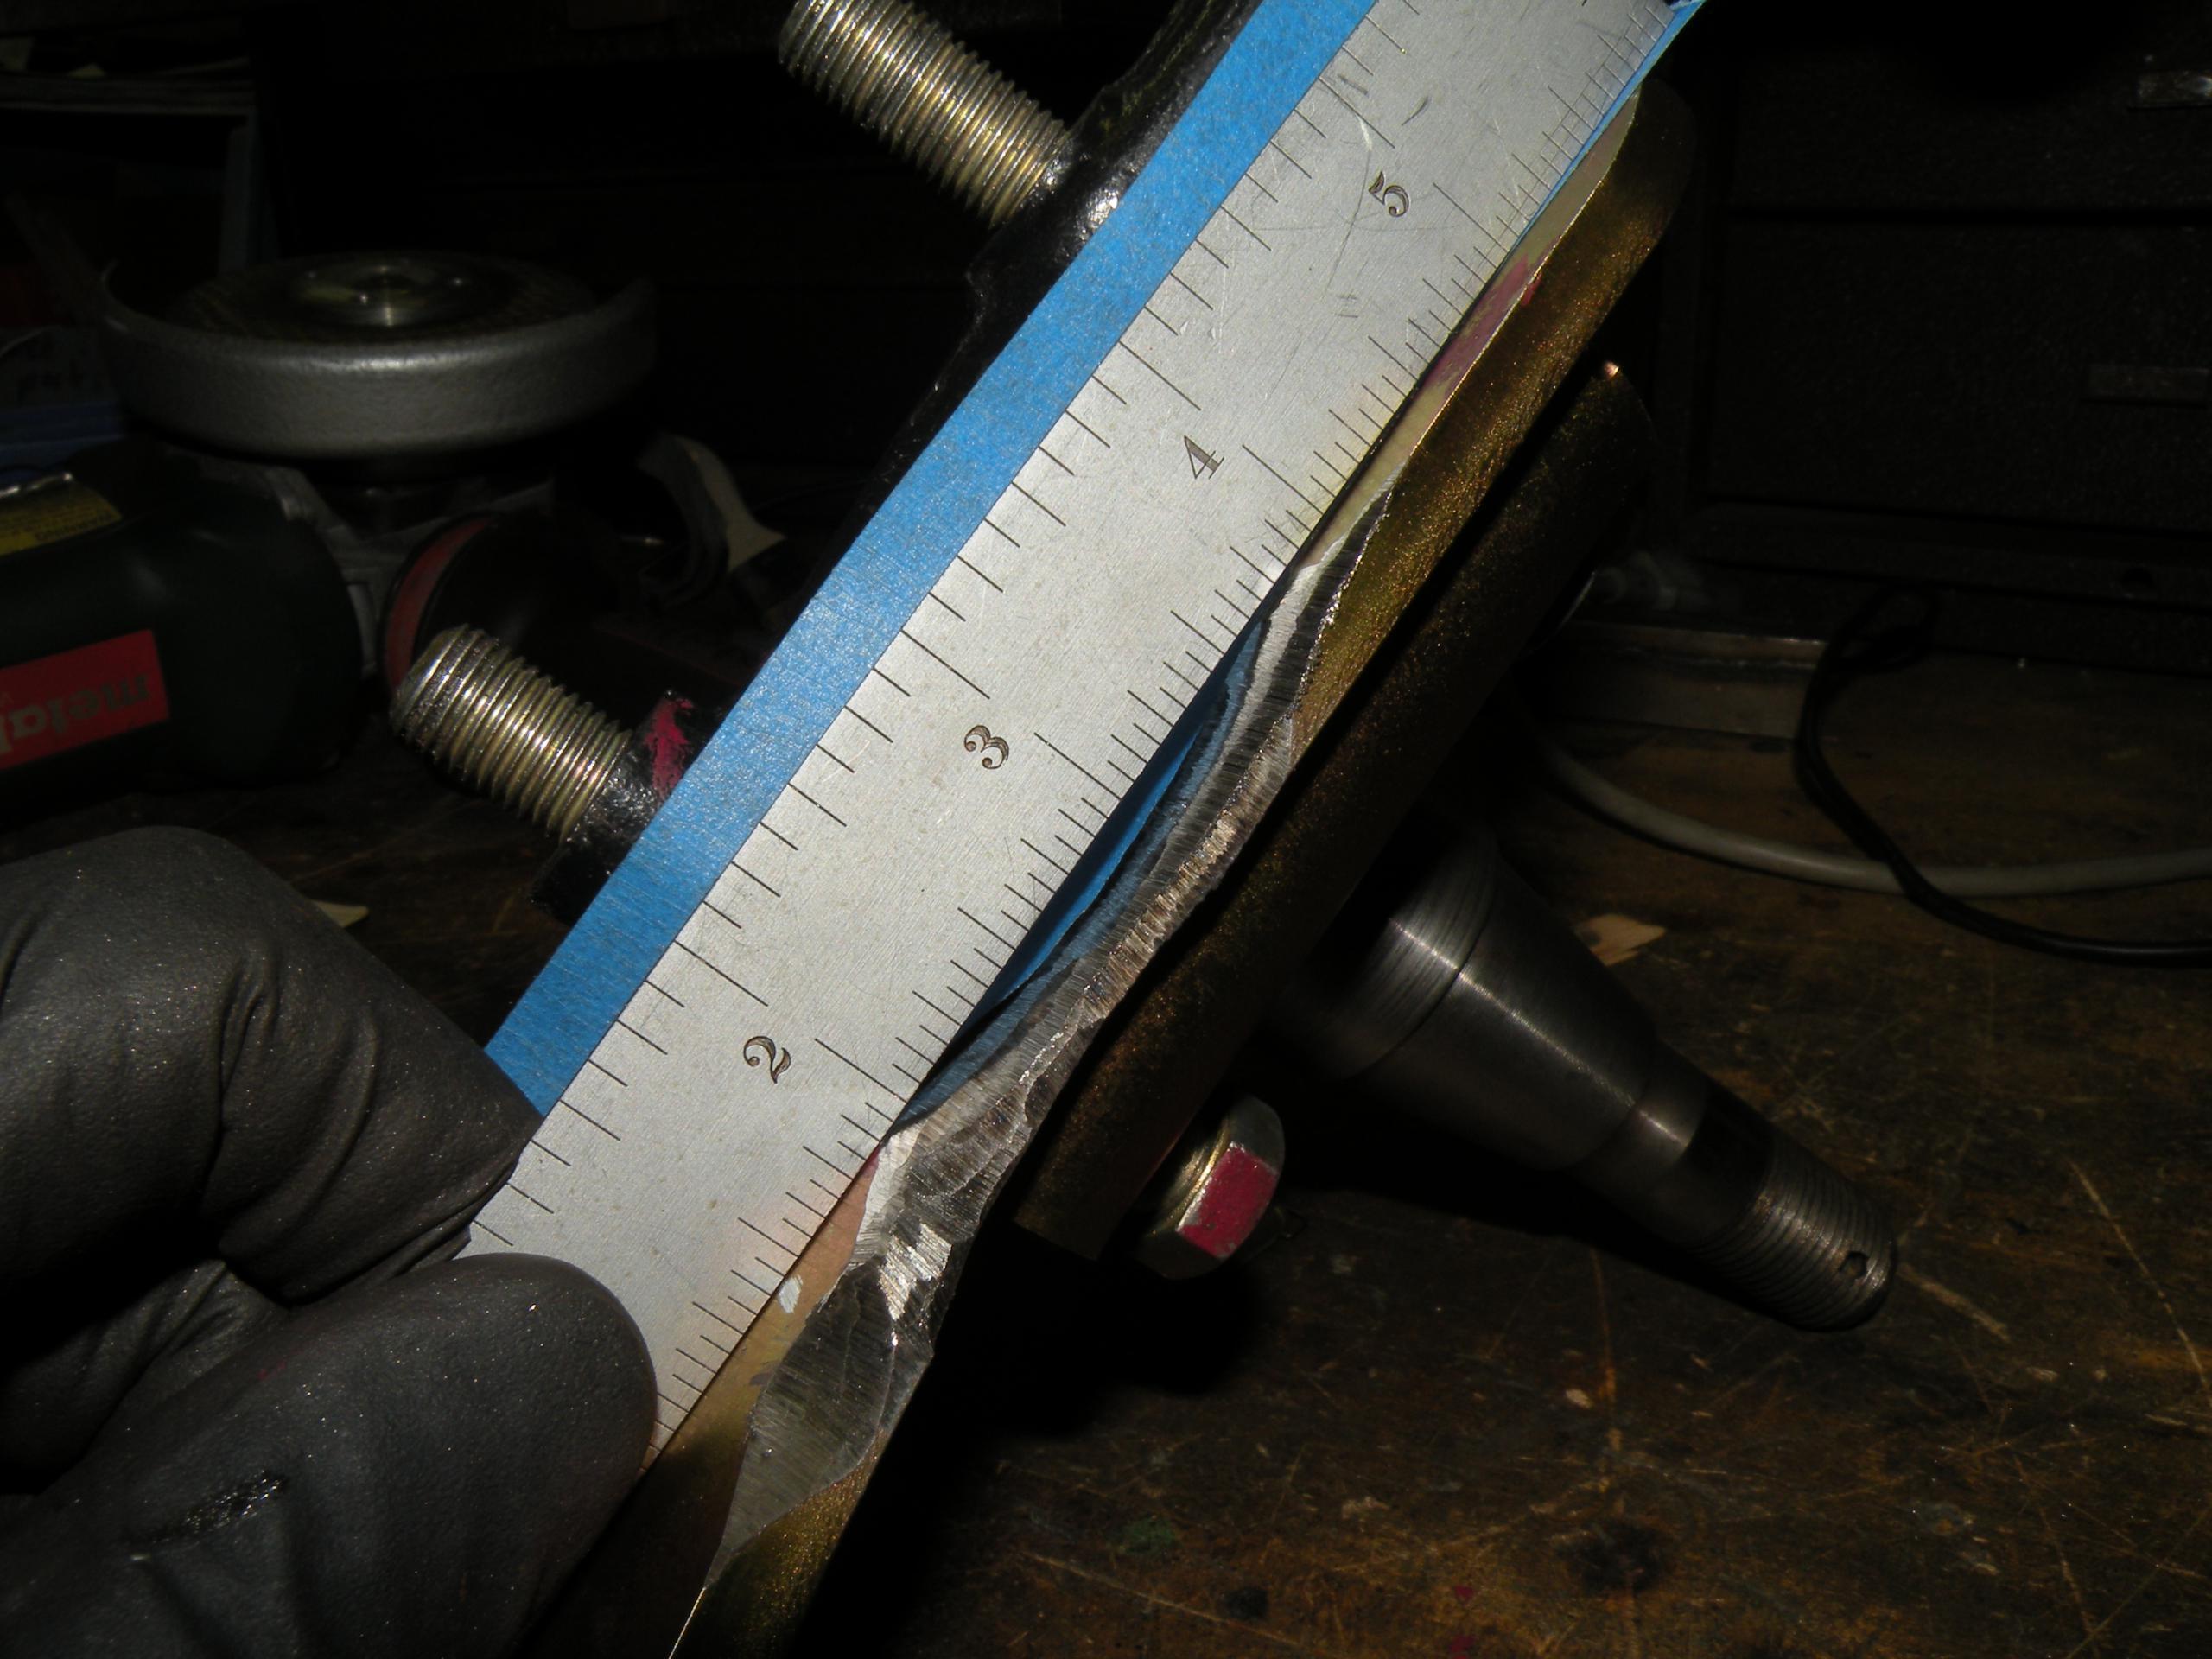
Almost worse, the peculiar short steering arm prevents the bracket and spindle from seating flat. I trust nothing claimed “bolt on” — it never is! — and there was about .05″ of gap under the spindle base due to interference.
Luckily the modifications to the Scarebird bracket are not hard to do. Pictures and notes follow.
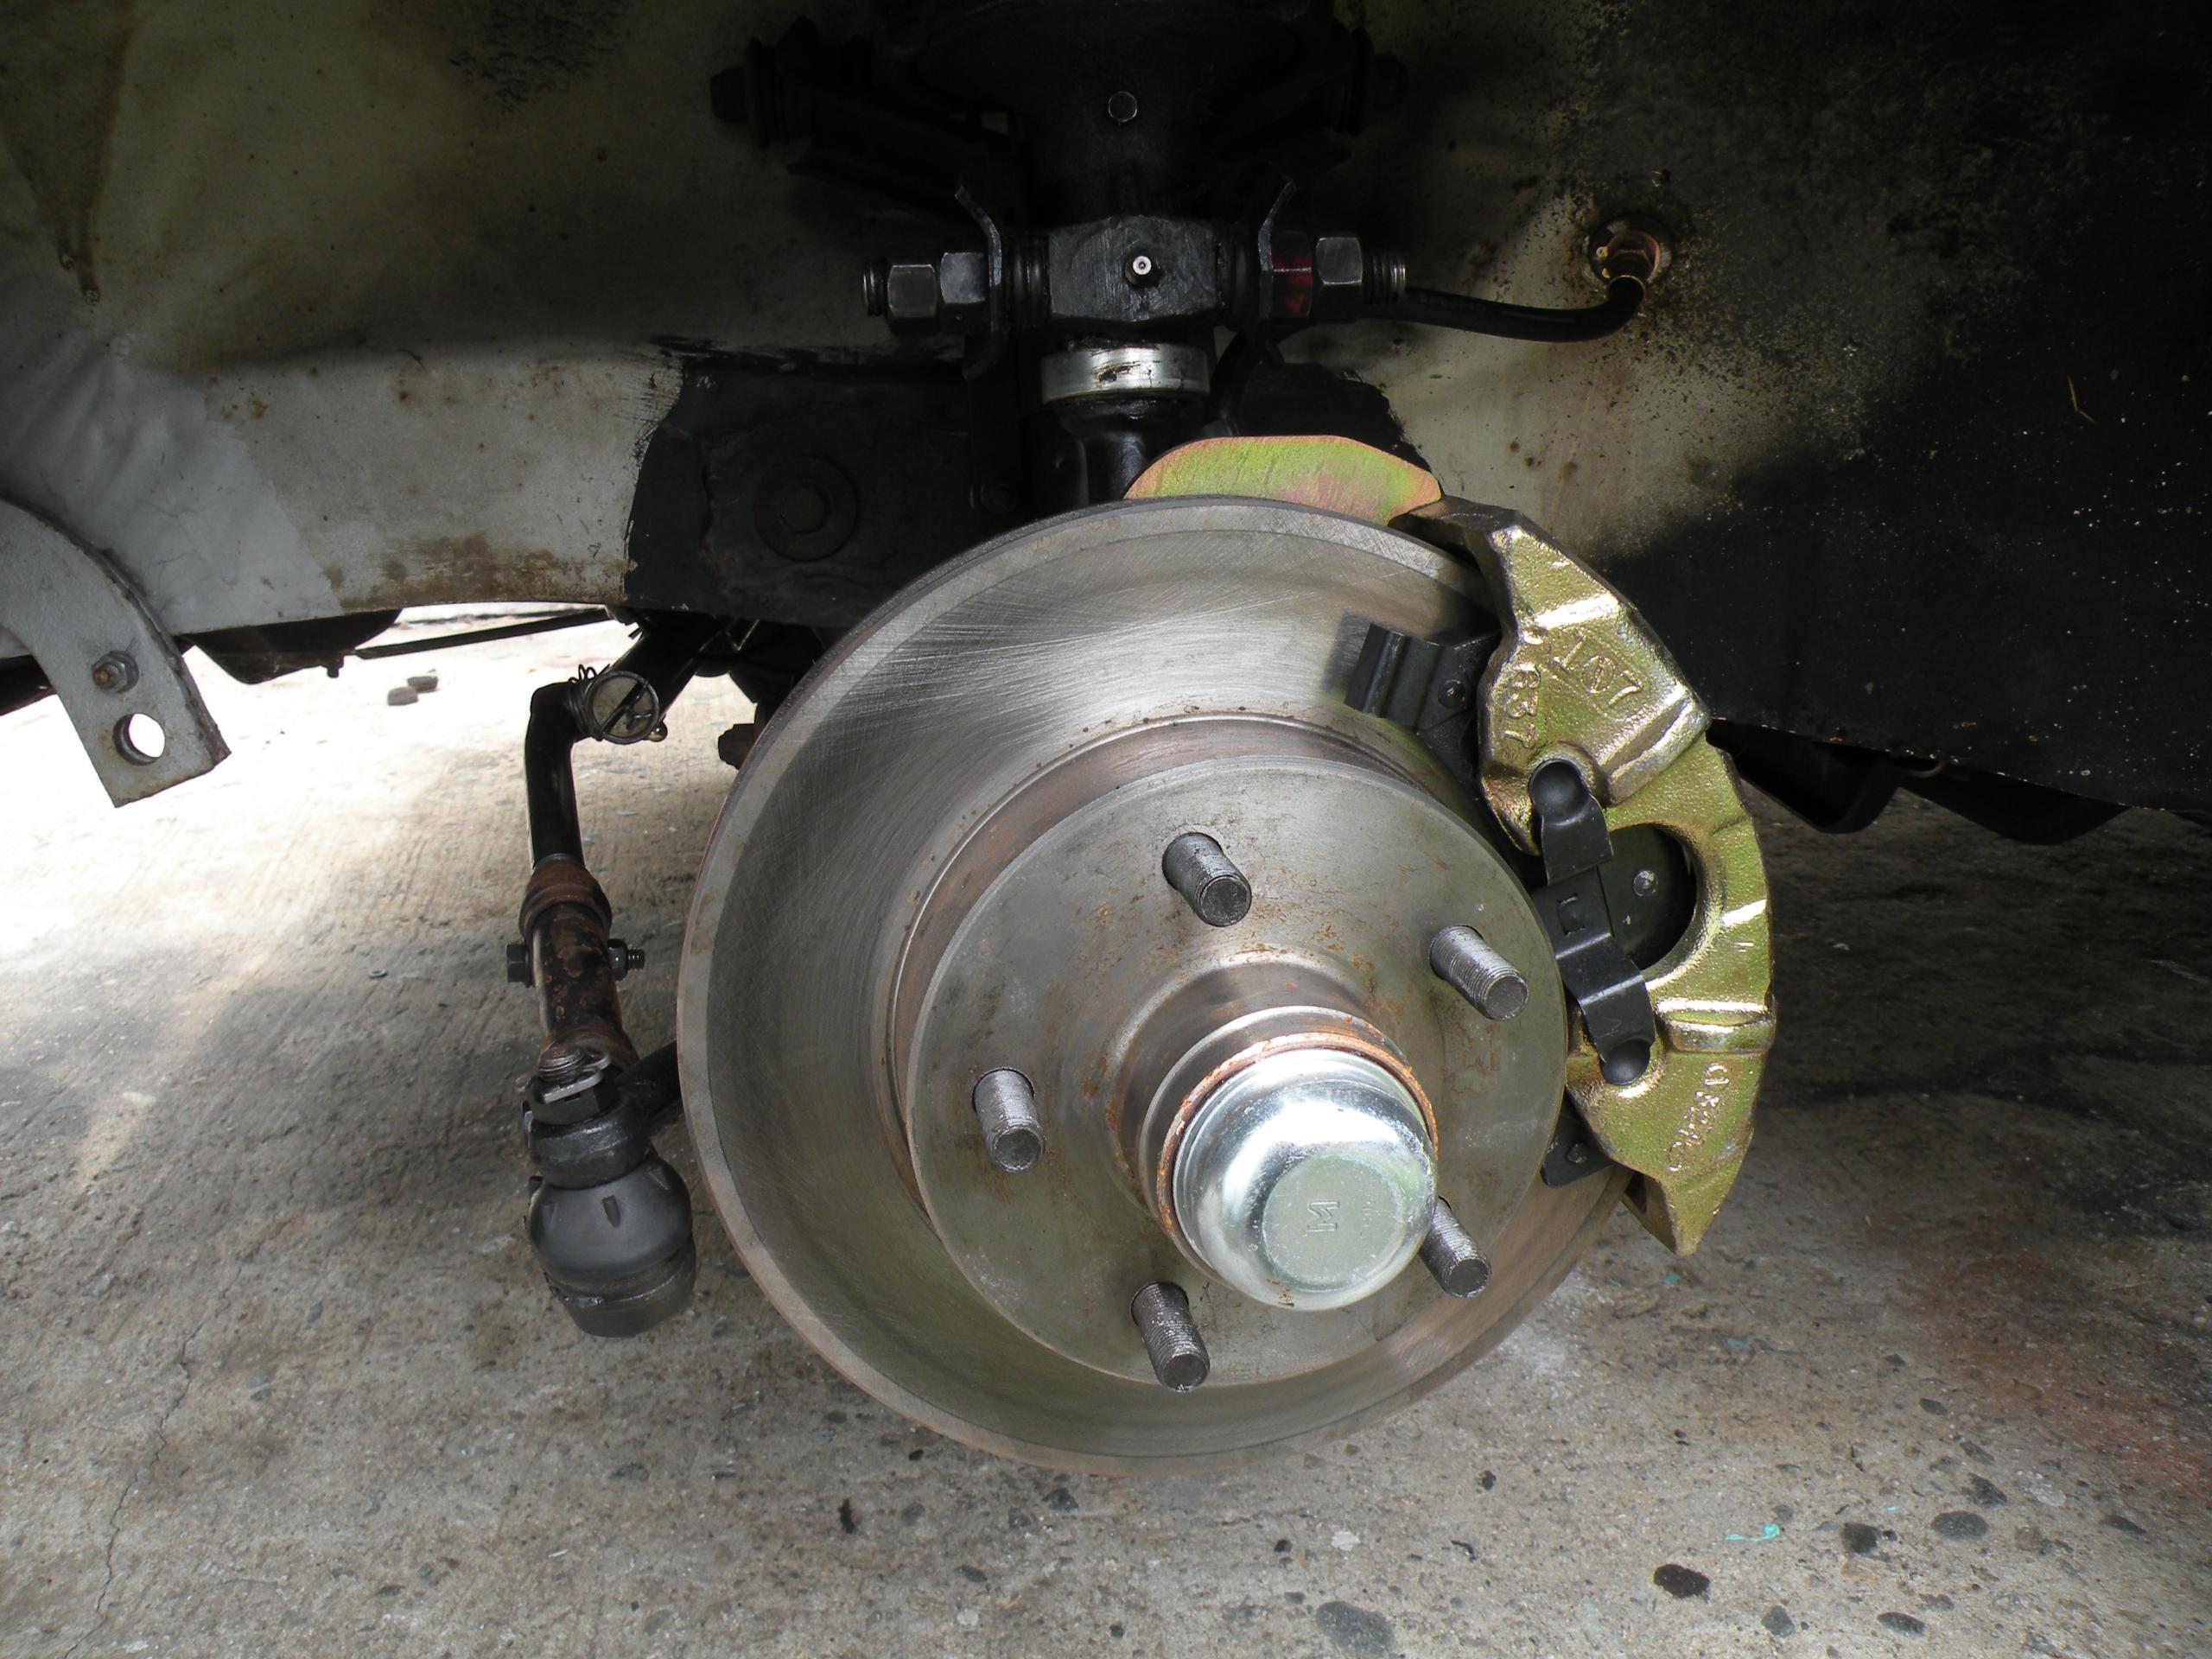
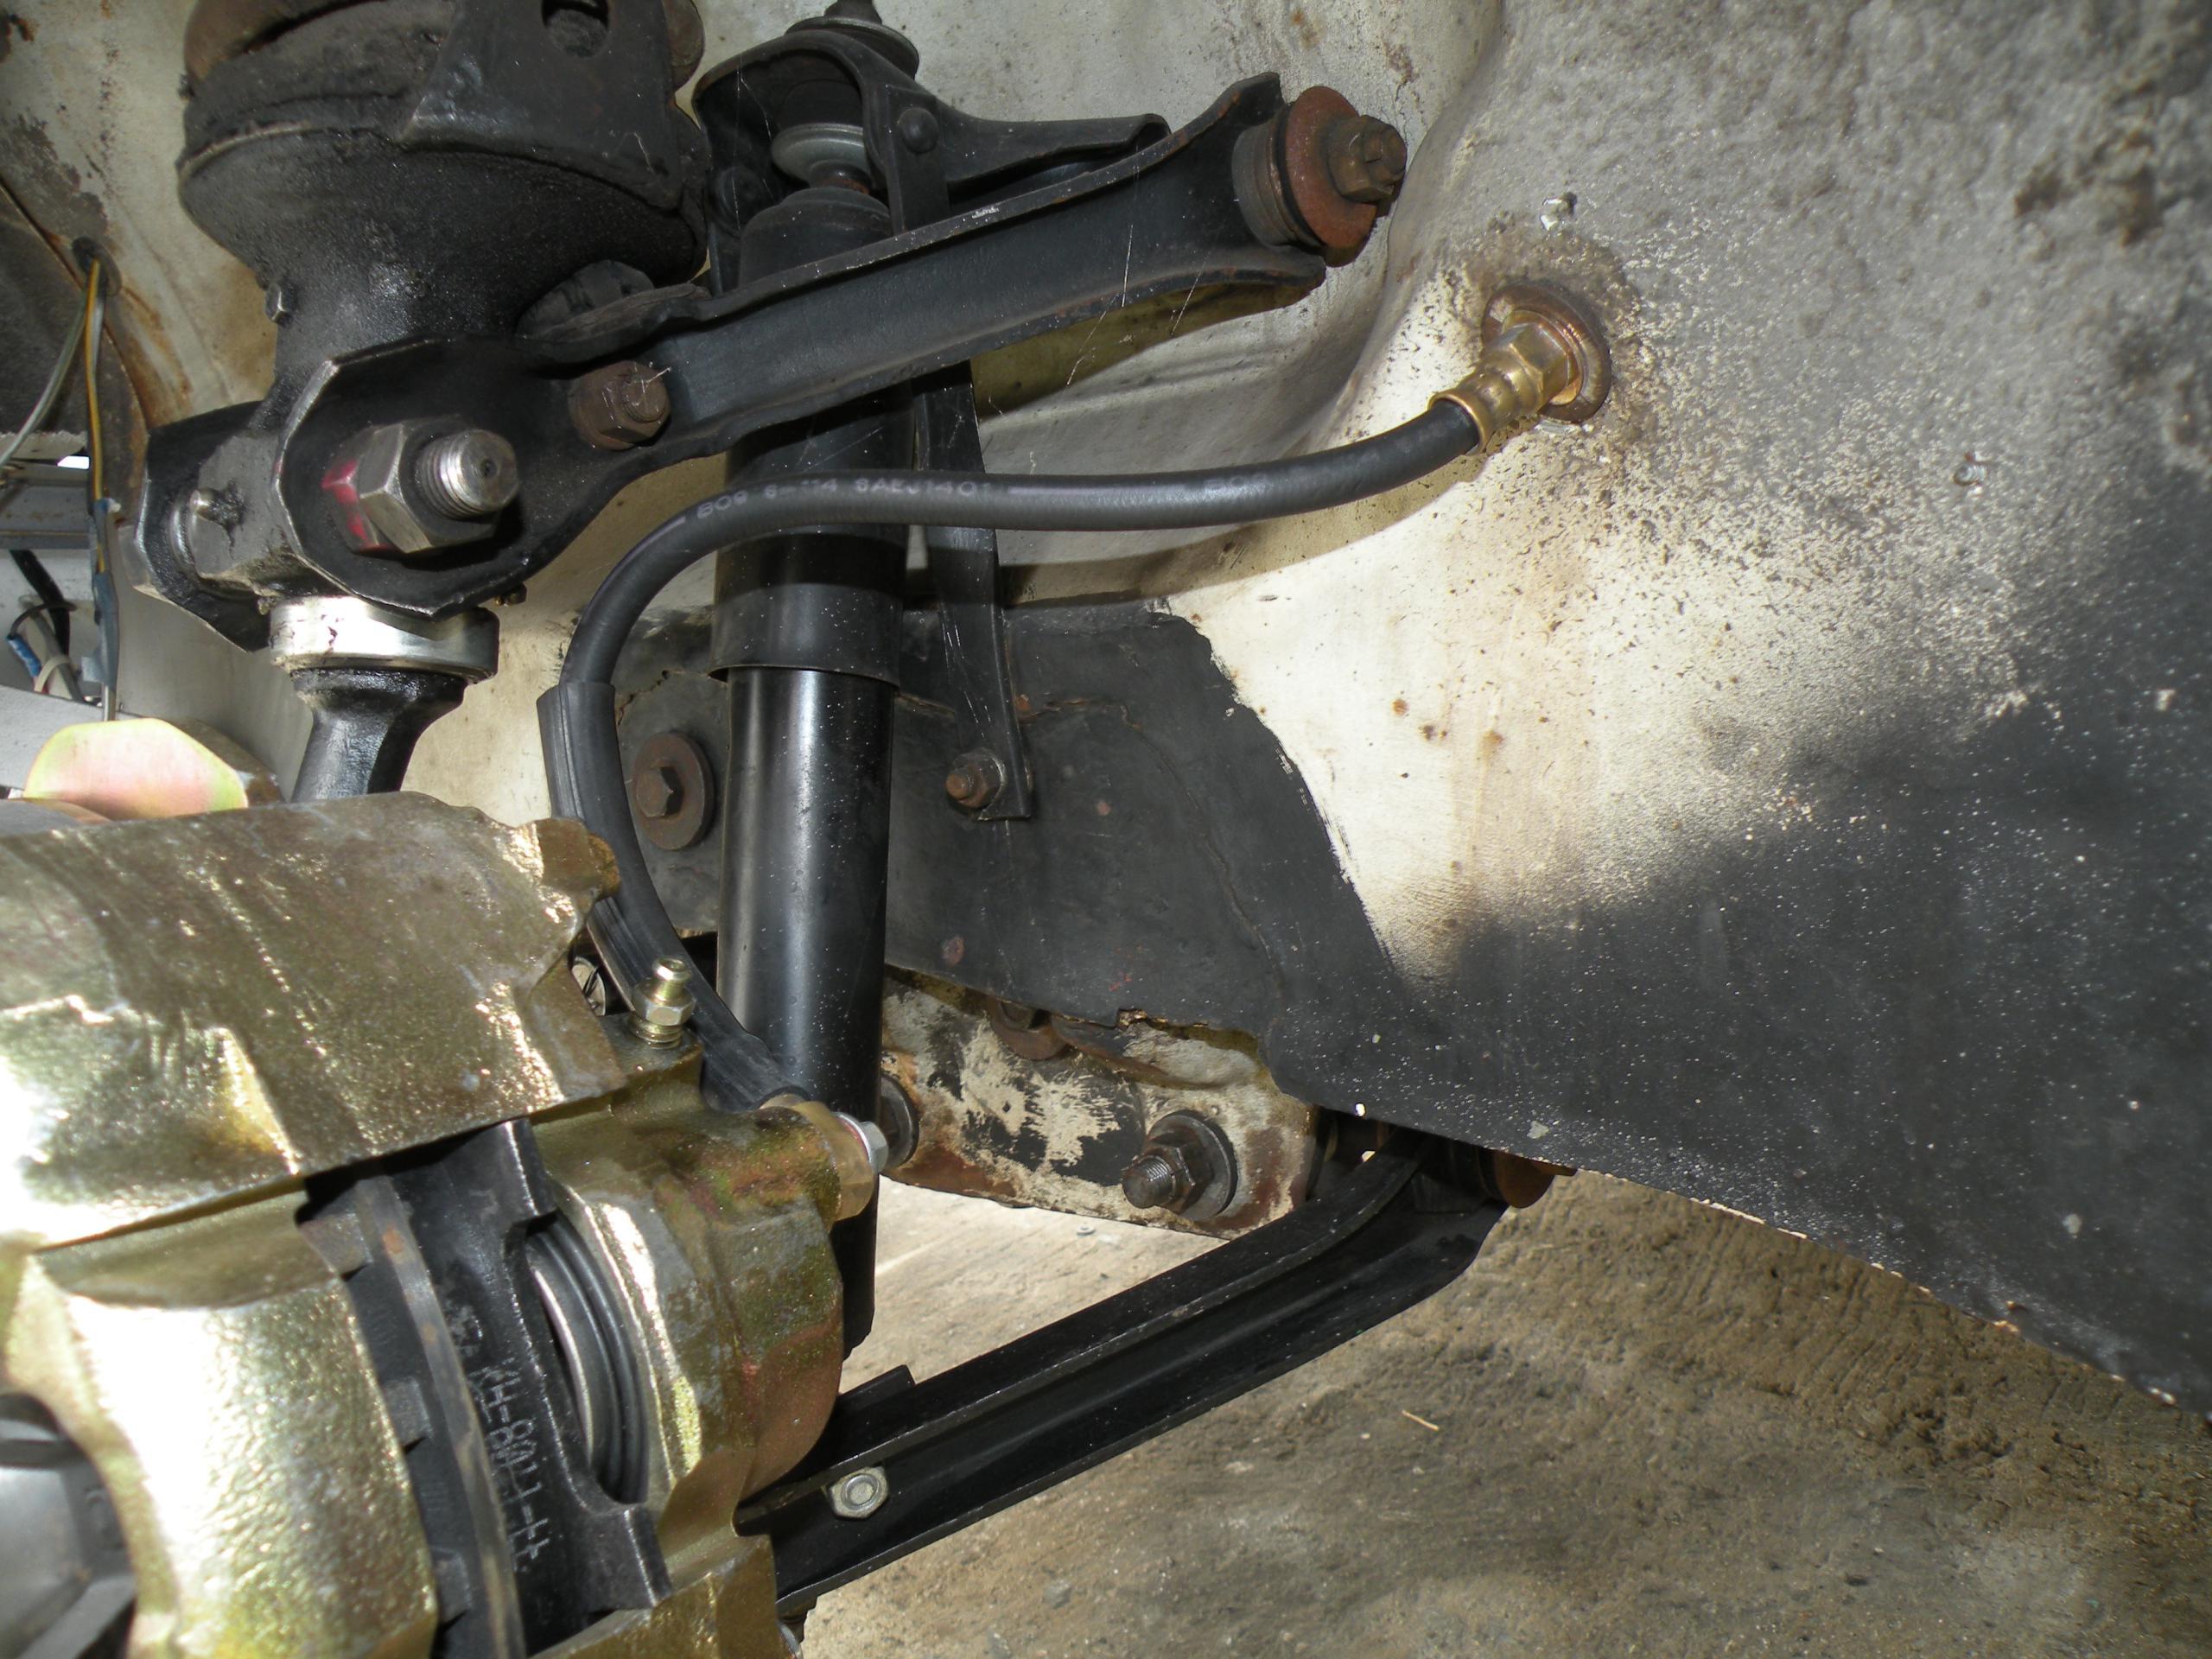
Here’s the driver’s side, with the drum brakes removed, everything cleaned up, ready for install.
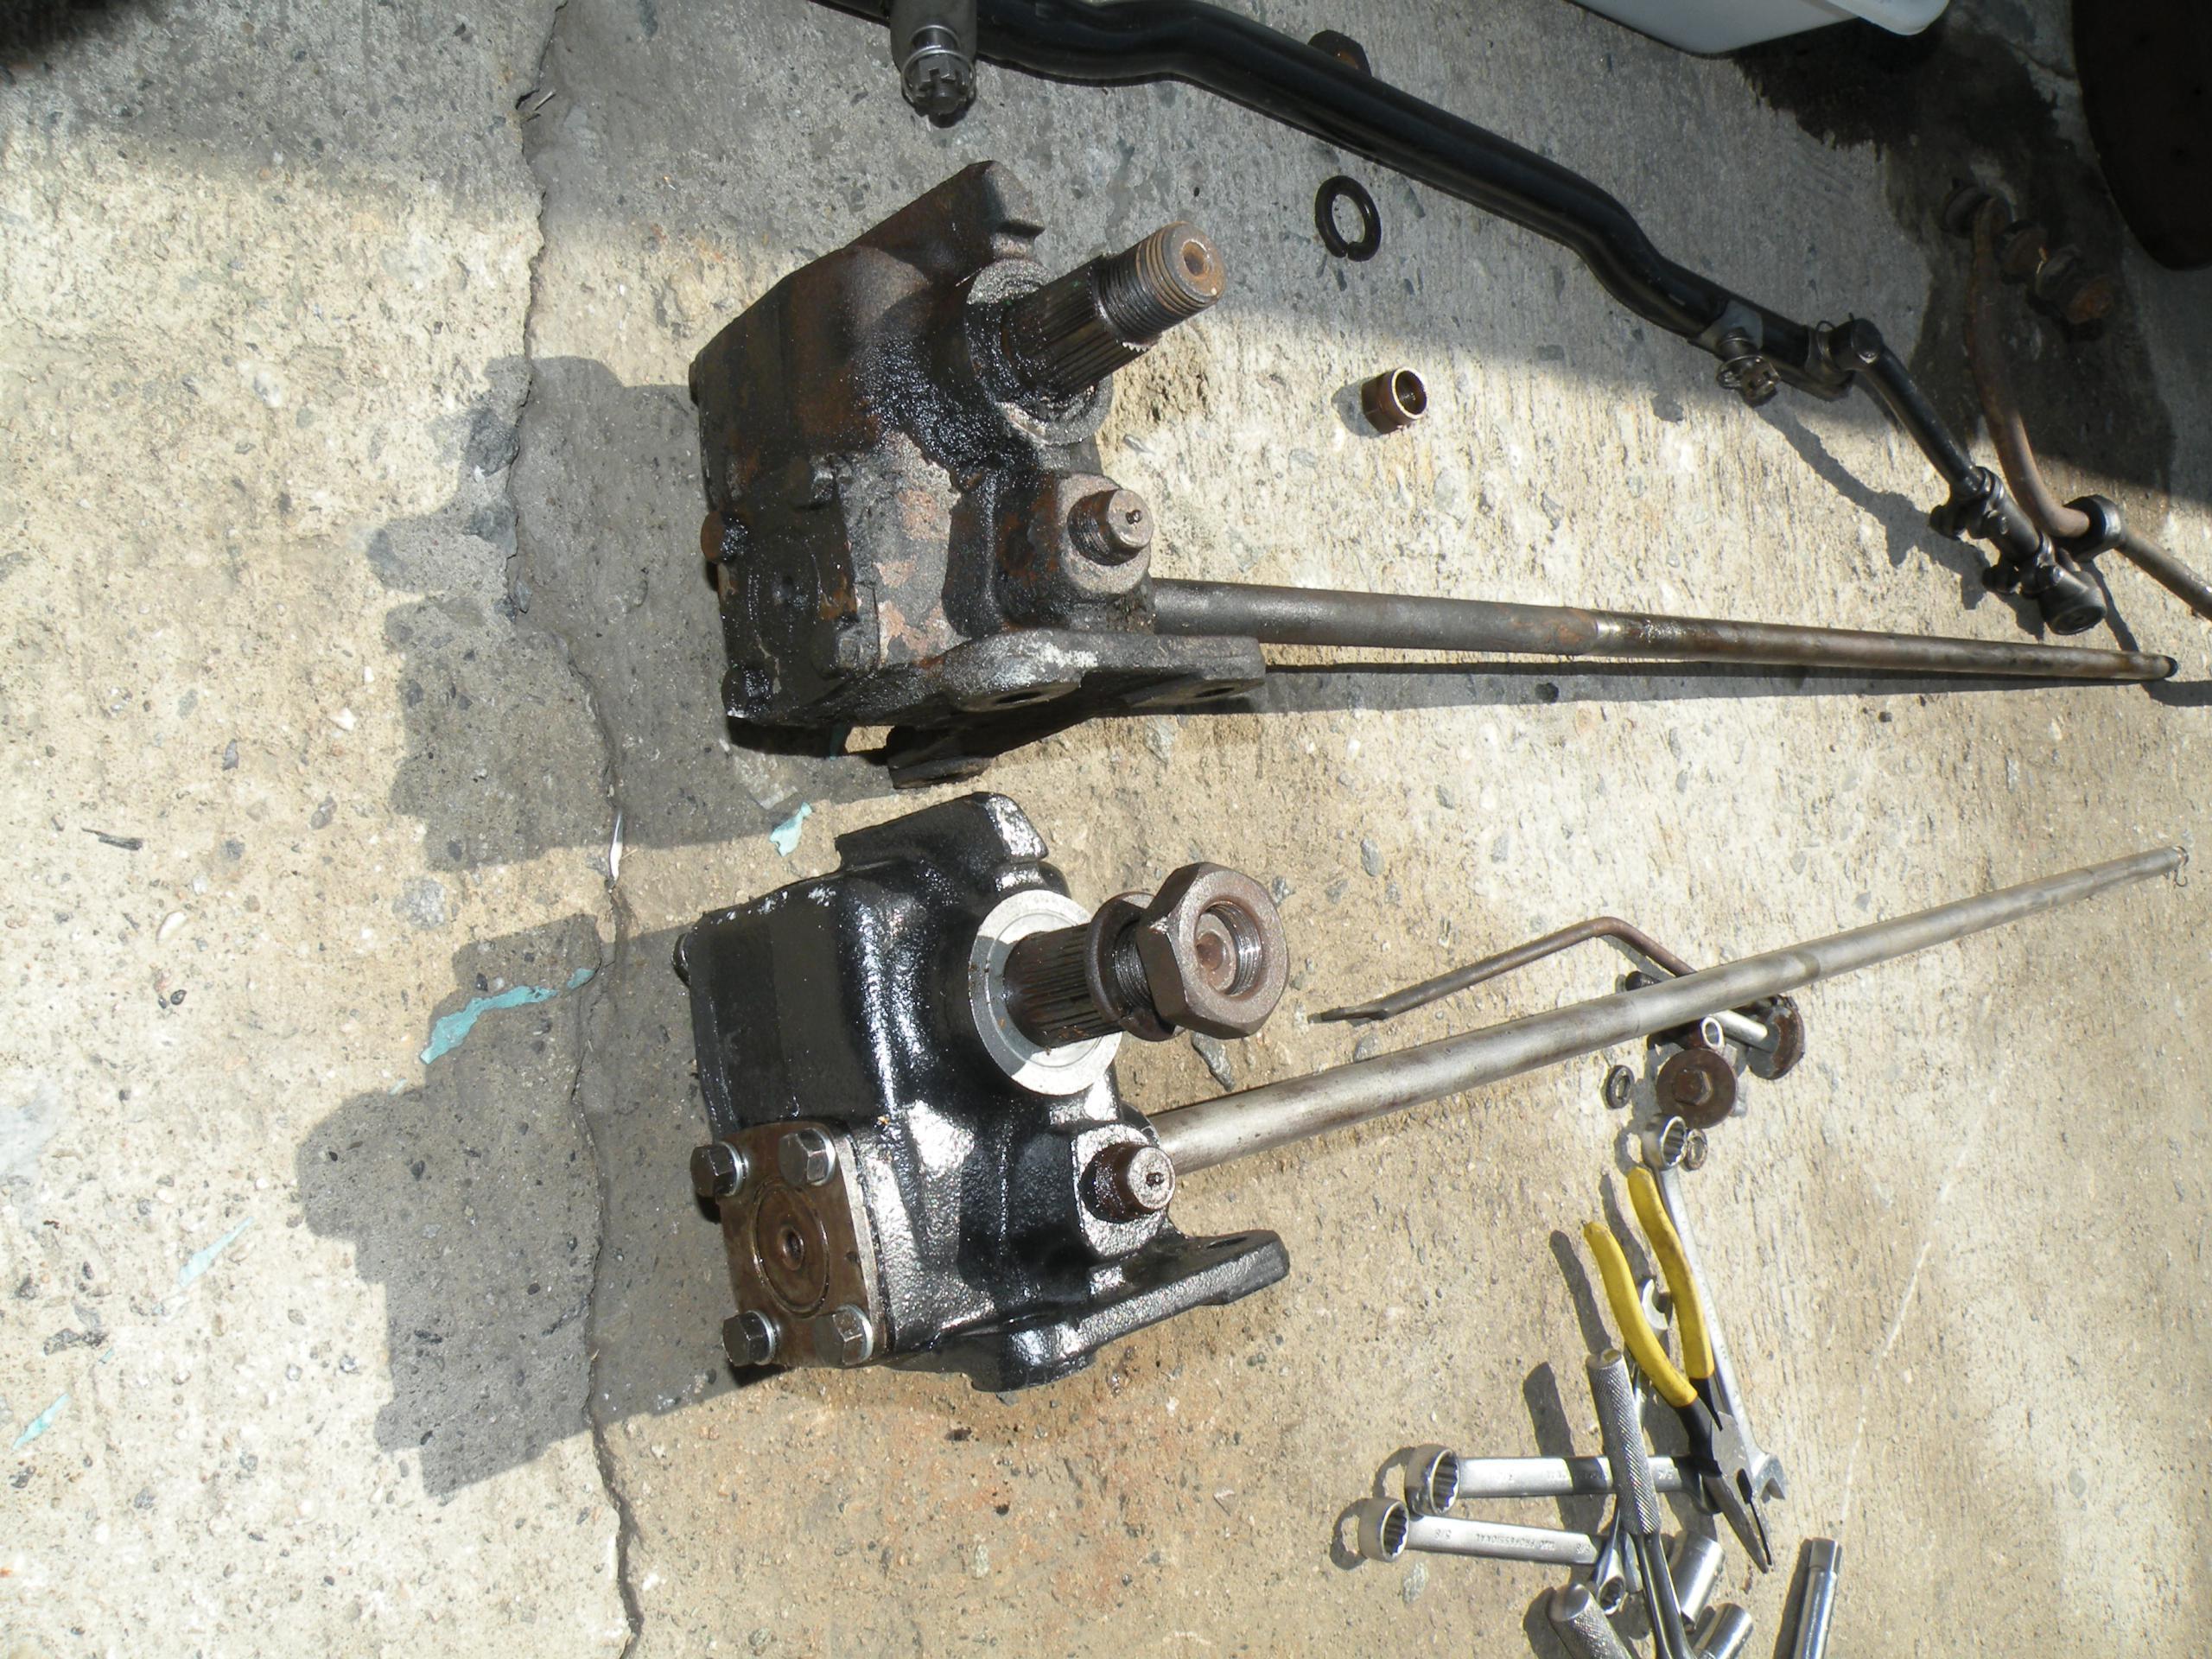
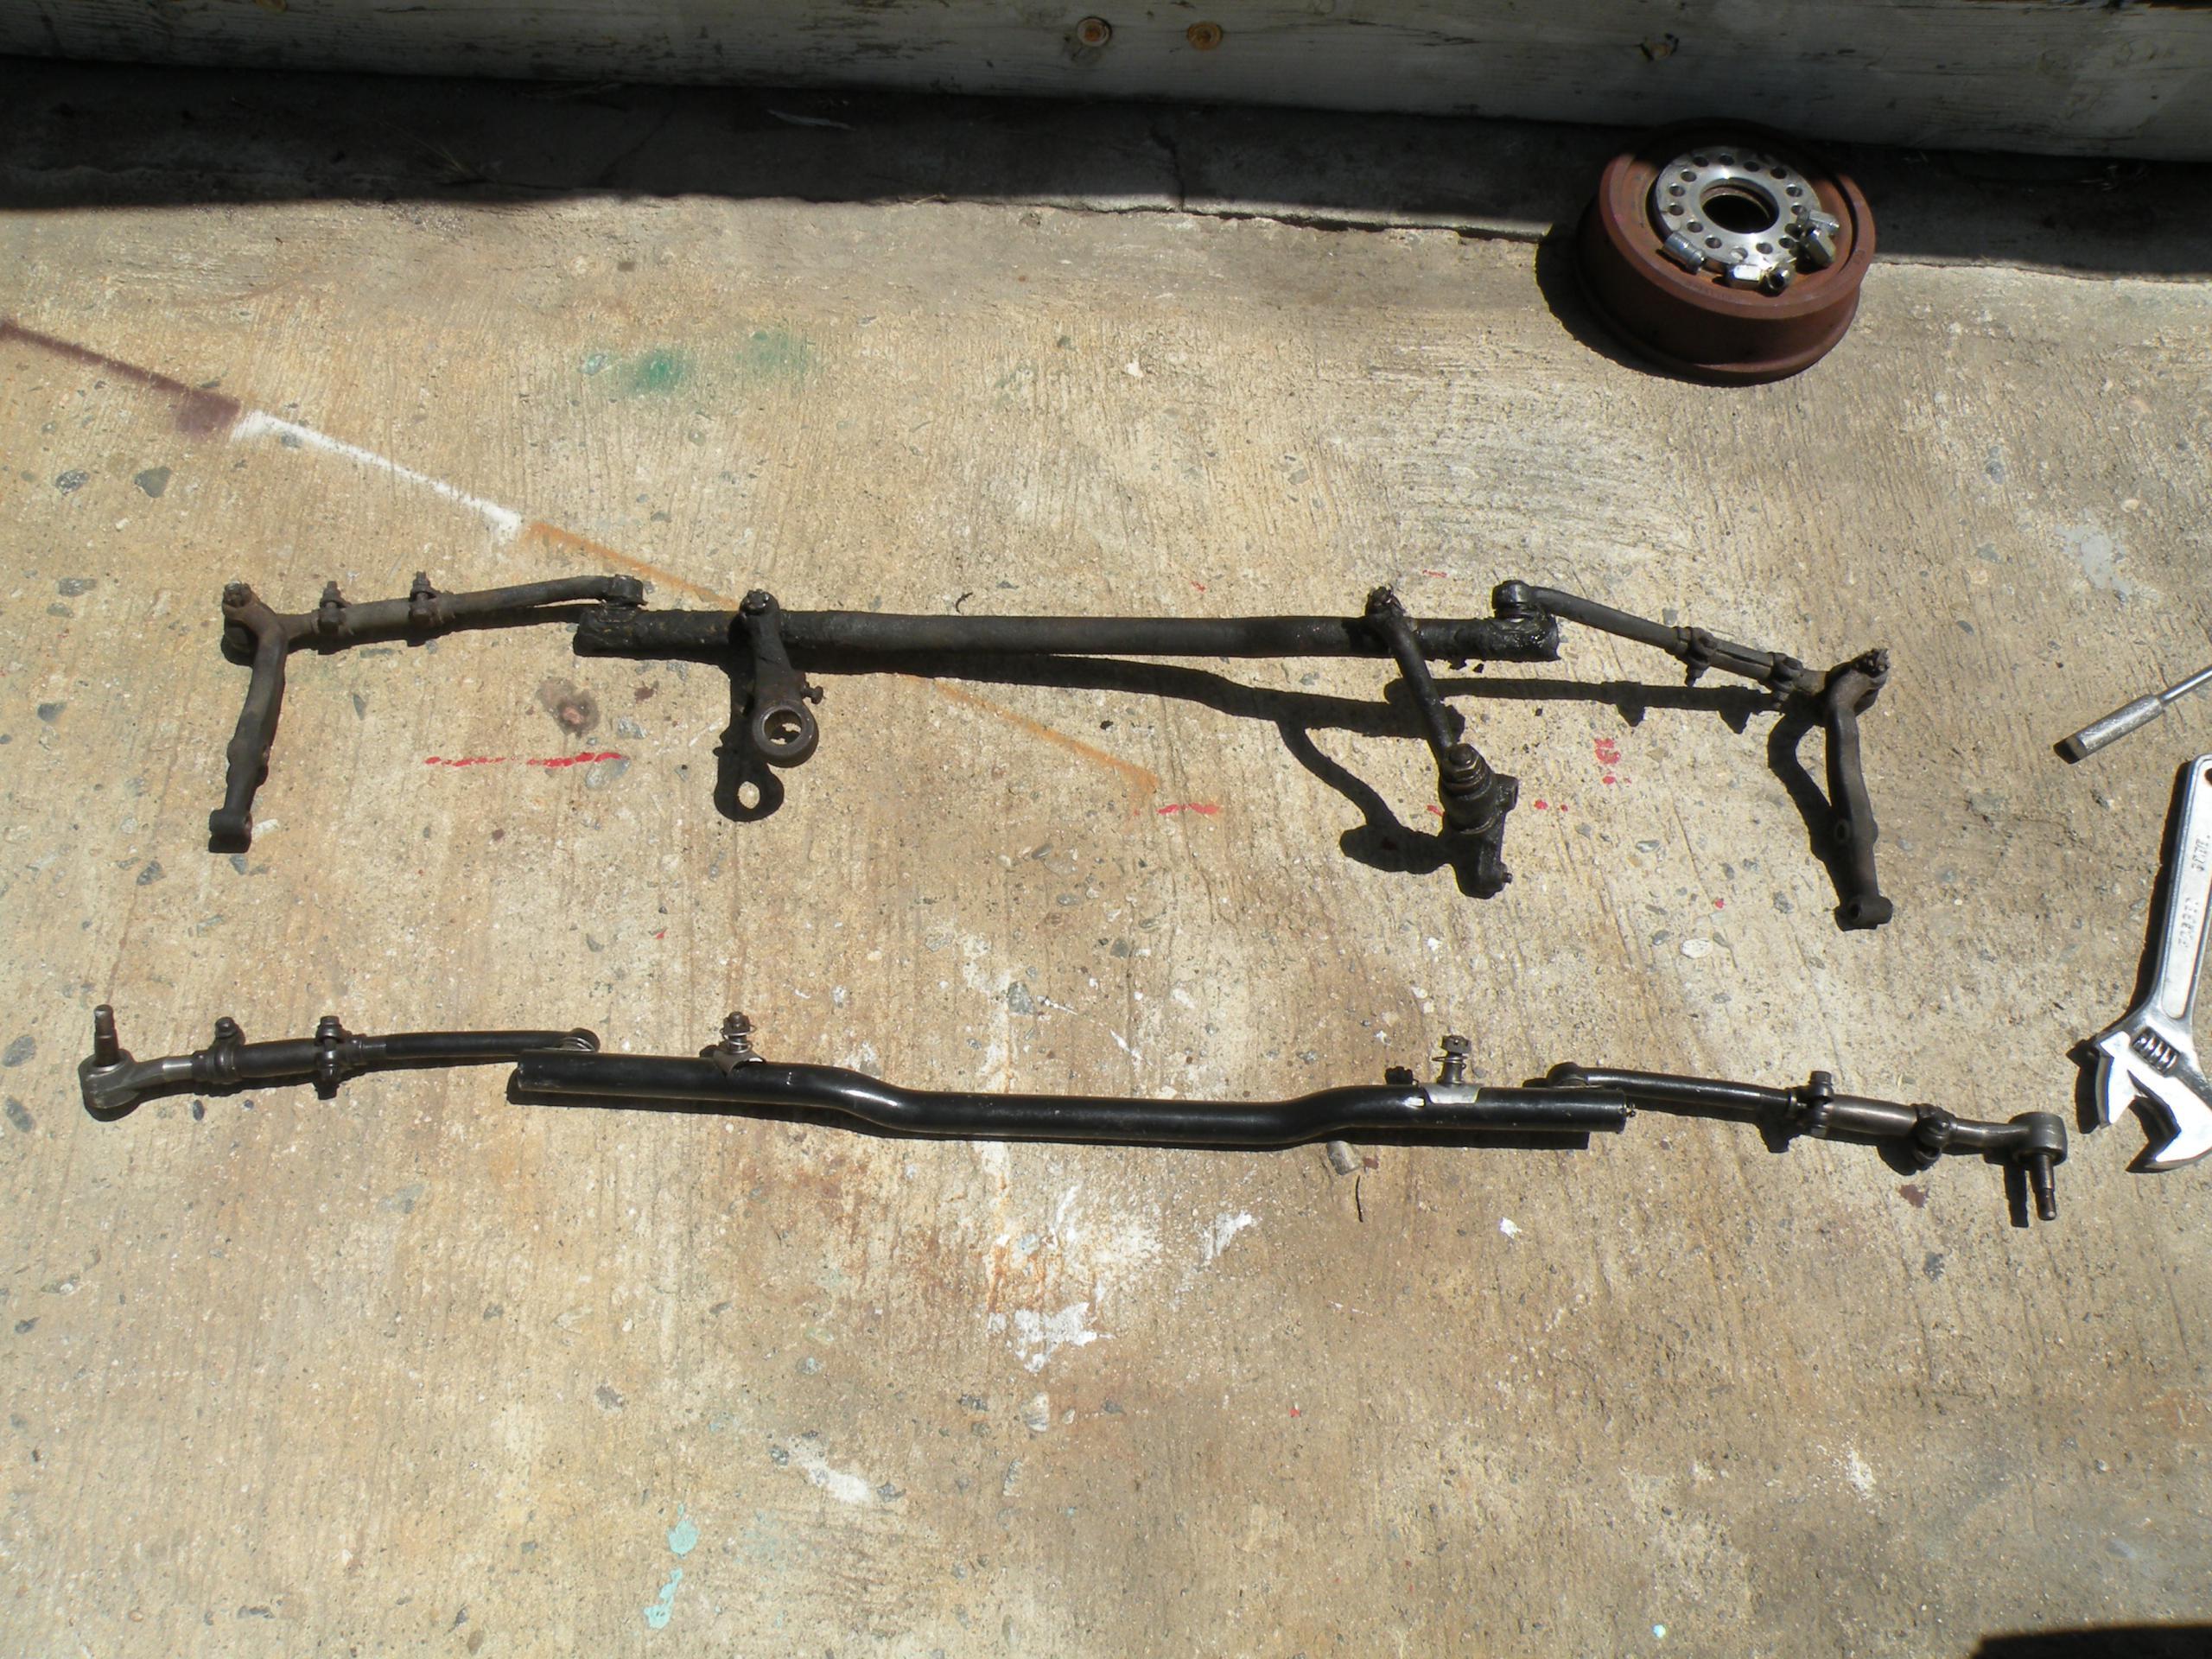
Over the last year I’d rebuilt a spare steering box and steering linkage and installed them at the same time. Here the old, encrusted parts are laying next to the painted, prepped units. The steering box is very tiny, and peculiar to this car. It had been bored out to accept a replacement steel bushing sometime in the past (someone told me this was common practice ‘back when) which was now worn, so I bored that part out to accept an NOS bronze factory bush. I spent the time getting it to a tight slip-fit. Using Right Stuff I sealed it up so I
can run gear oil instead of grease for a smoother box.
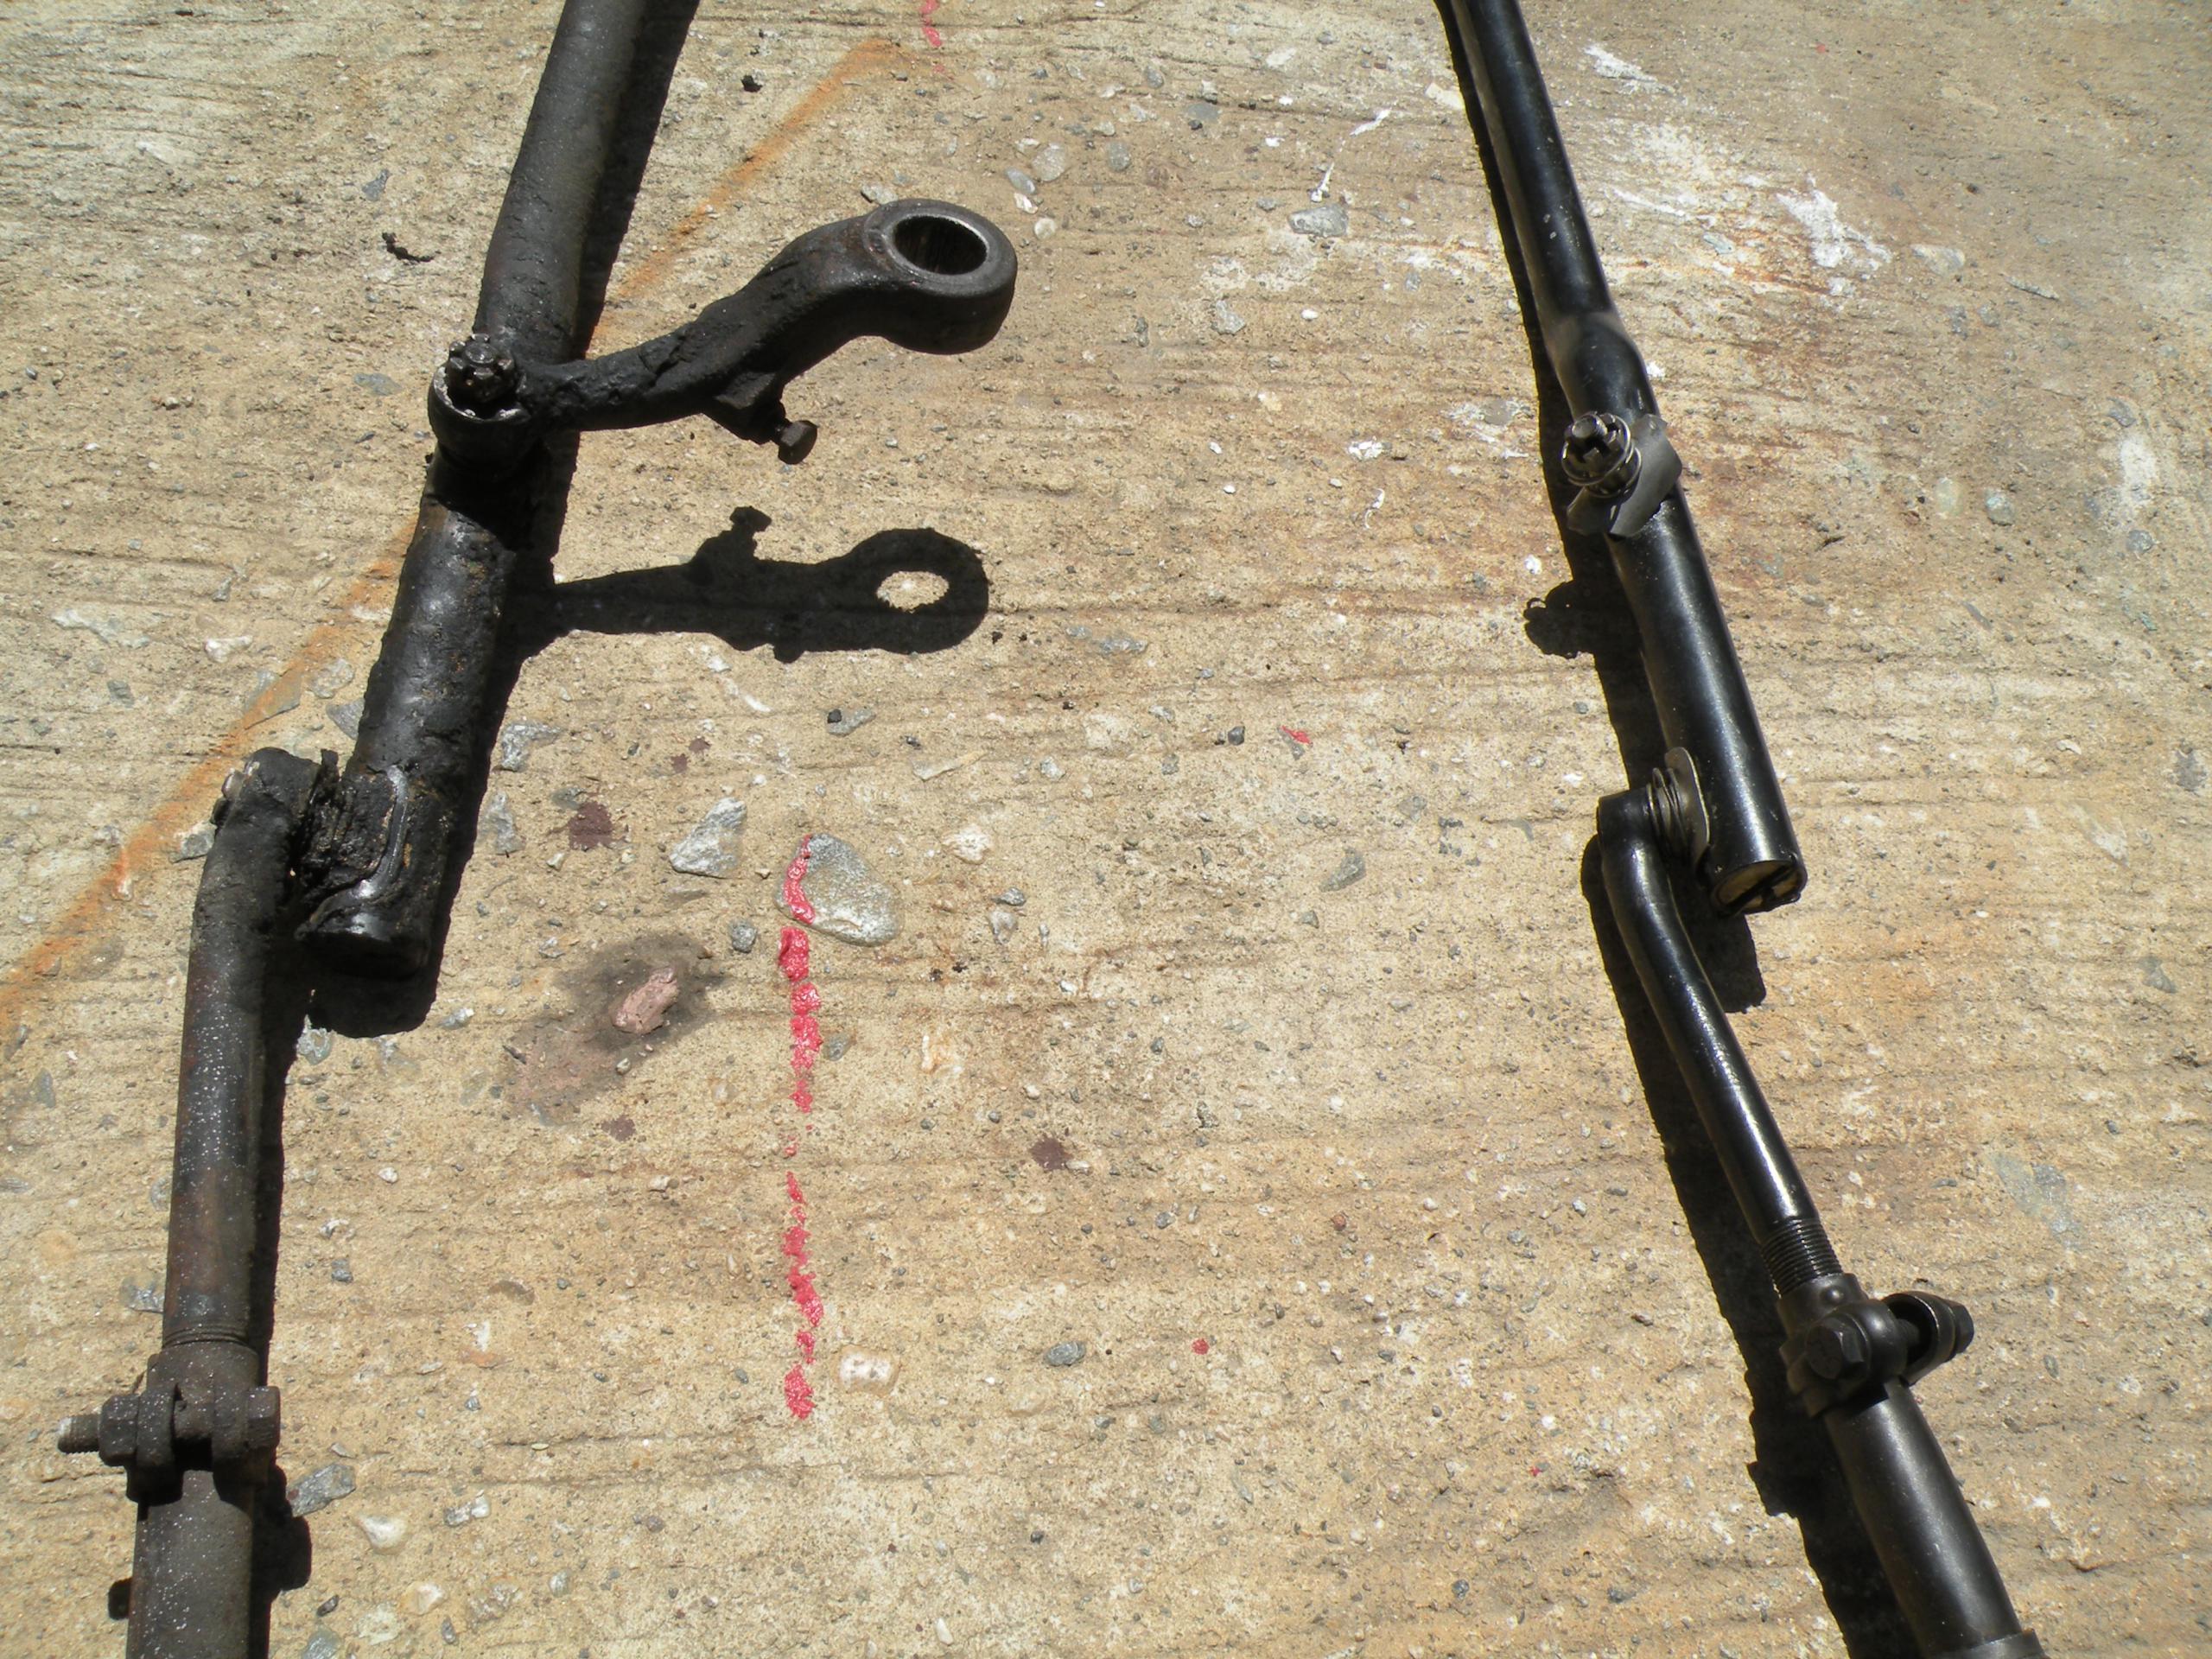
The steering linkage is surprisingly complex, and contains many ball-socket cups and springs. Easy to rebuild, but the cups wear and new/NOS parts are not available, so buy used units and mix’n’match as best you can.
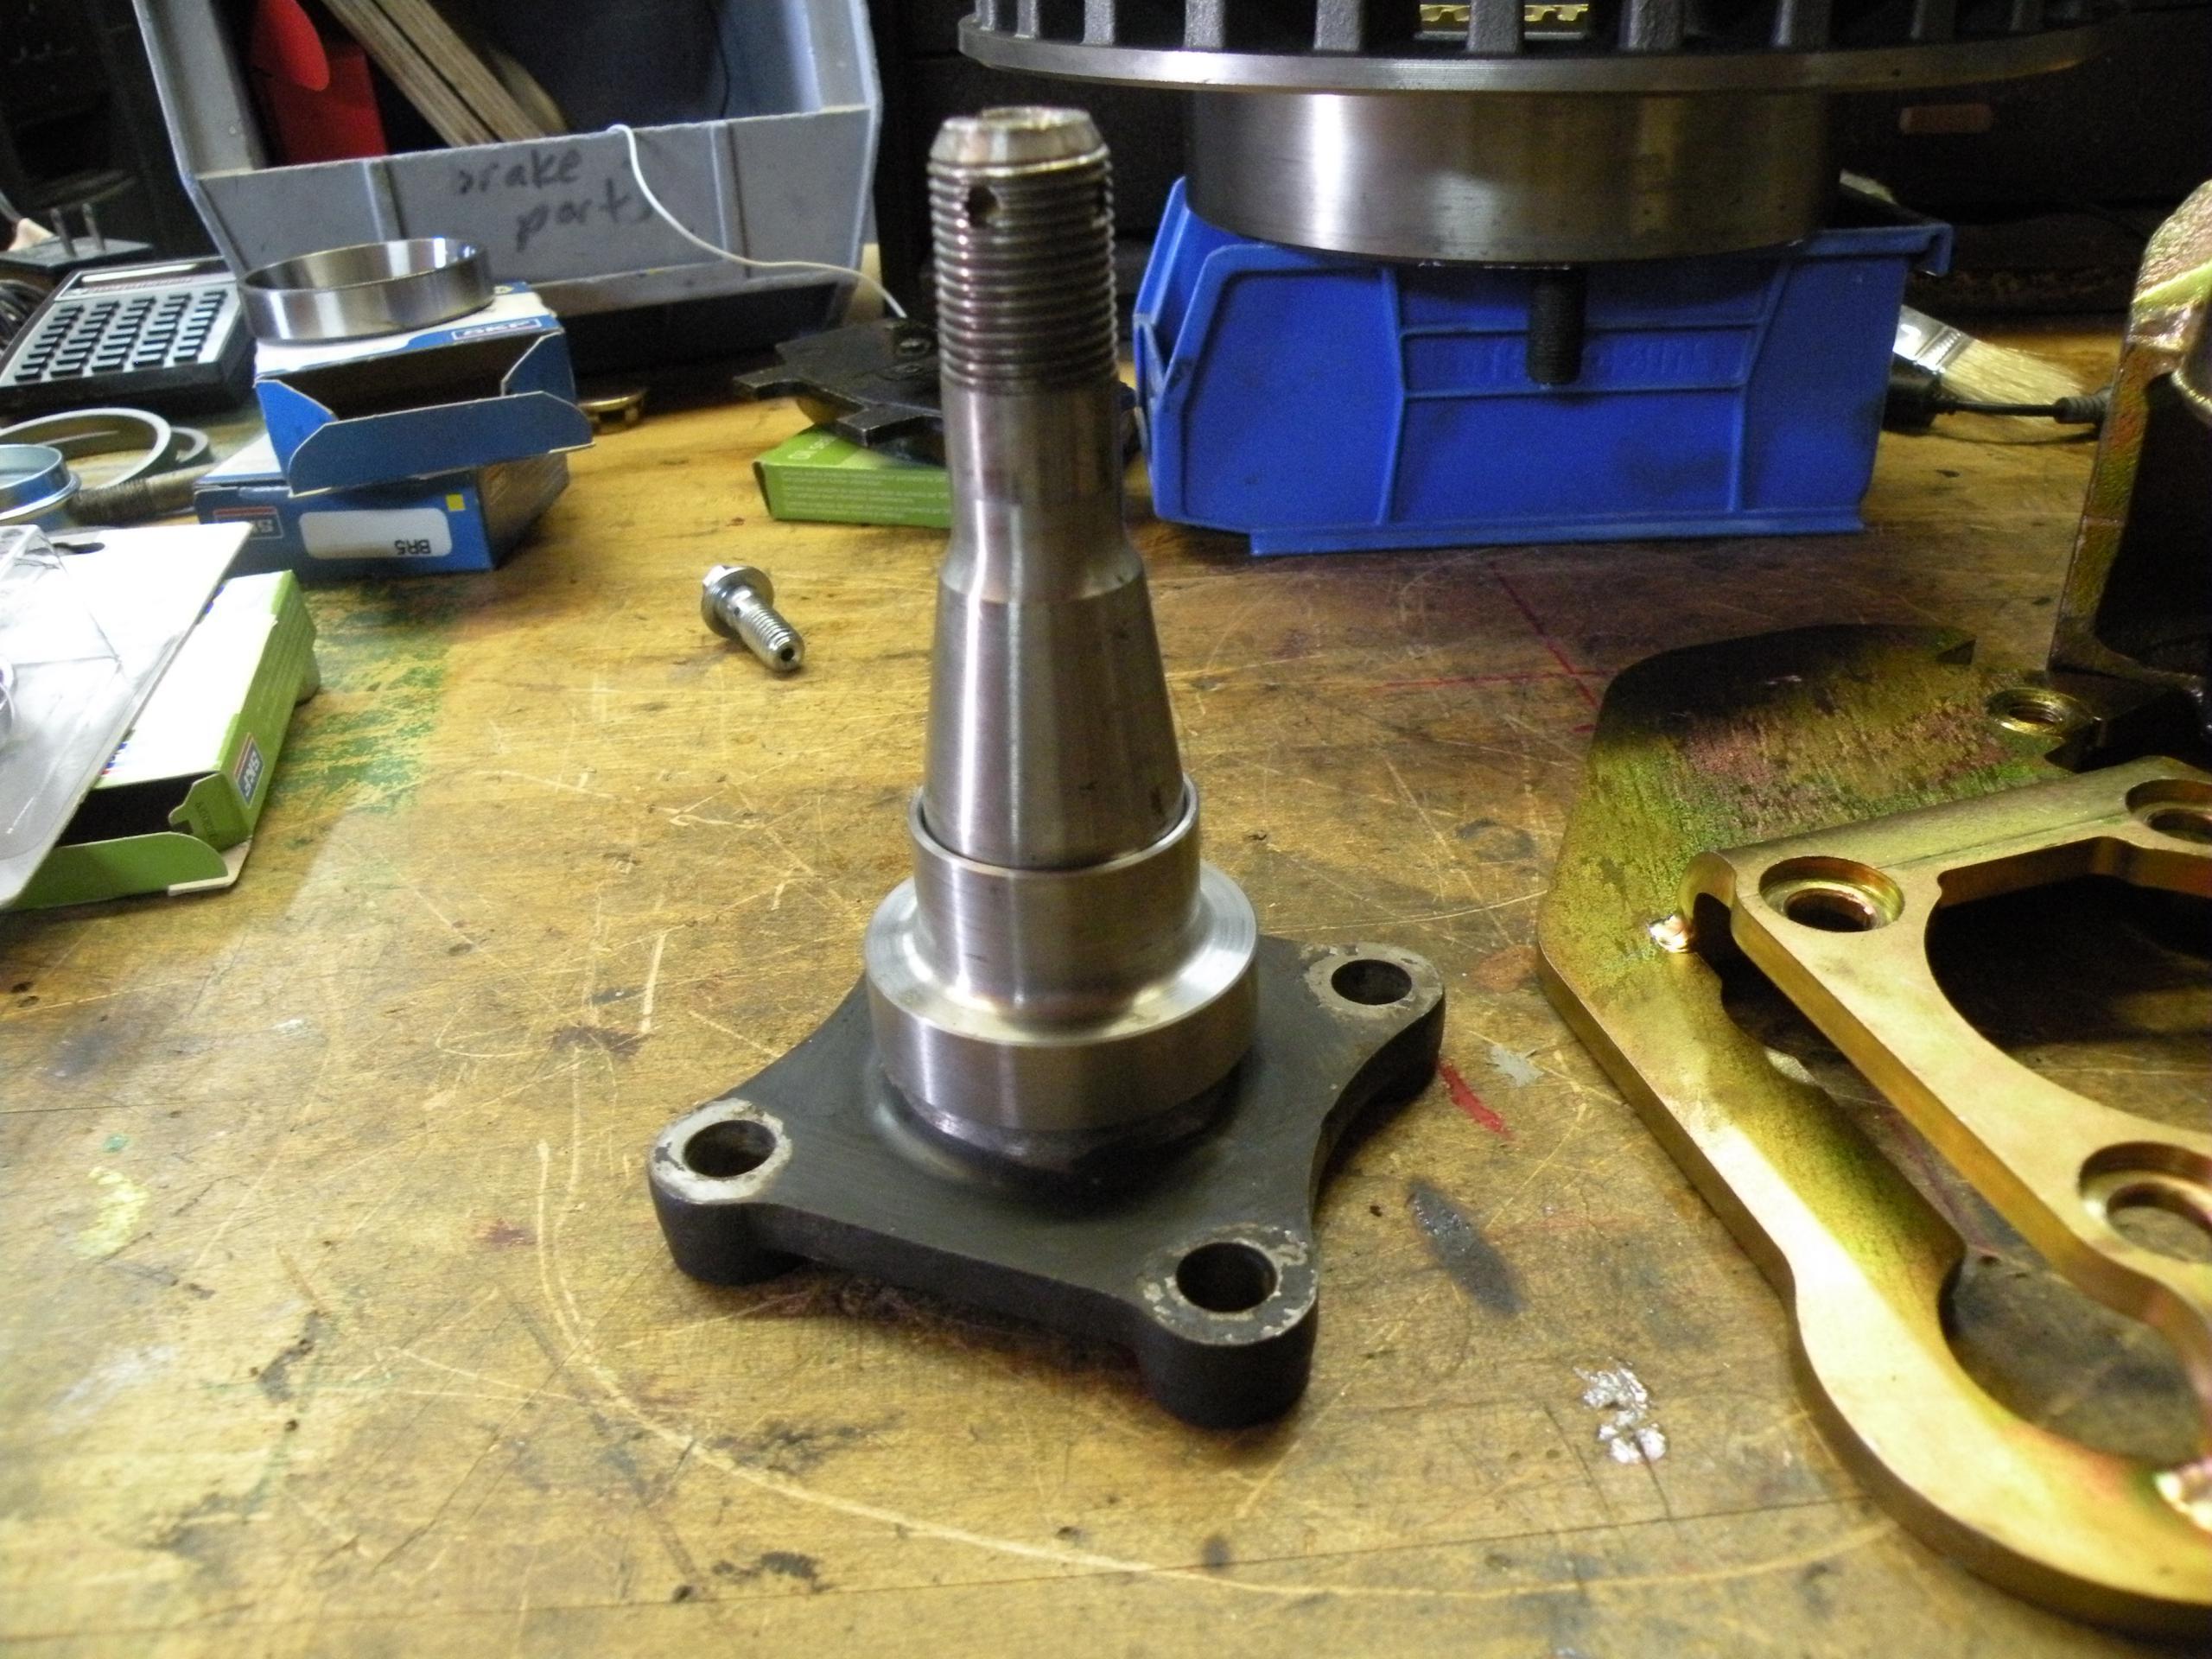
Here’s the old drum brake spindle with the Scarebird bearing and seal adapter in place (adapter not needed for new style brackets). Spindles last a long time, but the inner seal area gets worn from use, and often seep. The adapter provides a new bearing seat and seal area, so it’s now like new.
Scarebird bracket modifications
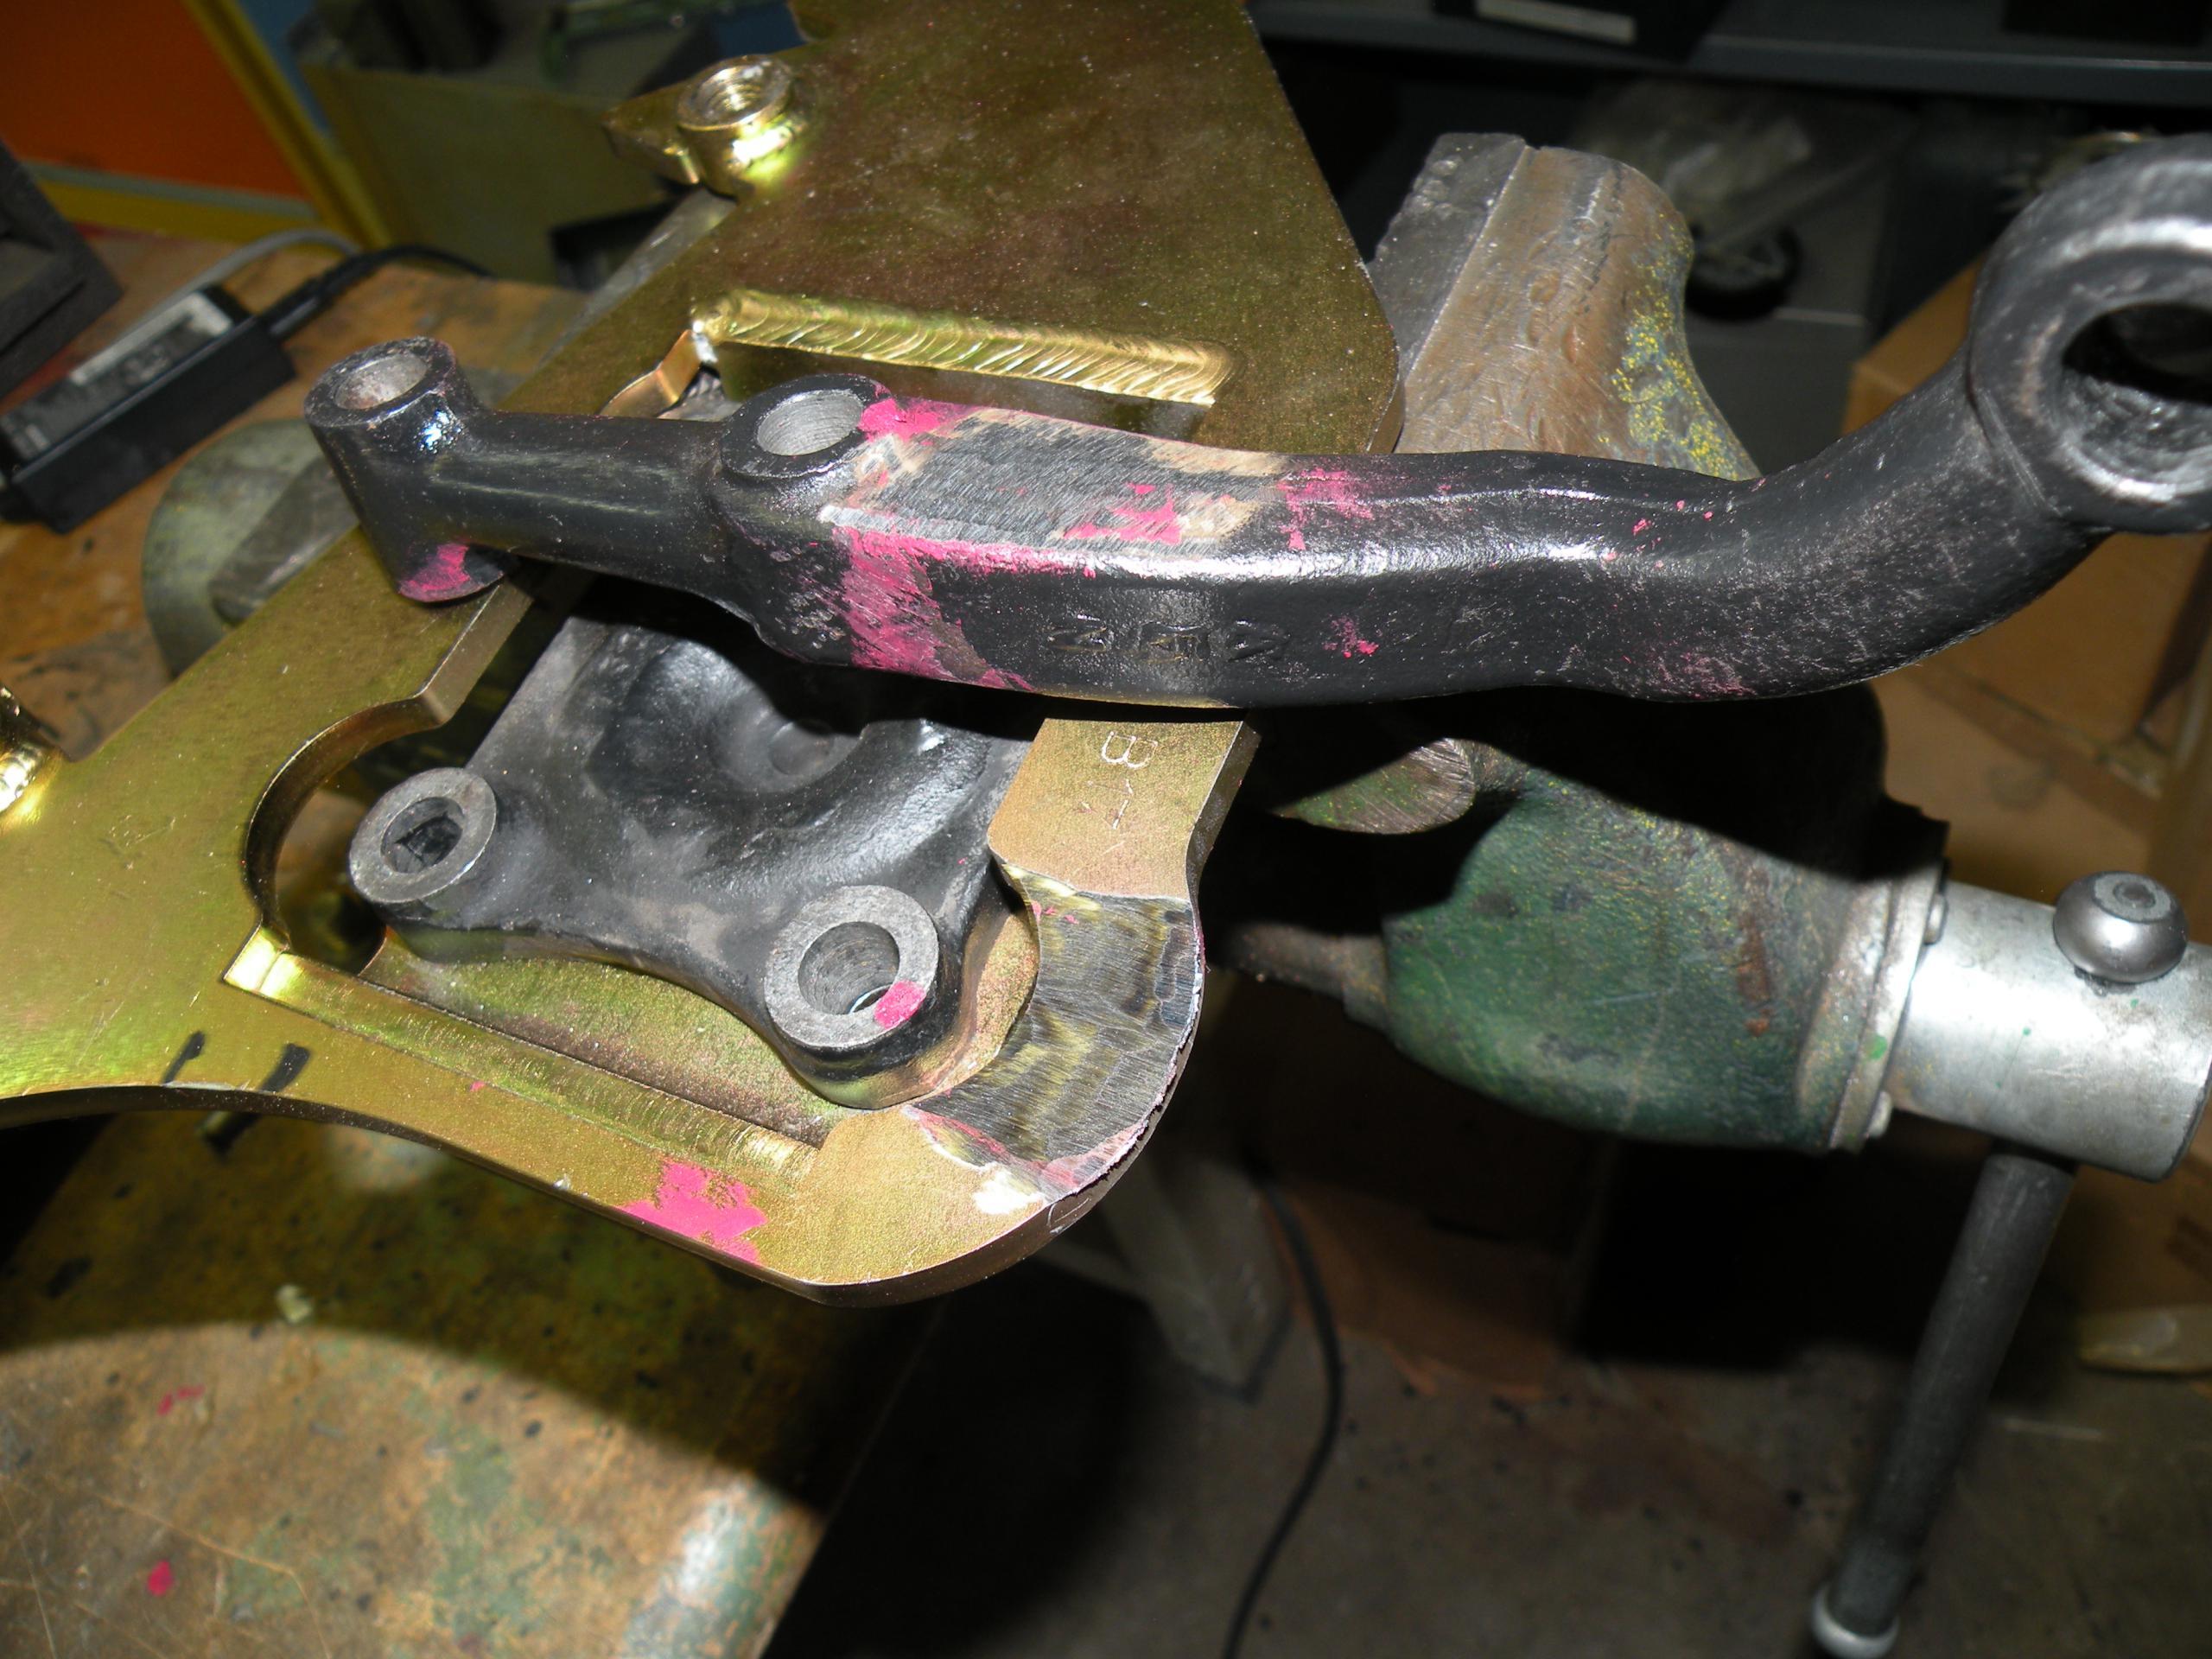
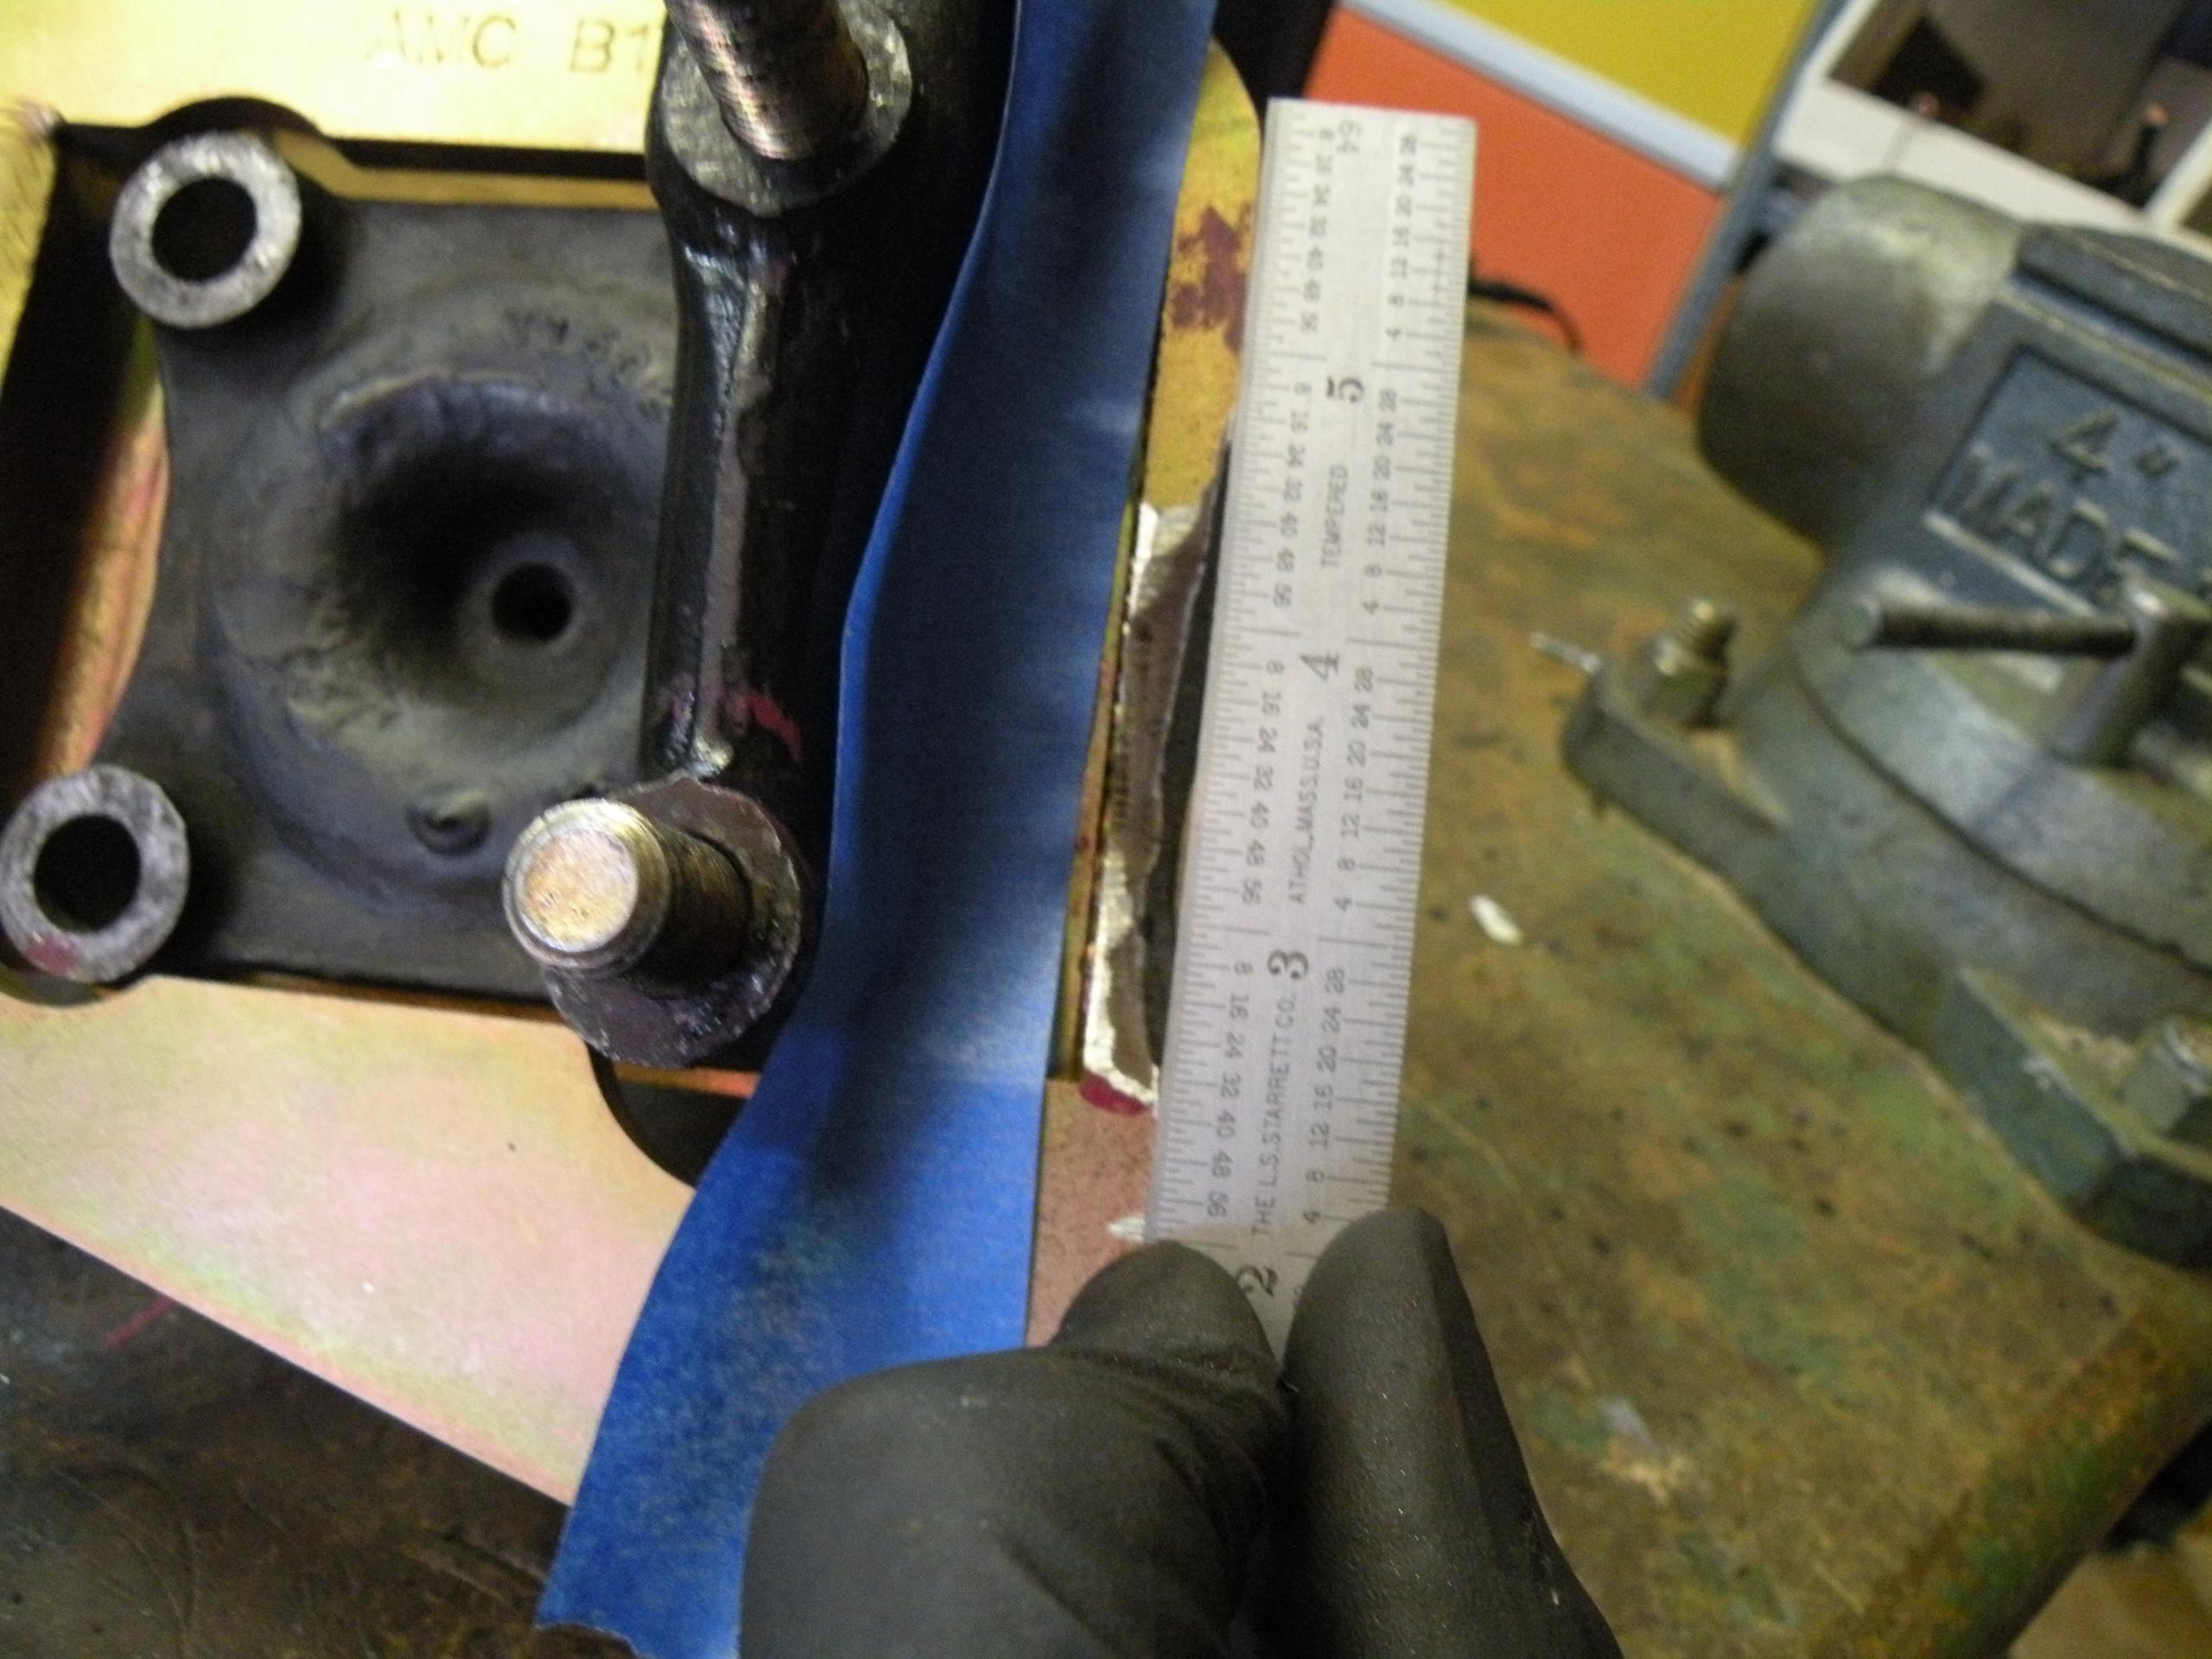
As stated earlier the Scarebird bracket doesn’t clear the lower rear trunnion and the steering arm (old style – new may need some clearancing for the trunnion cap, but not the steering arm) . Metal needs to be removed to create clearance. It’s not rocket science, but care is required. It won’t affect strength in any meaningful way. You can ogle the pictures for the basic information. I could have milled it out but thinning it with an angle grinder left everything radiused and since this was cut’n’fit it was simply easier to grind.
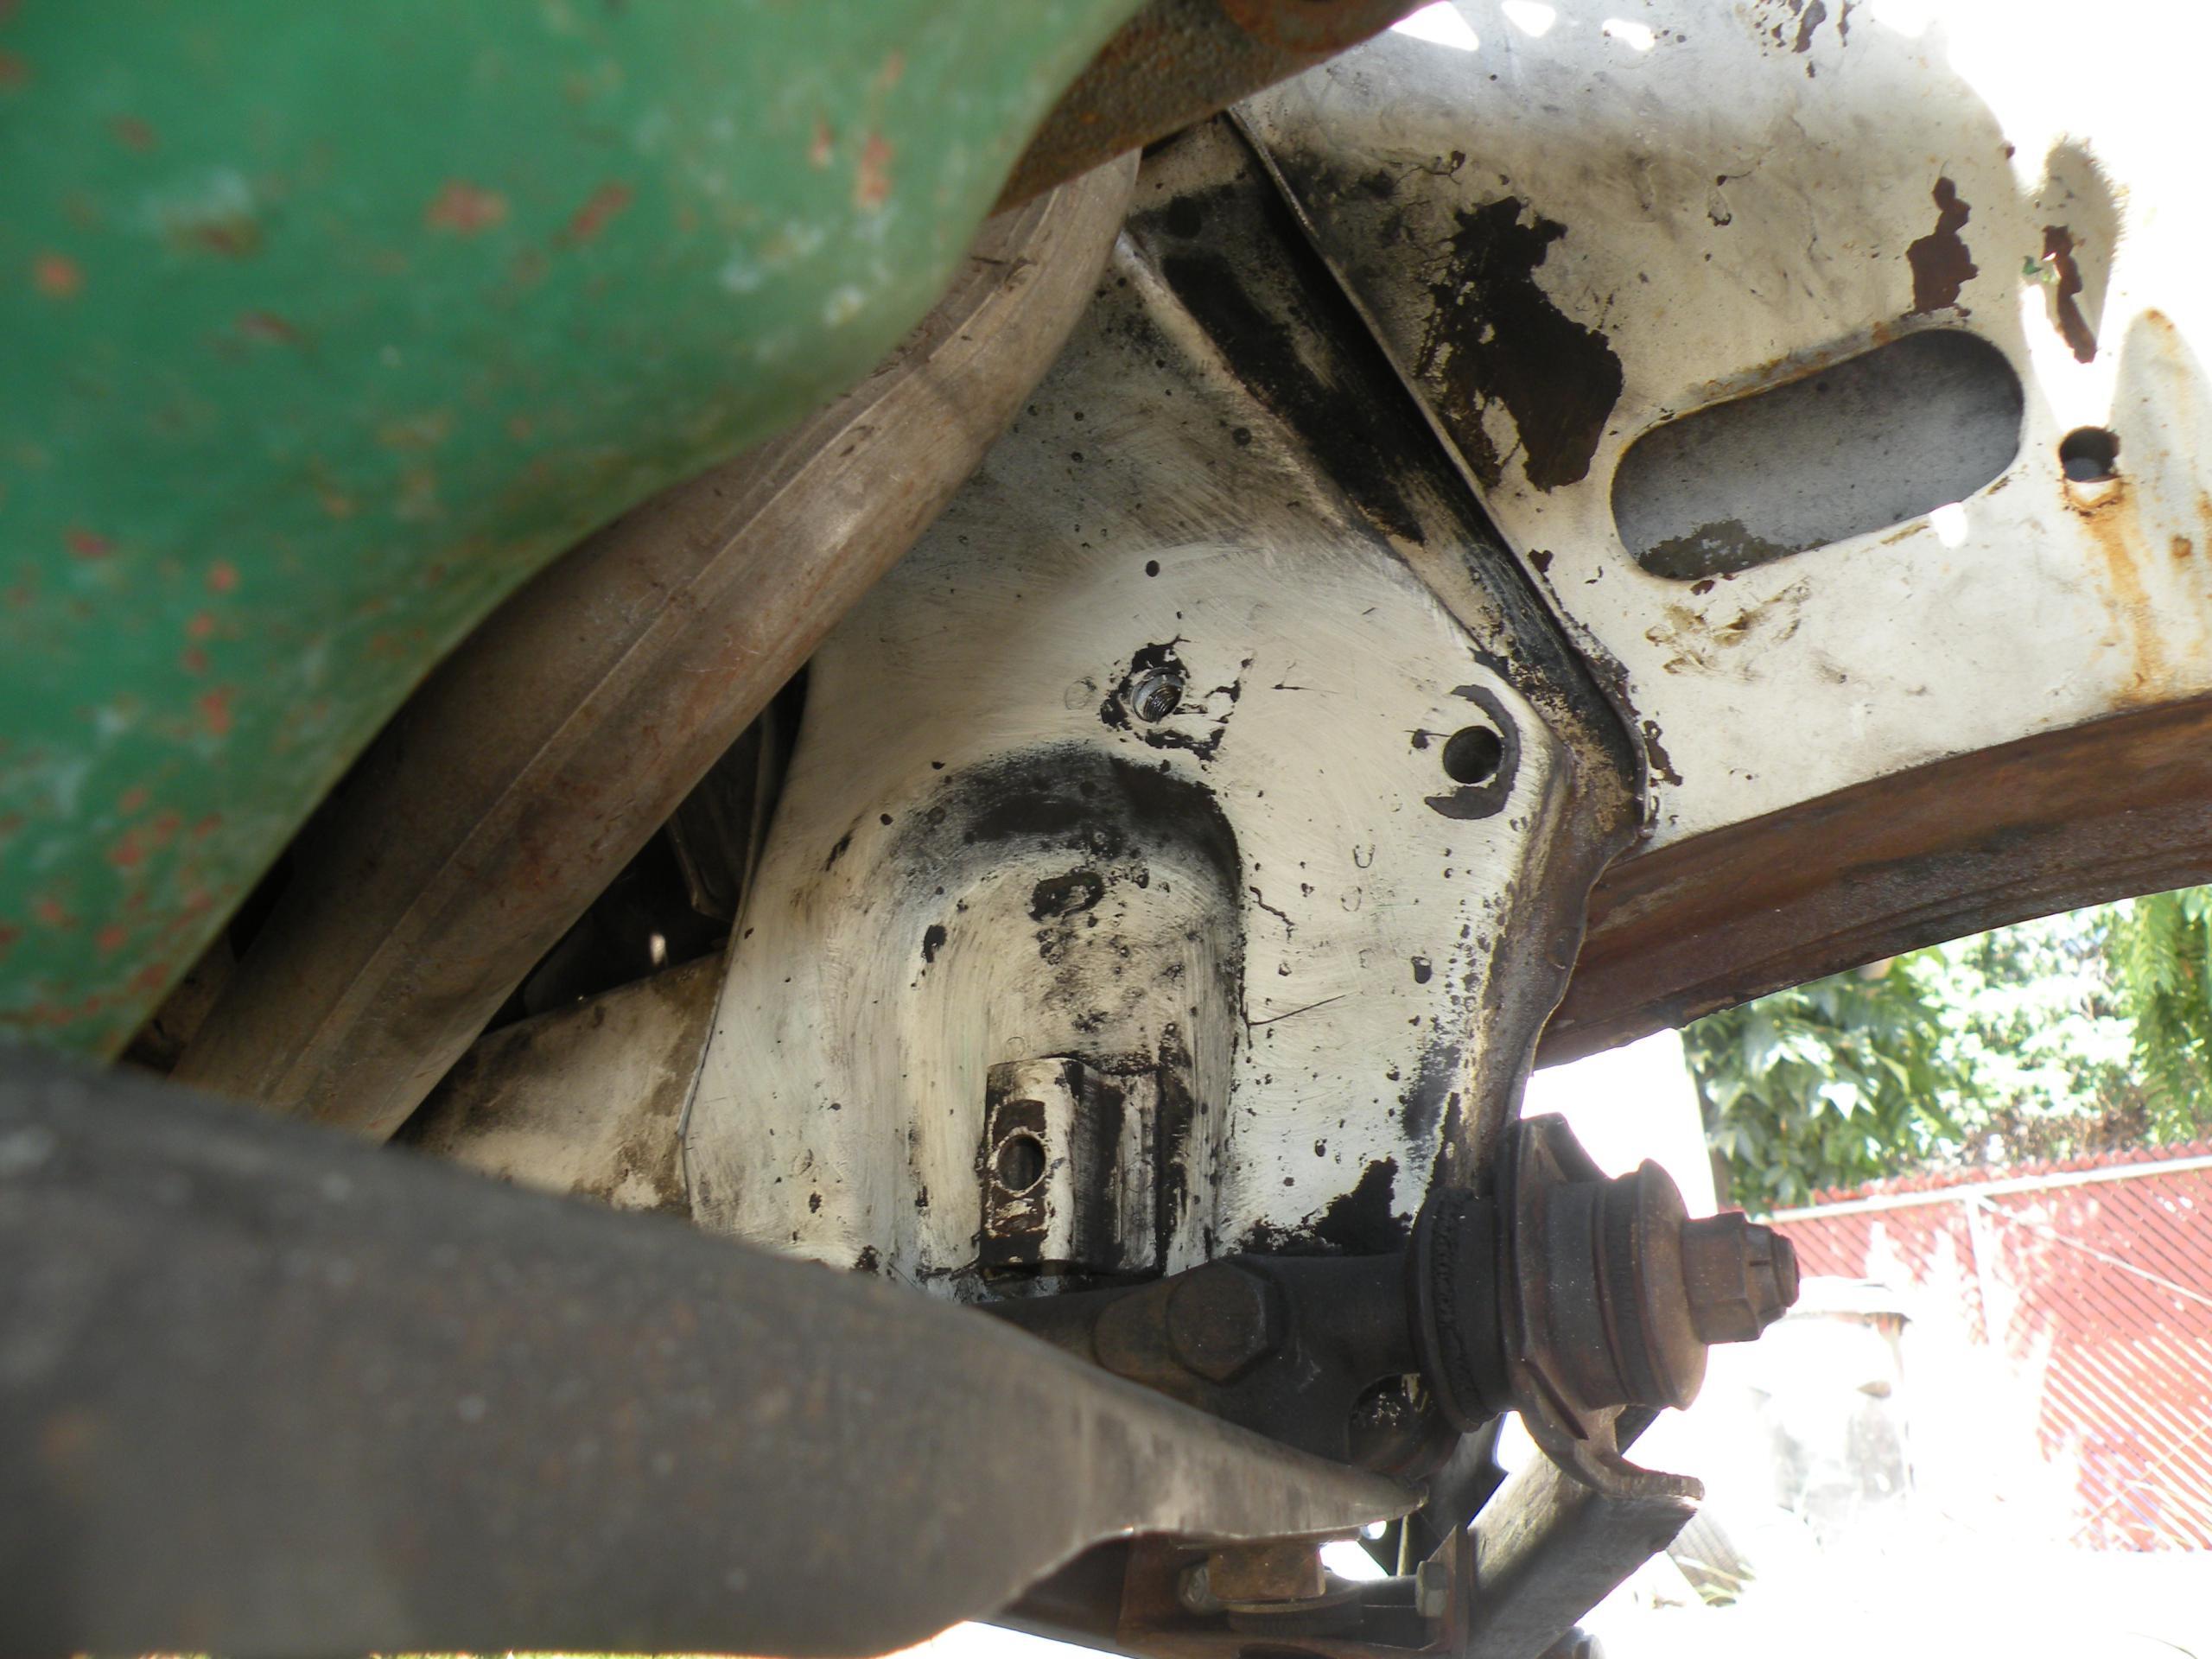
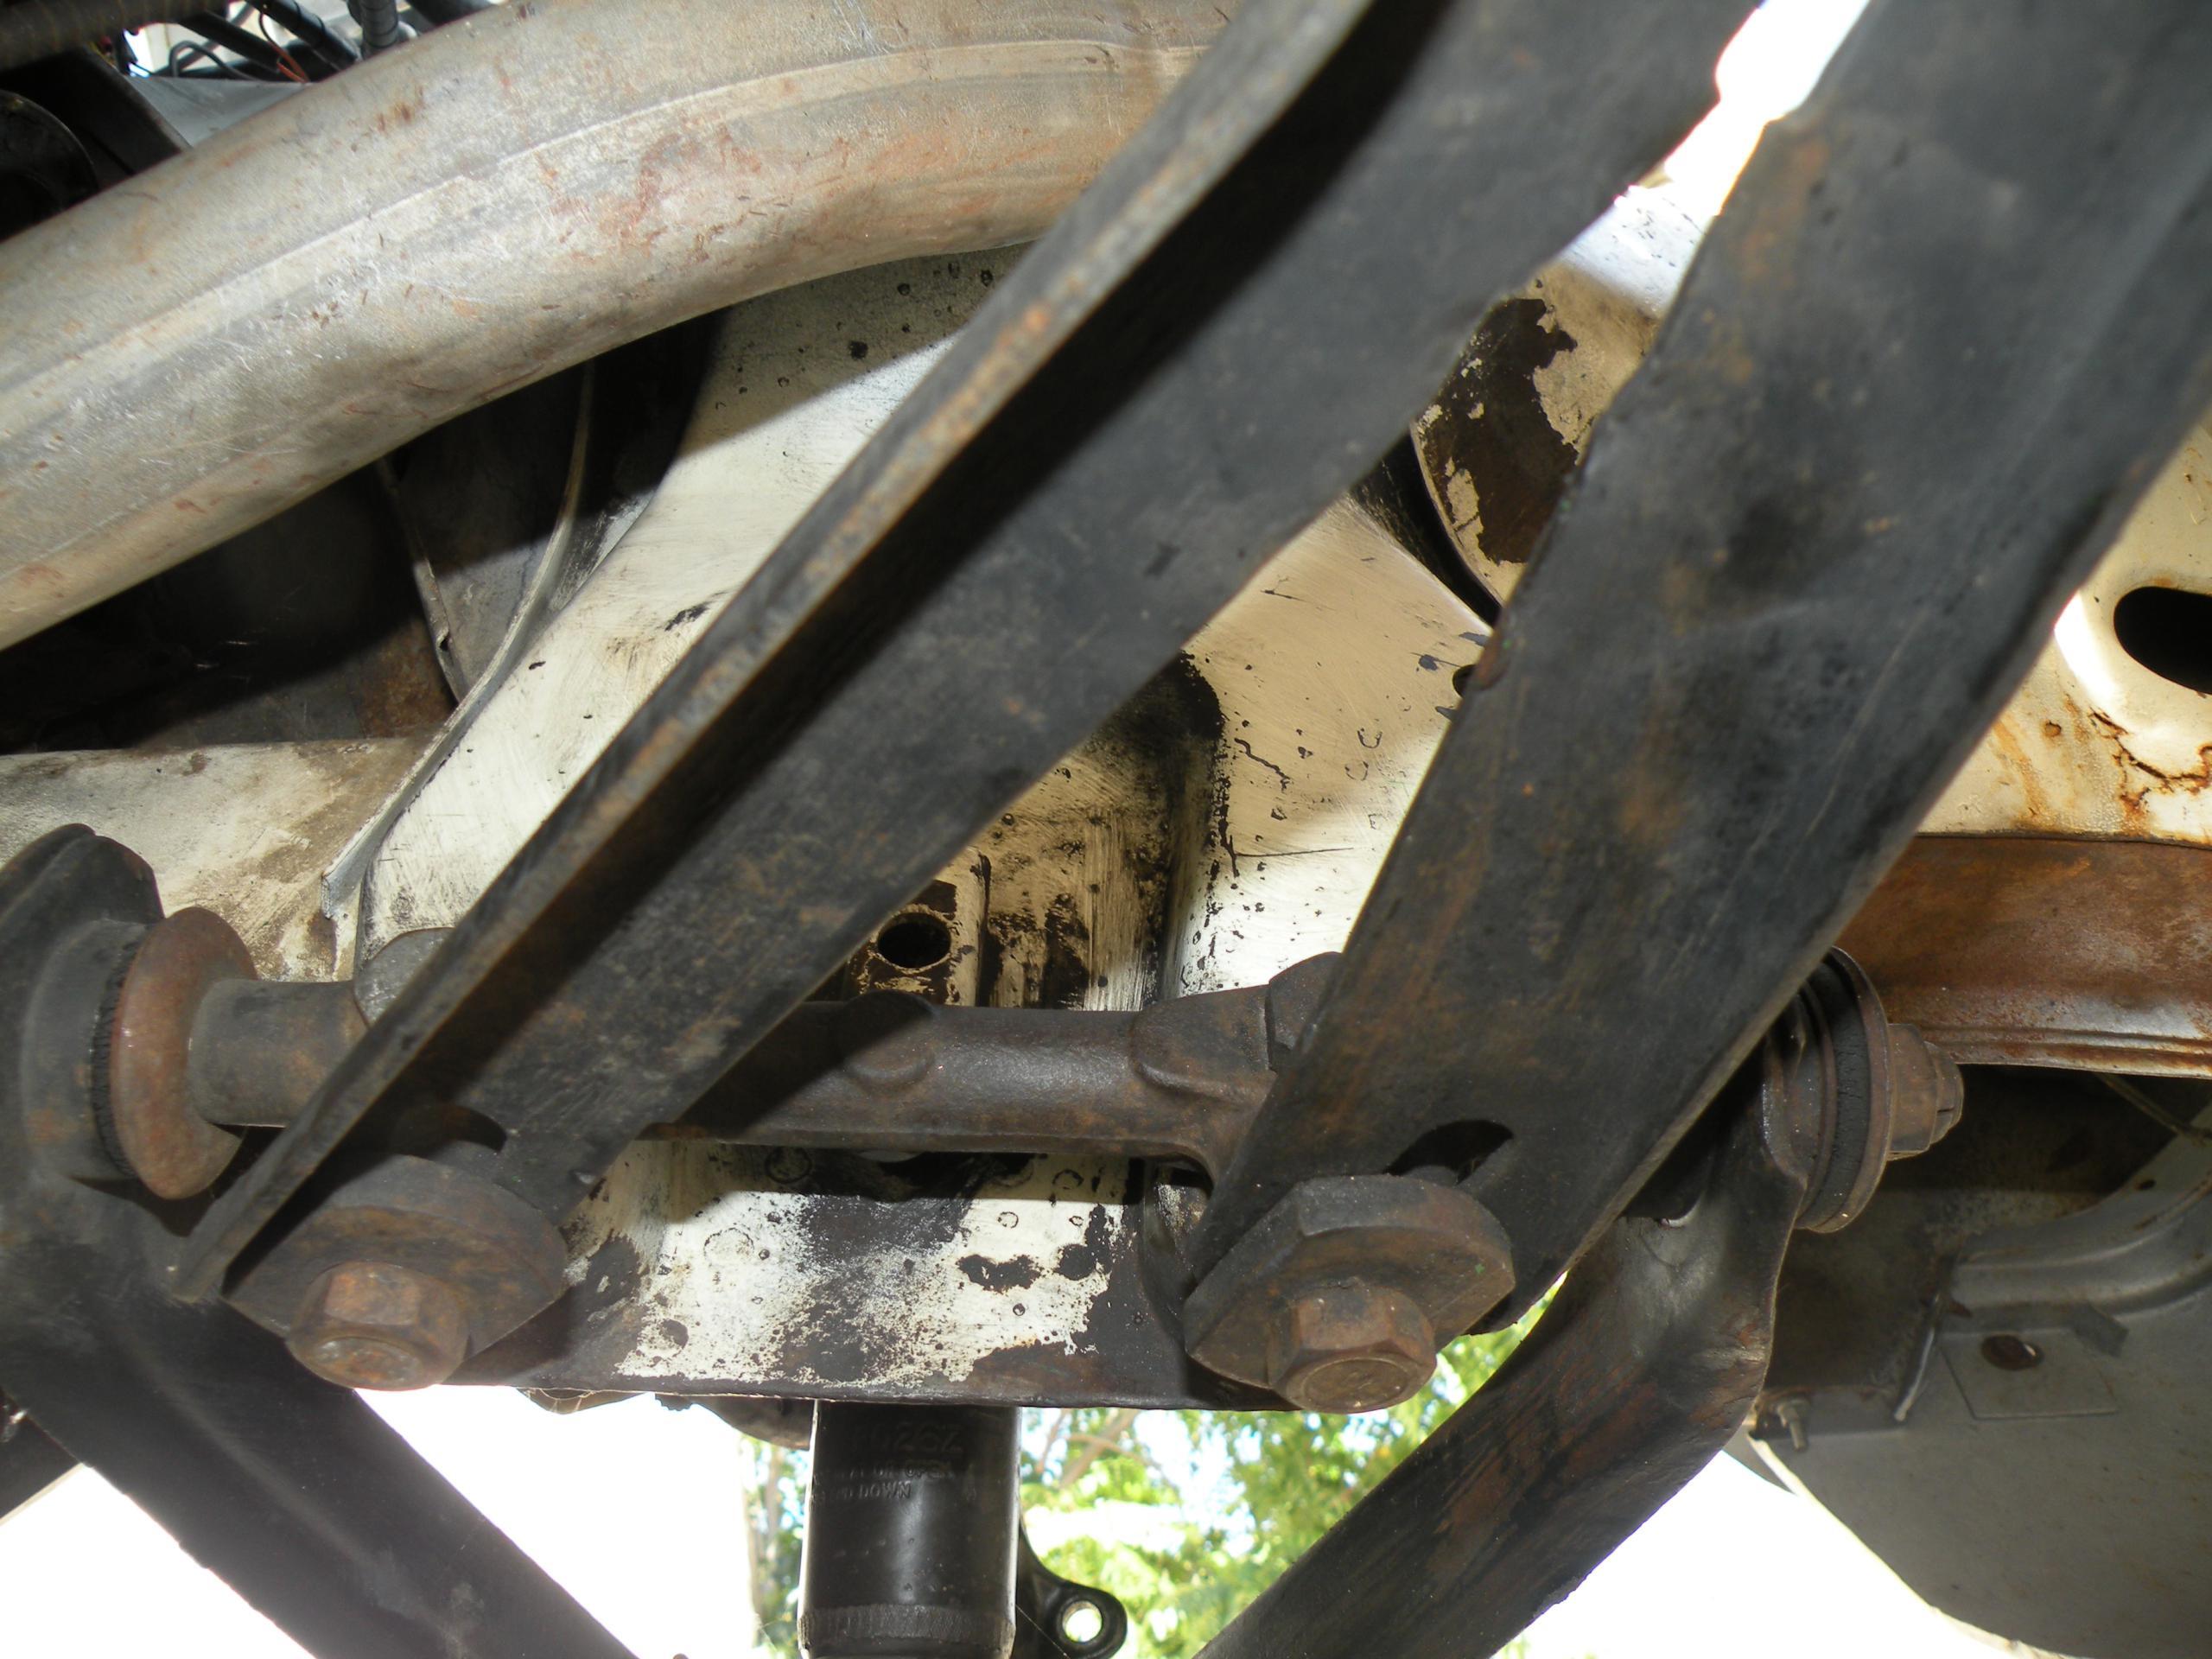
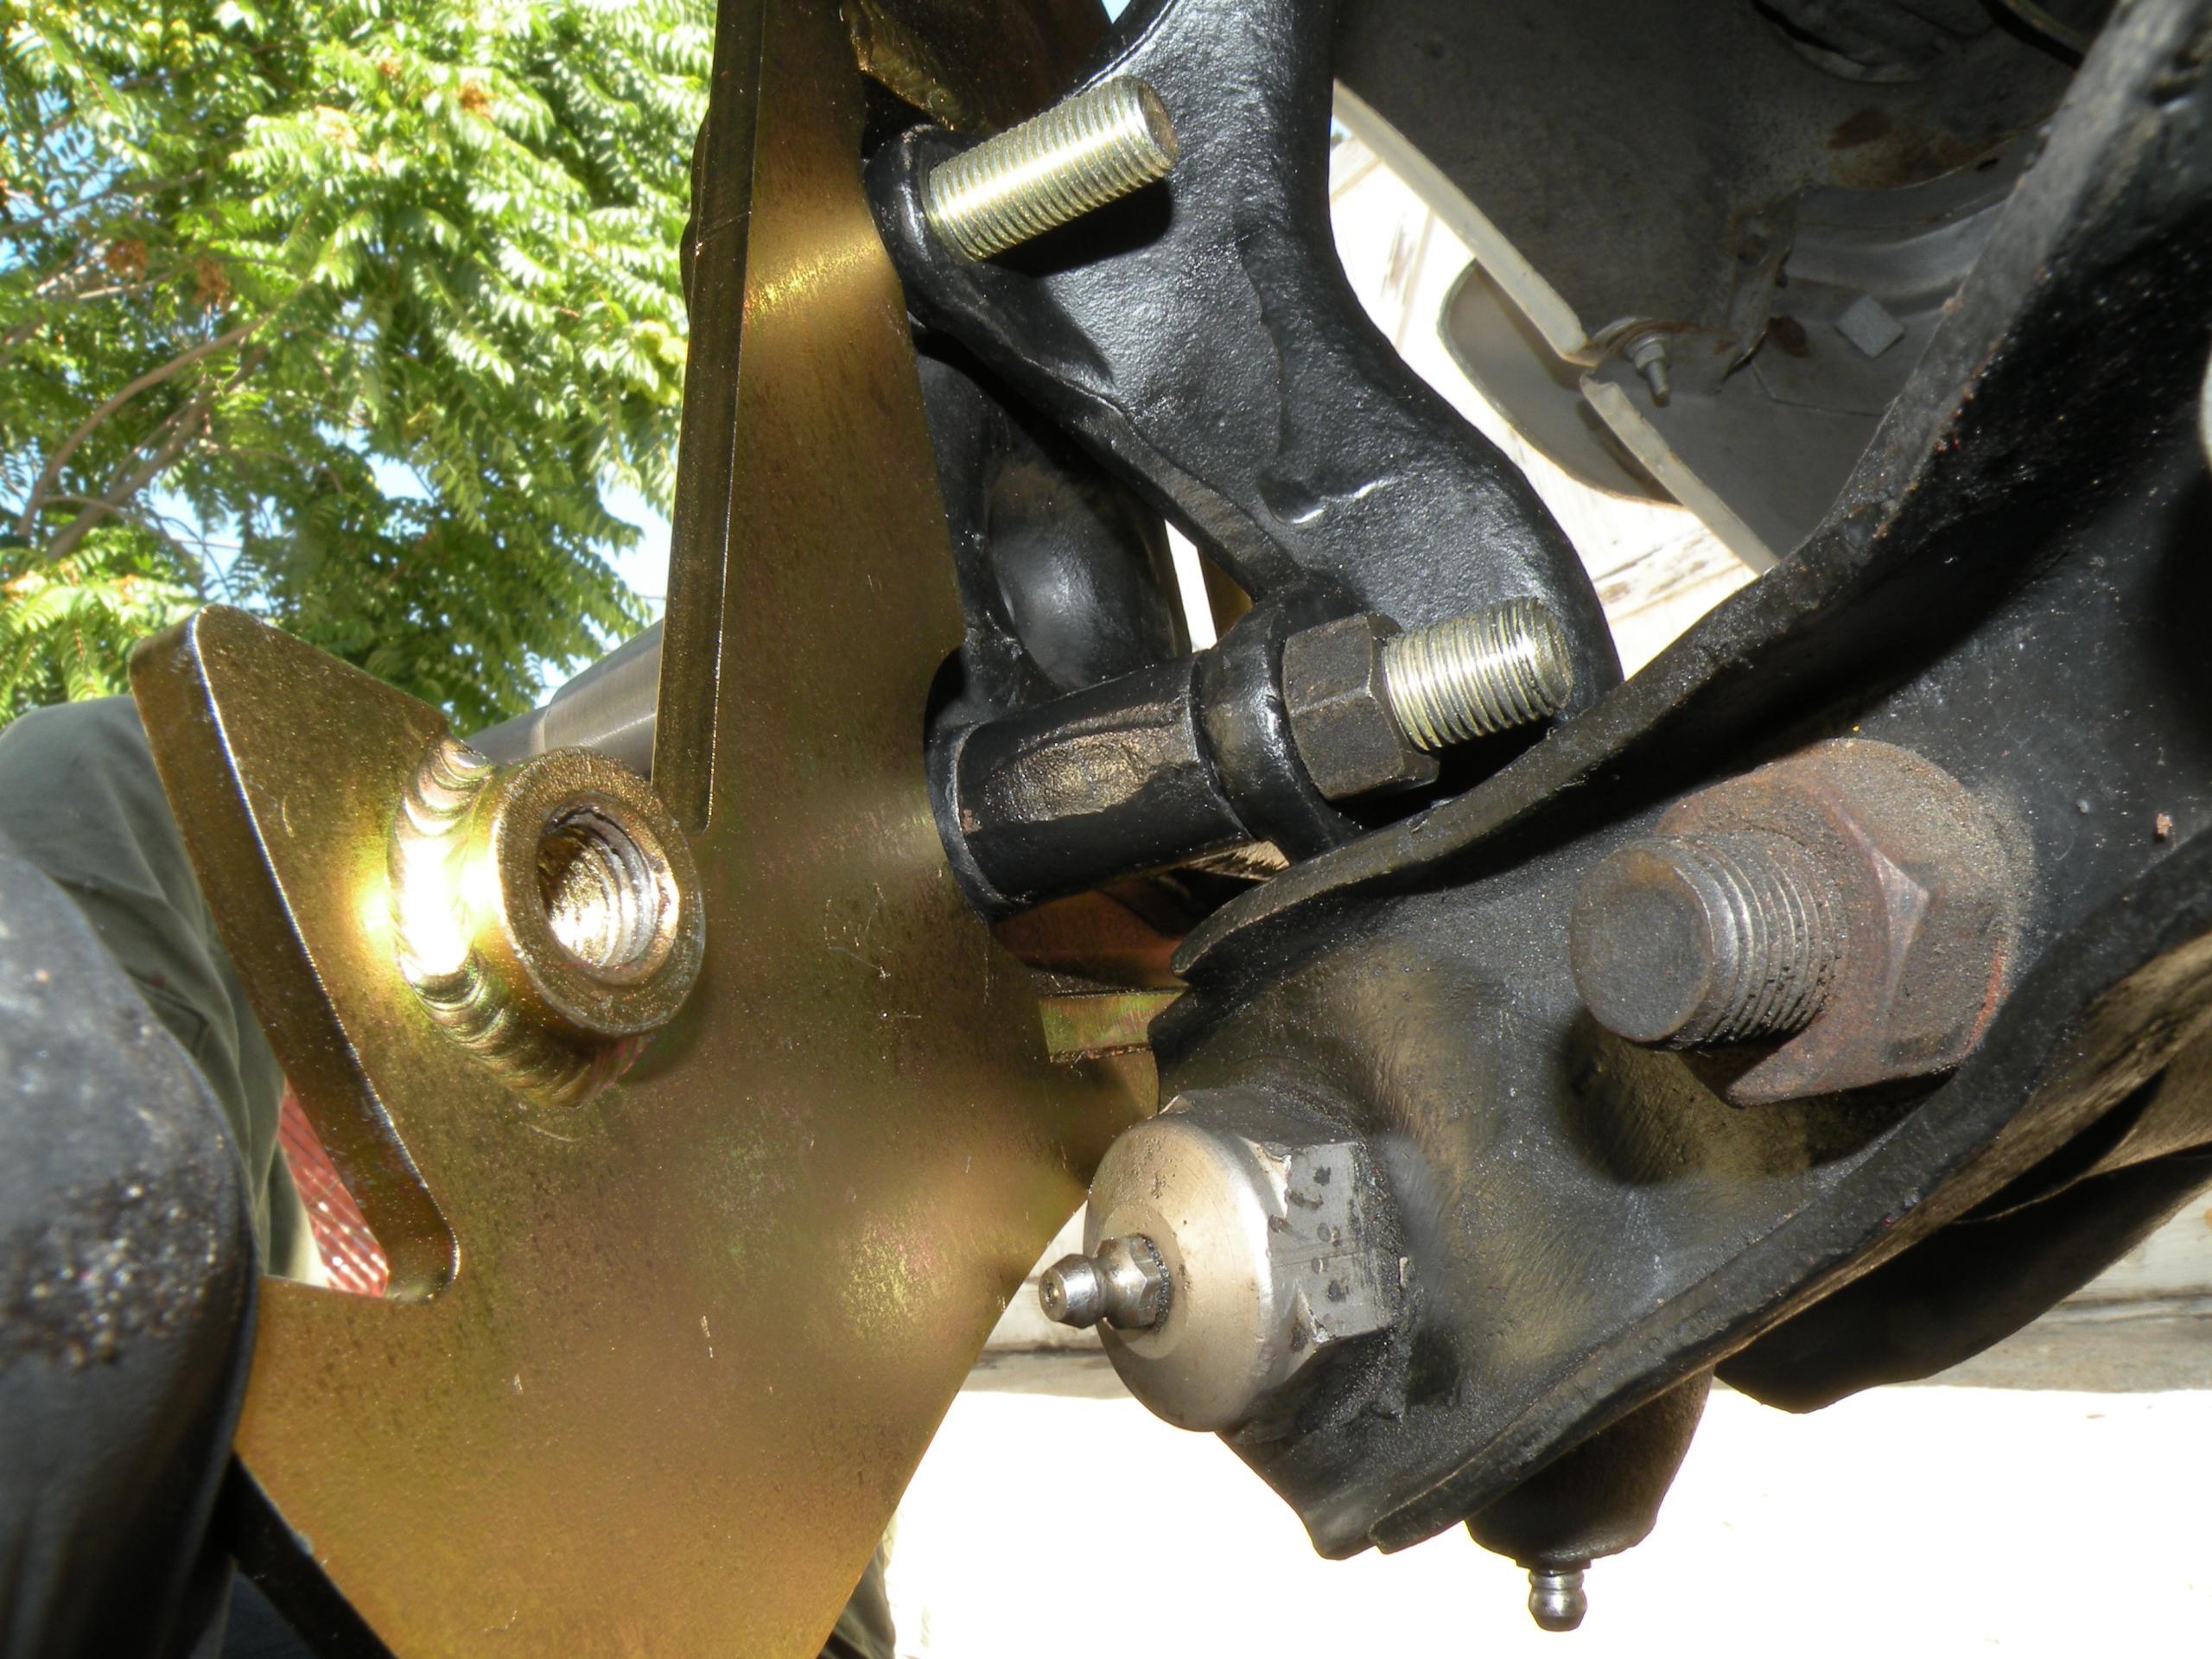
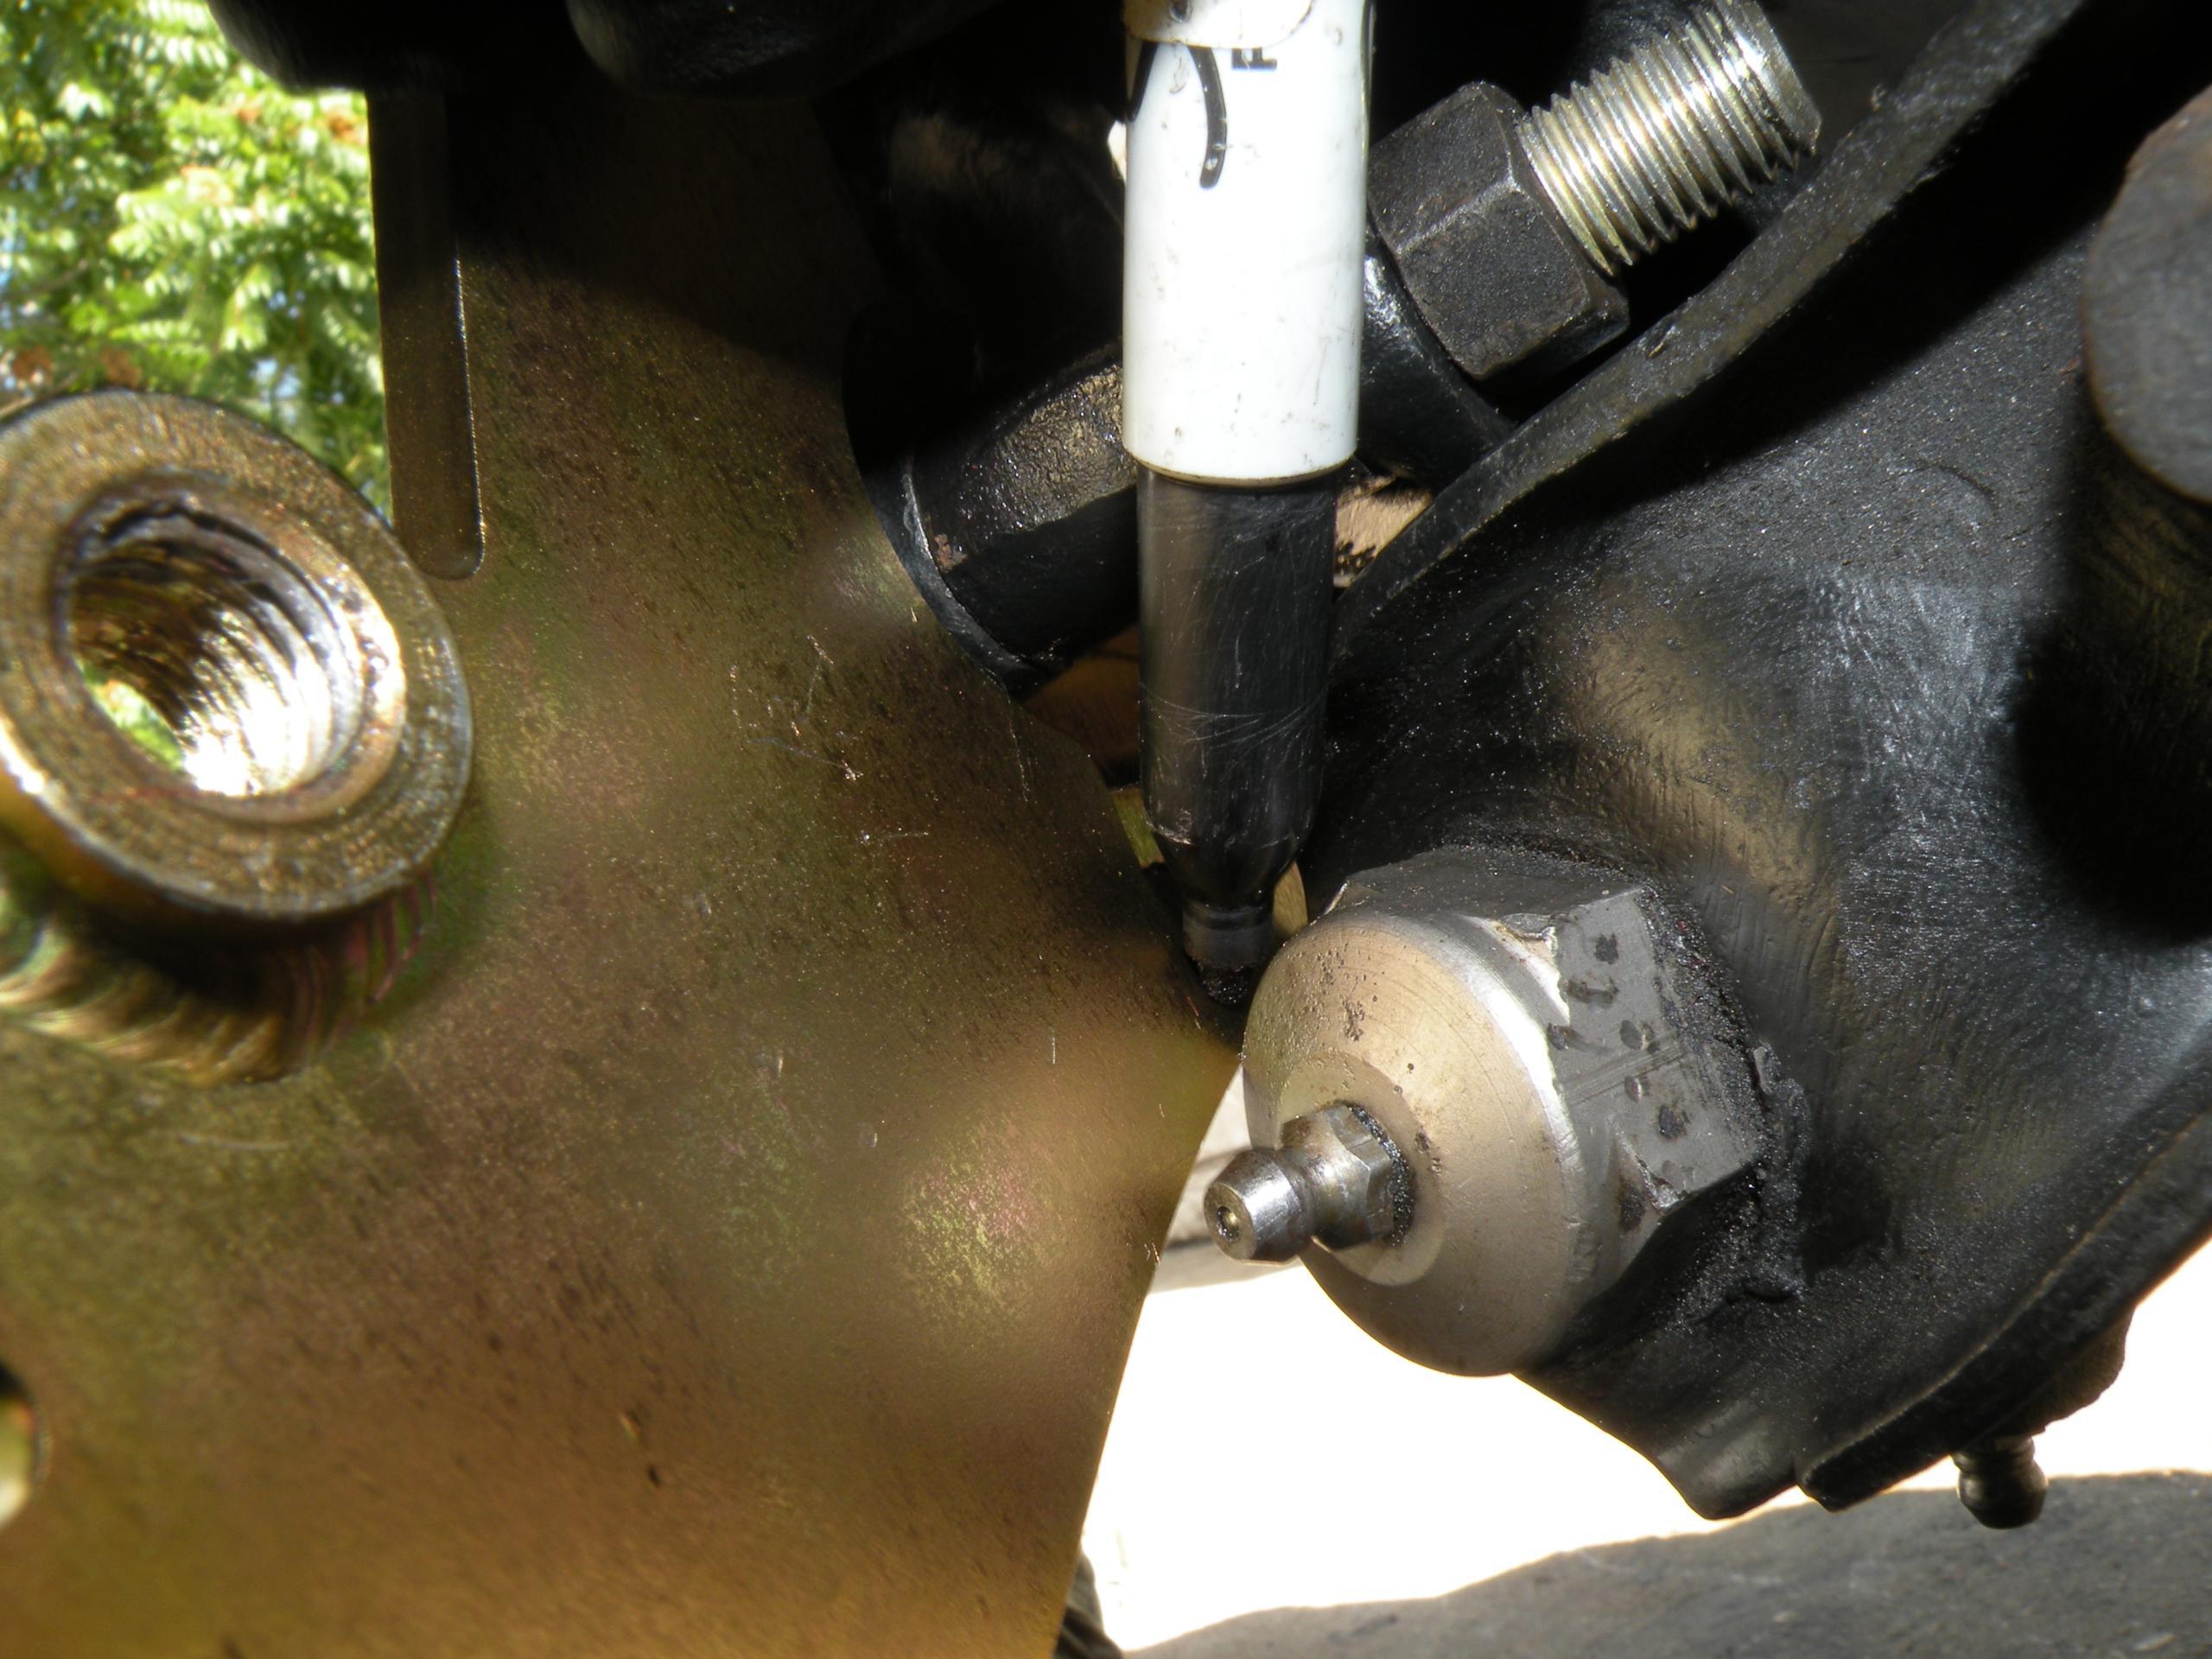
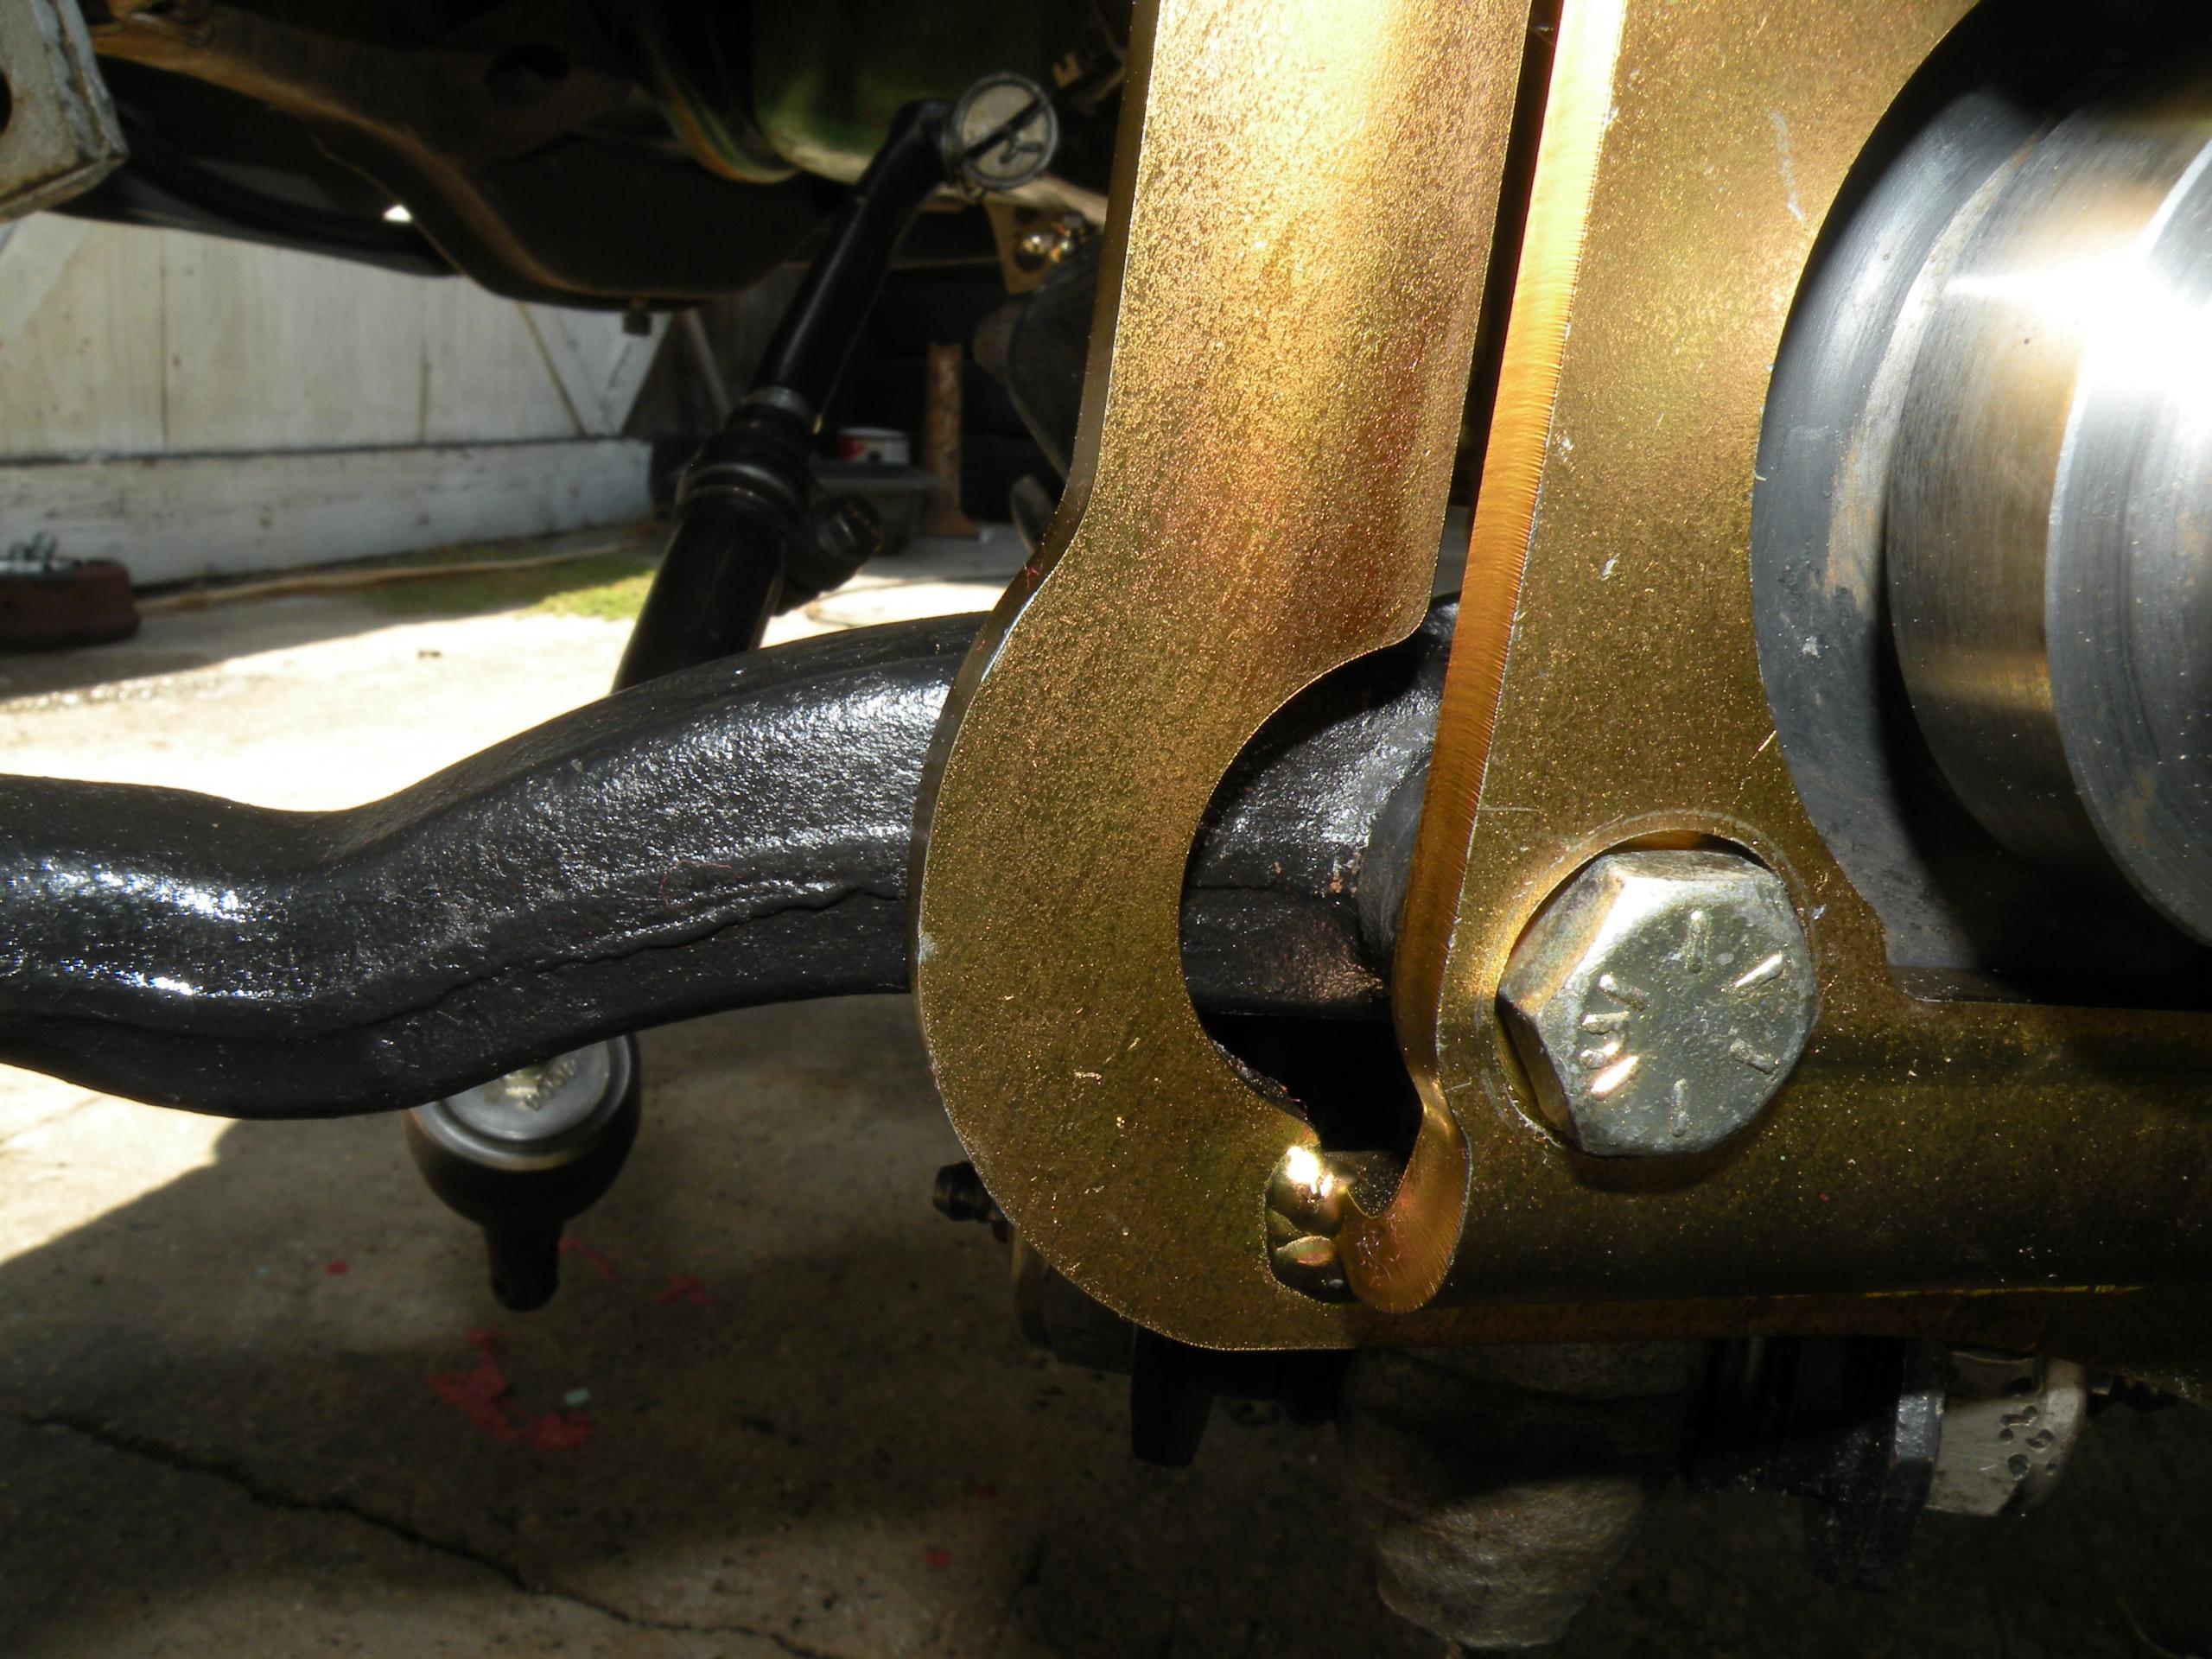
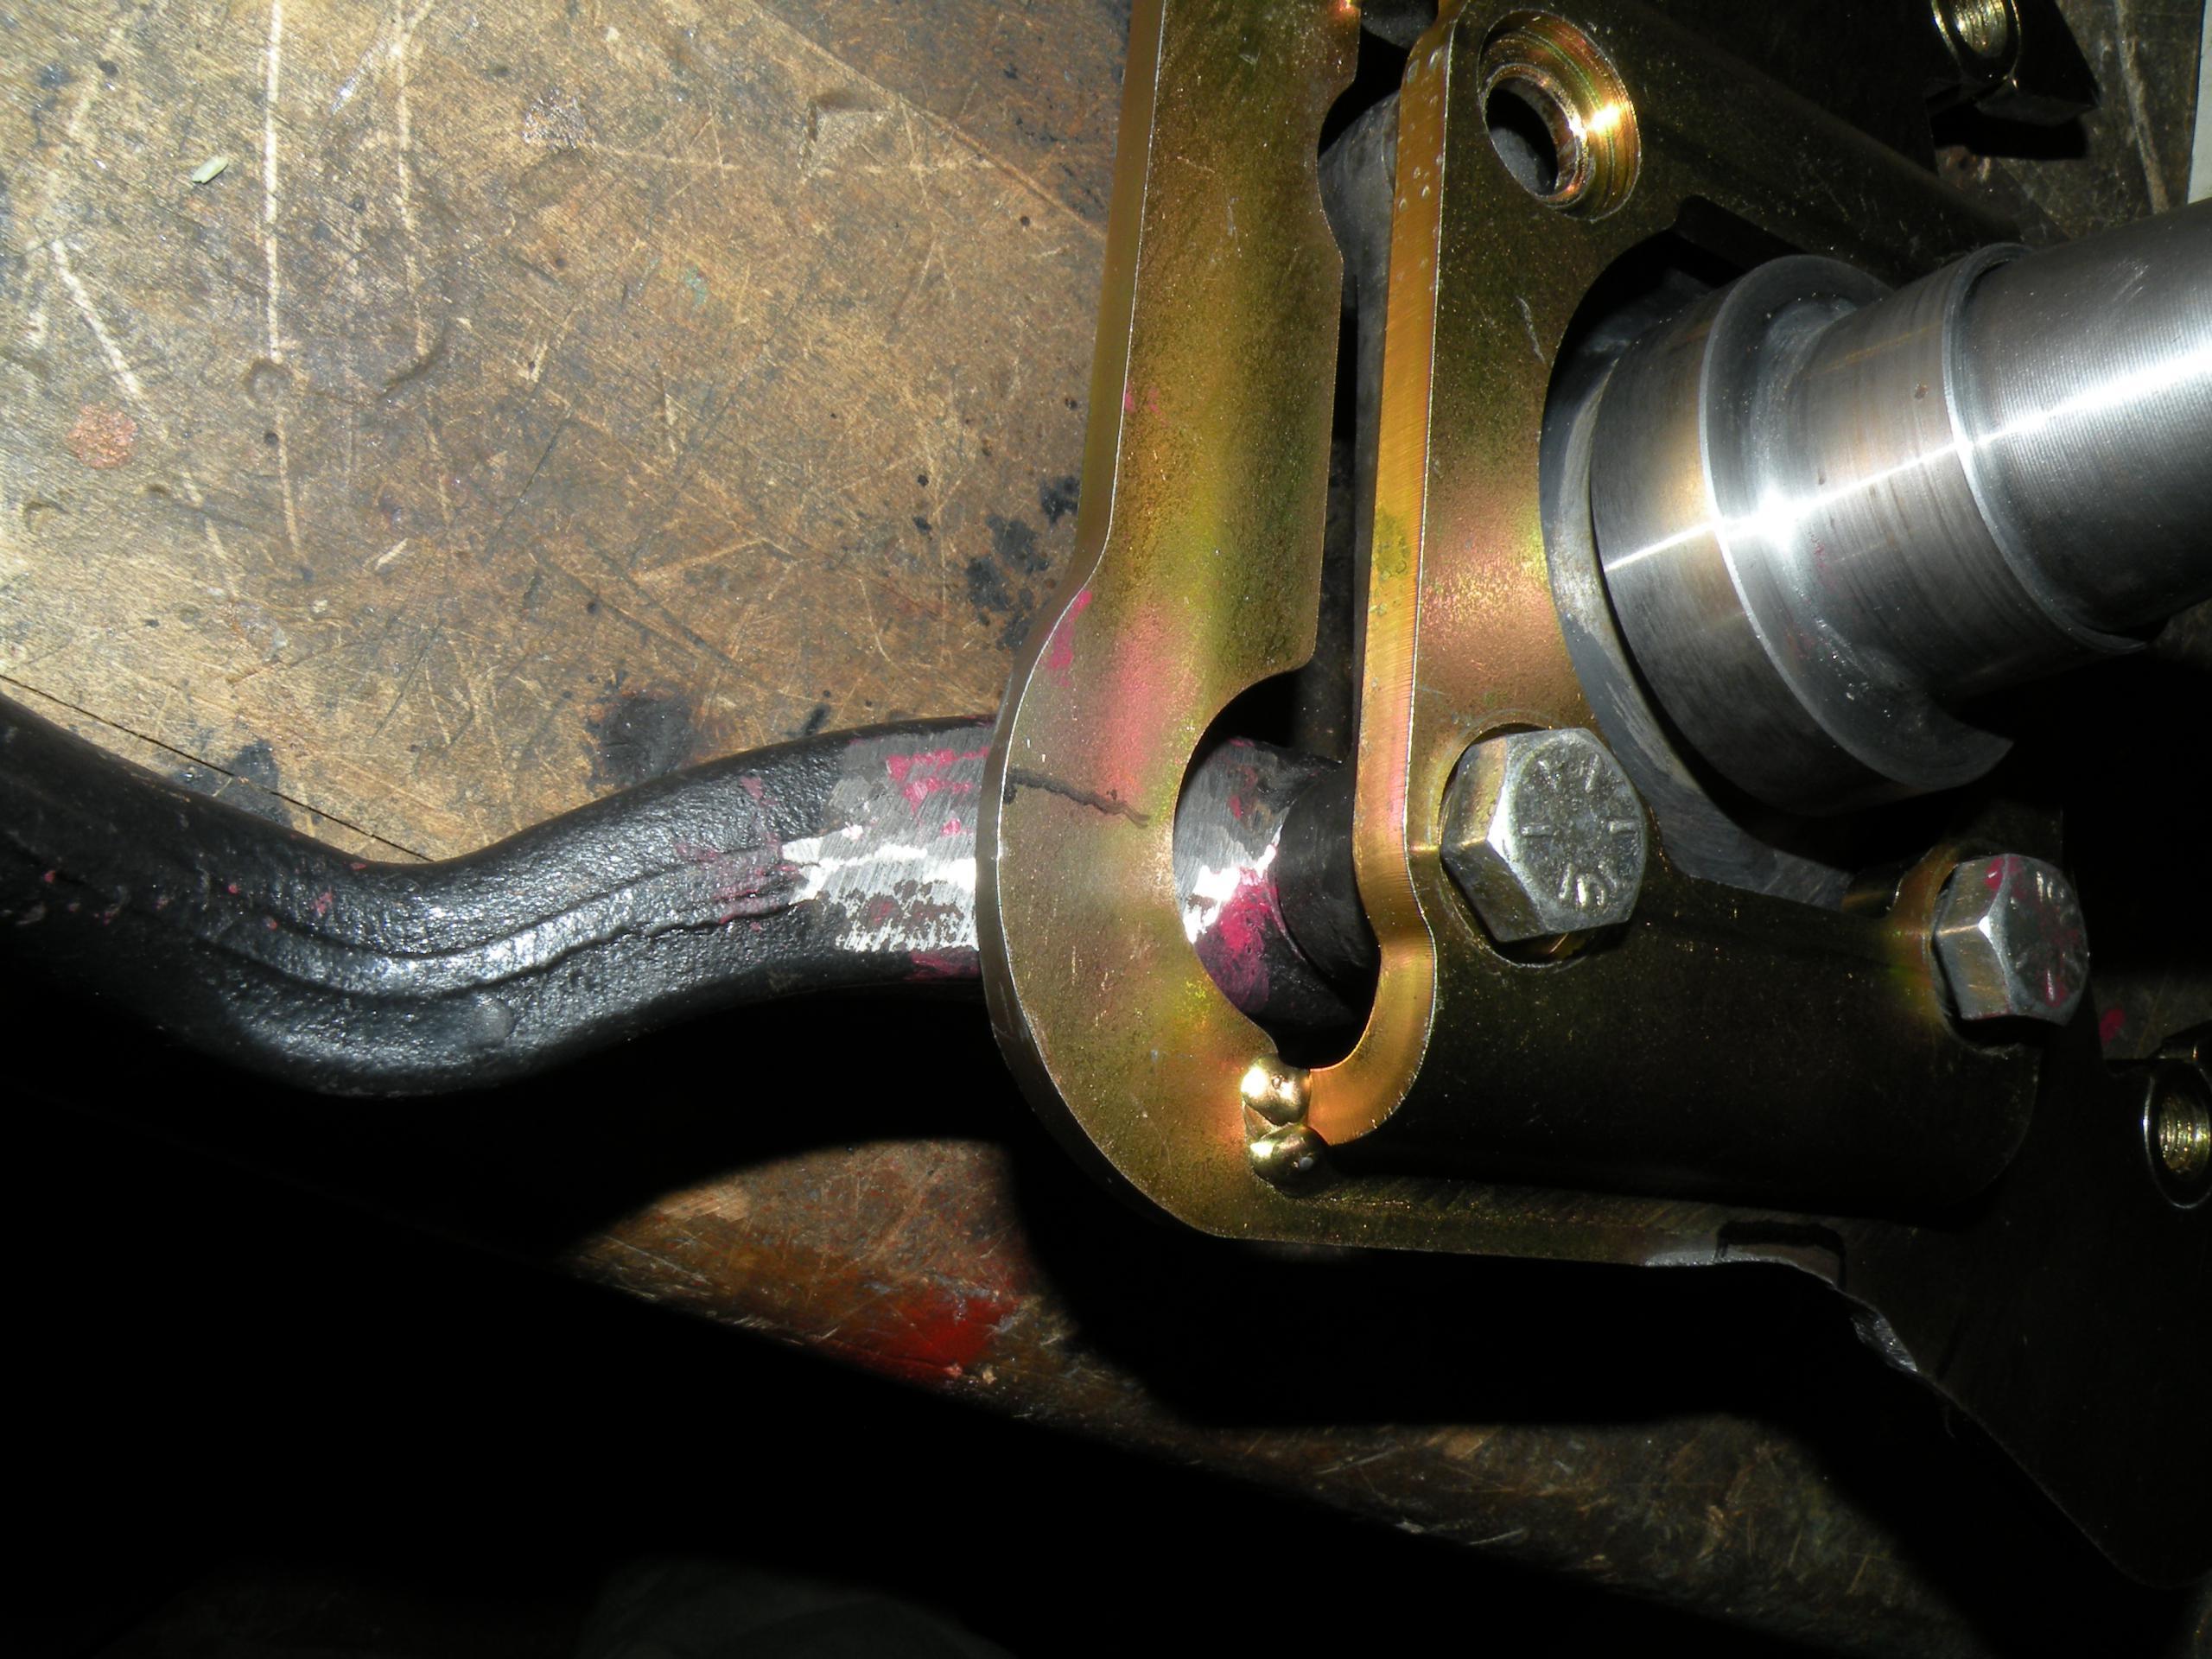
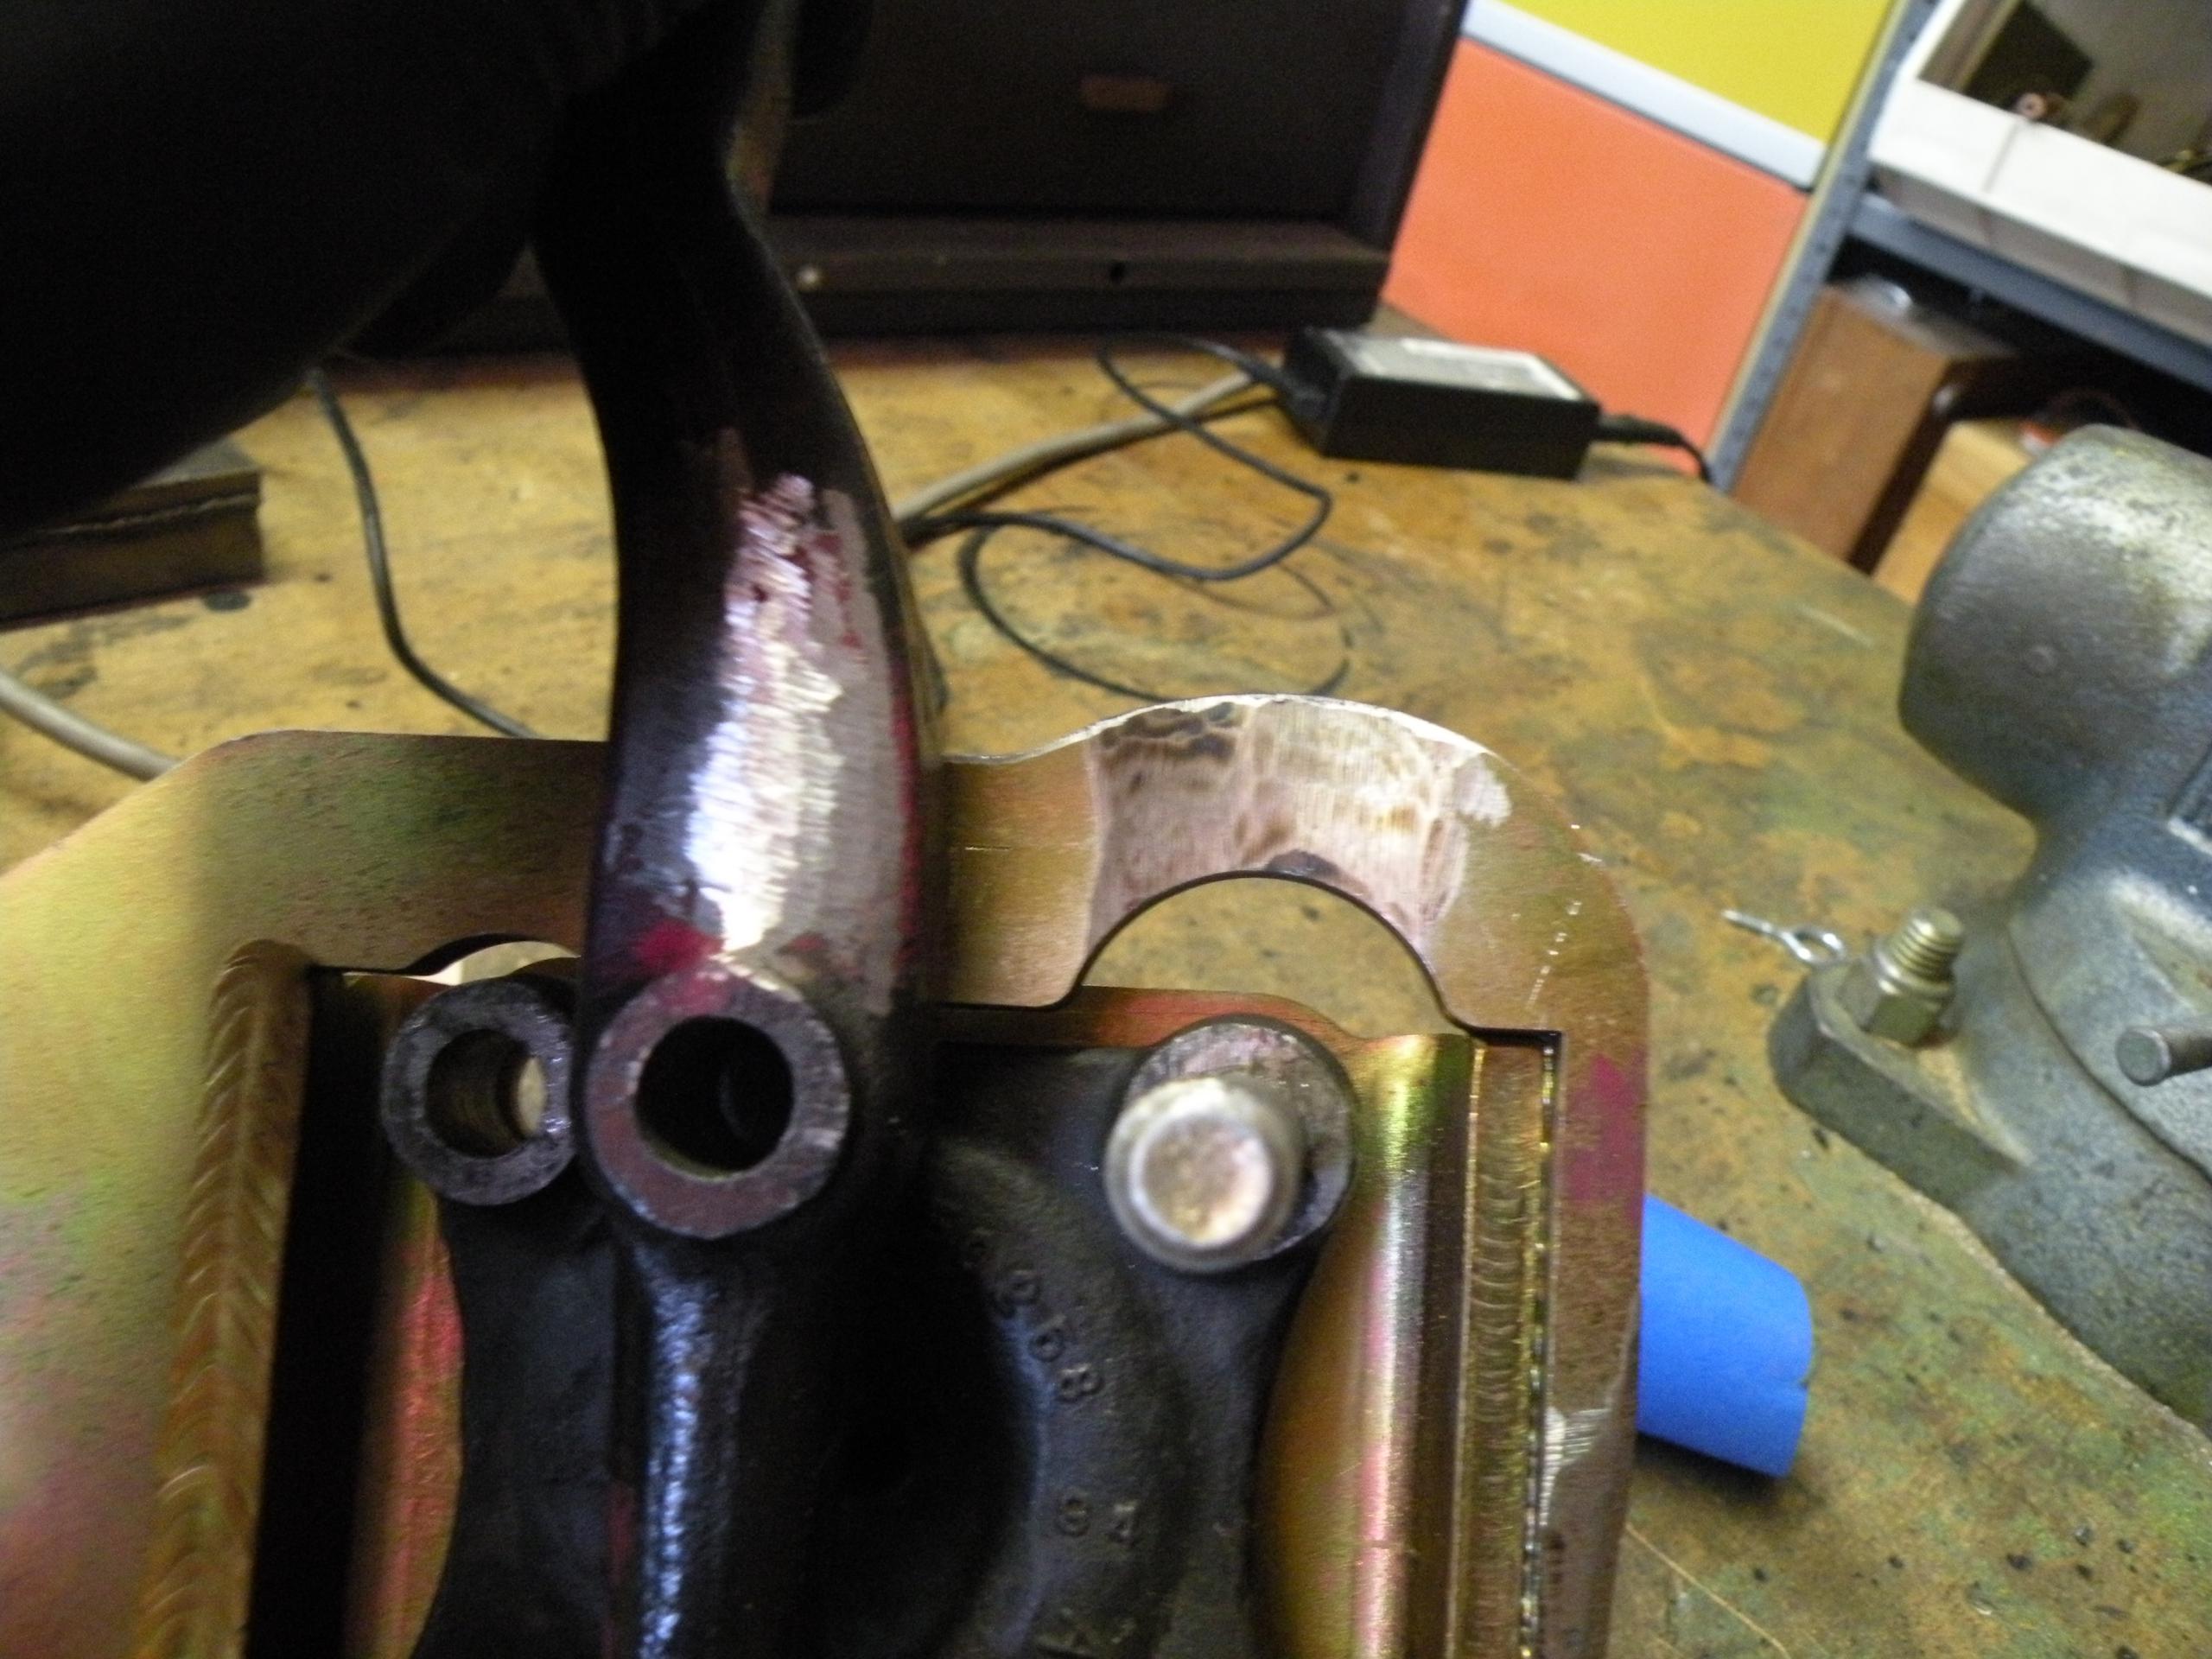
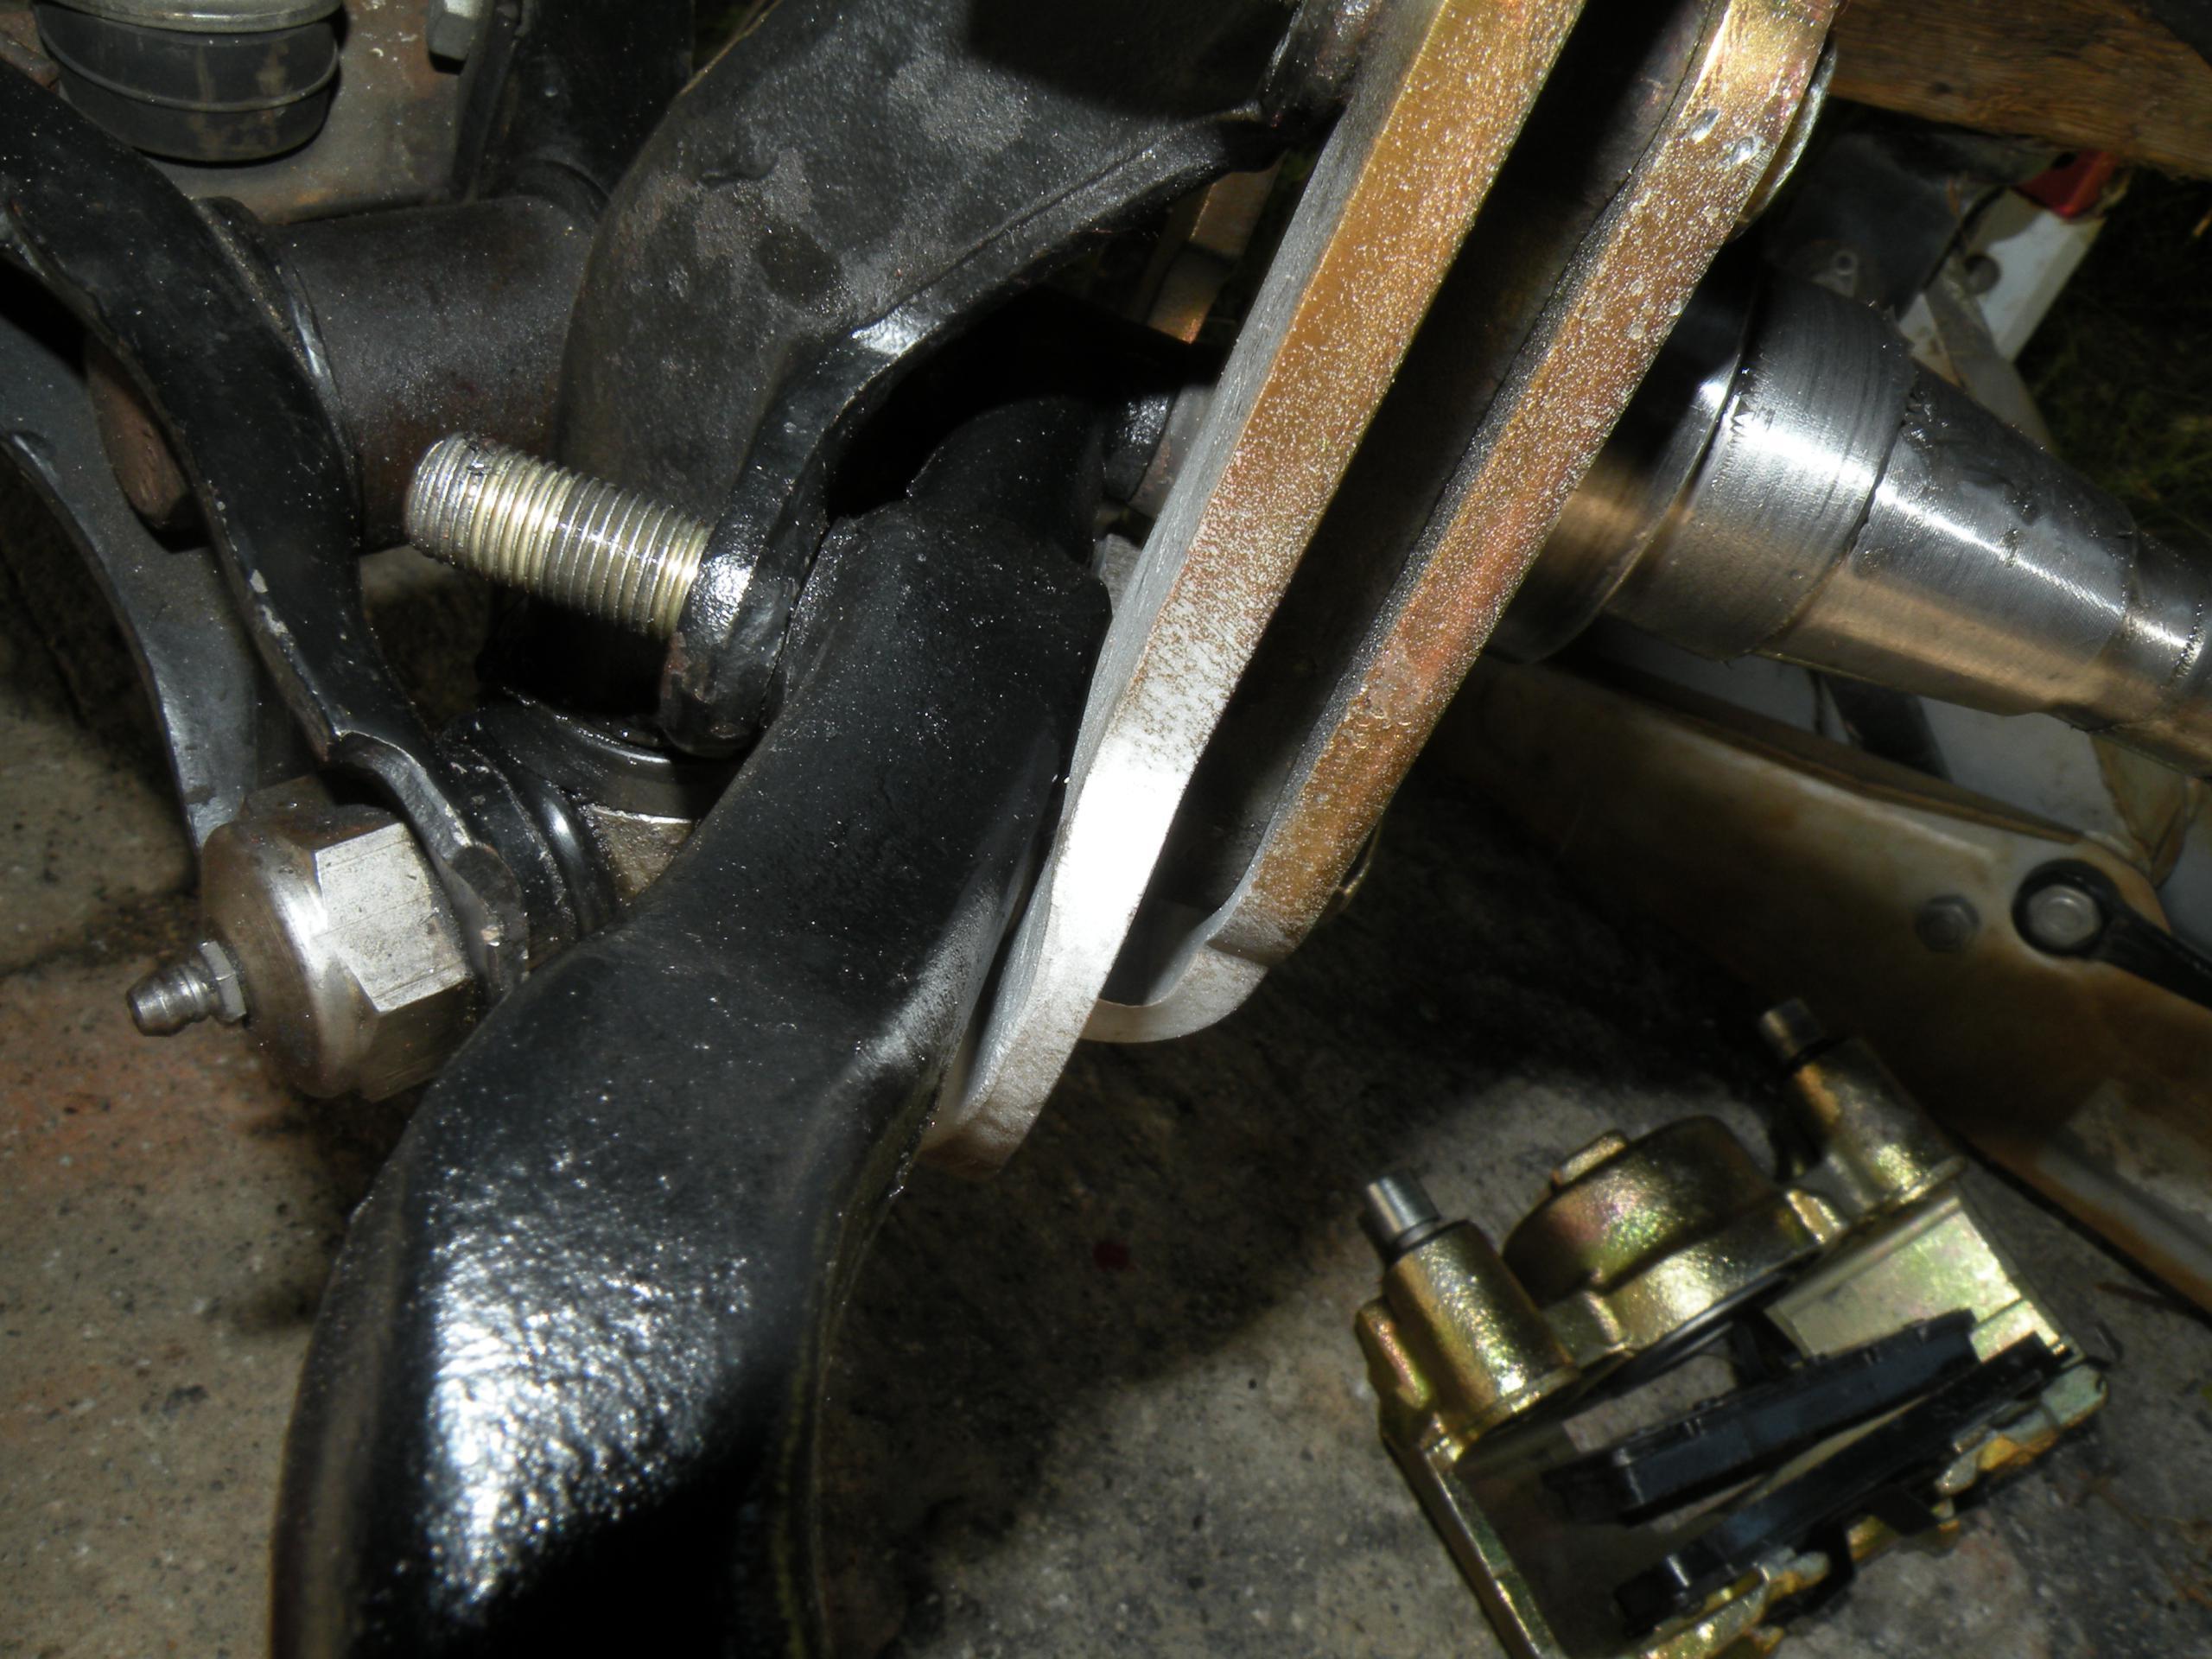
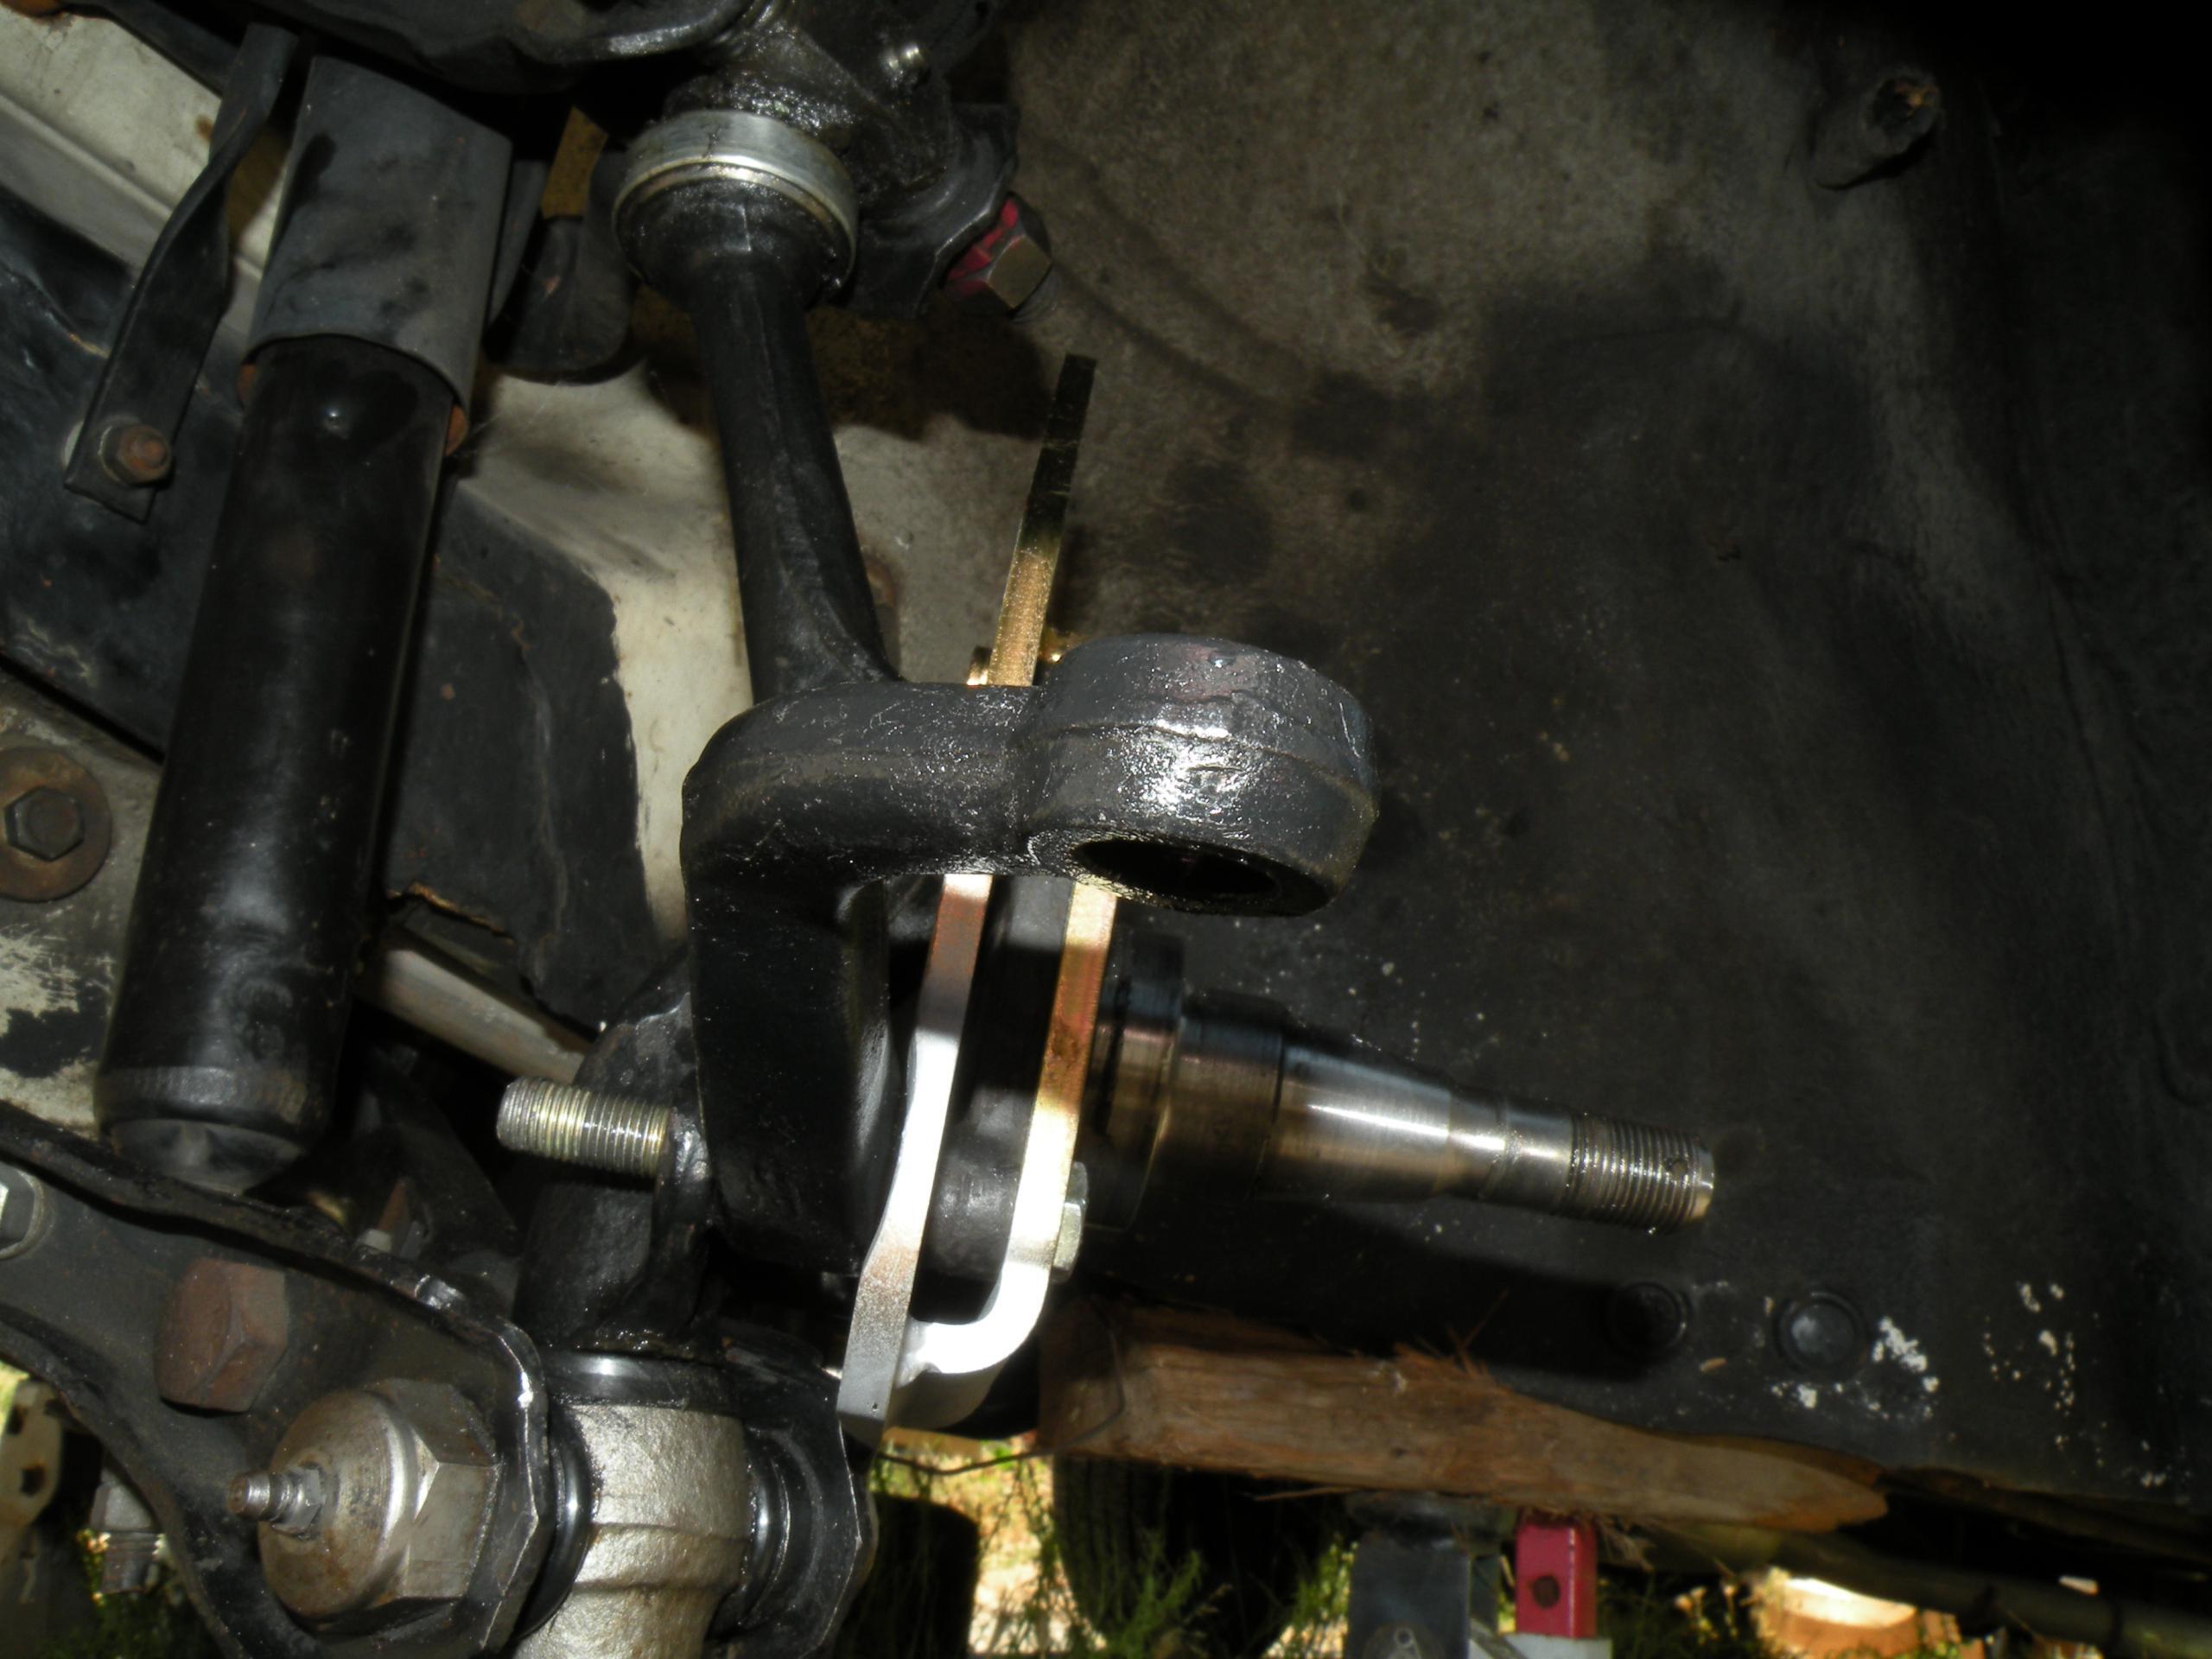
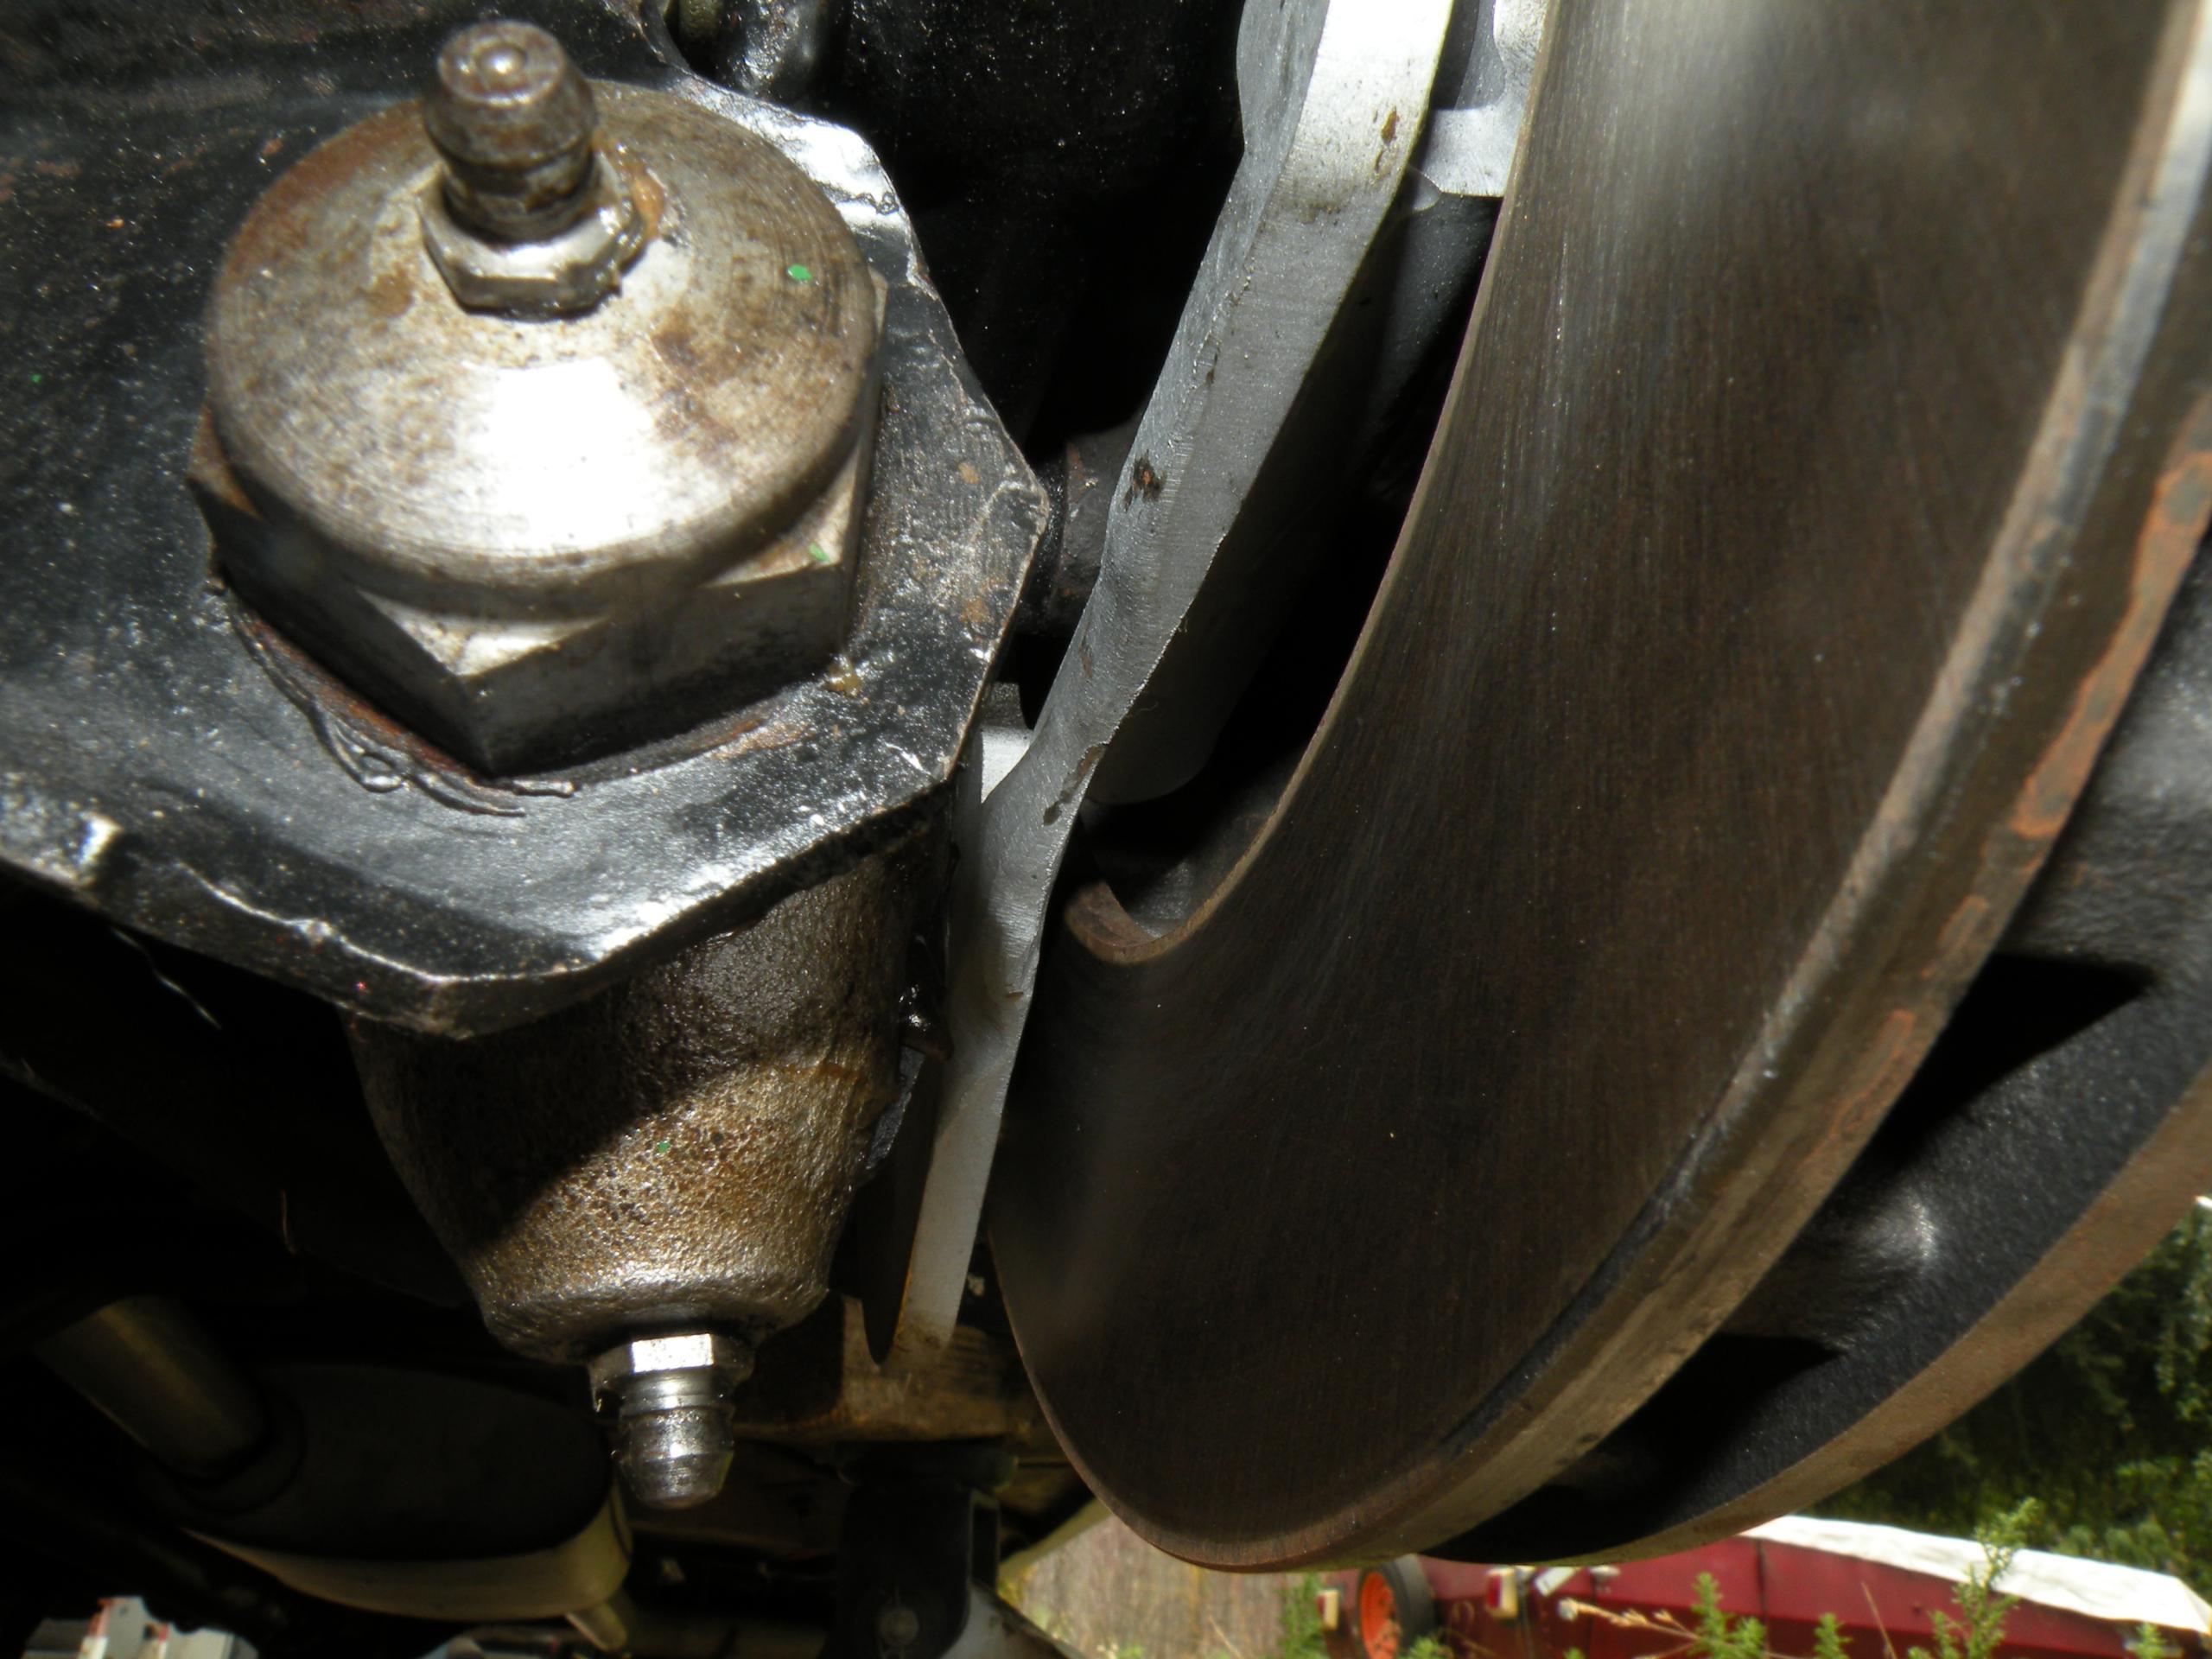
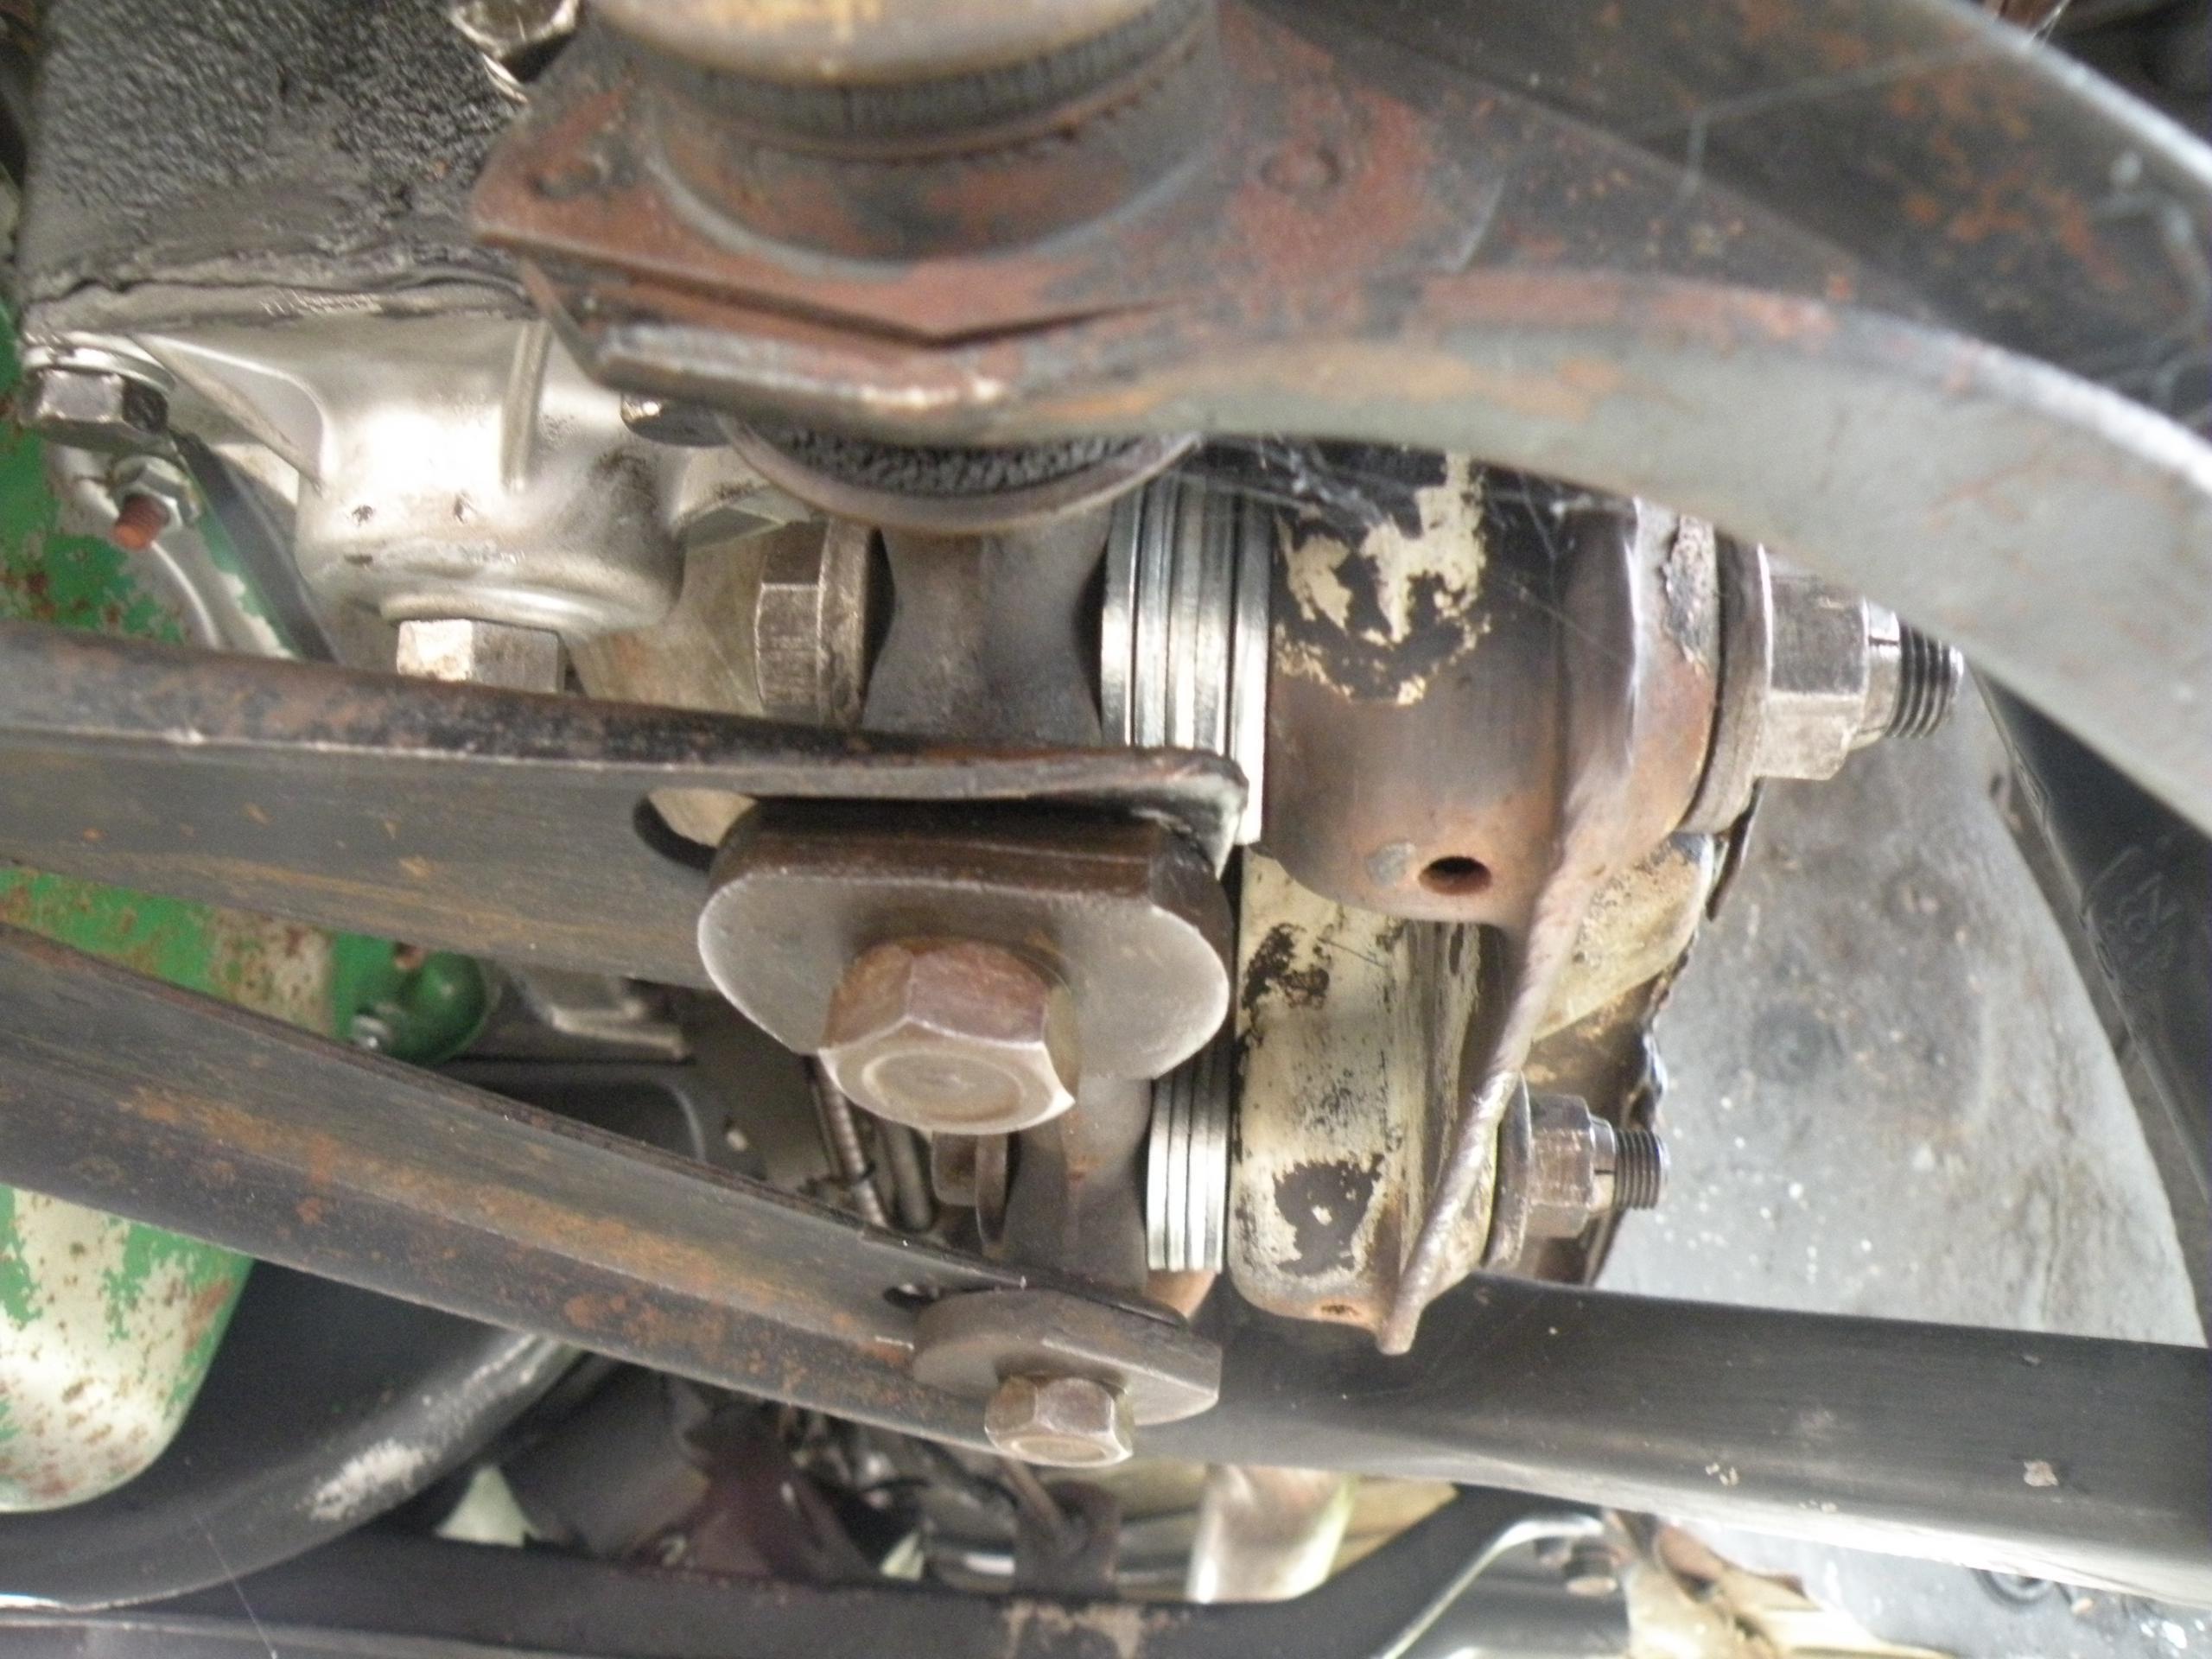
Drivers side, lower rear trunnion cap strikes bracket when wheels are turned full lock. Which side depends on how the bracket is mounted — caliper to front or back. As lower photo shows everything clears with wheels turned straight.
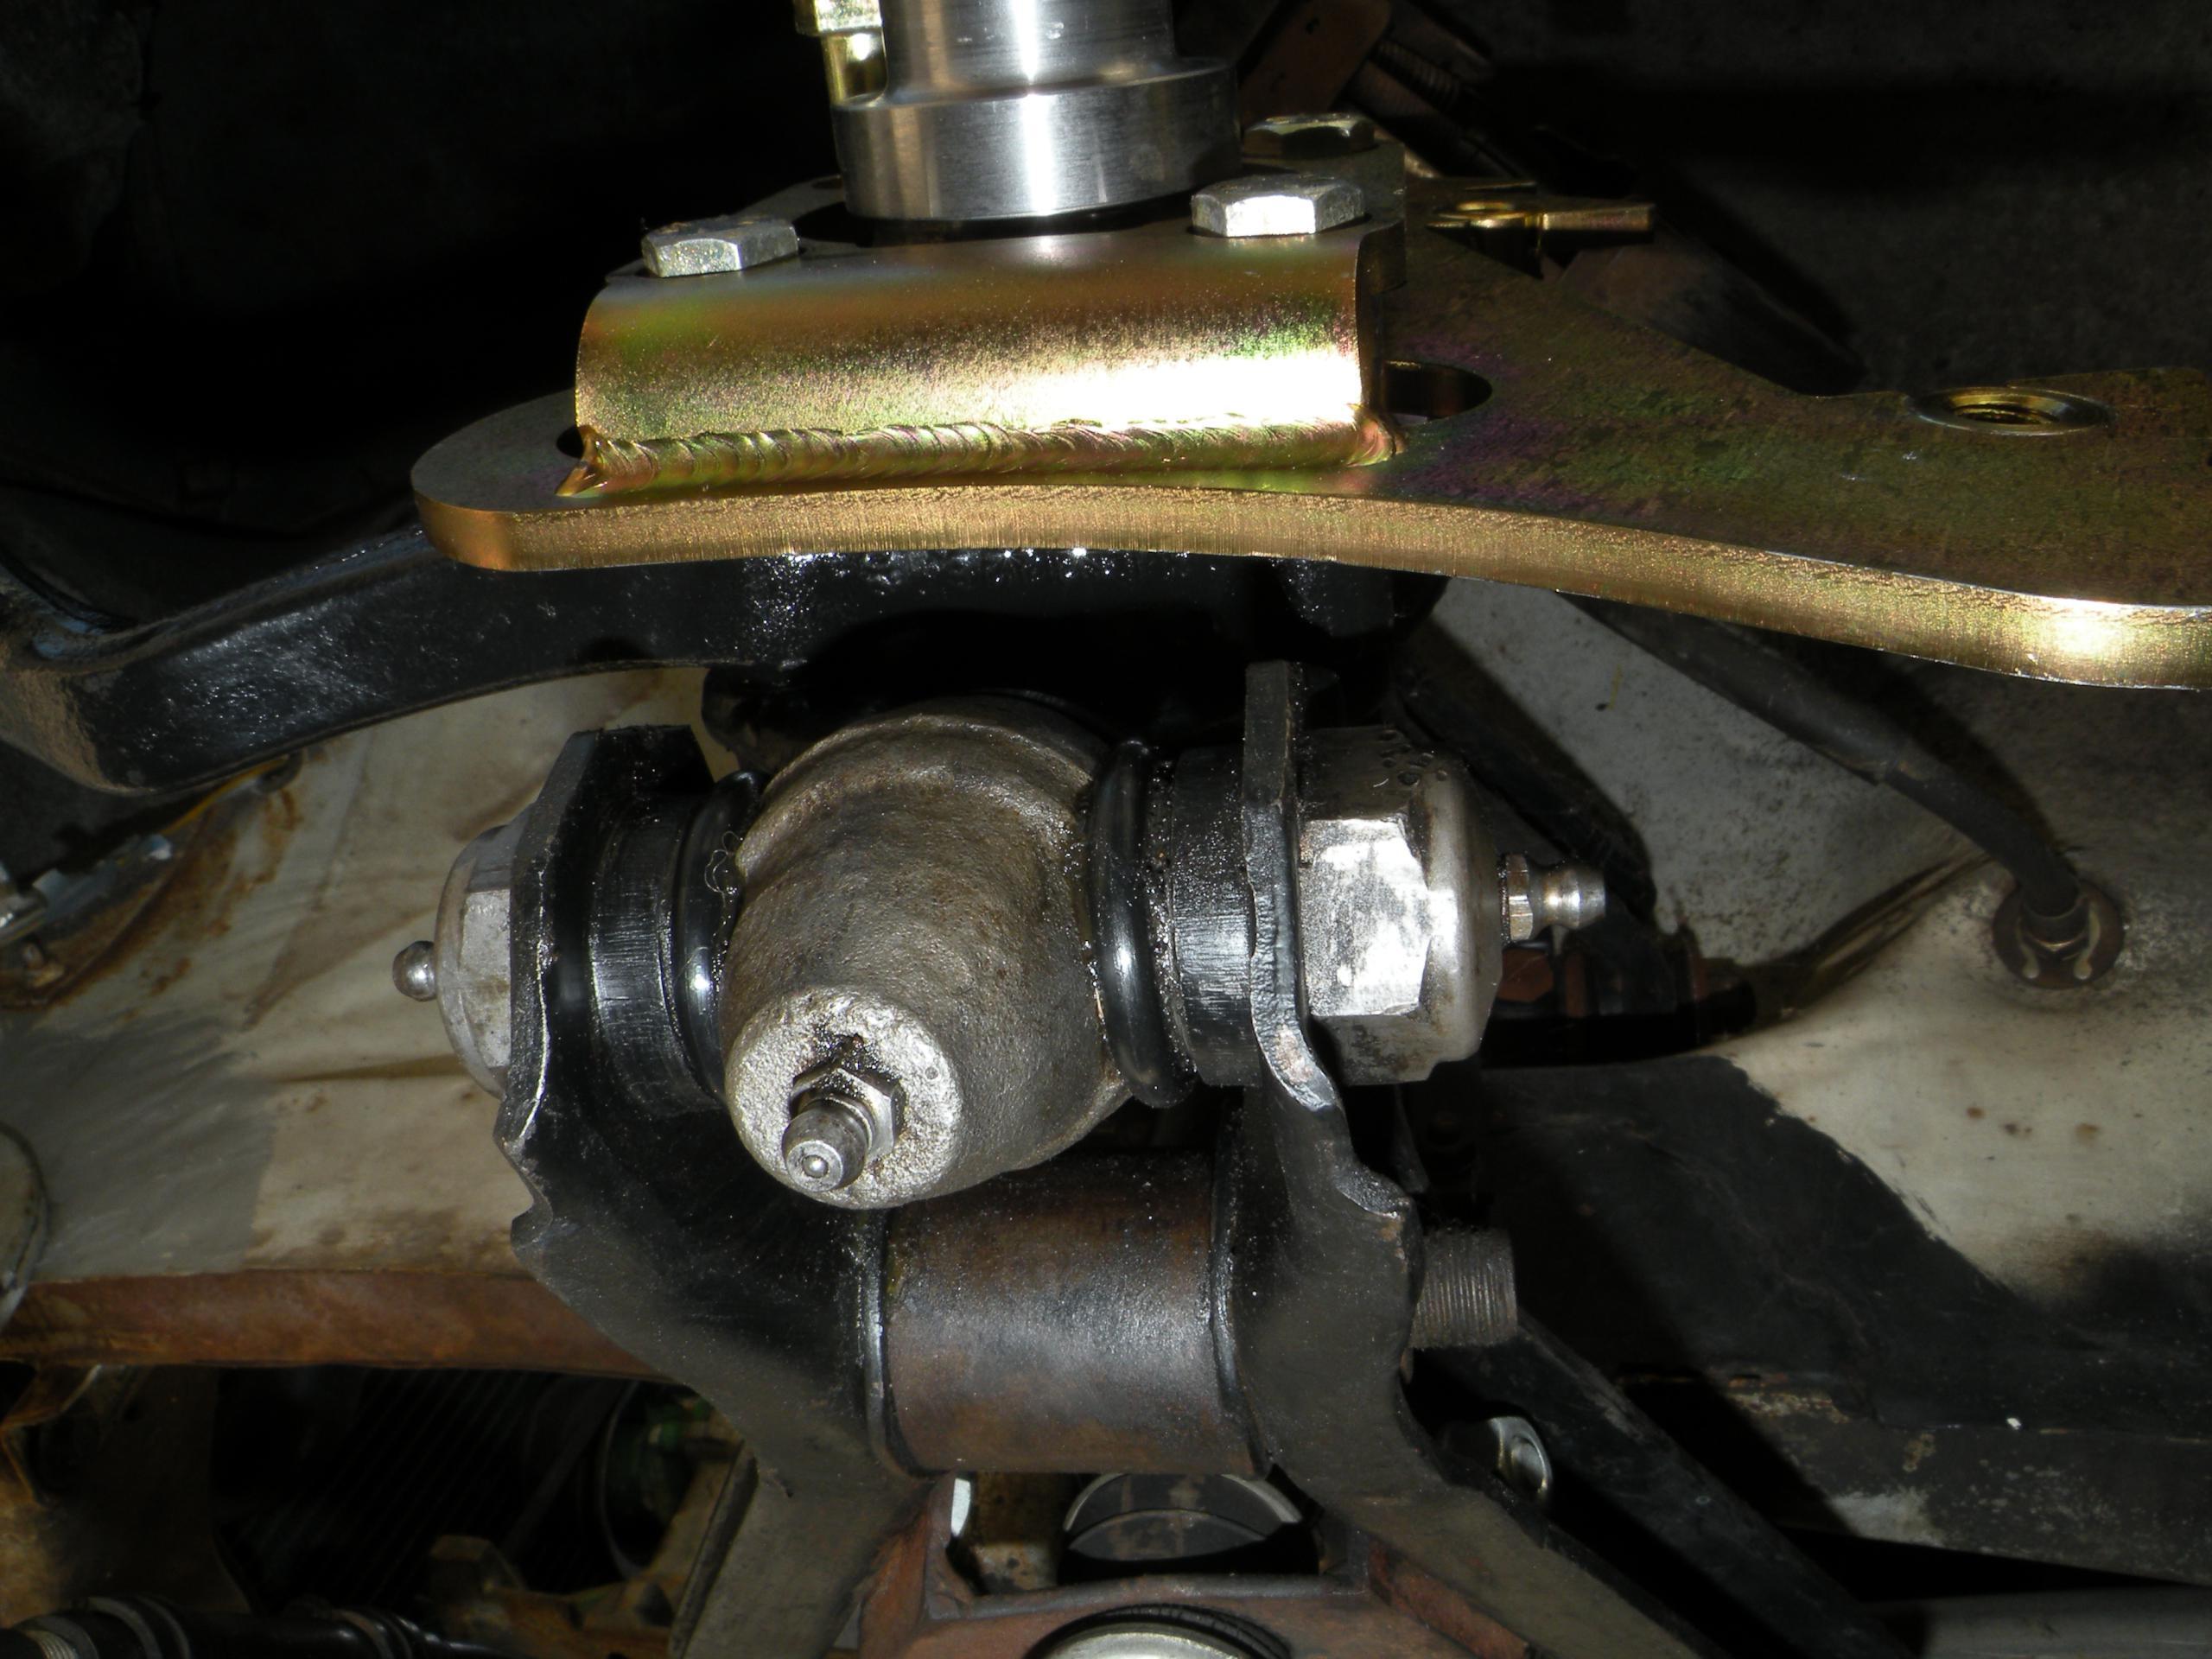
Steering arm hits bracket. This isn’t an issue with the new style flat brackets, just the old style.

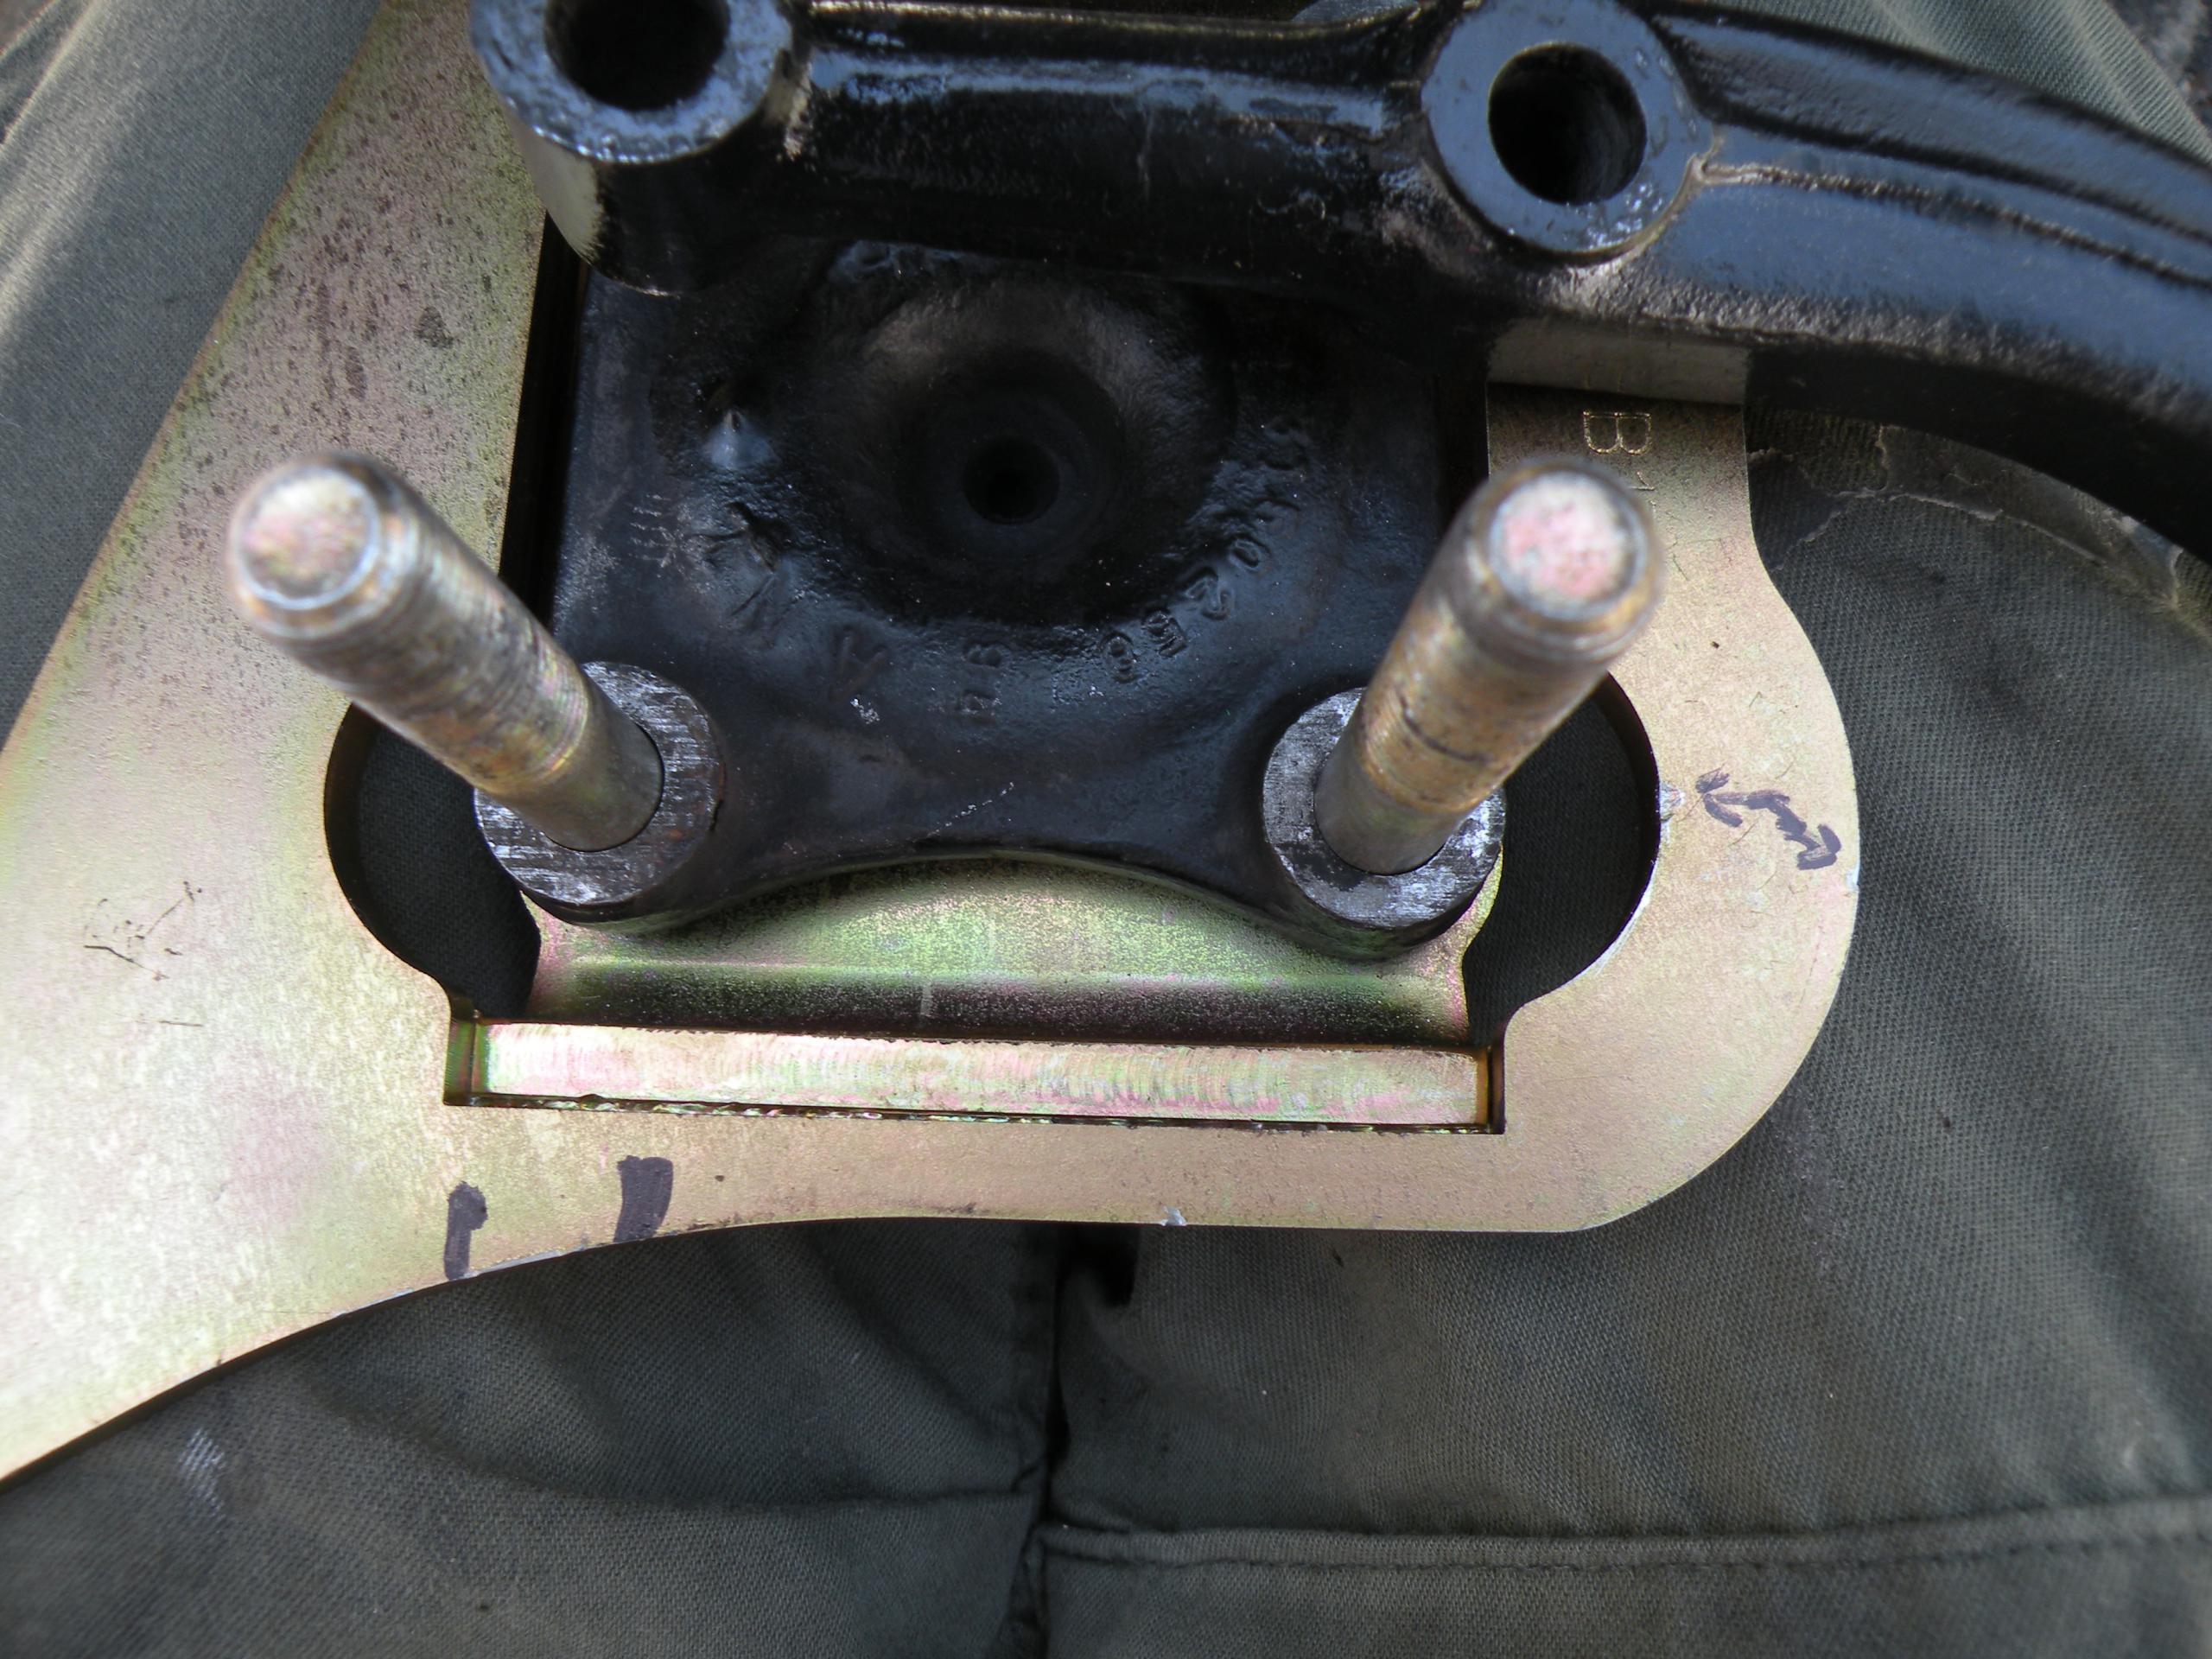

Here’s the bracket after grinding and before painting and install.
The brackets and calipers are bilaterally symmetrical, meaning there’s a left and a right, but you can flip and rotate them as desired to place the caliper where you want. However in this car only one position works: rearward mounted calipers. This also happens to put the caliper bleeder at exactly the tipity-top, where air bubbles collect, which makes for easy bleeding. Other AMCs allow front or rear mounting.
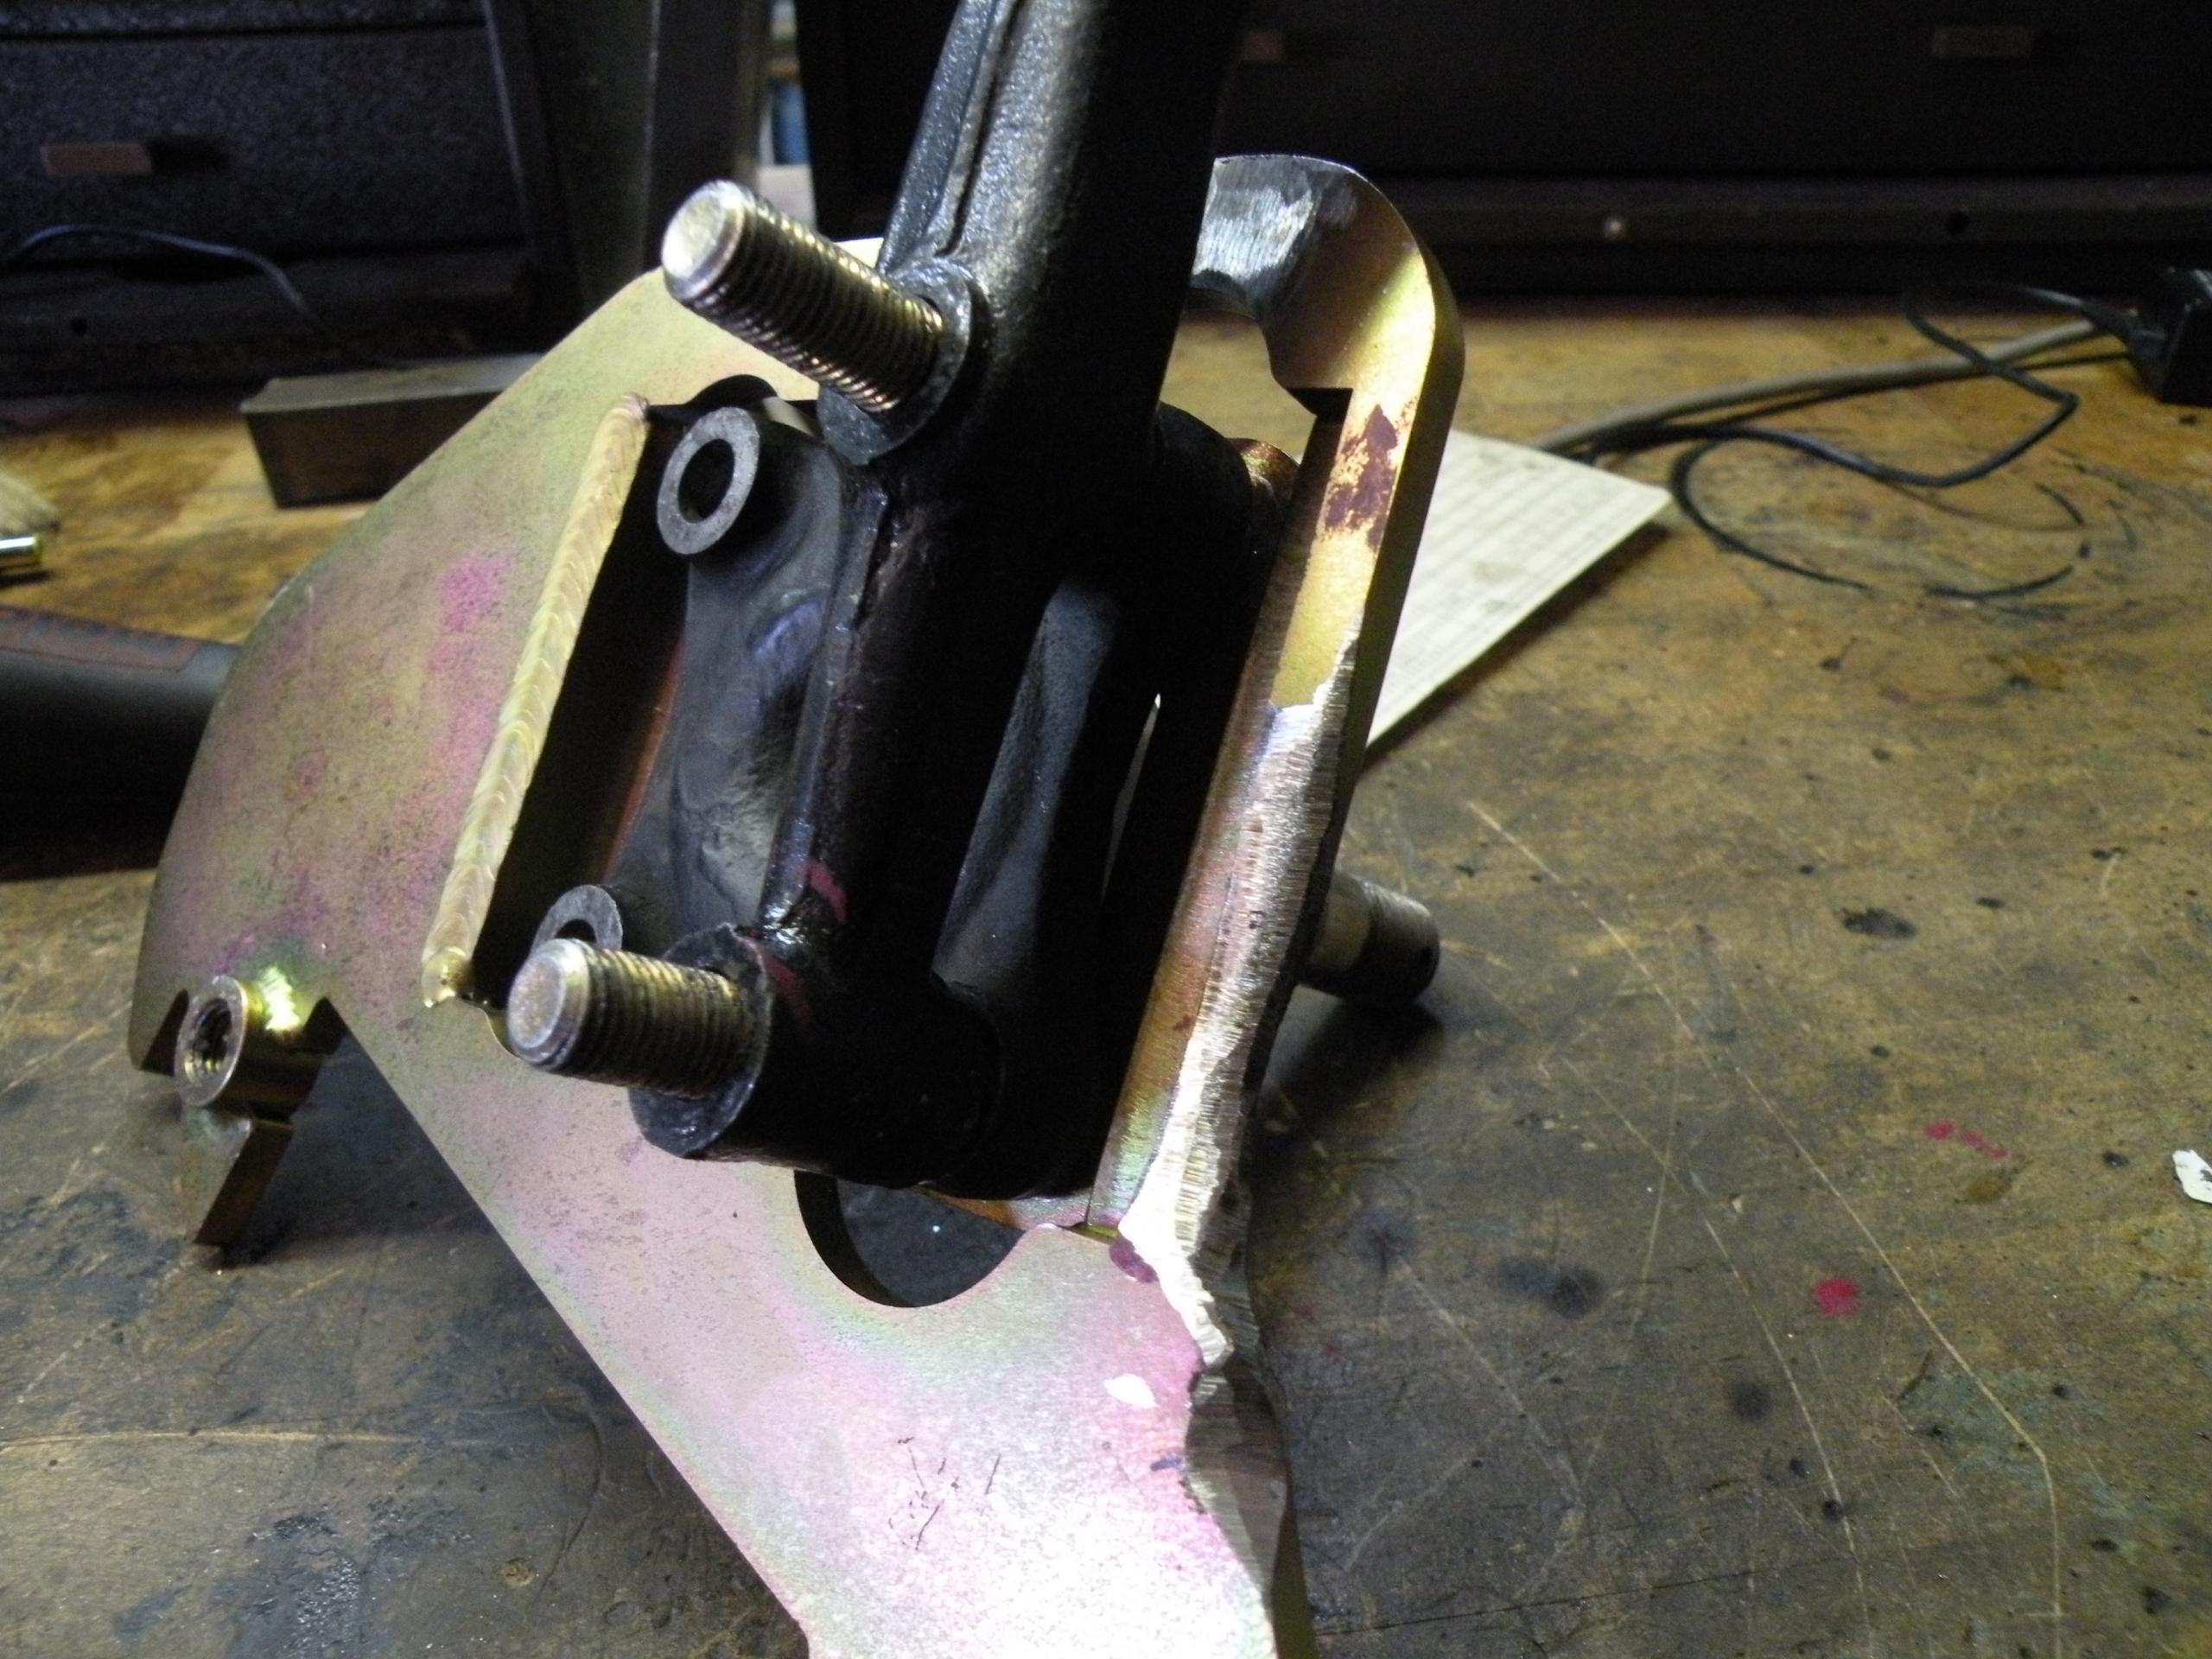
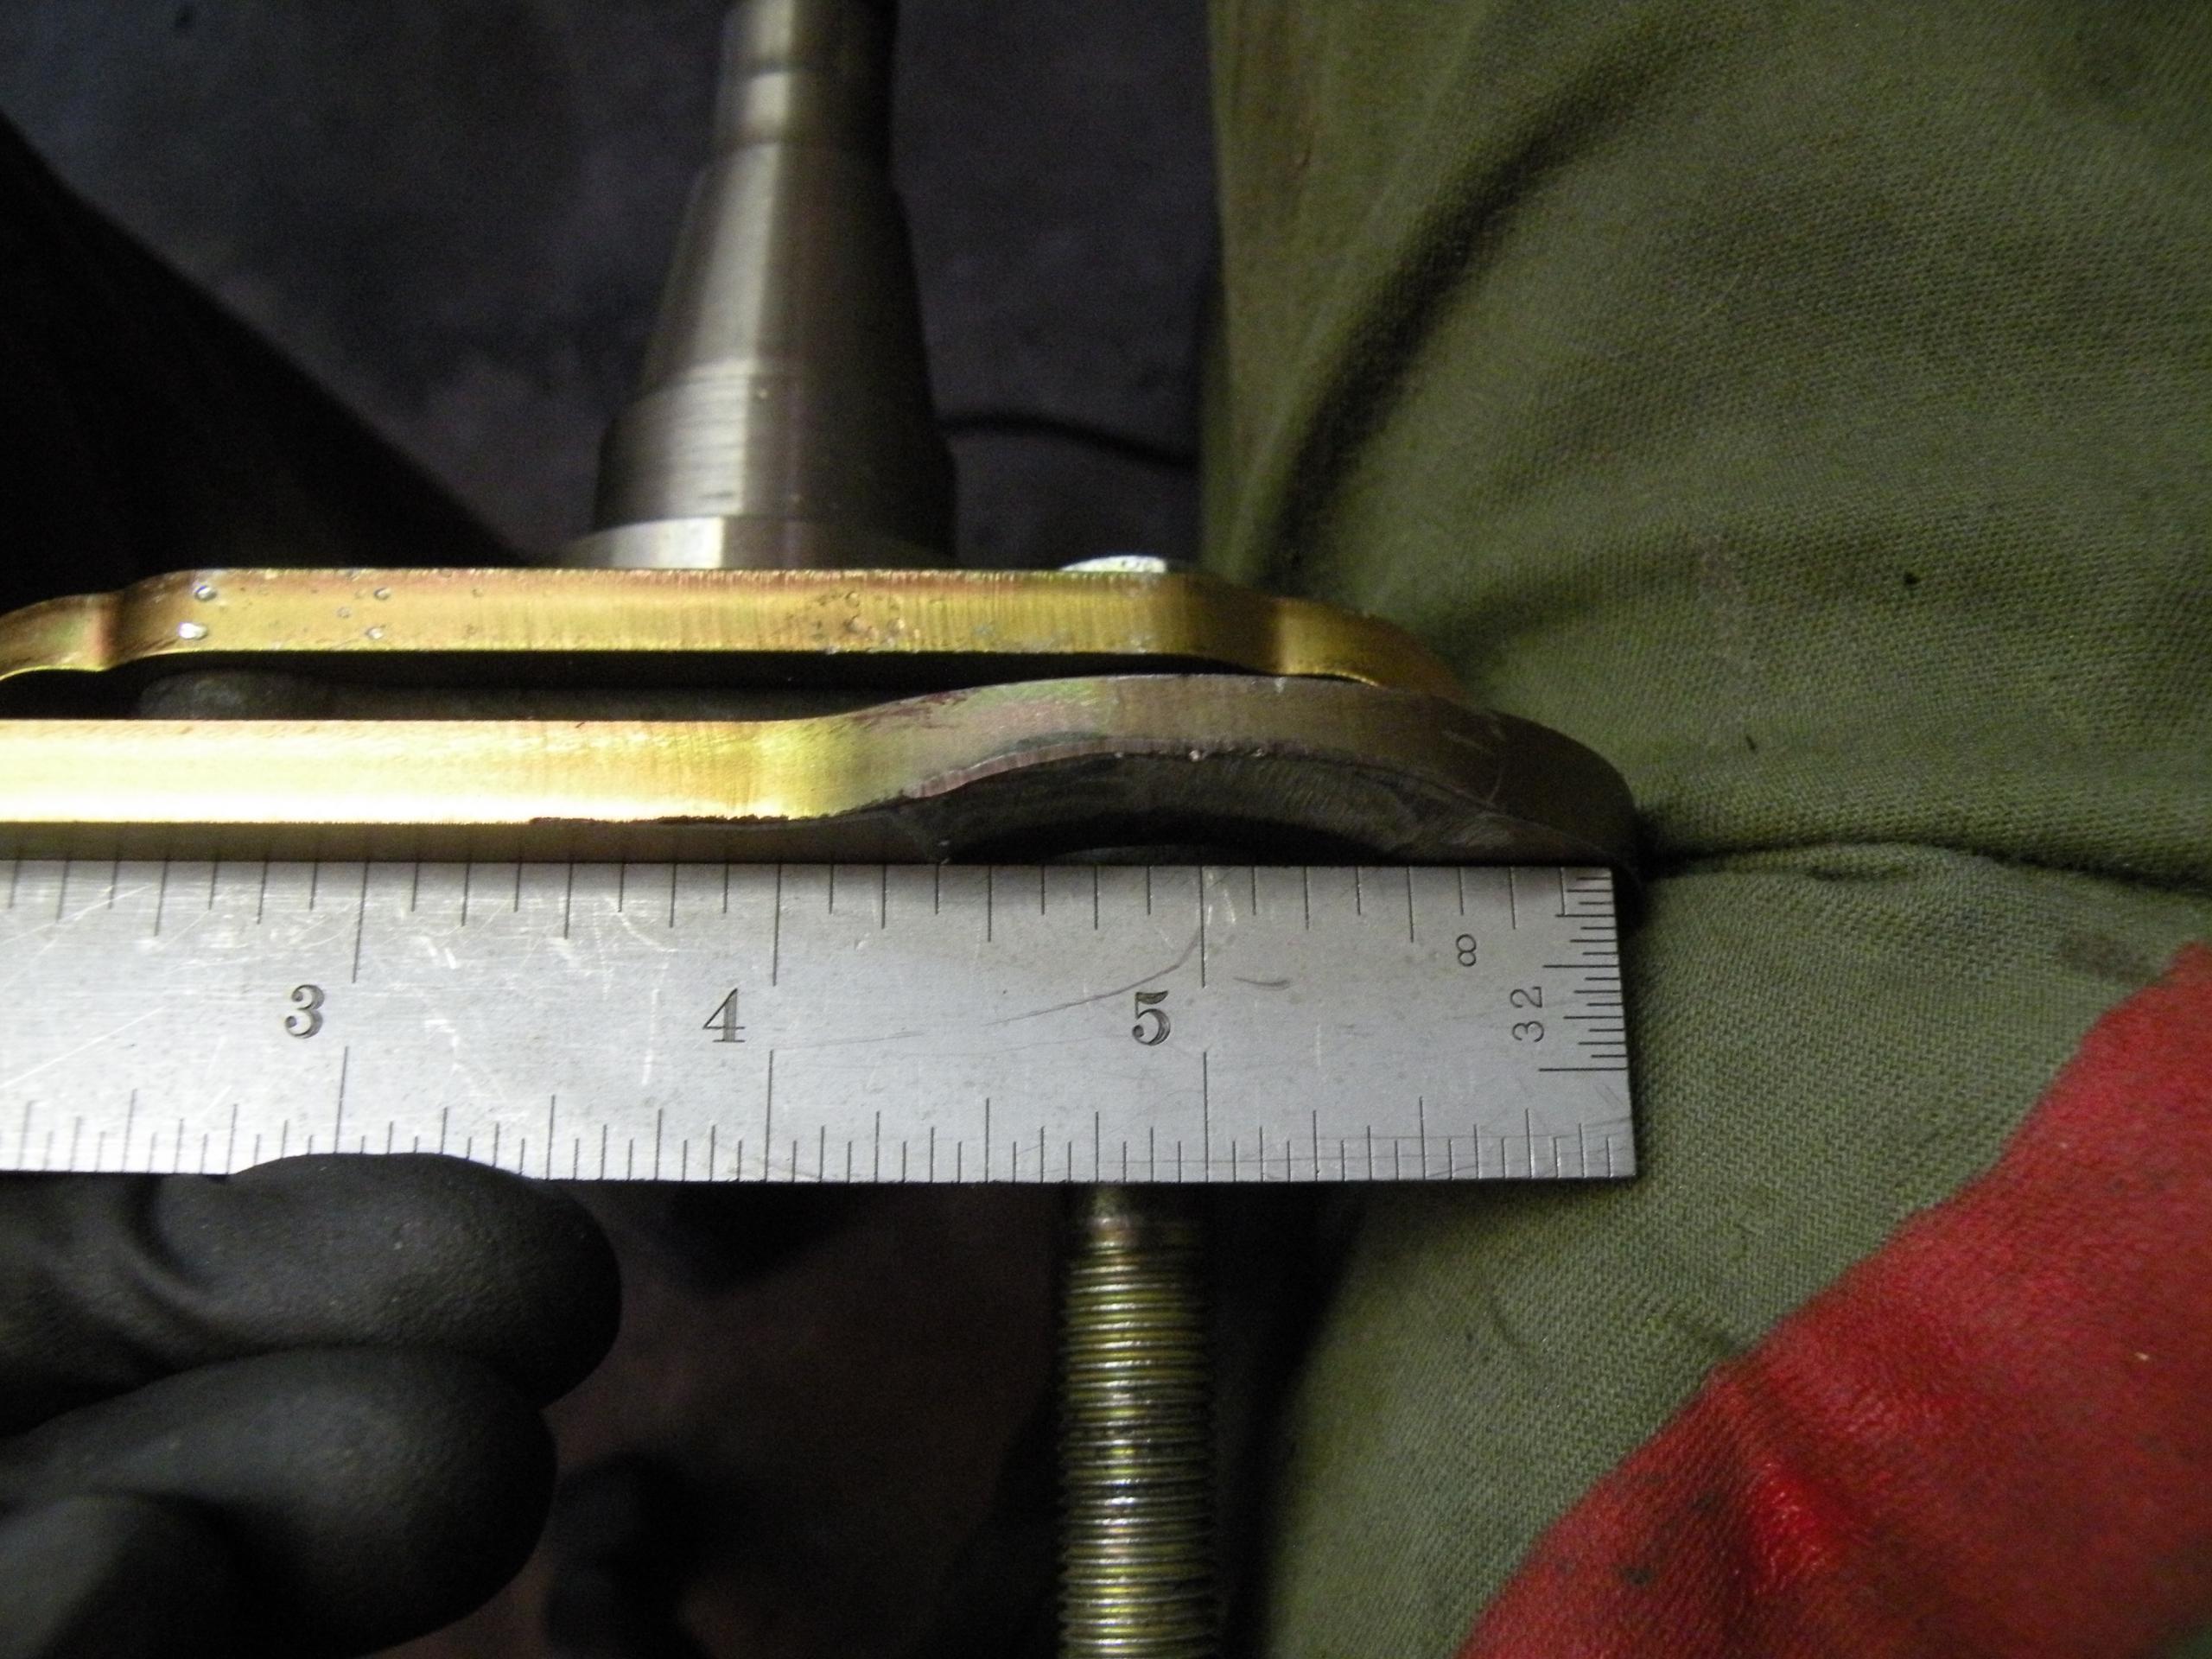
Bracket fitment after grinding.
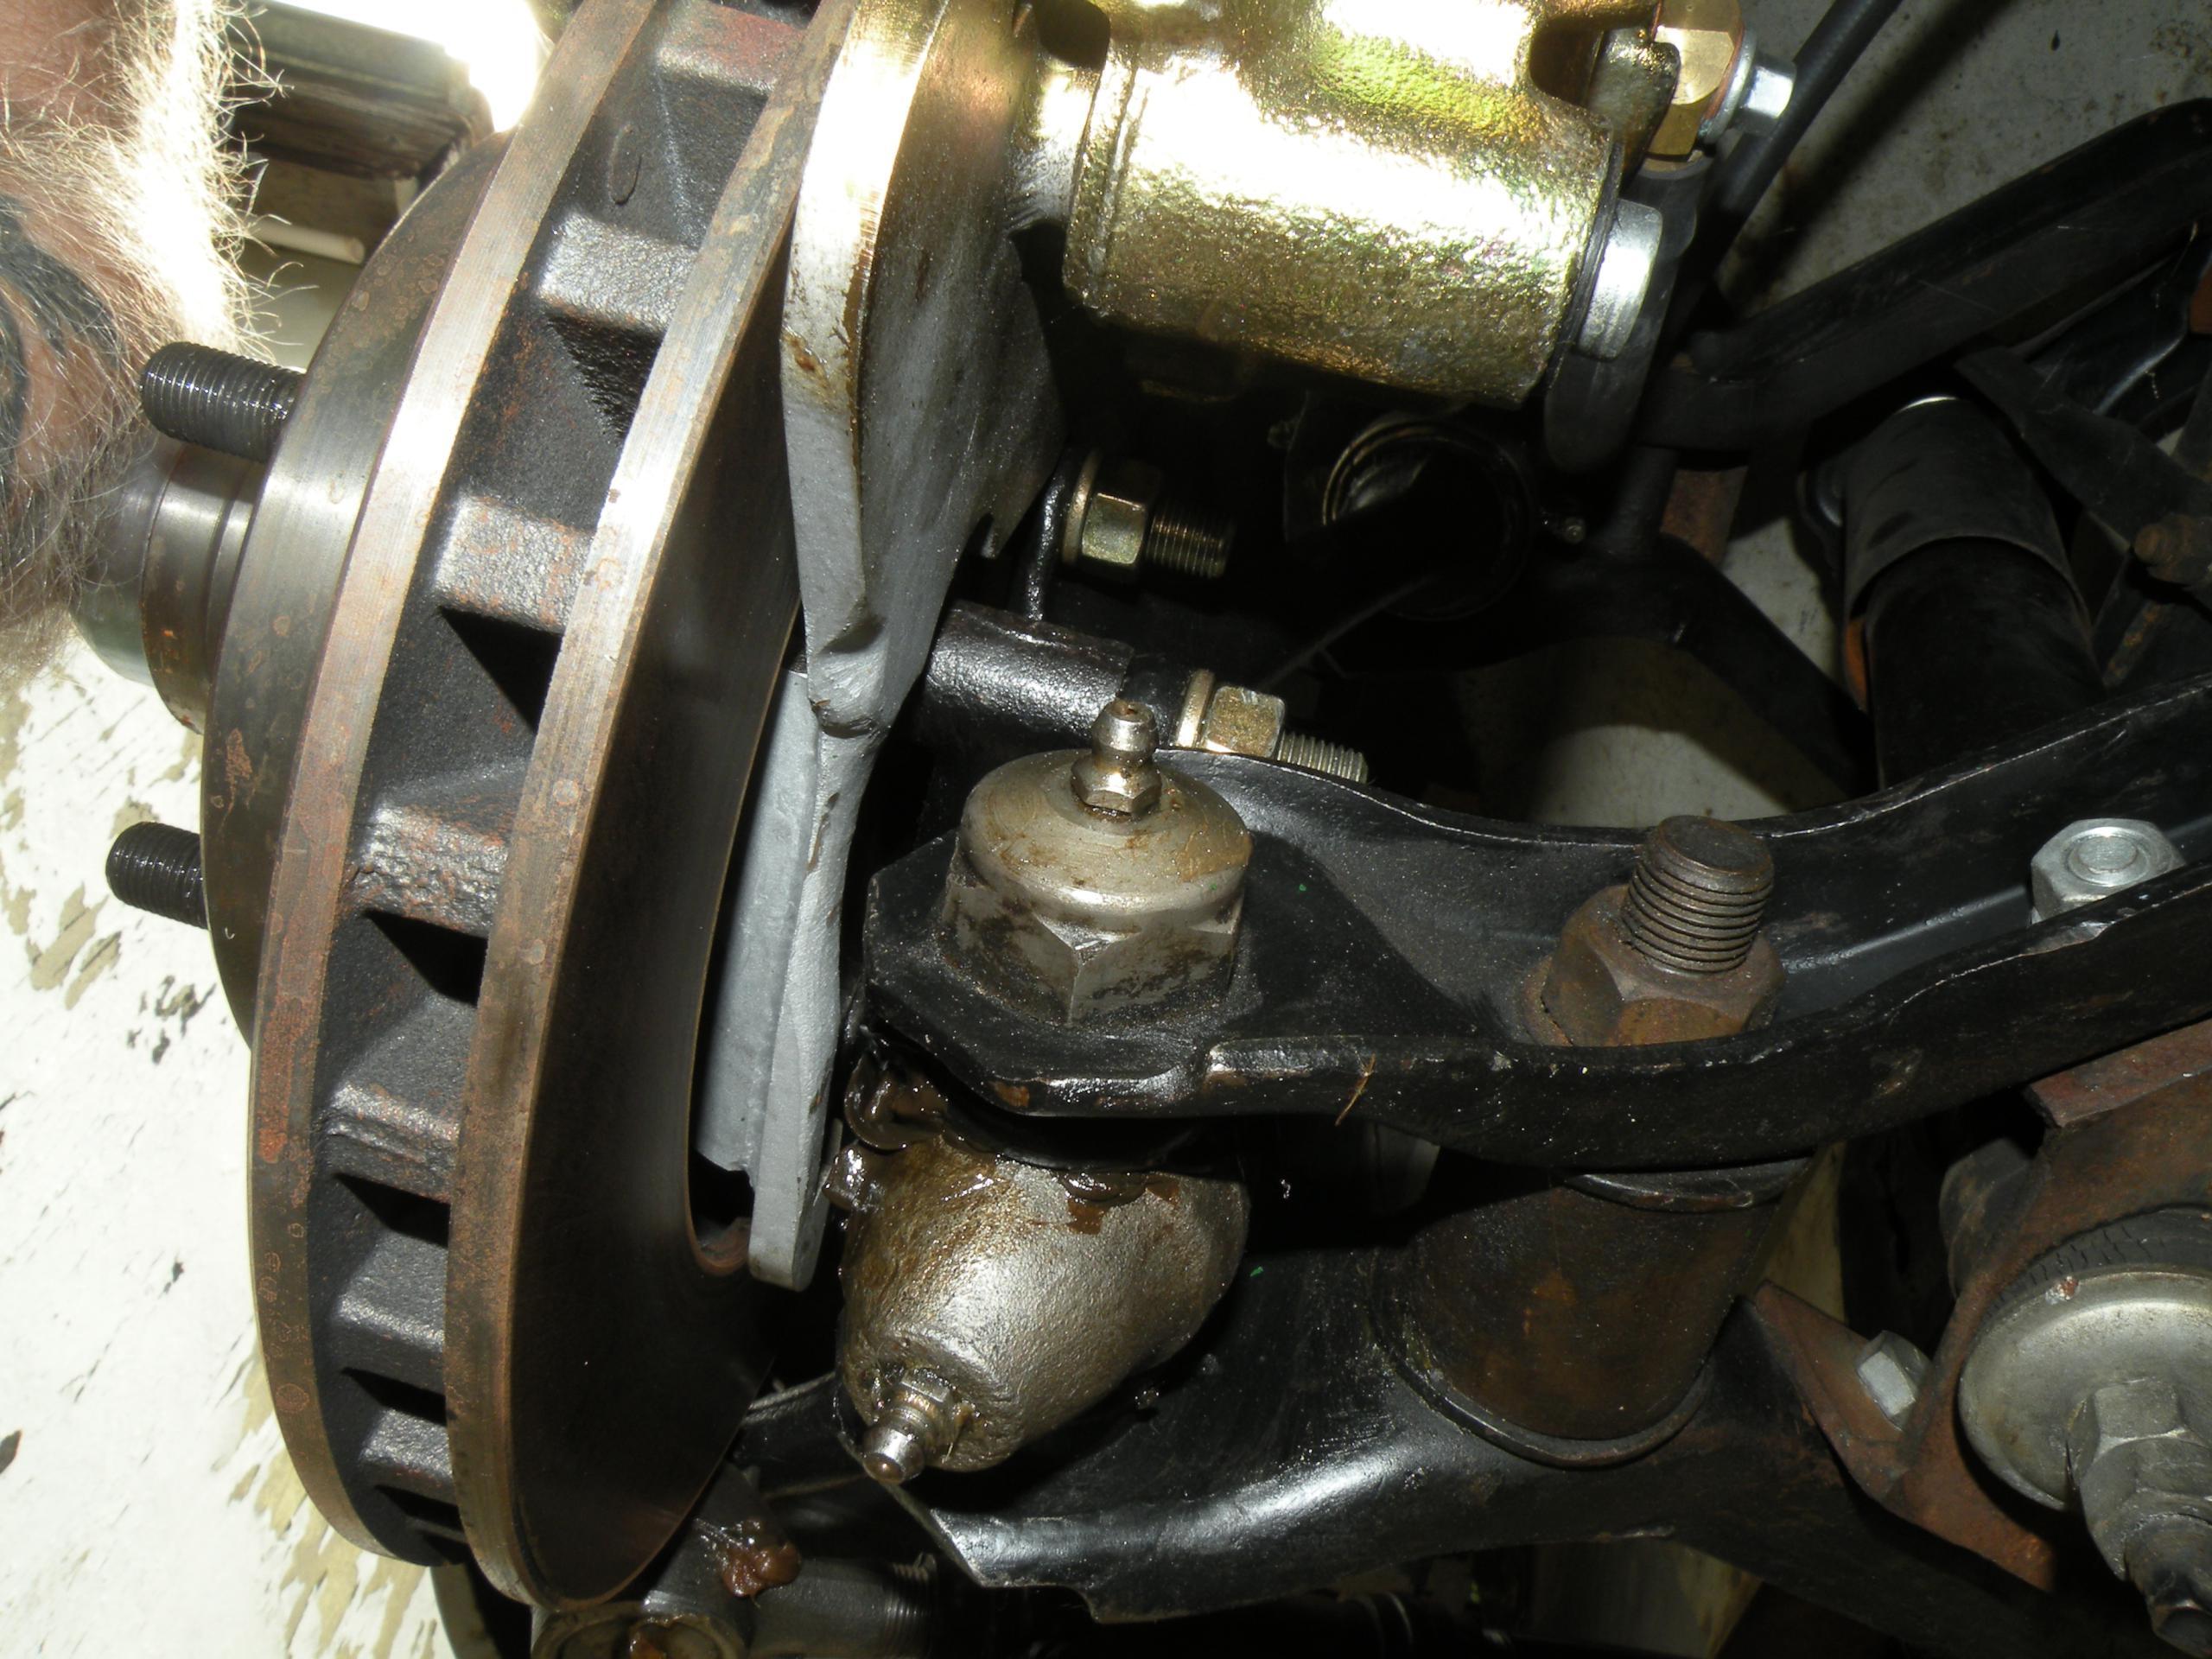
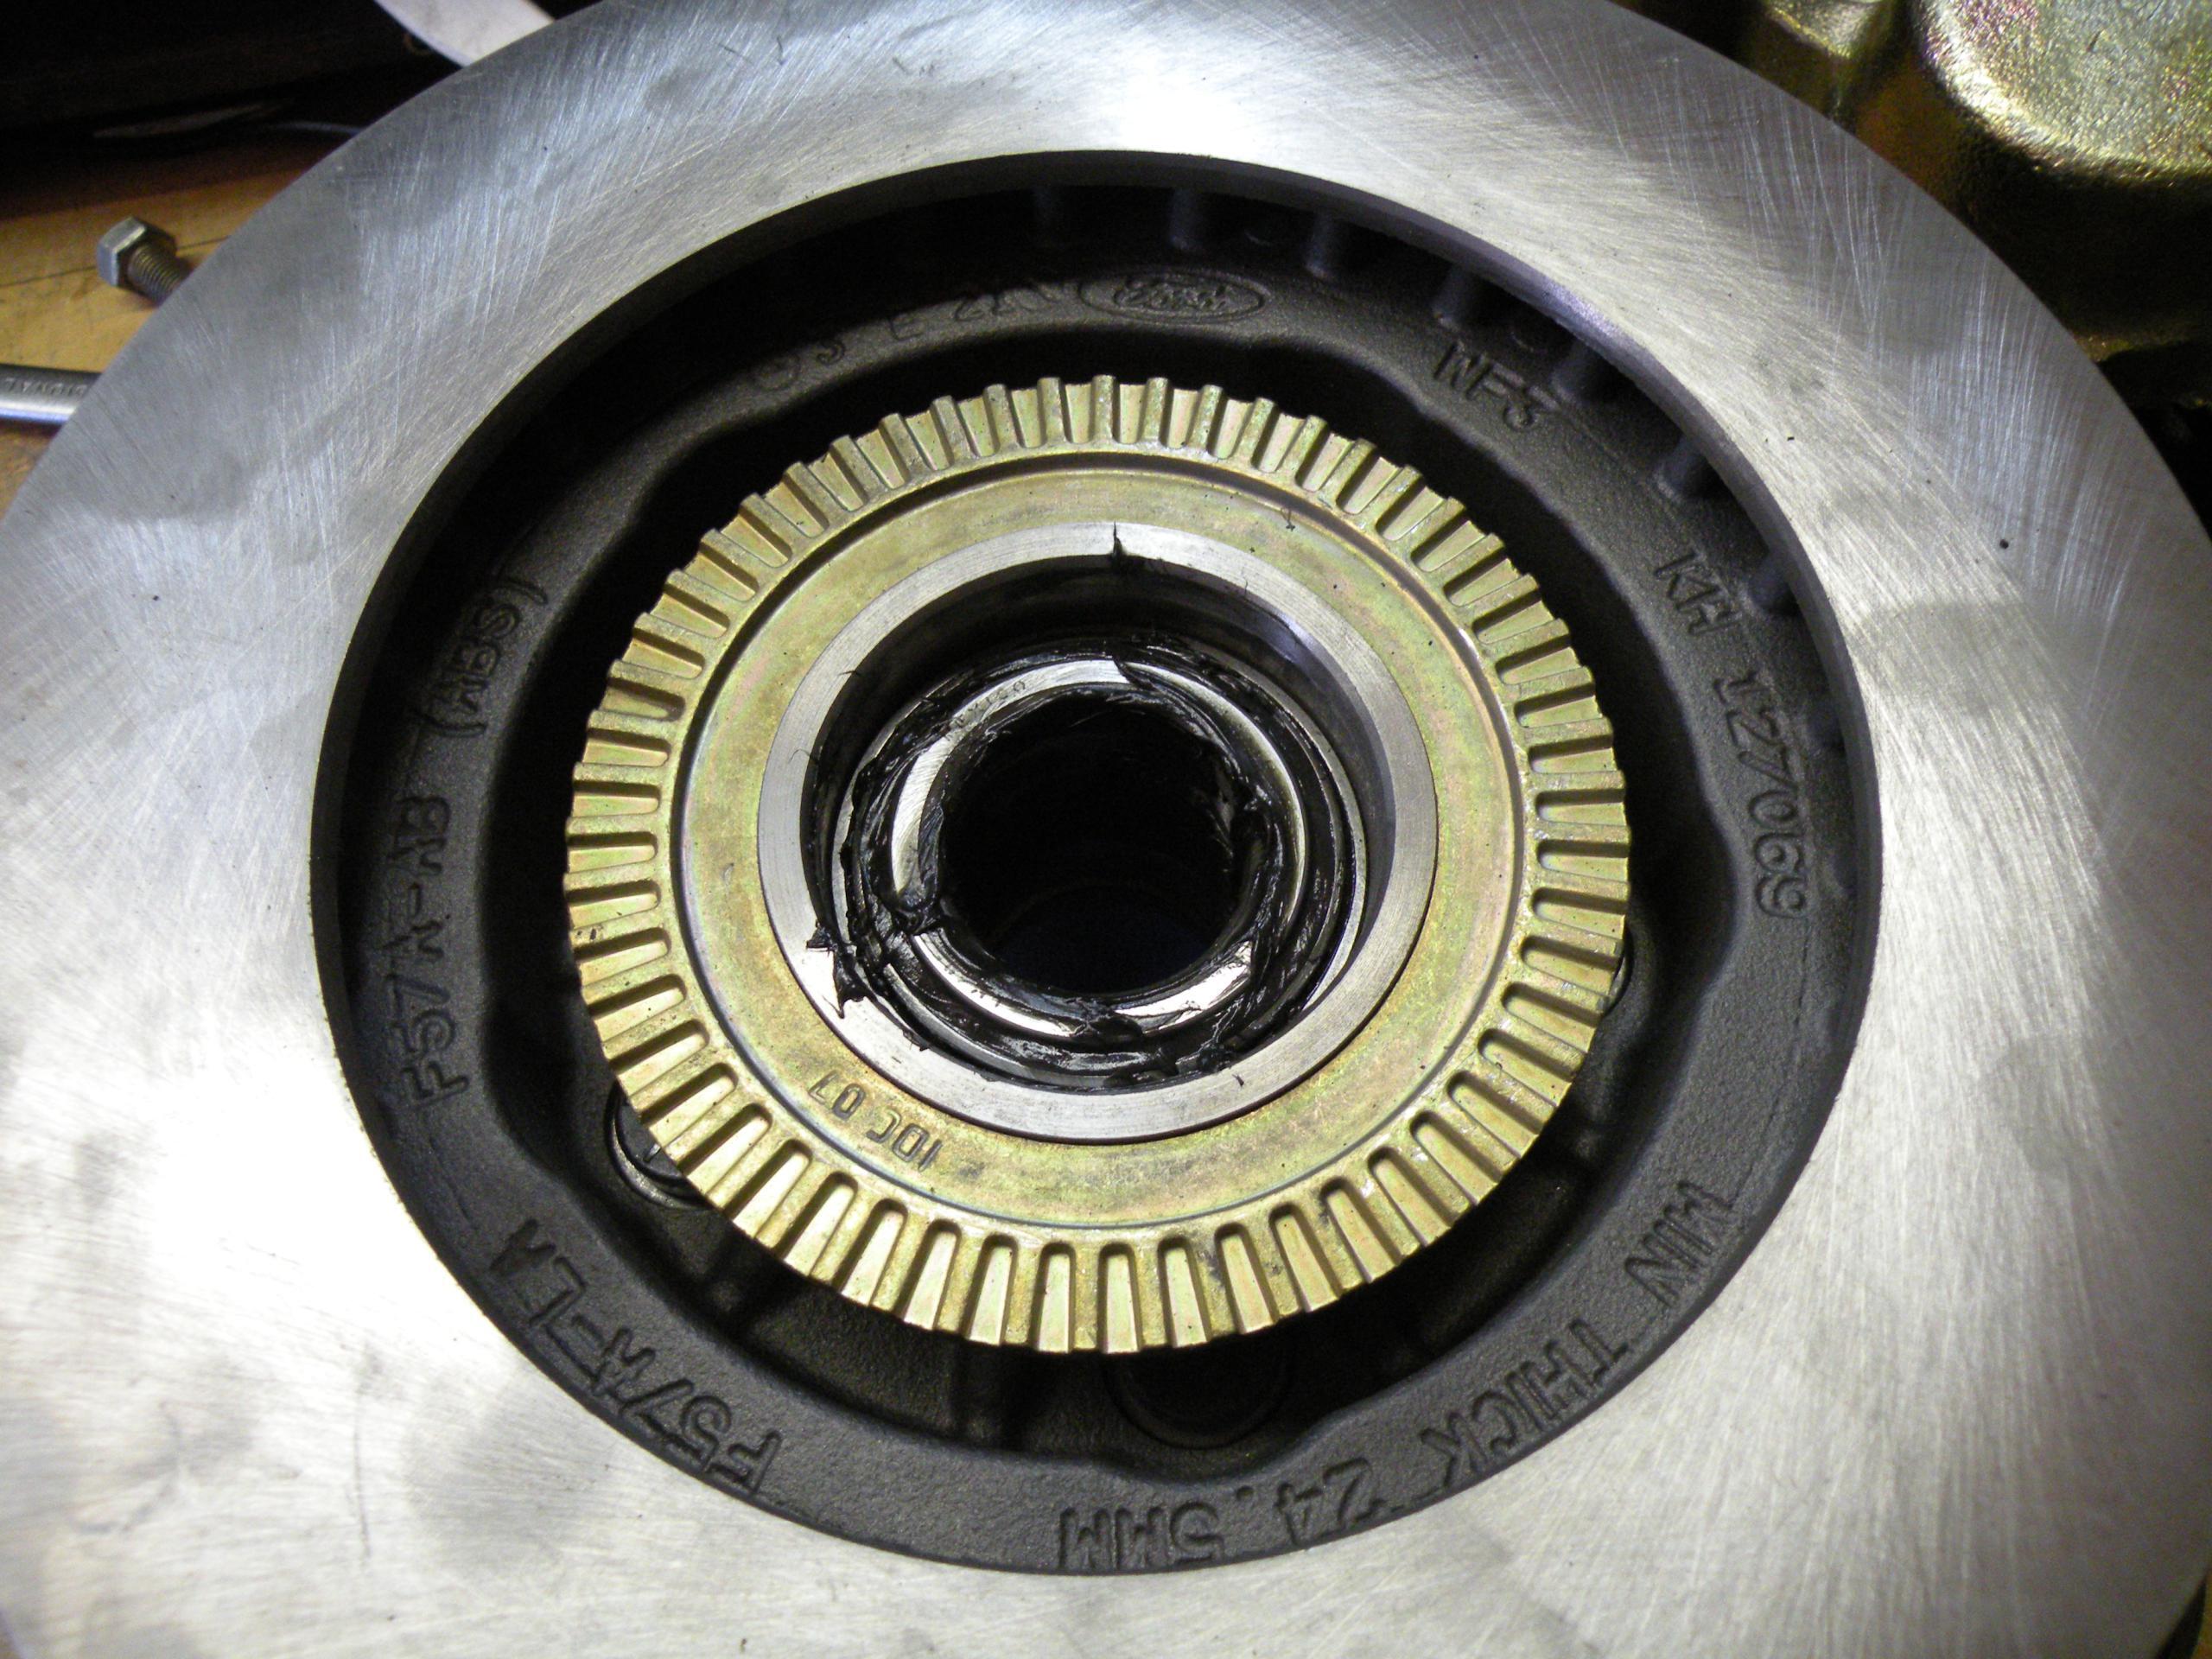
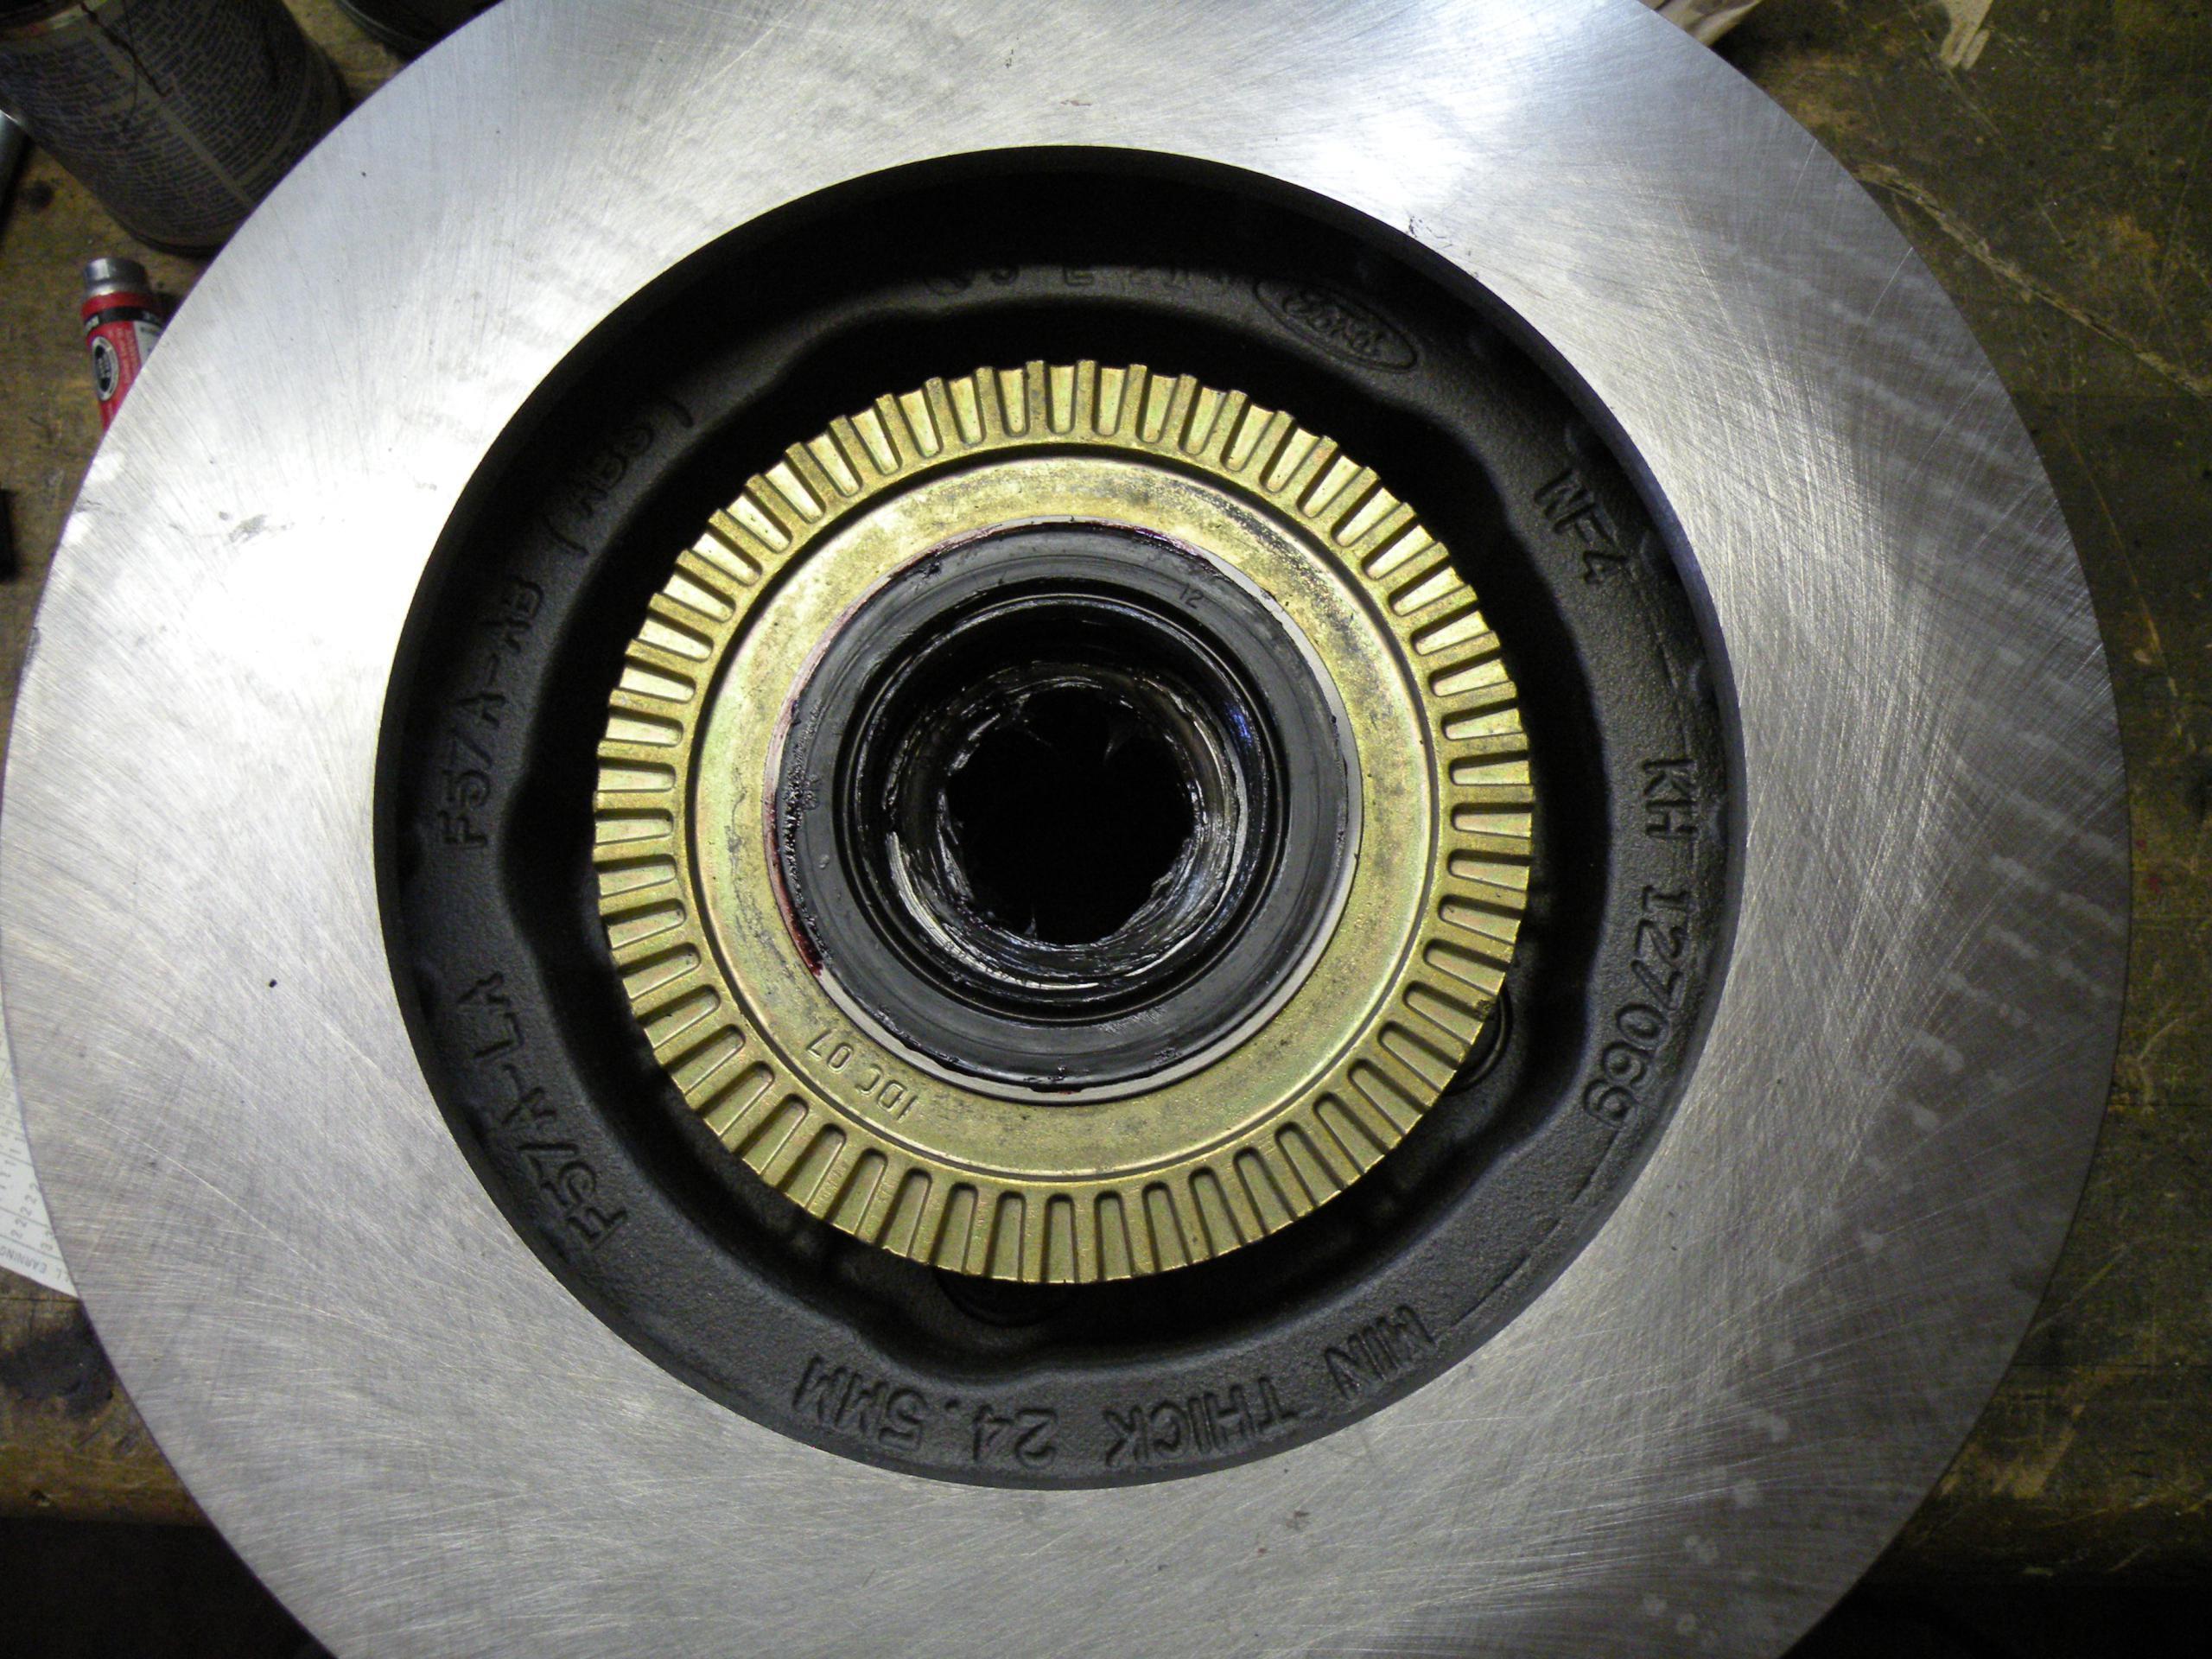
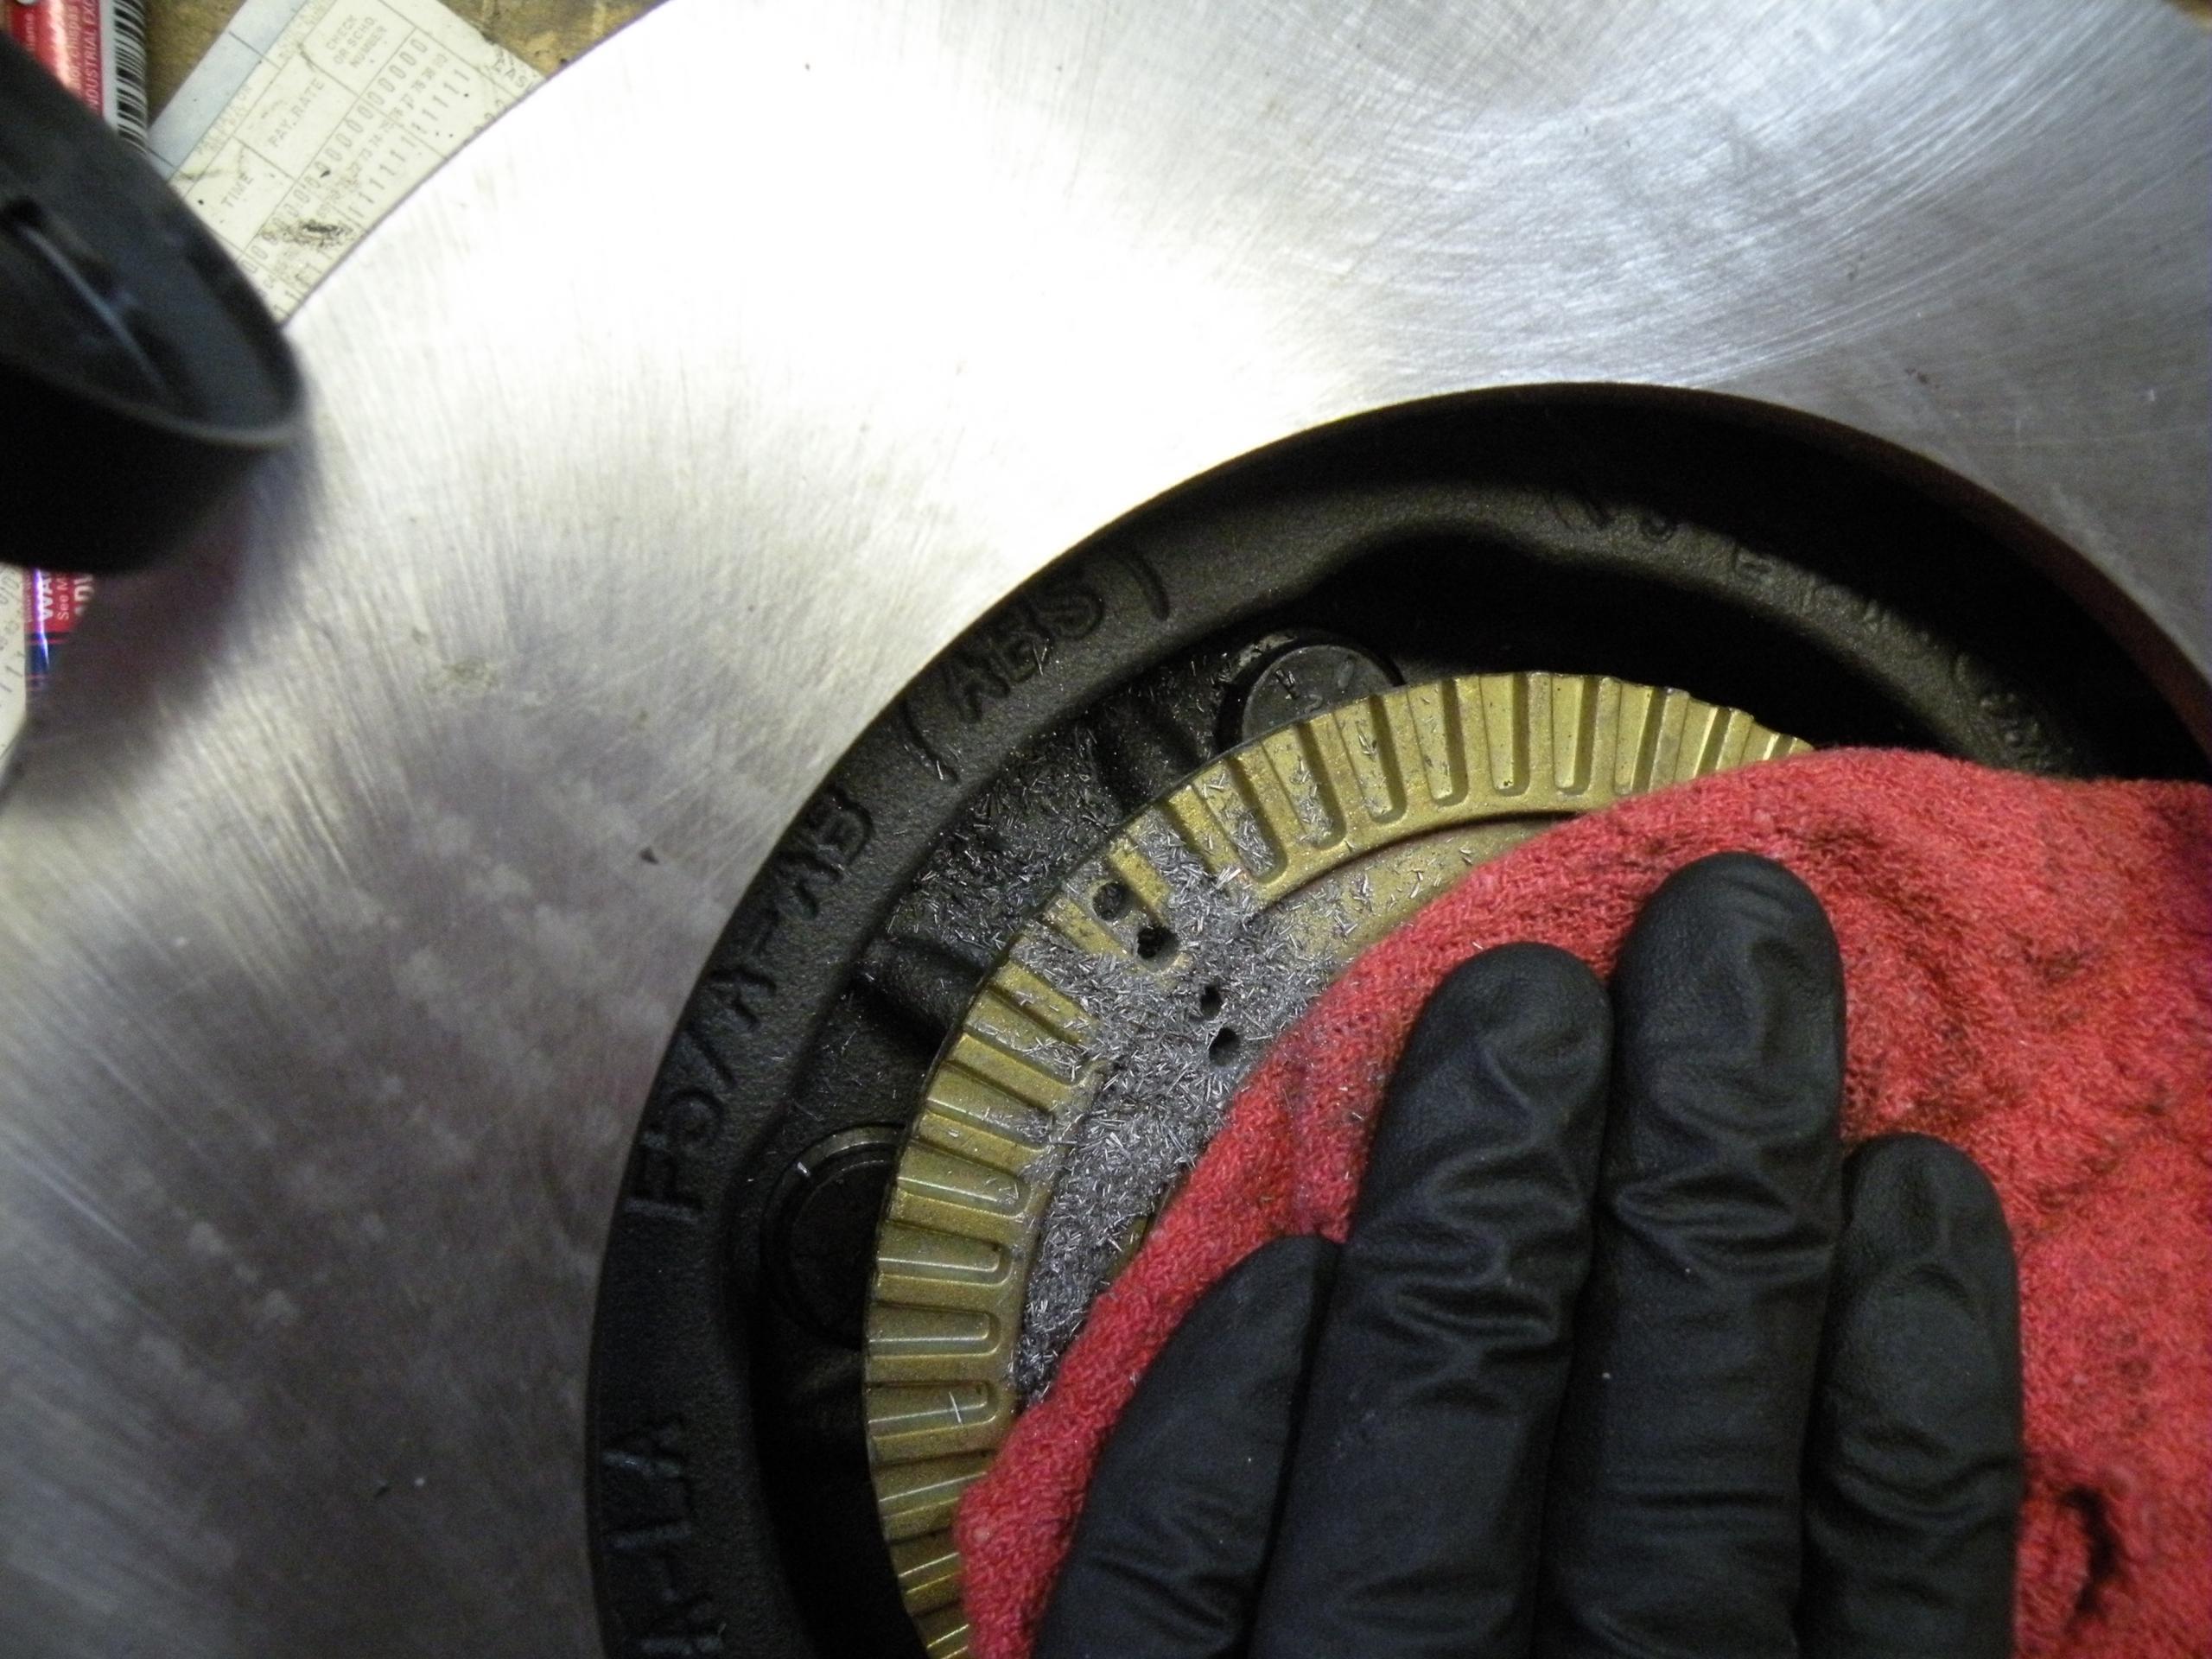
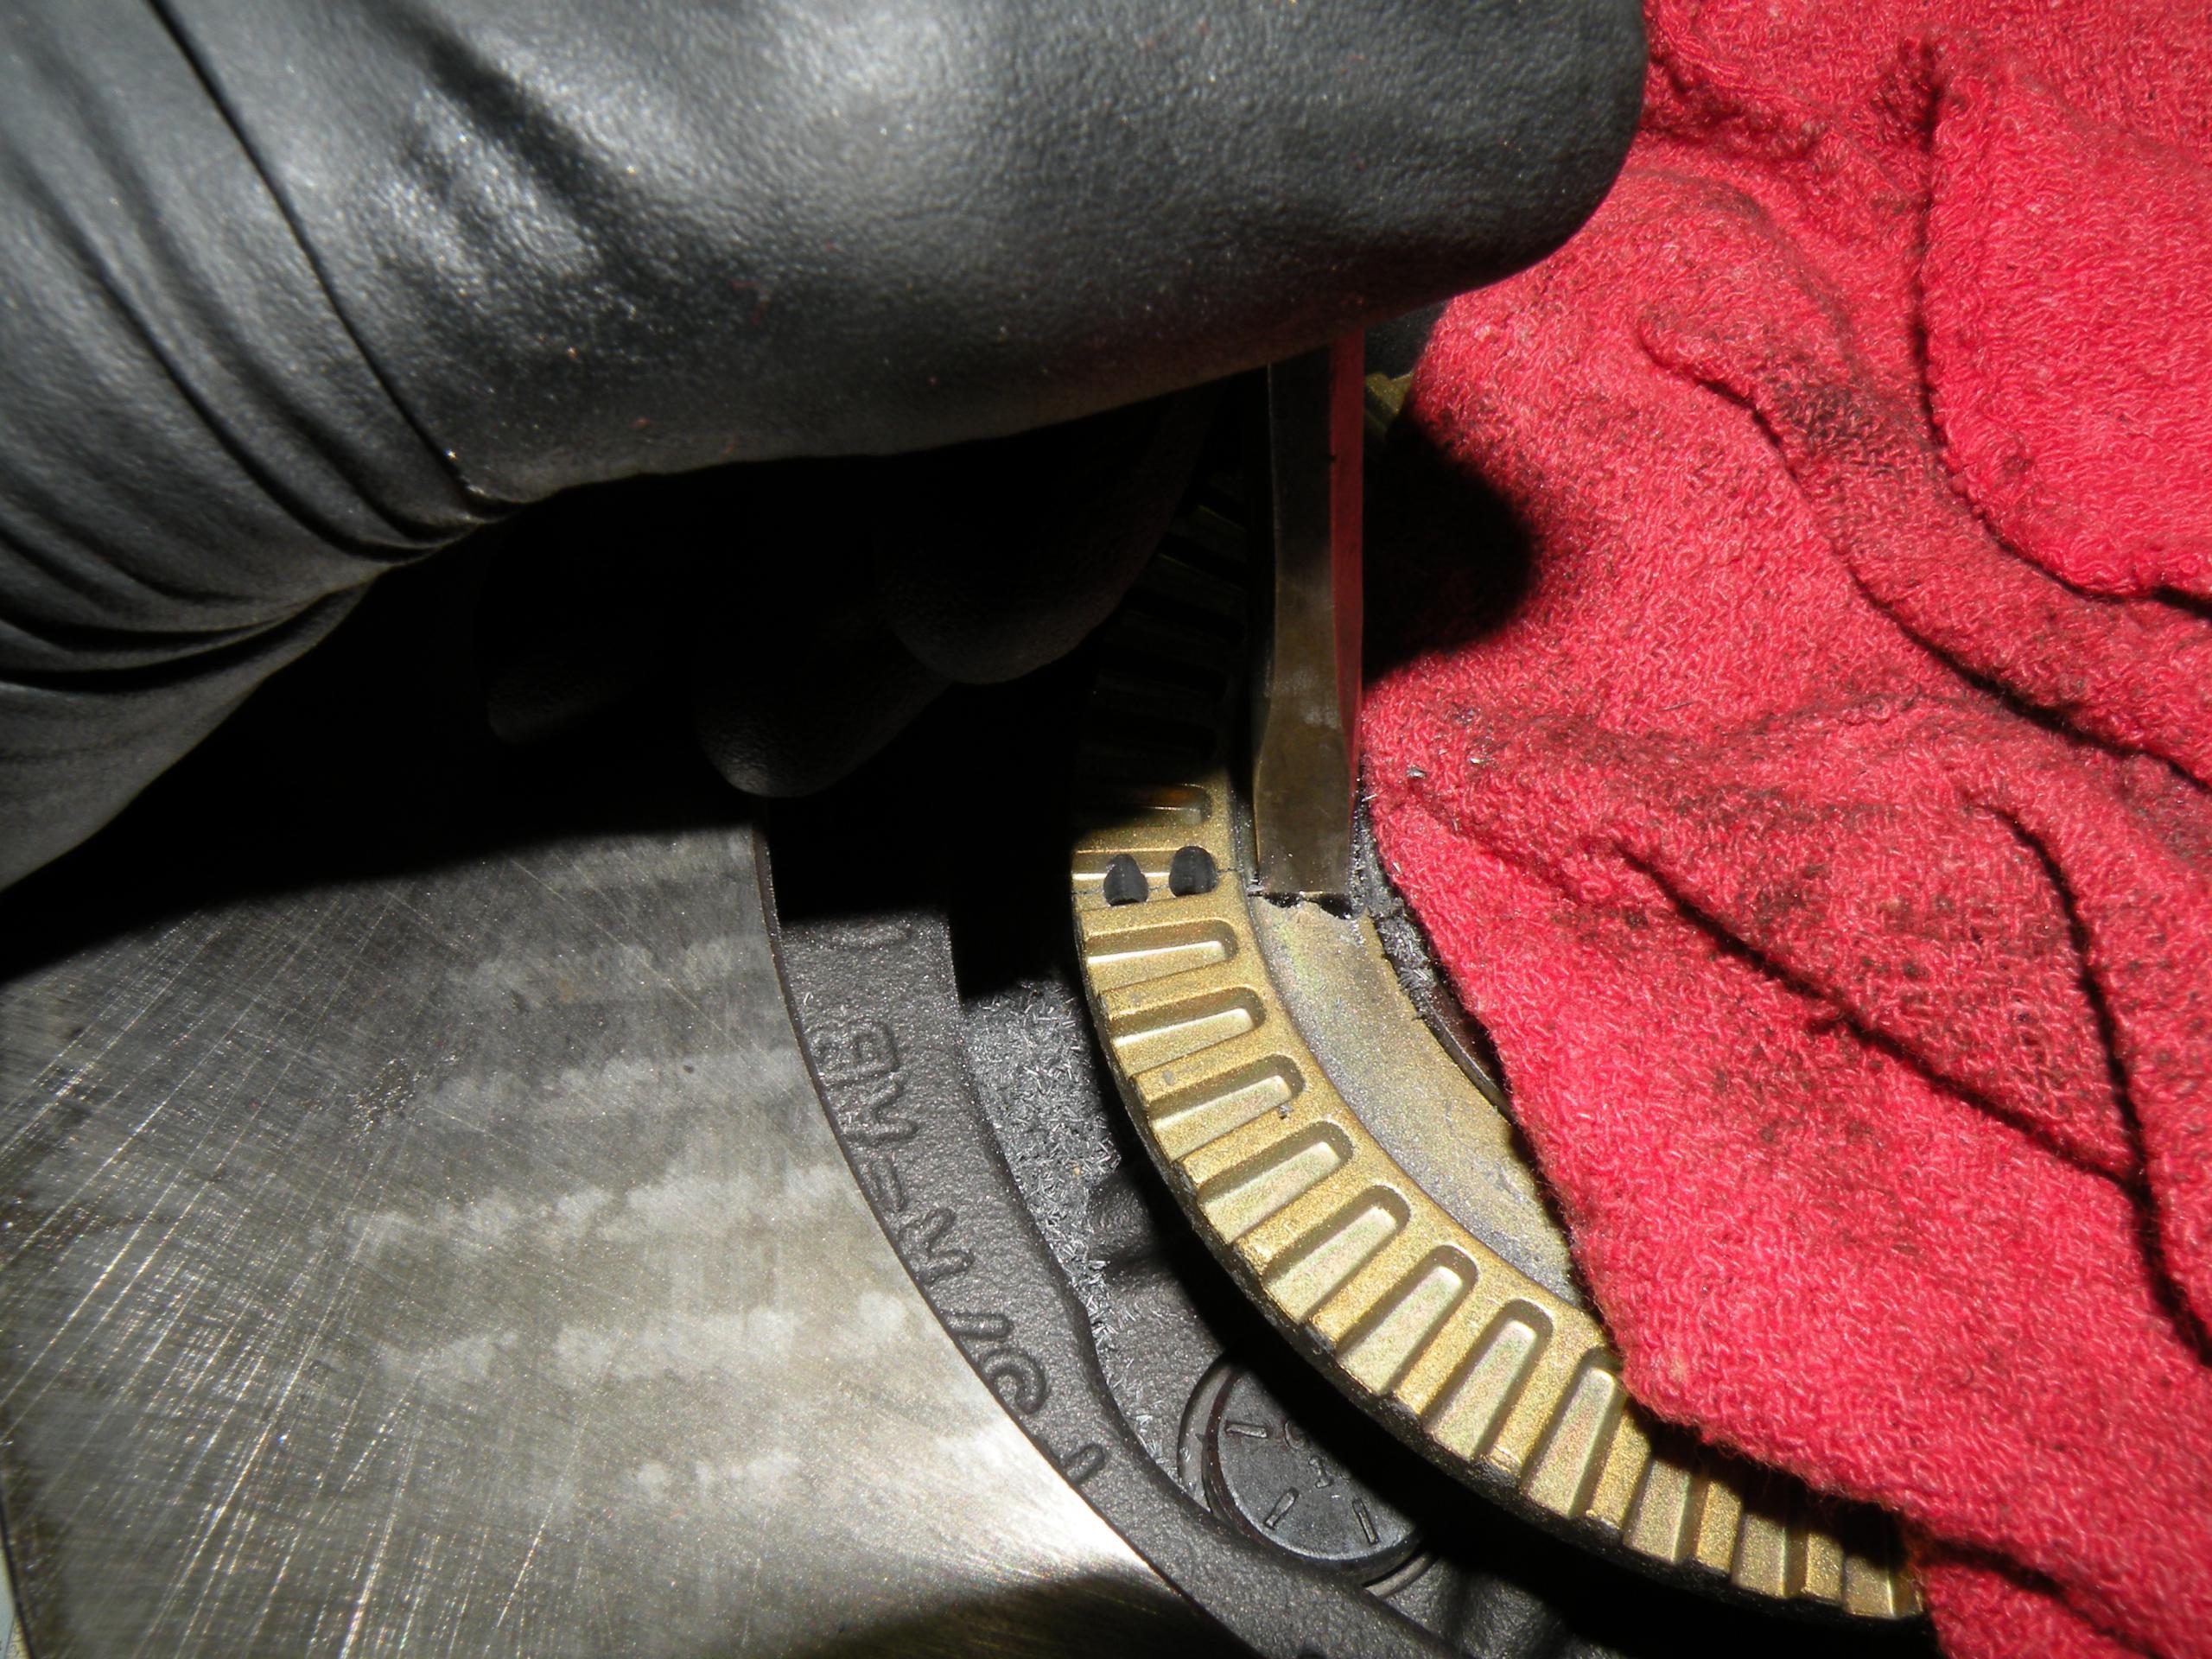
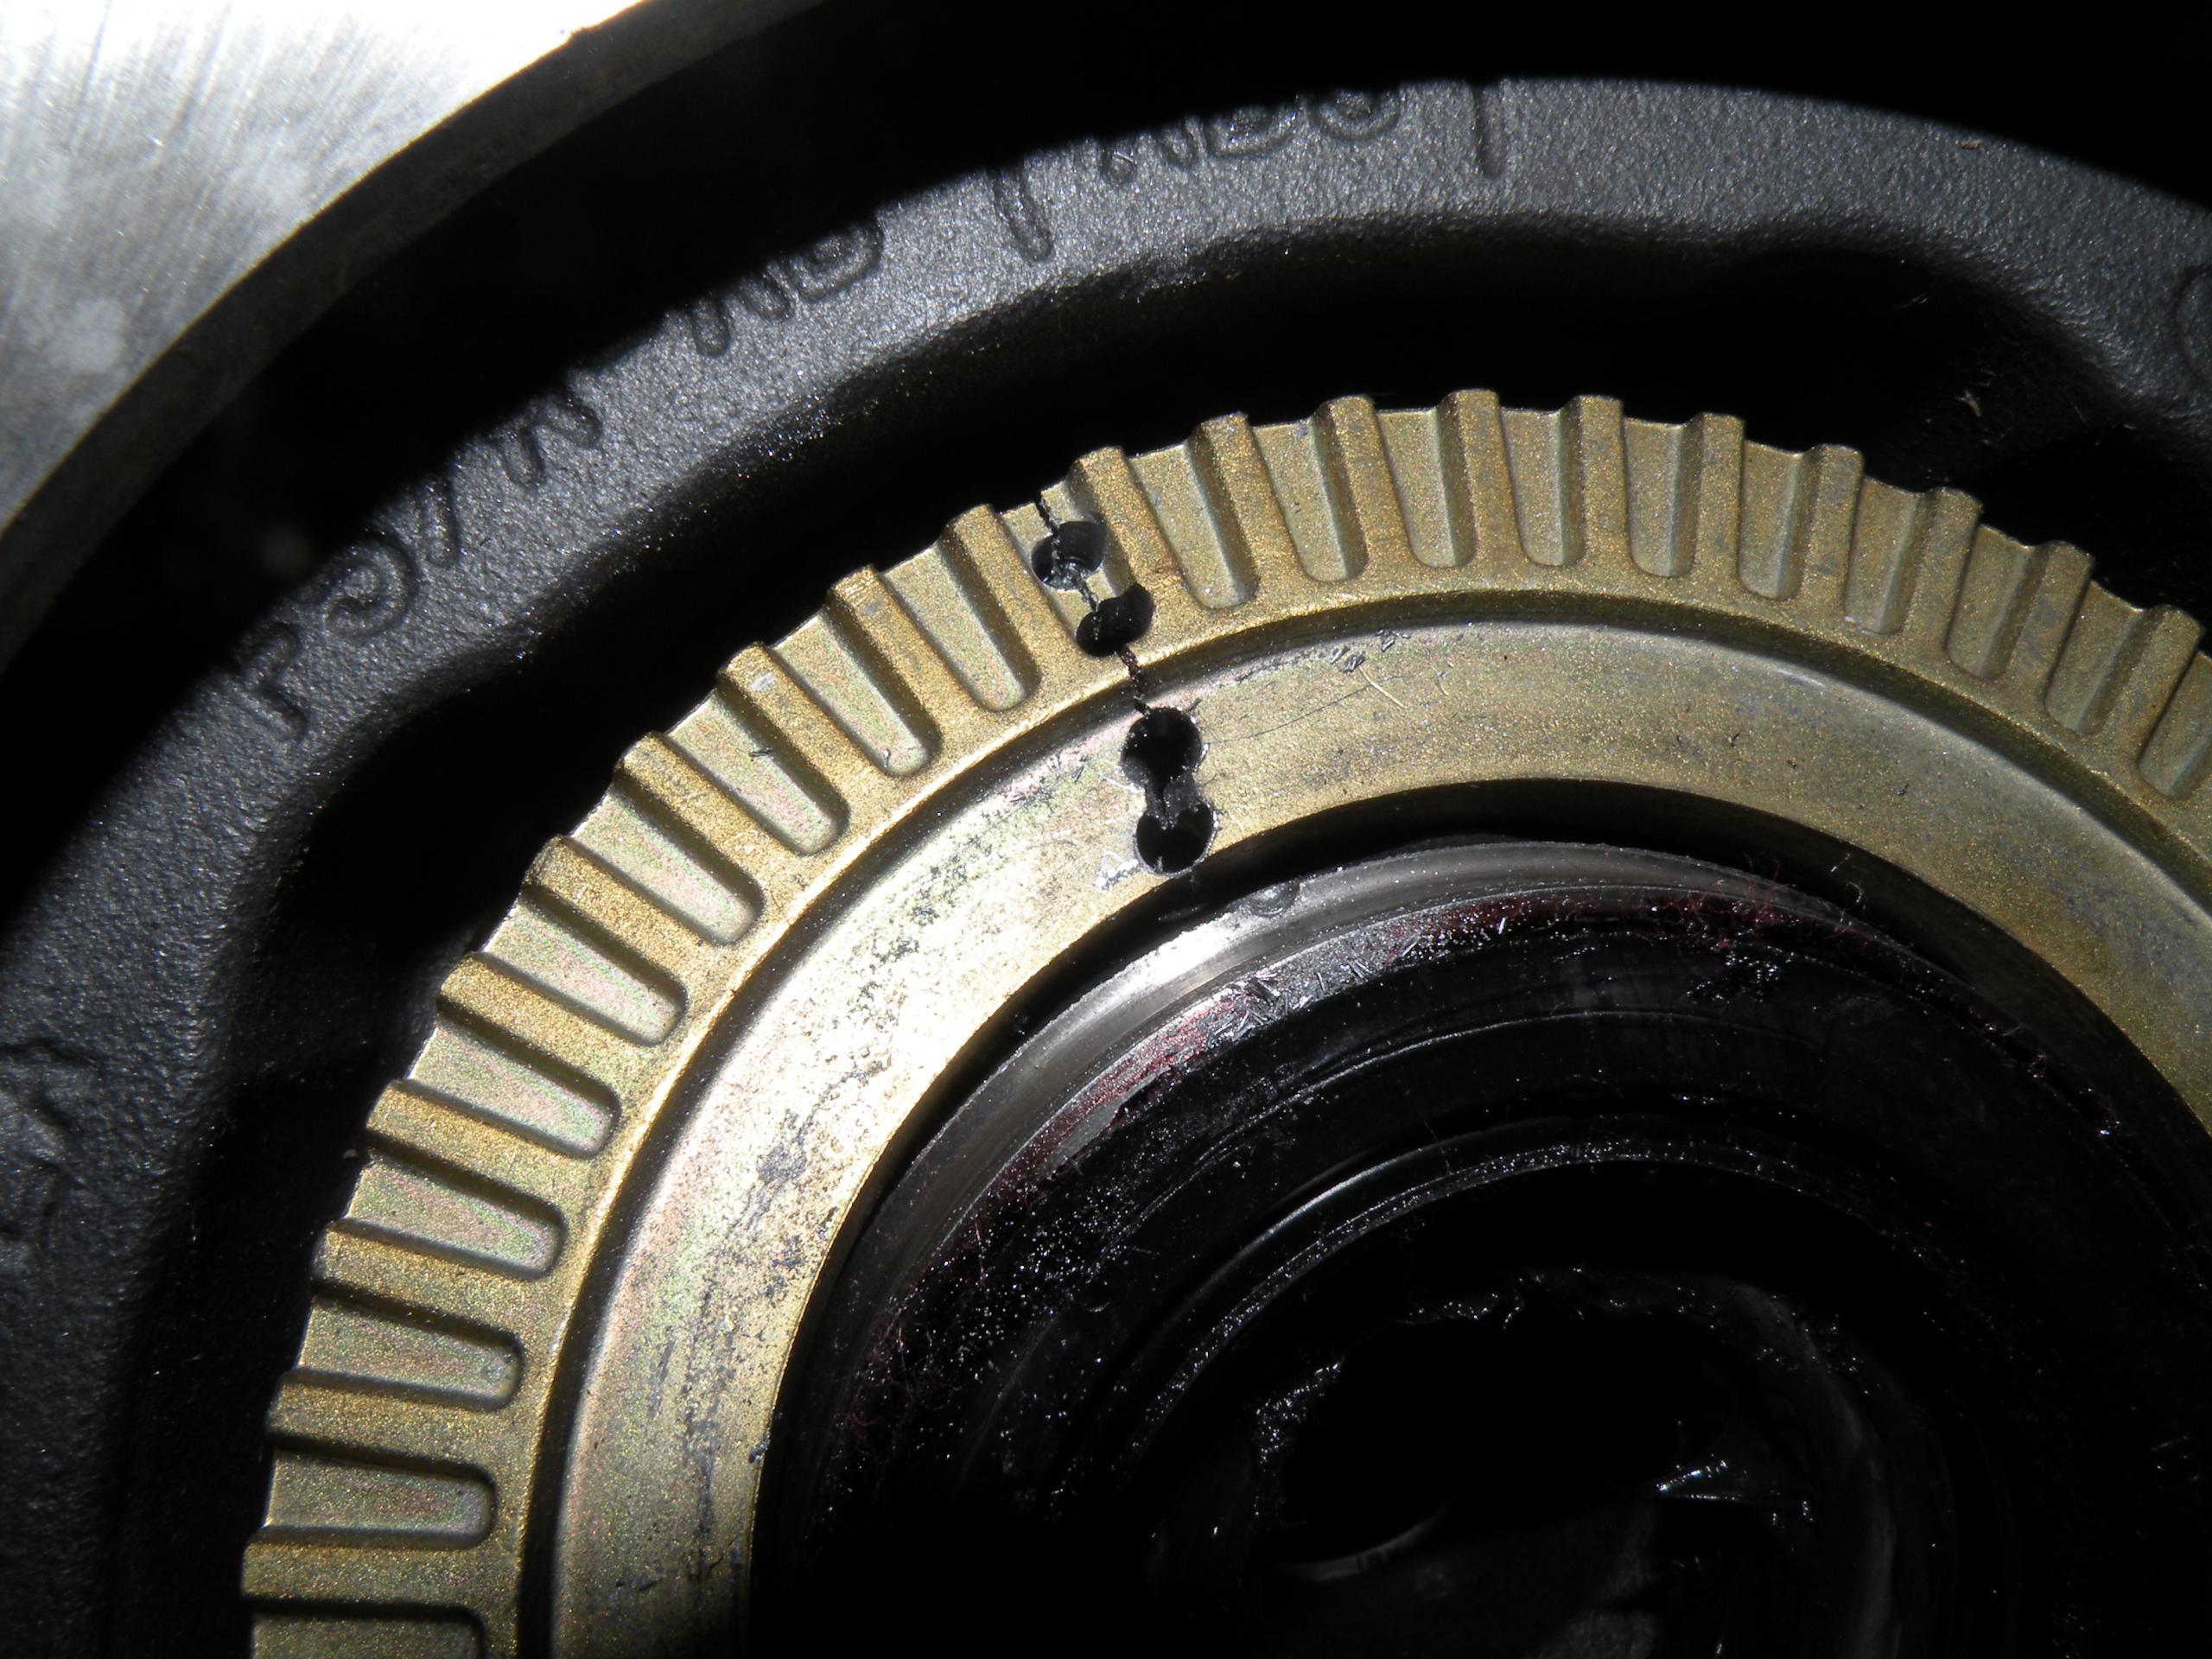
Oopsie, I forgot to remove the ABS tone ring from the Ranger rotor (not required for new style Previa rotor). It interferes with the bracket so it must be removed. It’s easy; since it’s a casting you can drill a couple of holes and a rap with a small chisel splits it, then you just lift it off.
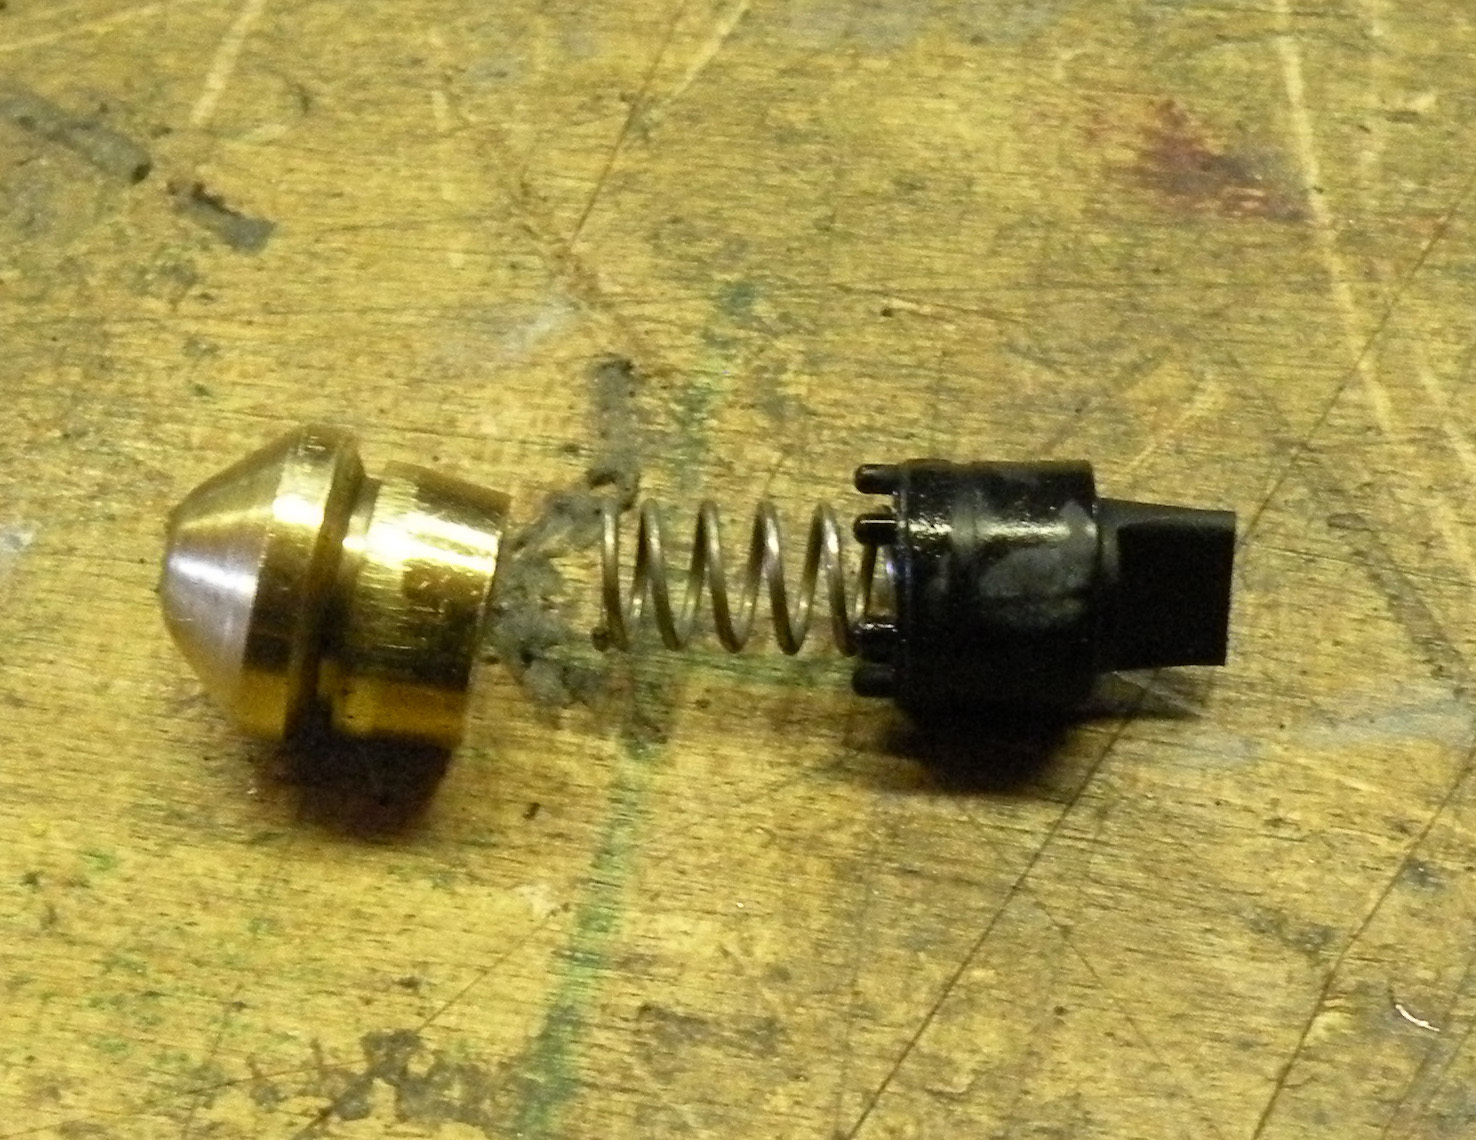
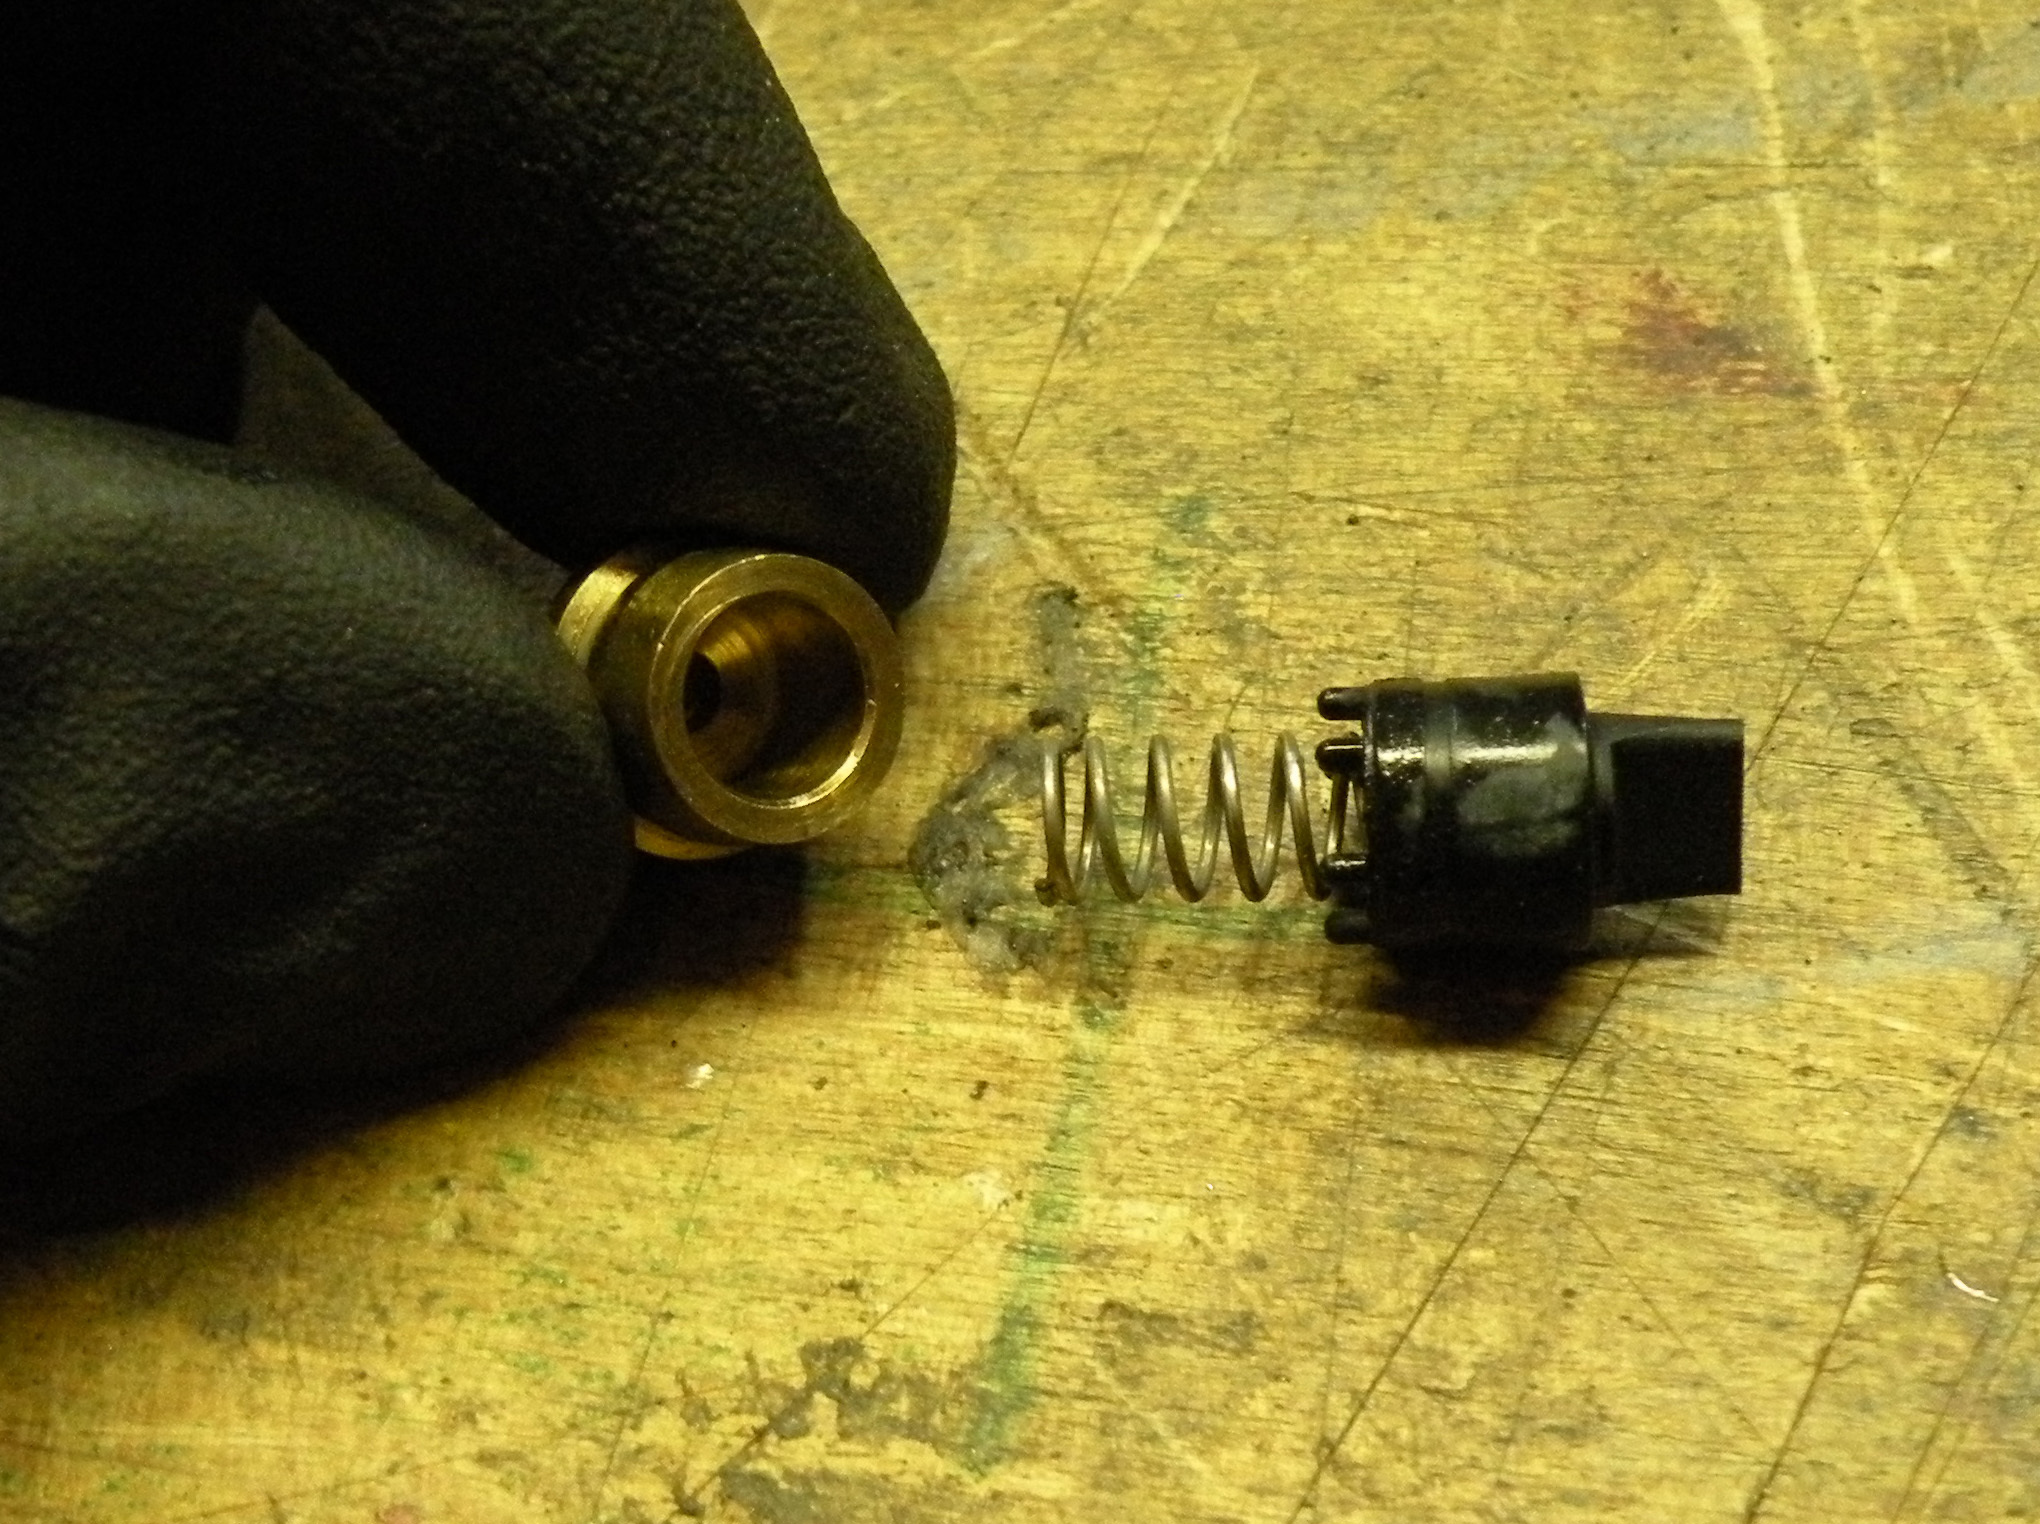
Since this was a drum brake car I had to pull the check valve out of the front brake port on the master cylinder. It’s easy but requires care — I used a drywall screw, screwed into the brass seat just enough to grip it, I extracted it by pulling straight out with a pair of pliers. If you warp the cone the brake line won’t seal then you have to go scrounge one up. For the record, here’s what the removed parts look like.
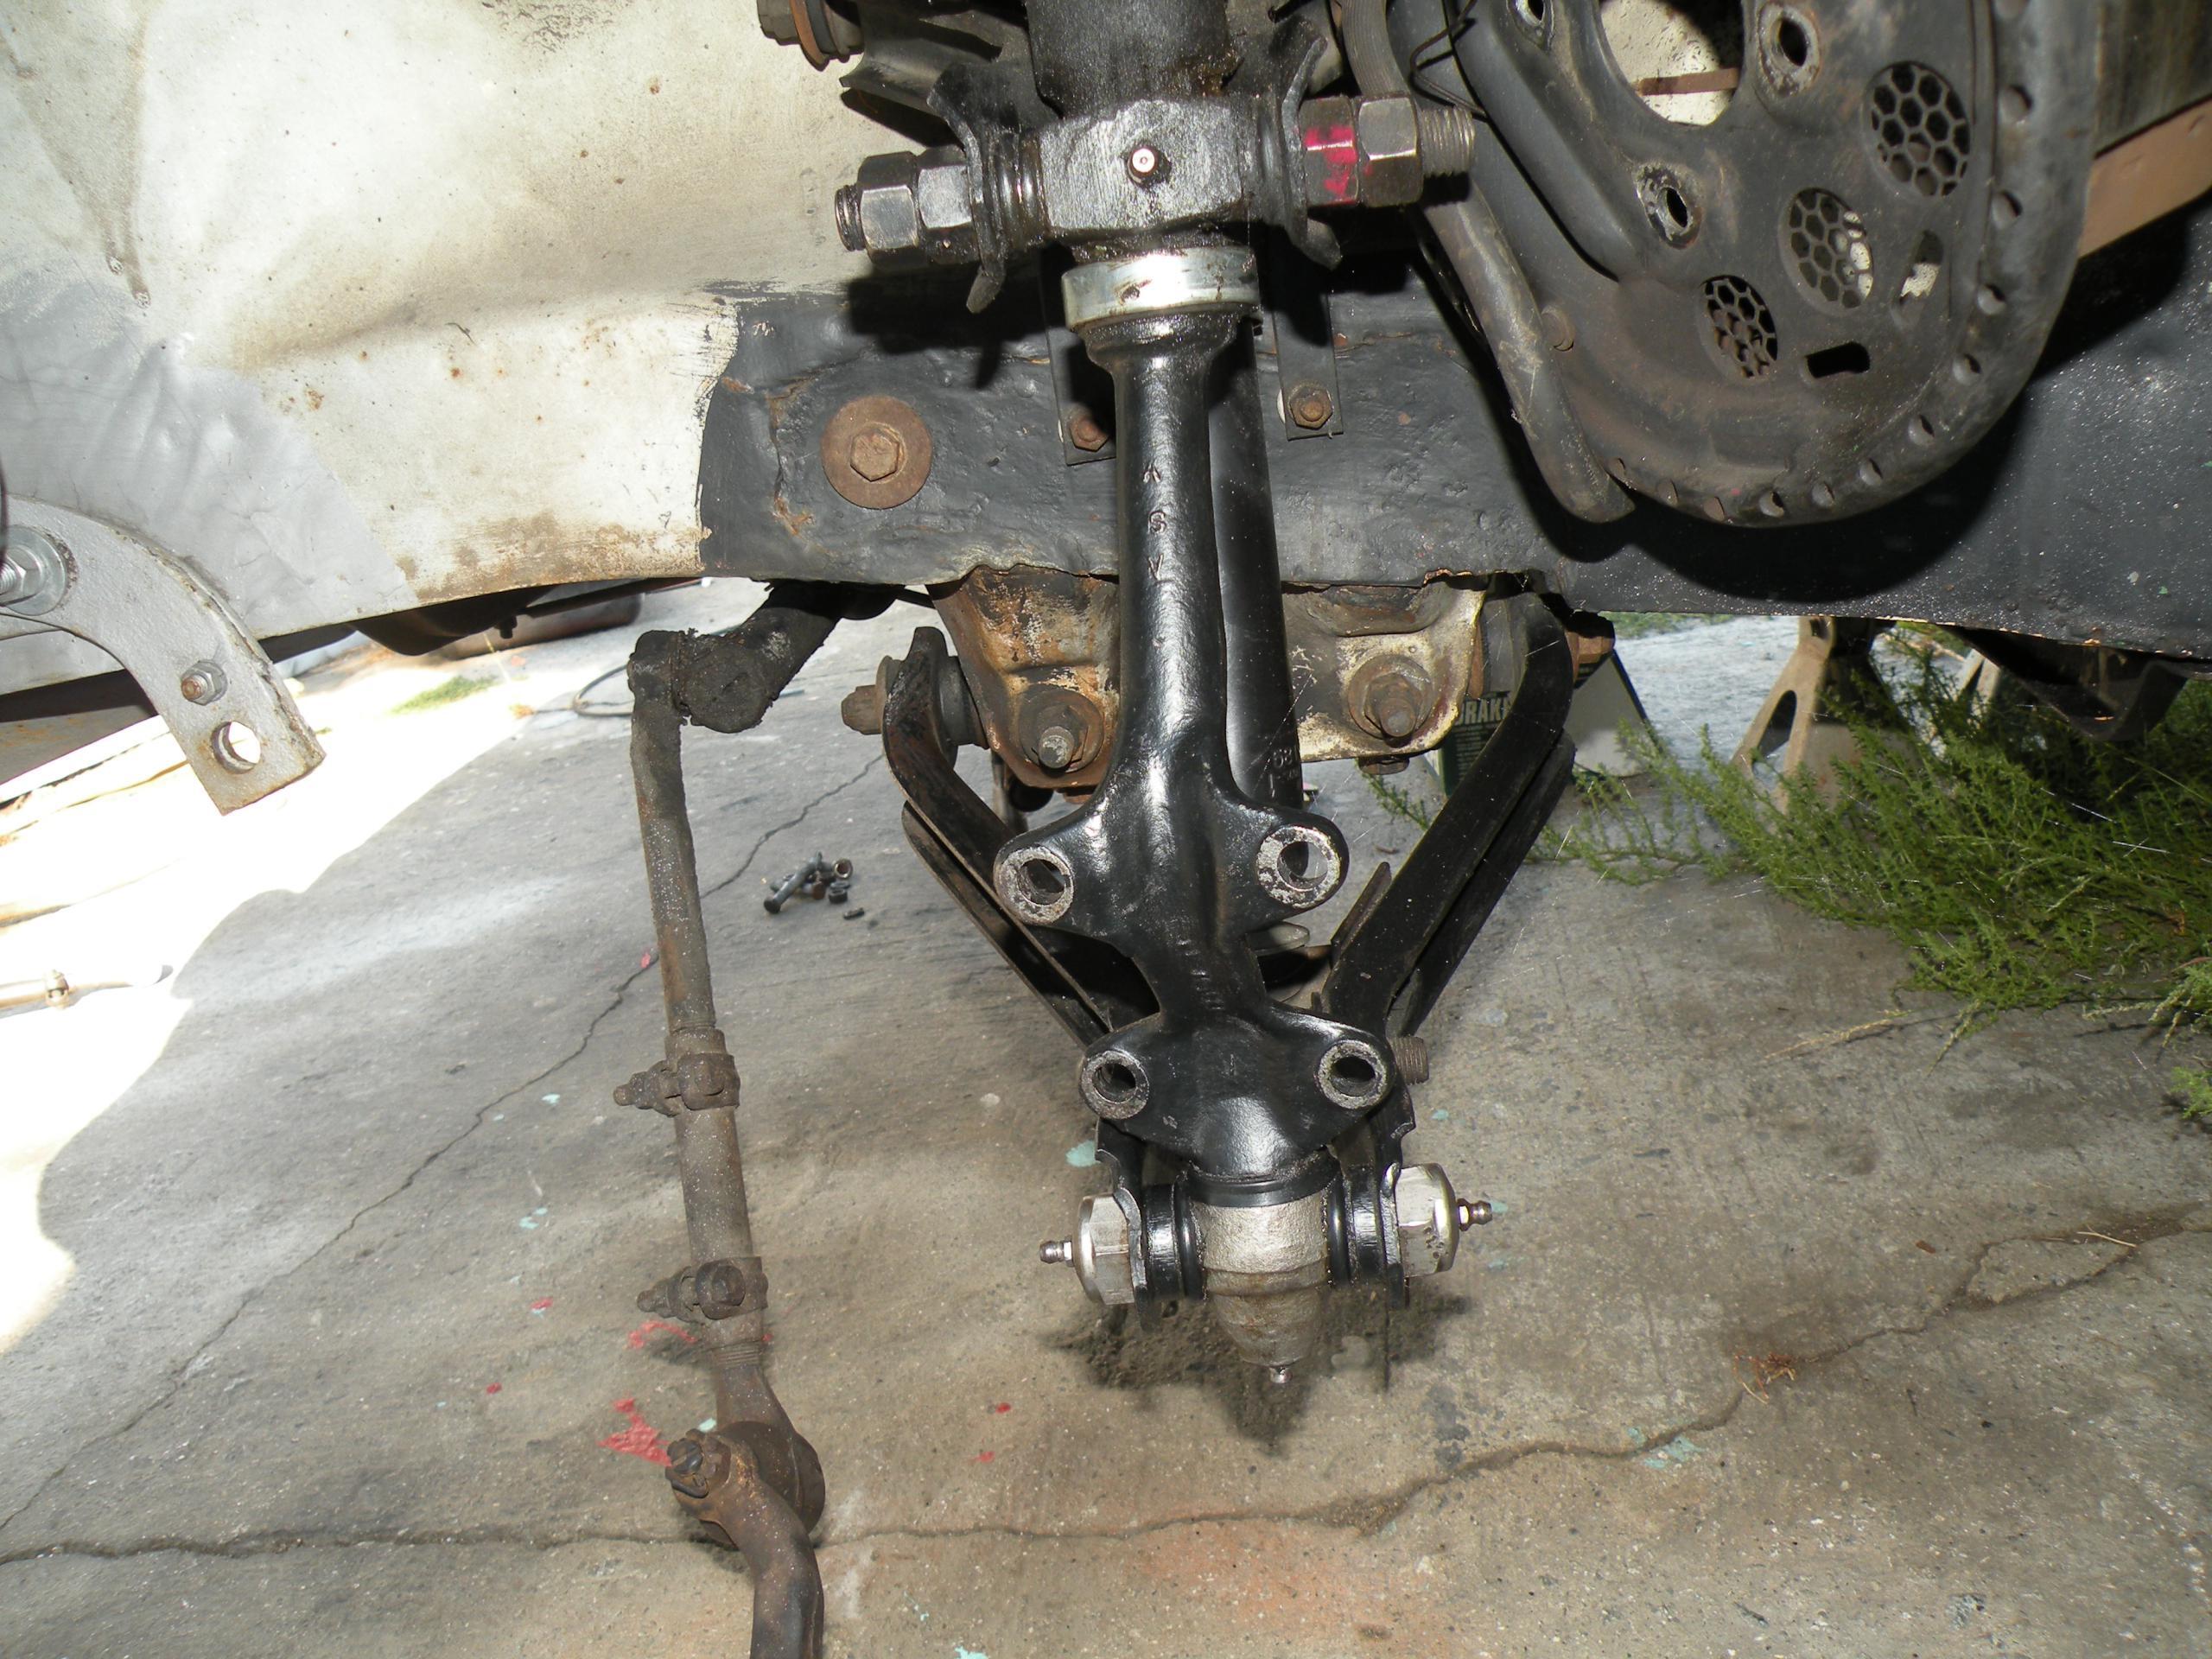
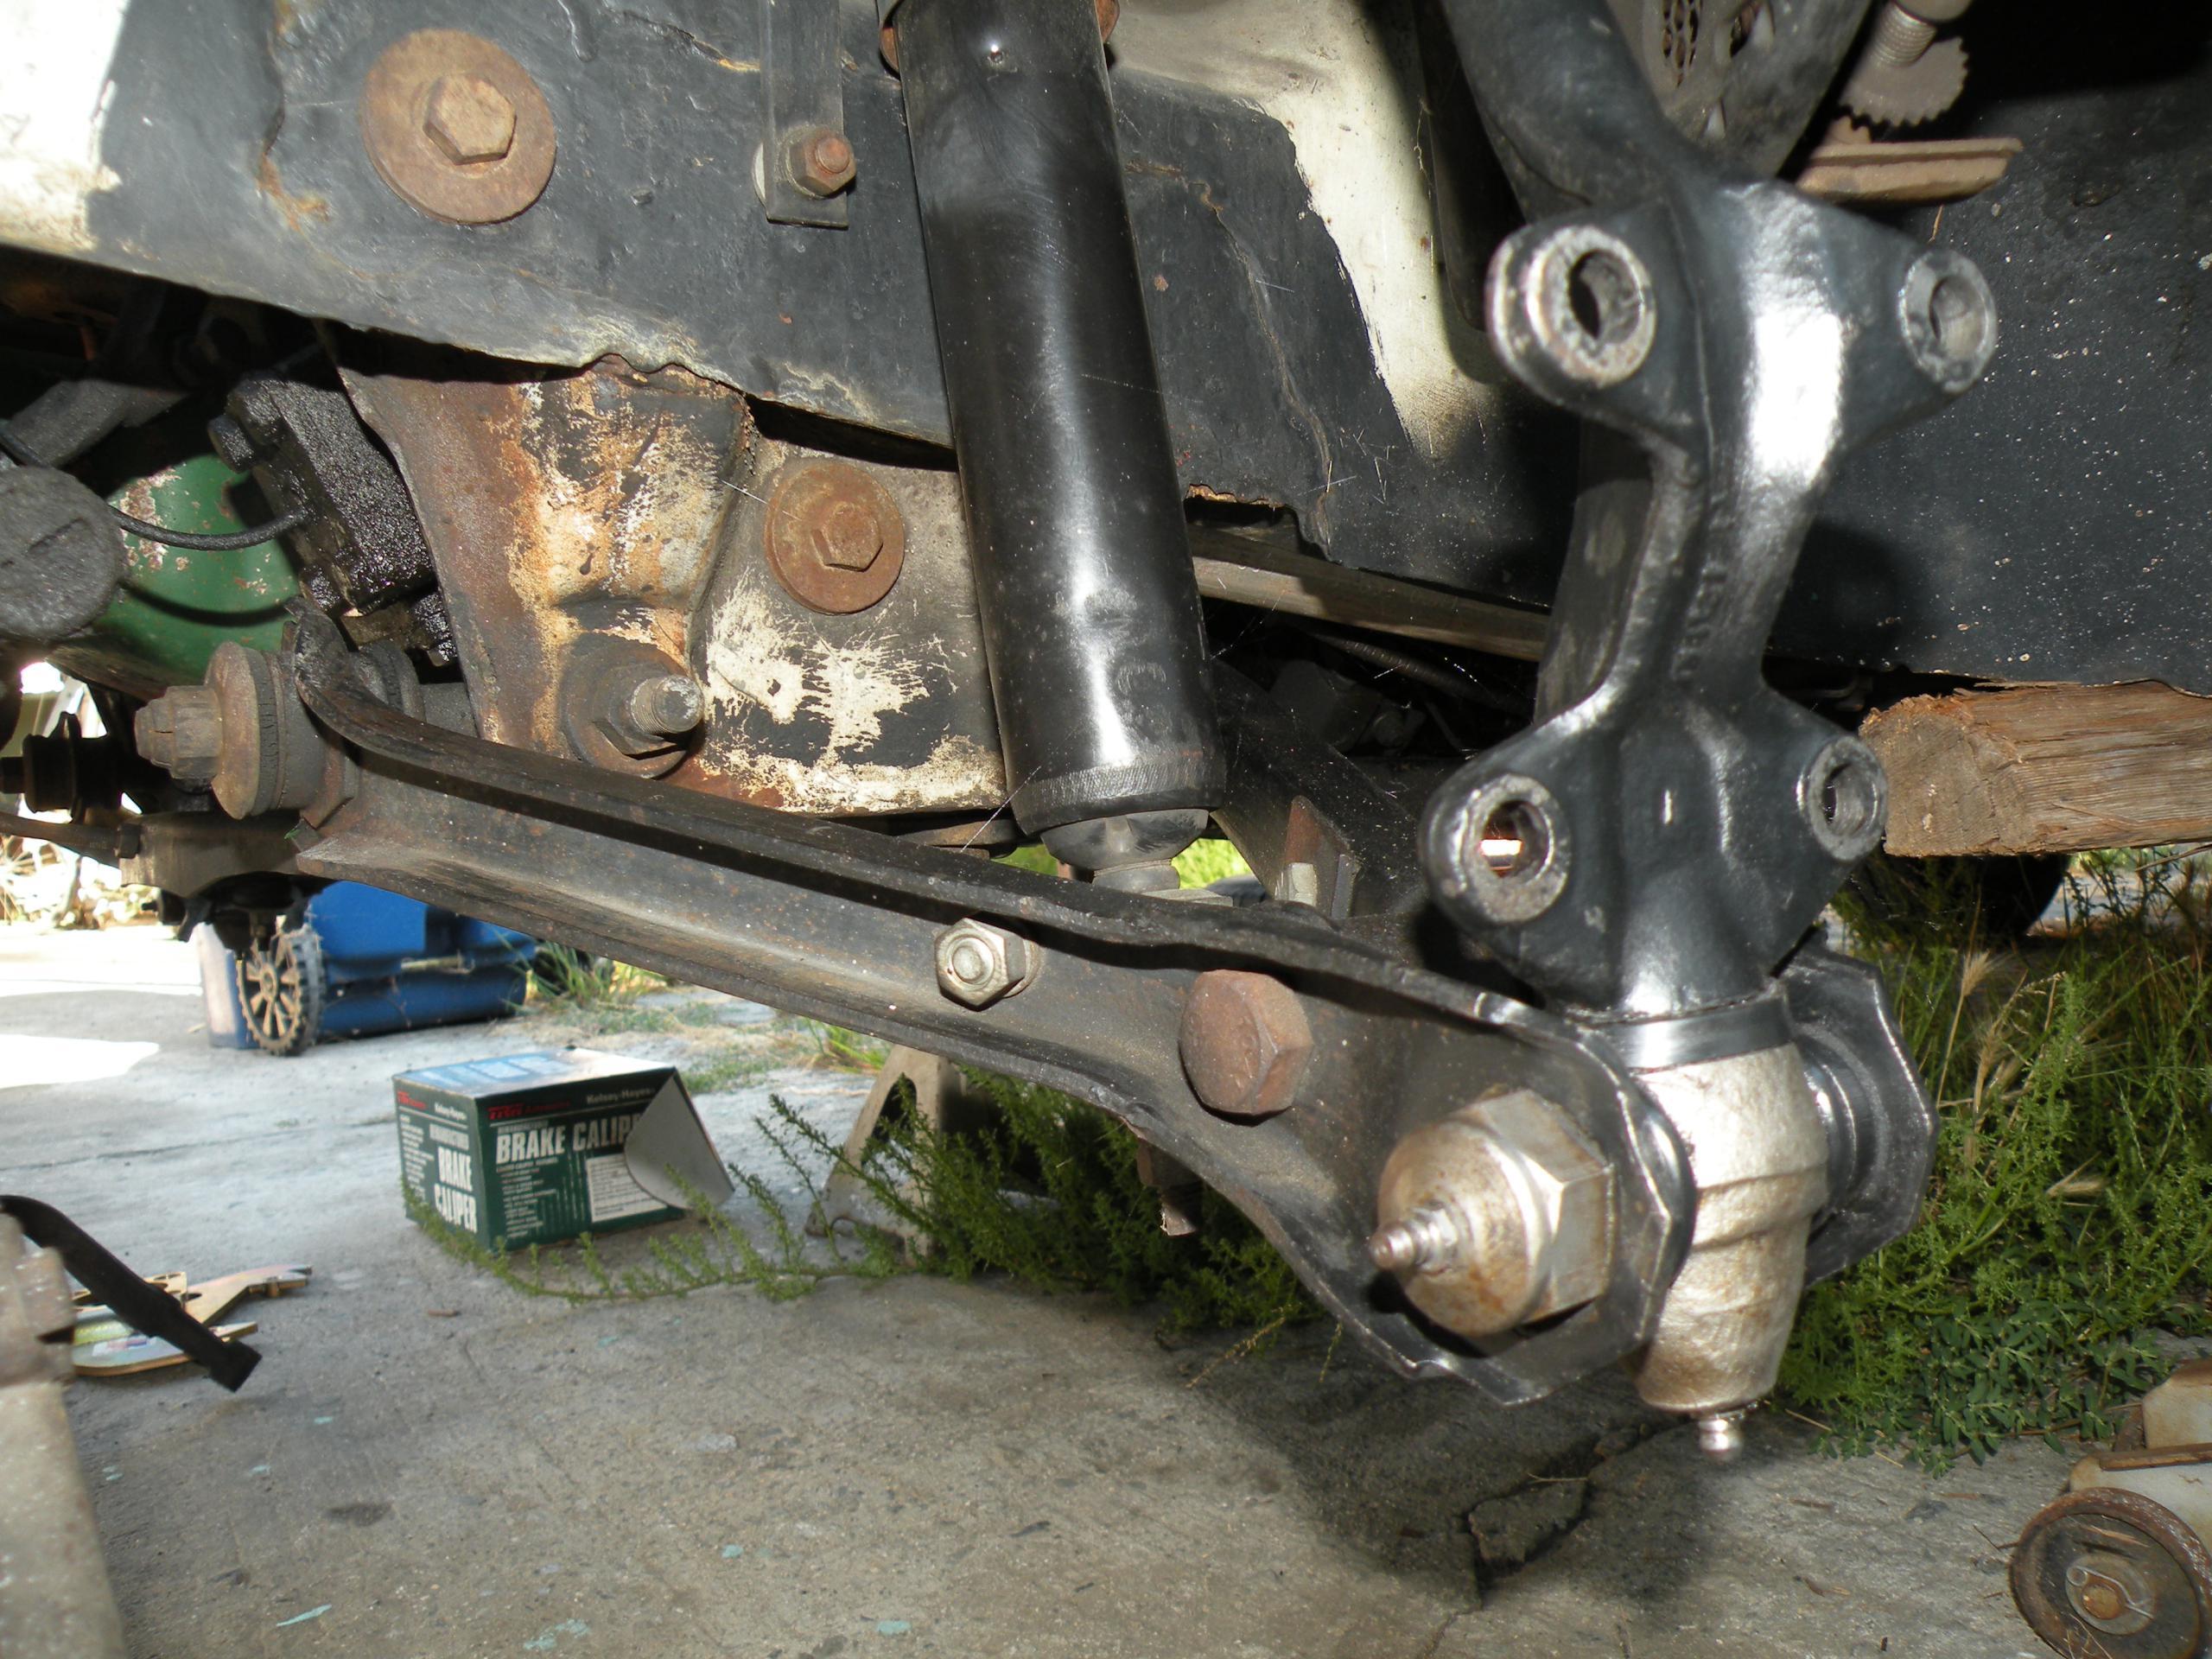
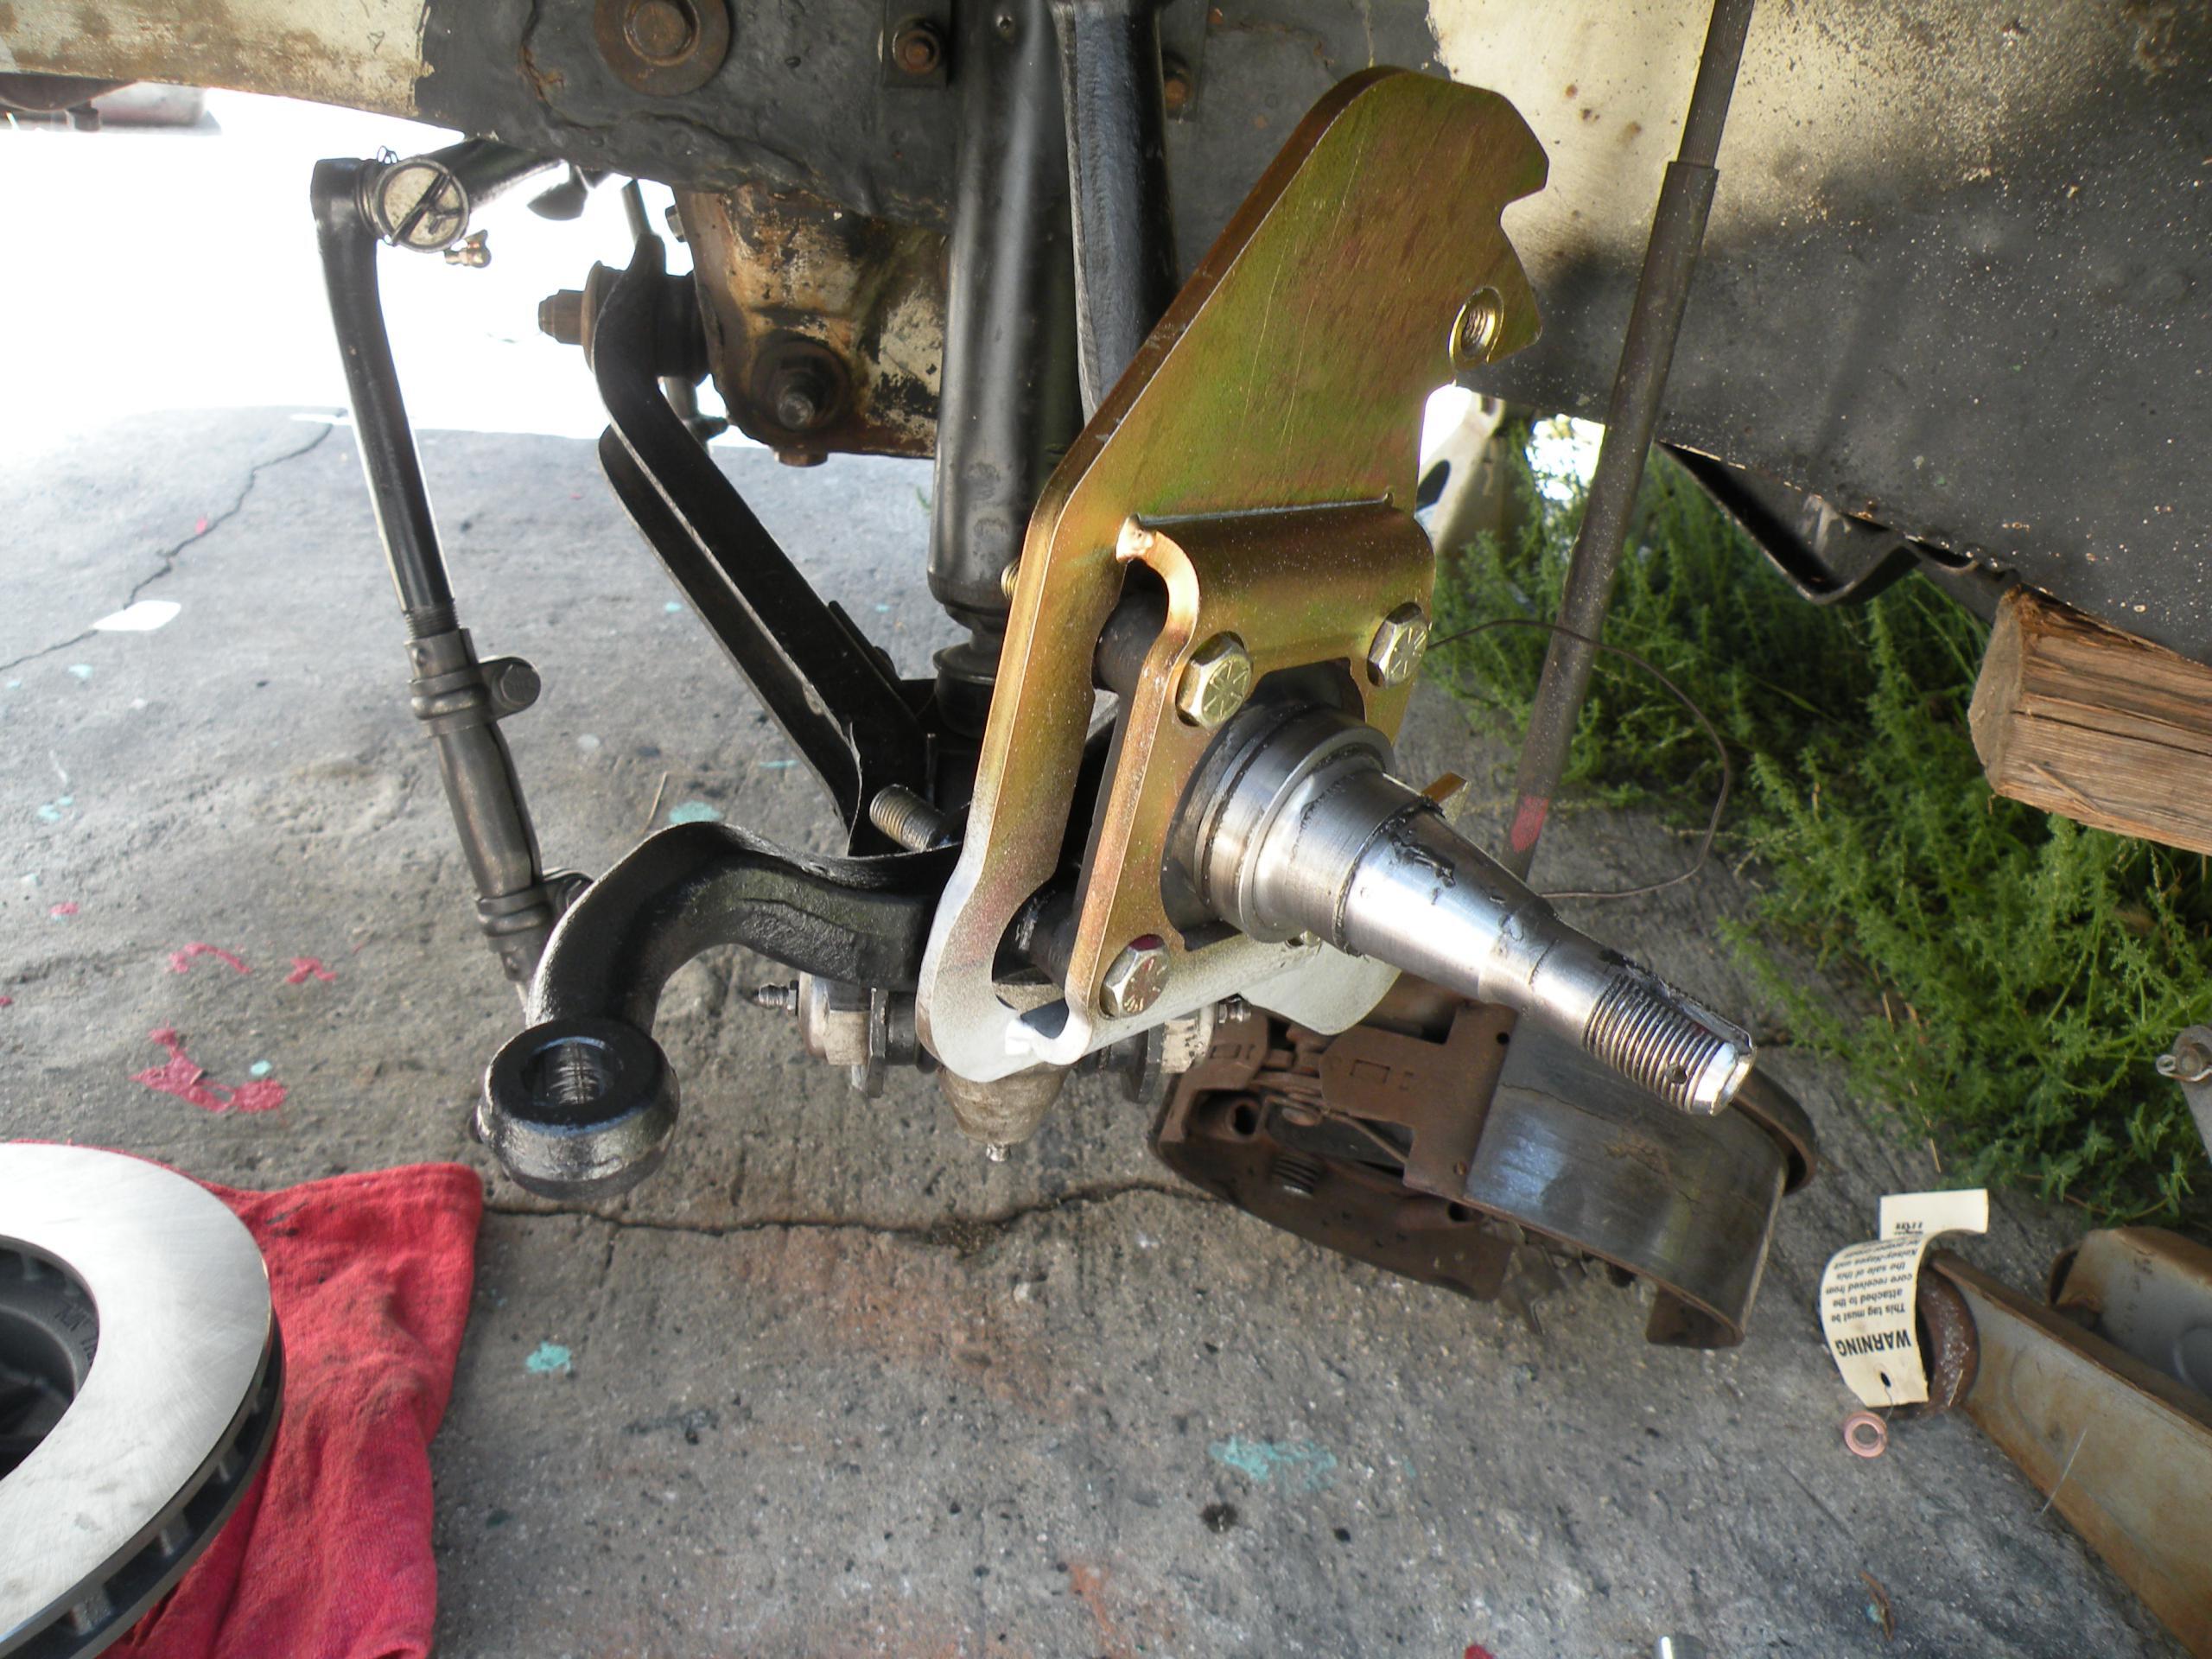
Once the bracket was modded to not interfere, it all just bolted together as intended. No surprises there, so no pictures. Here’s what it looks like now. Nice. Alas, disc brakes are a lot heavier than drums, the 9×2.5 drums were light and with the mods I’d made almost as good as discs…
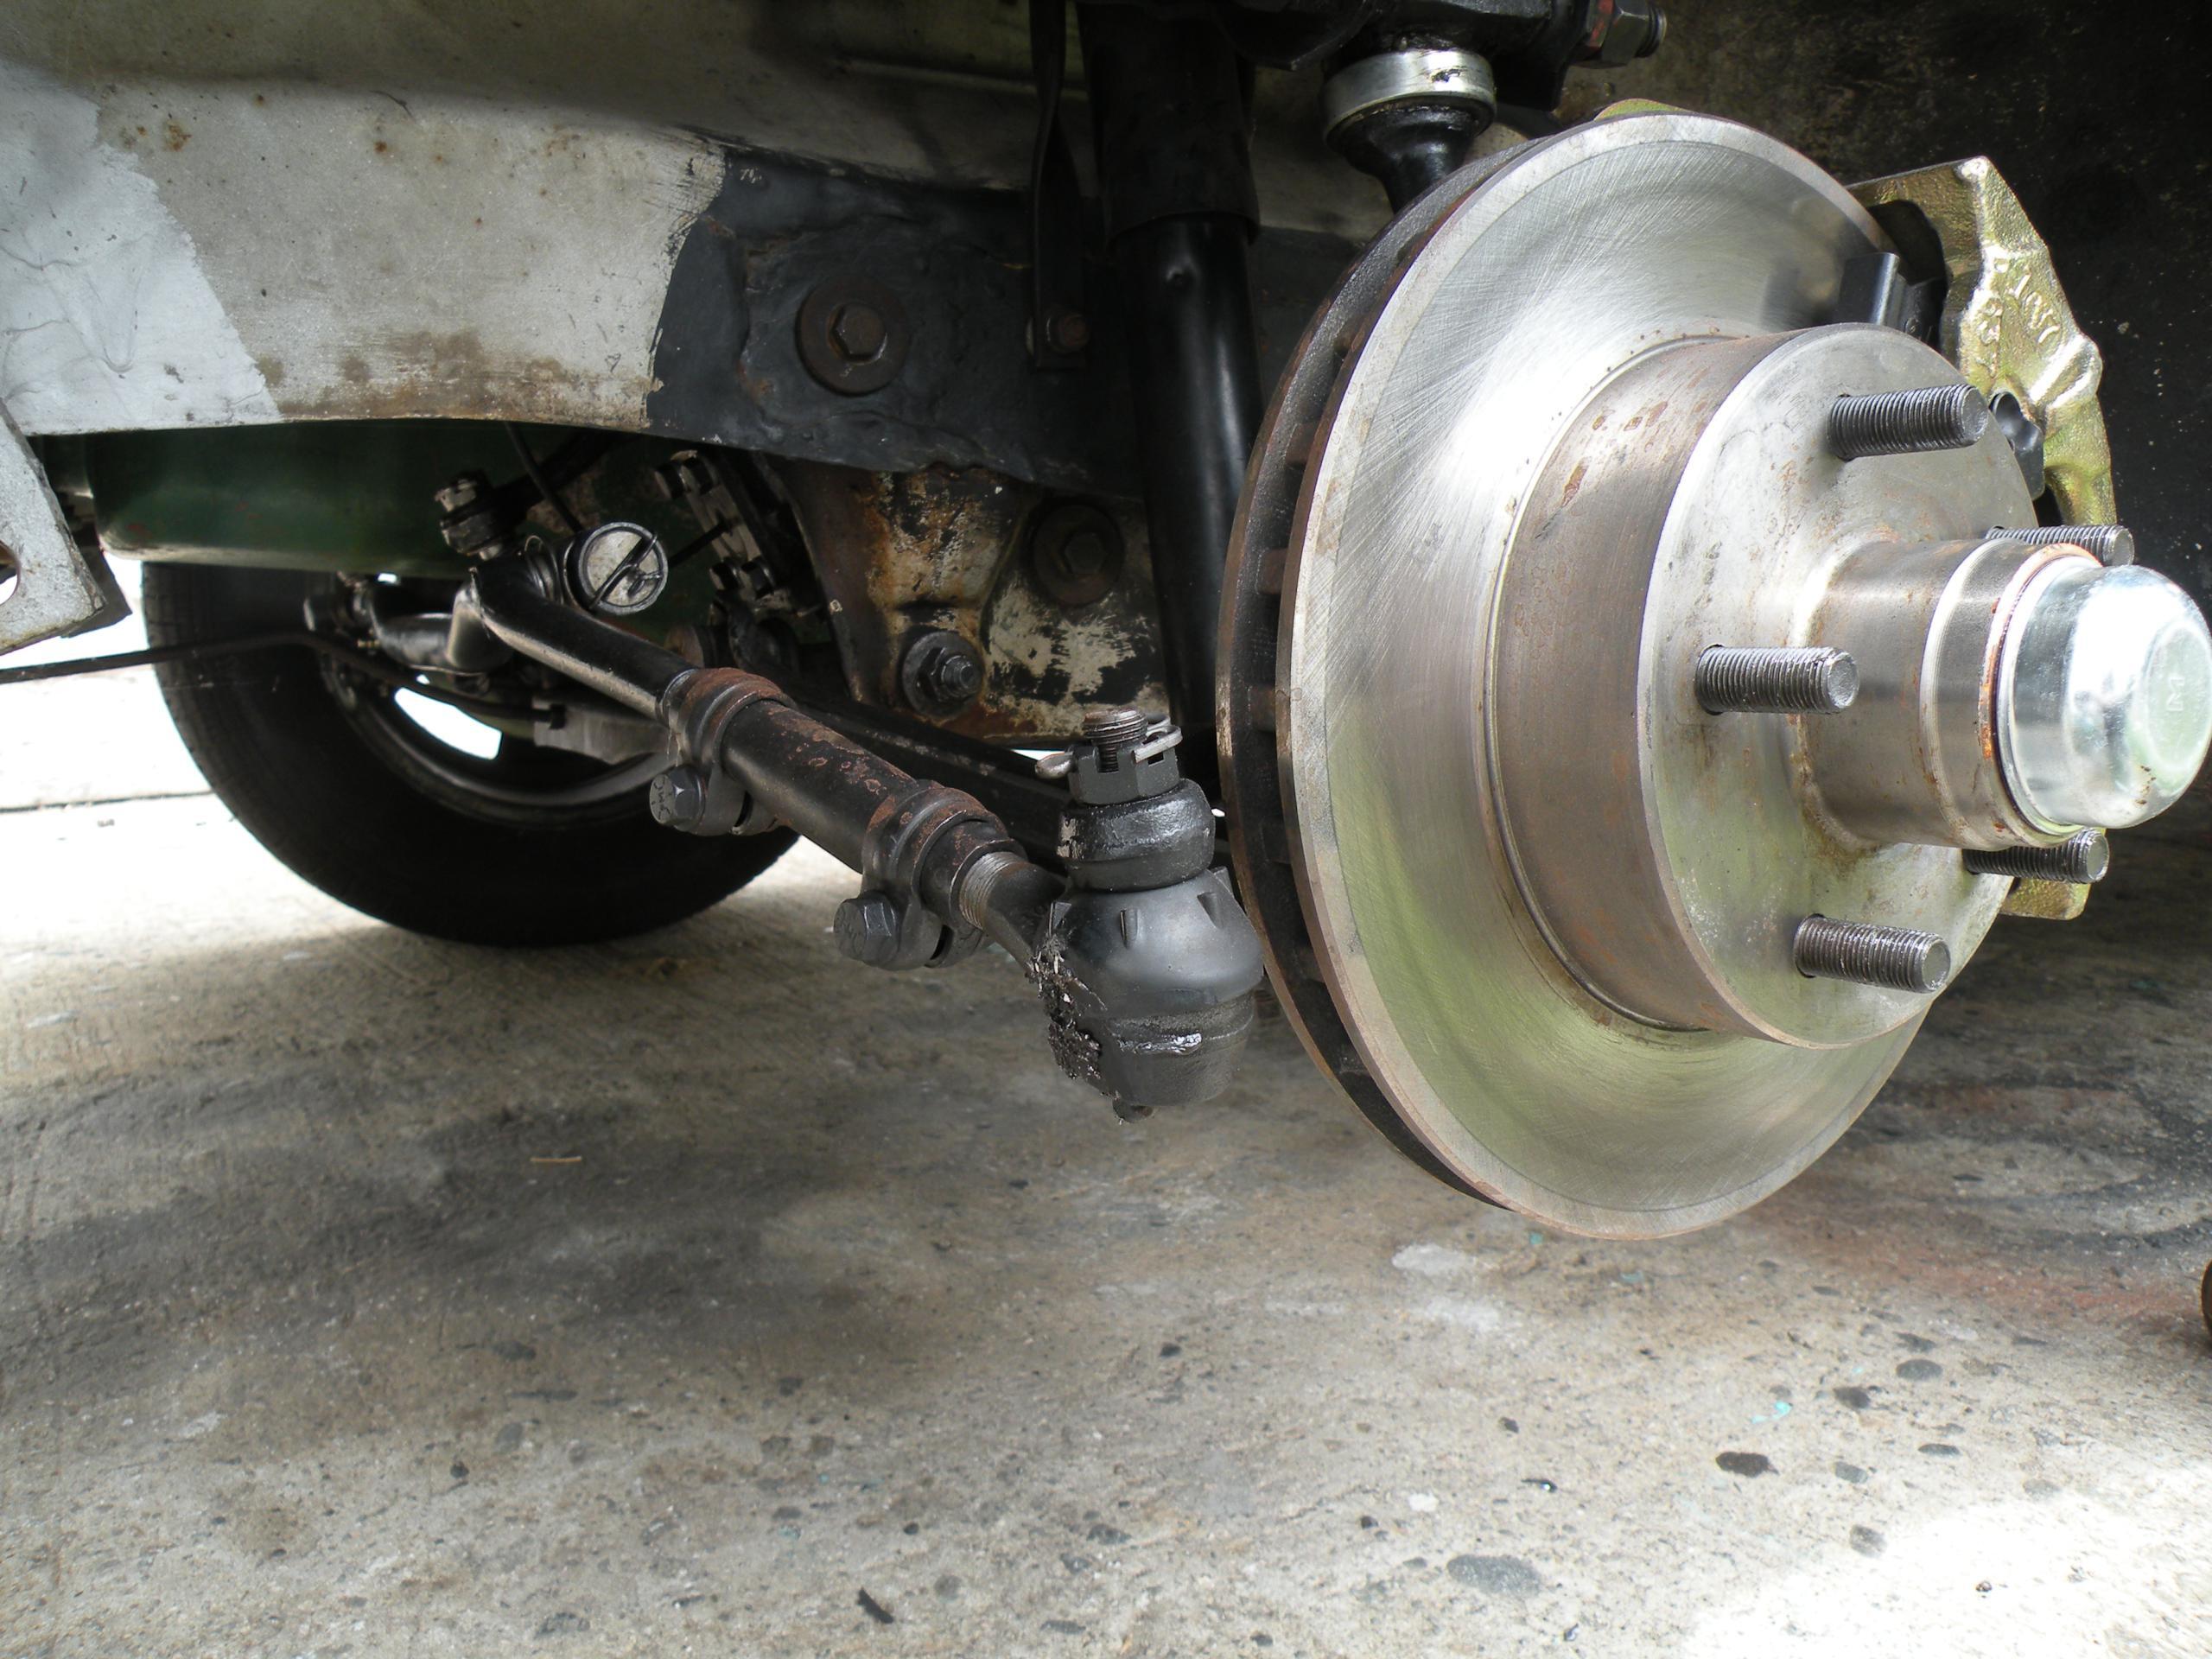
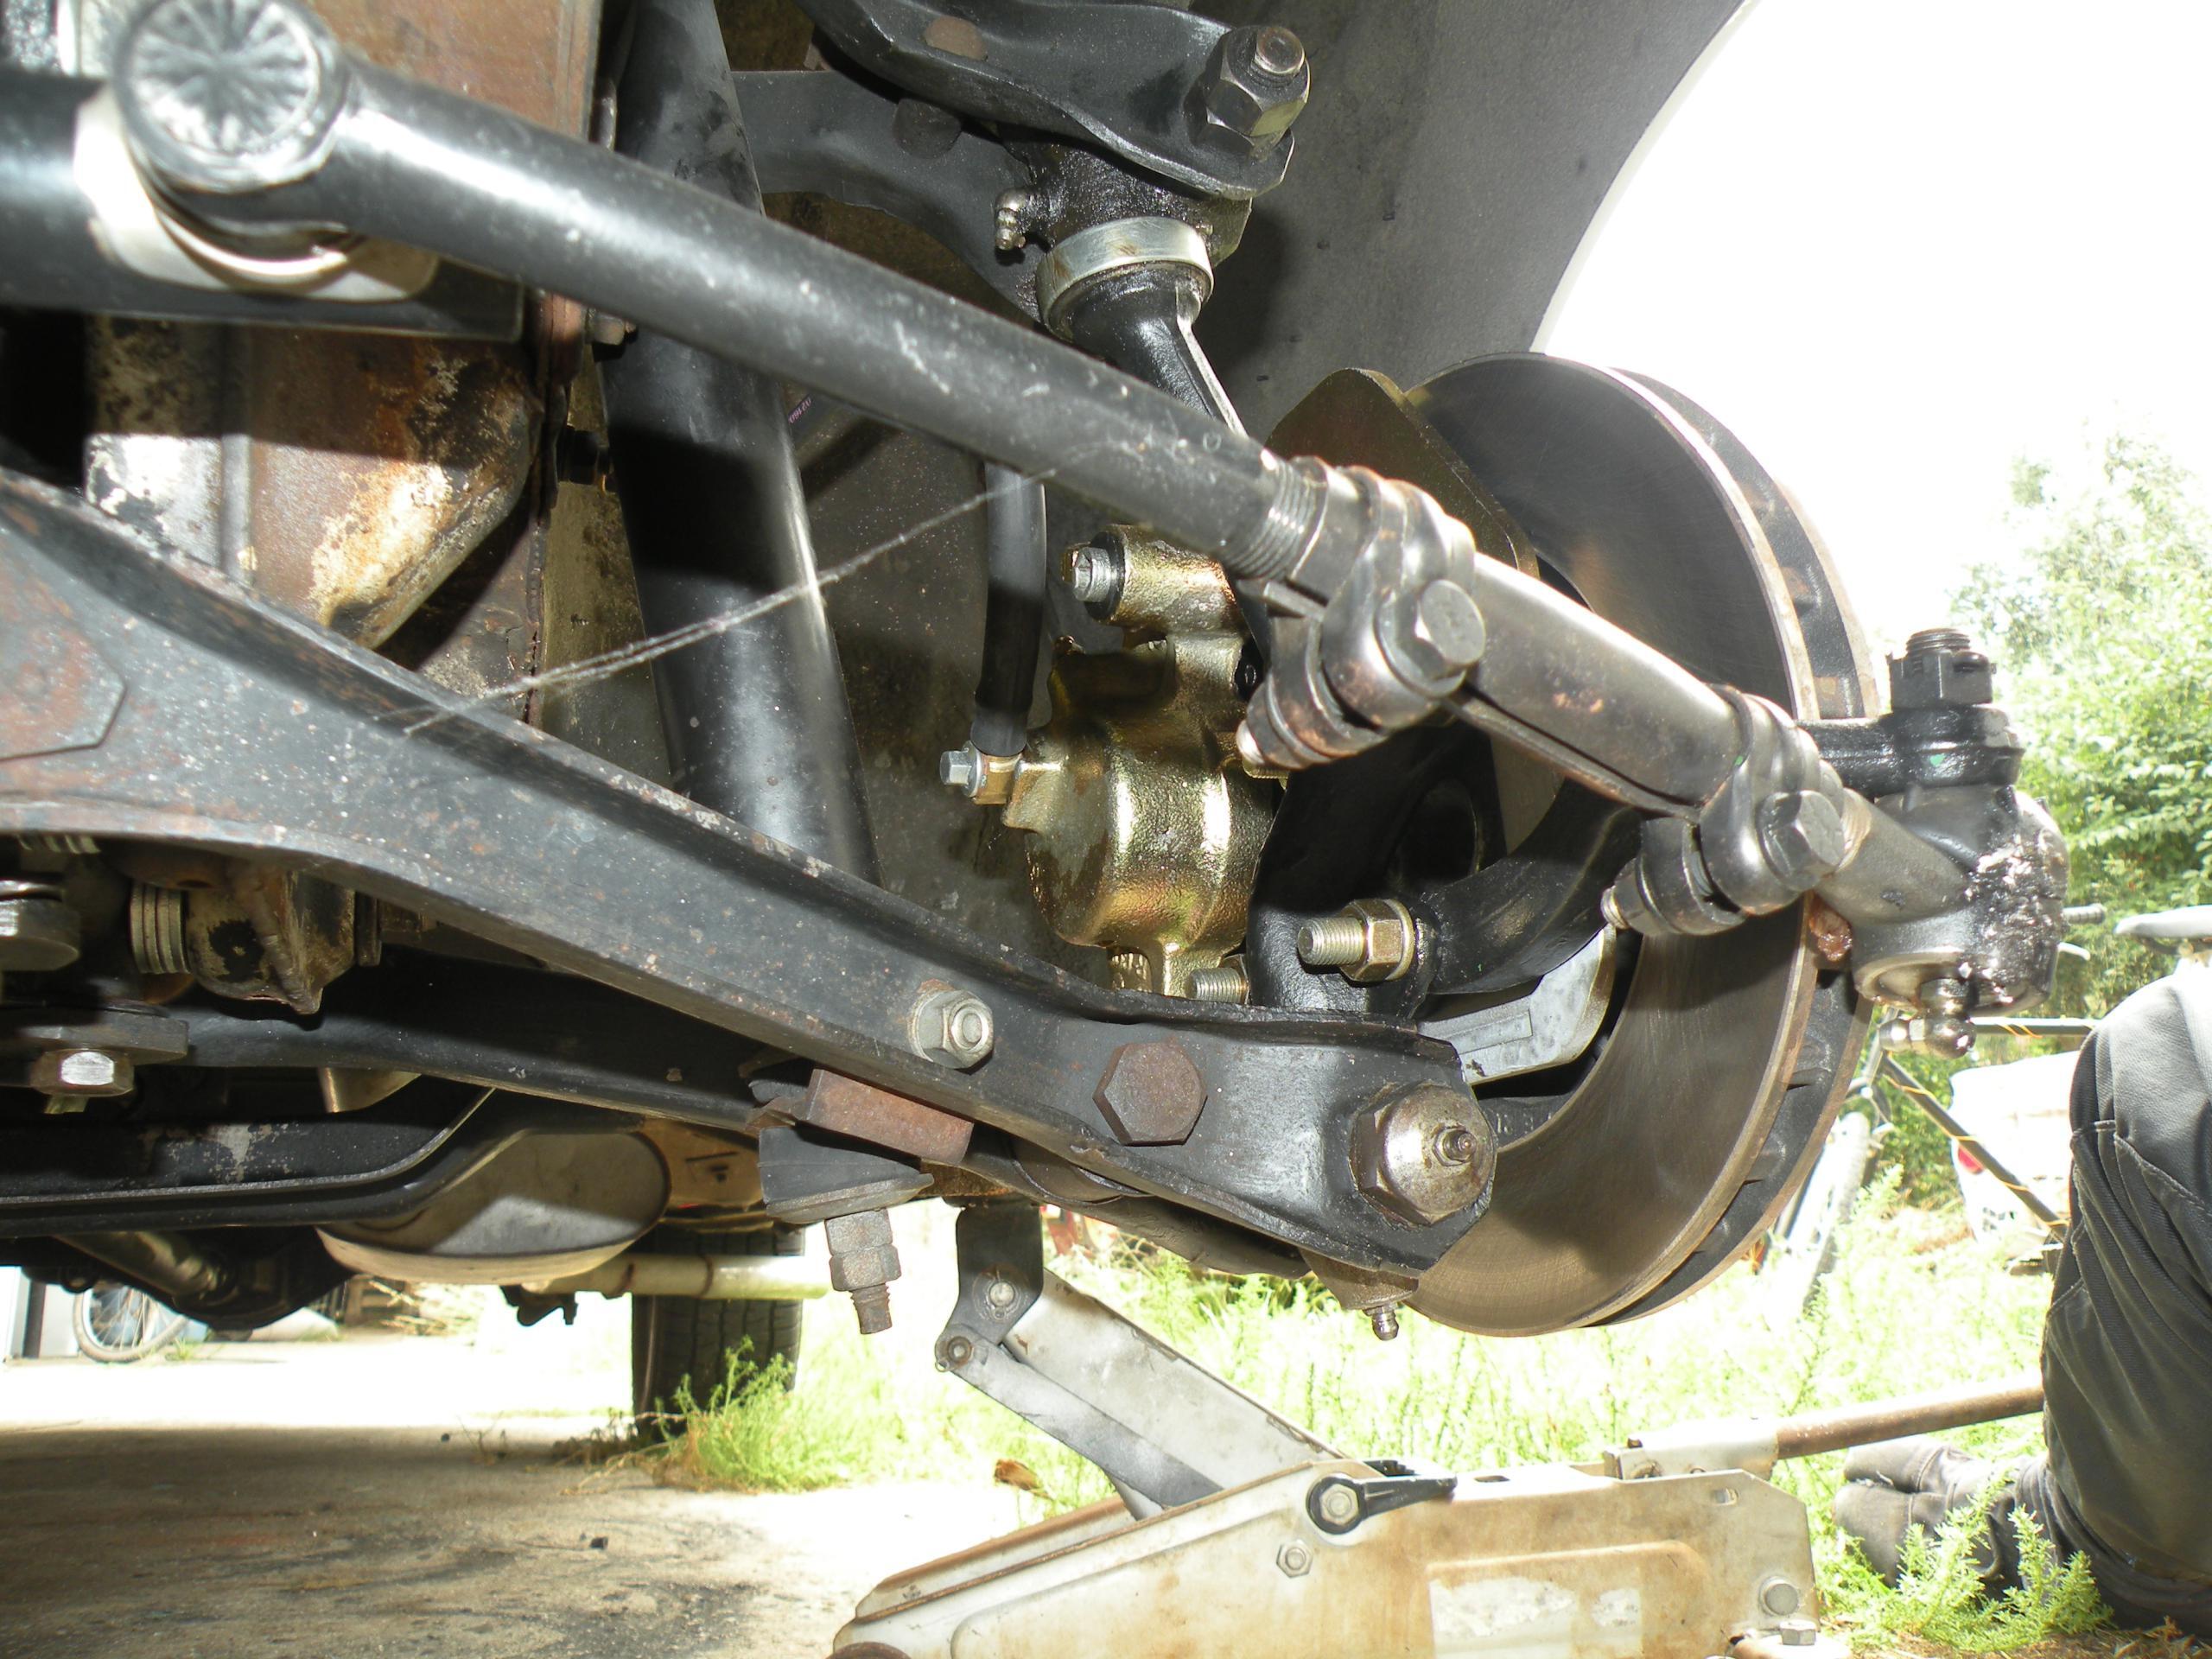
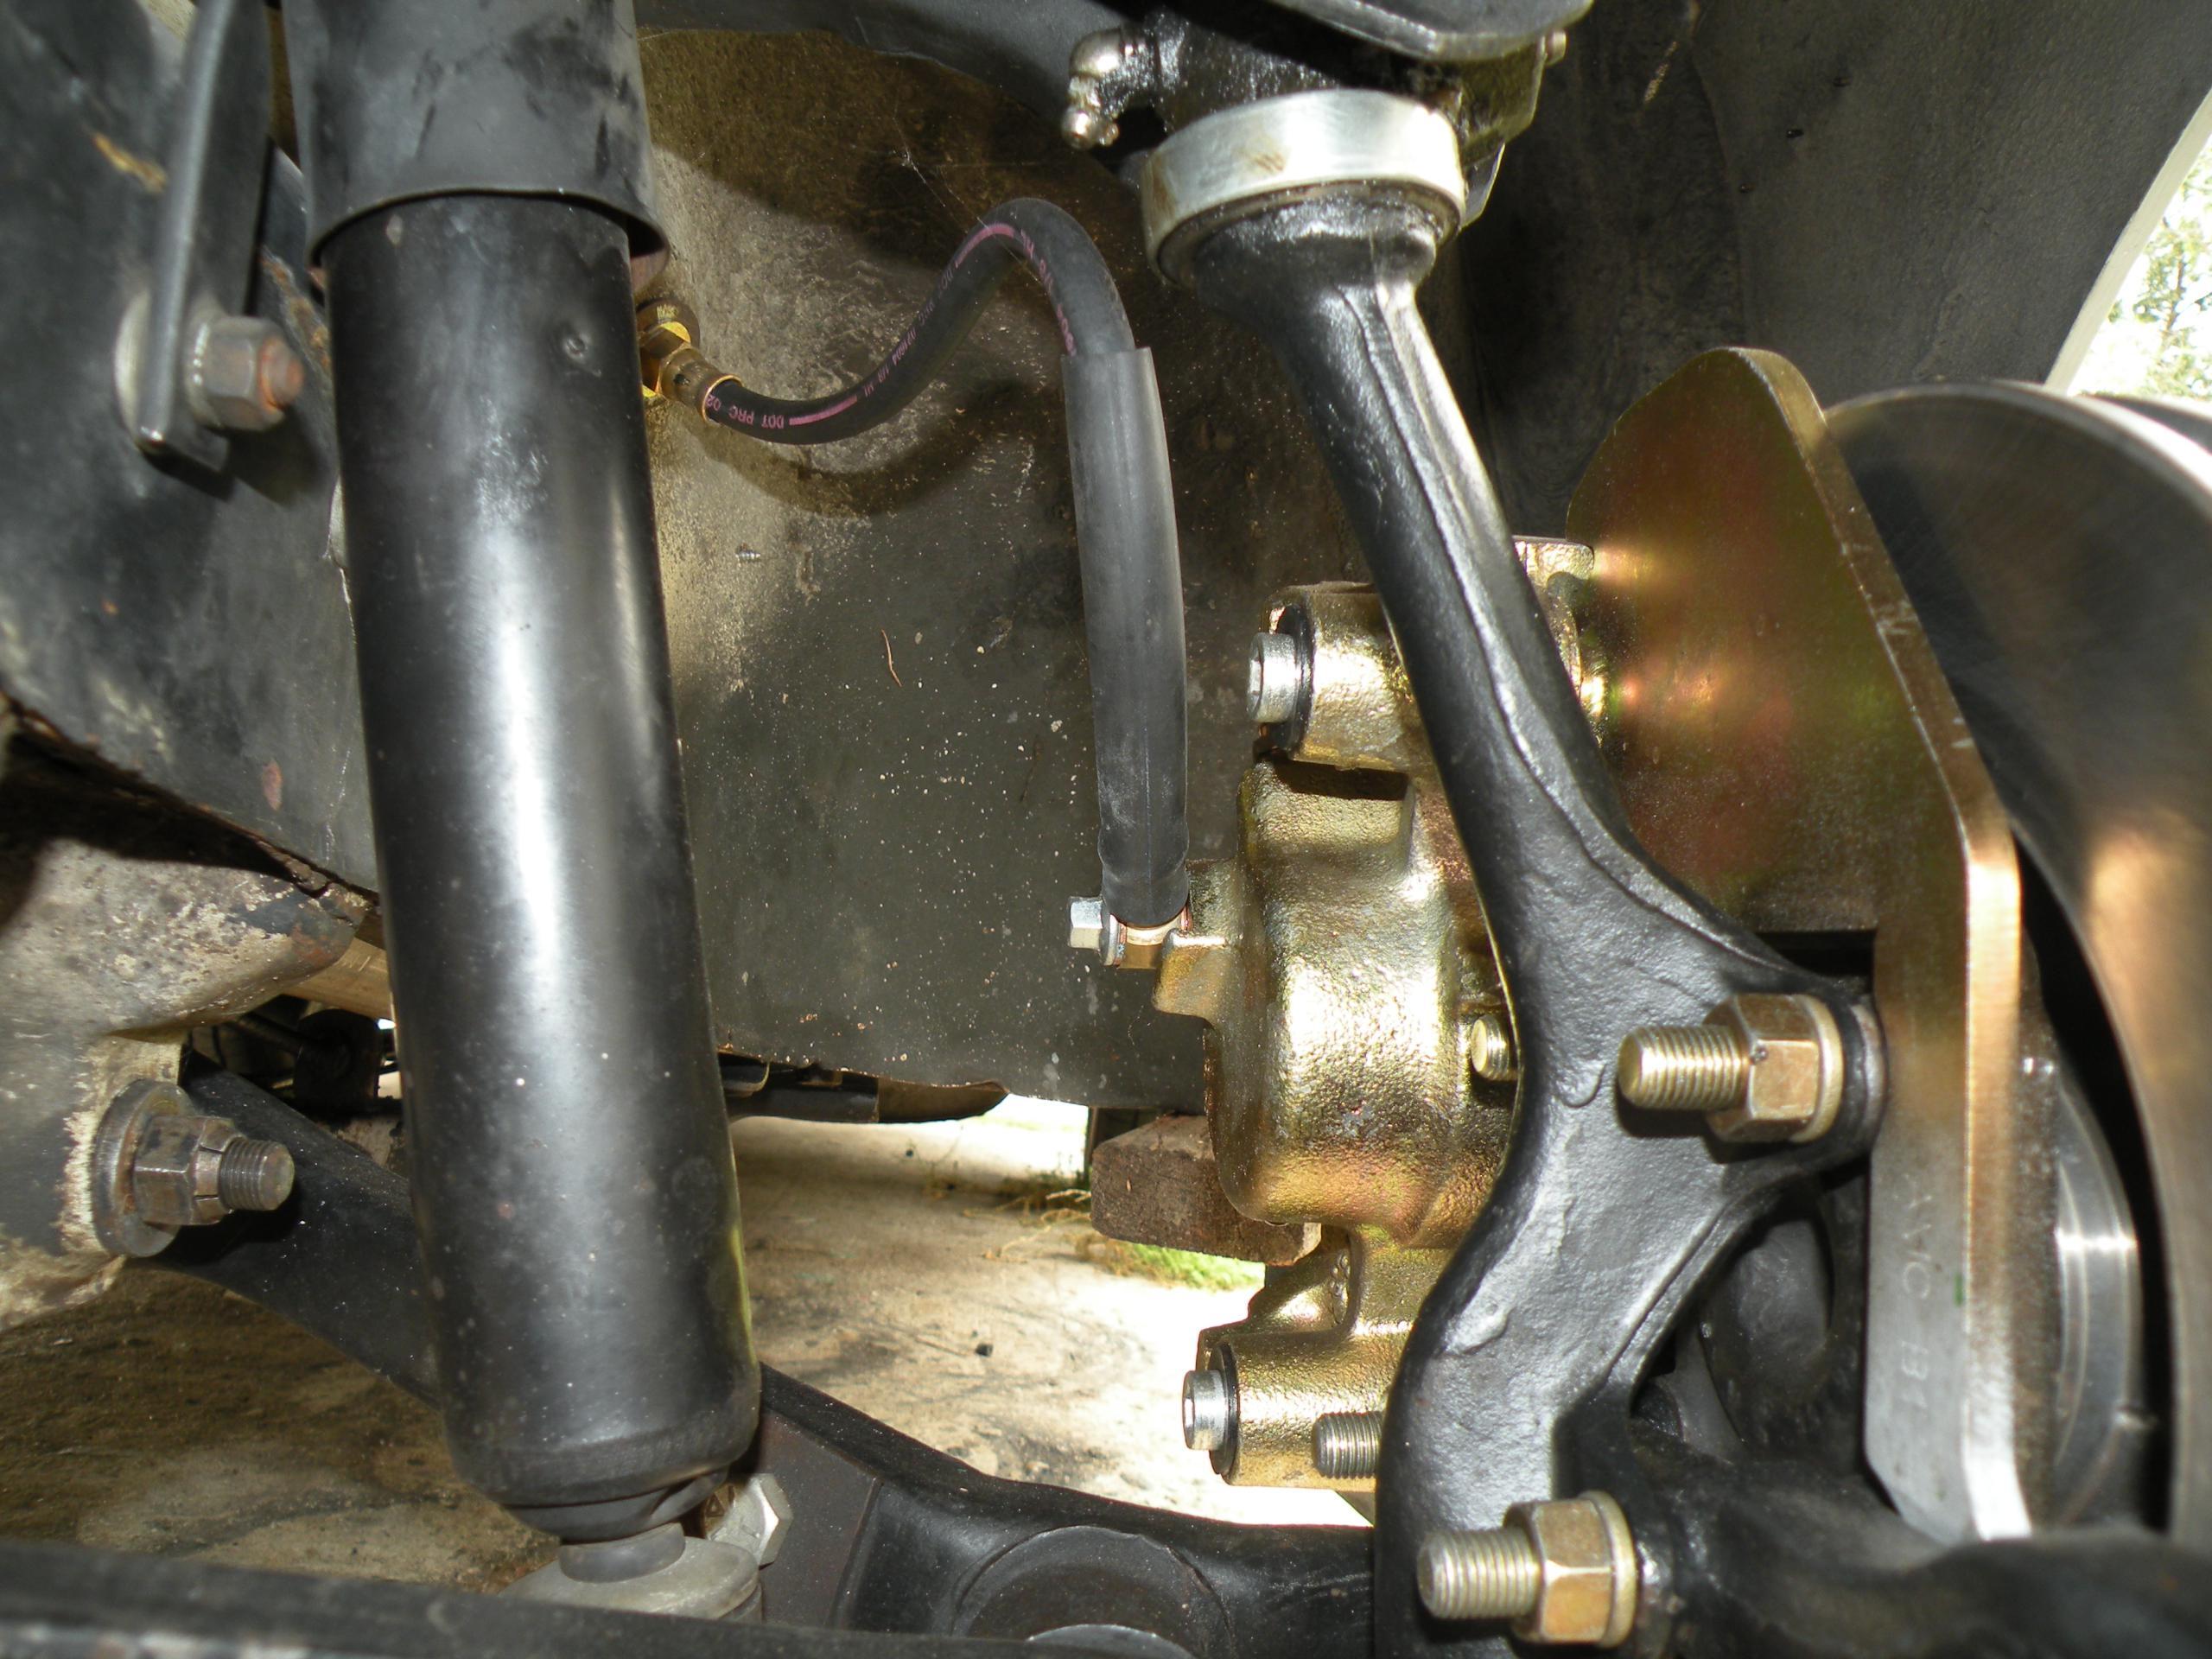
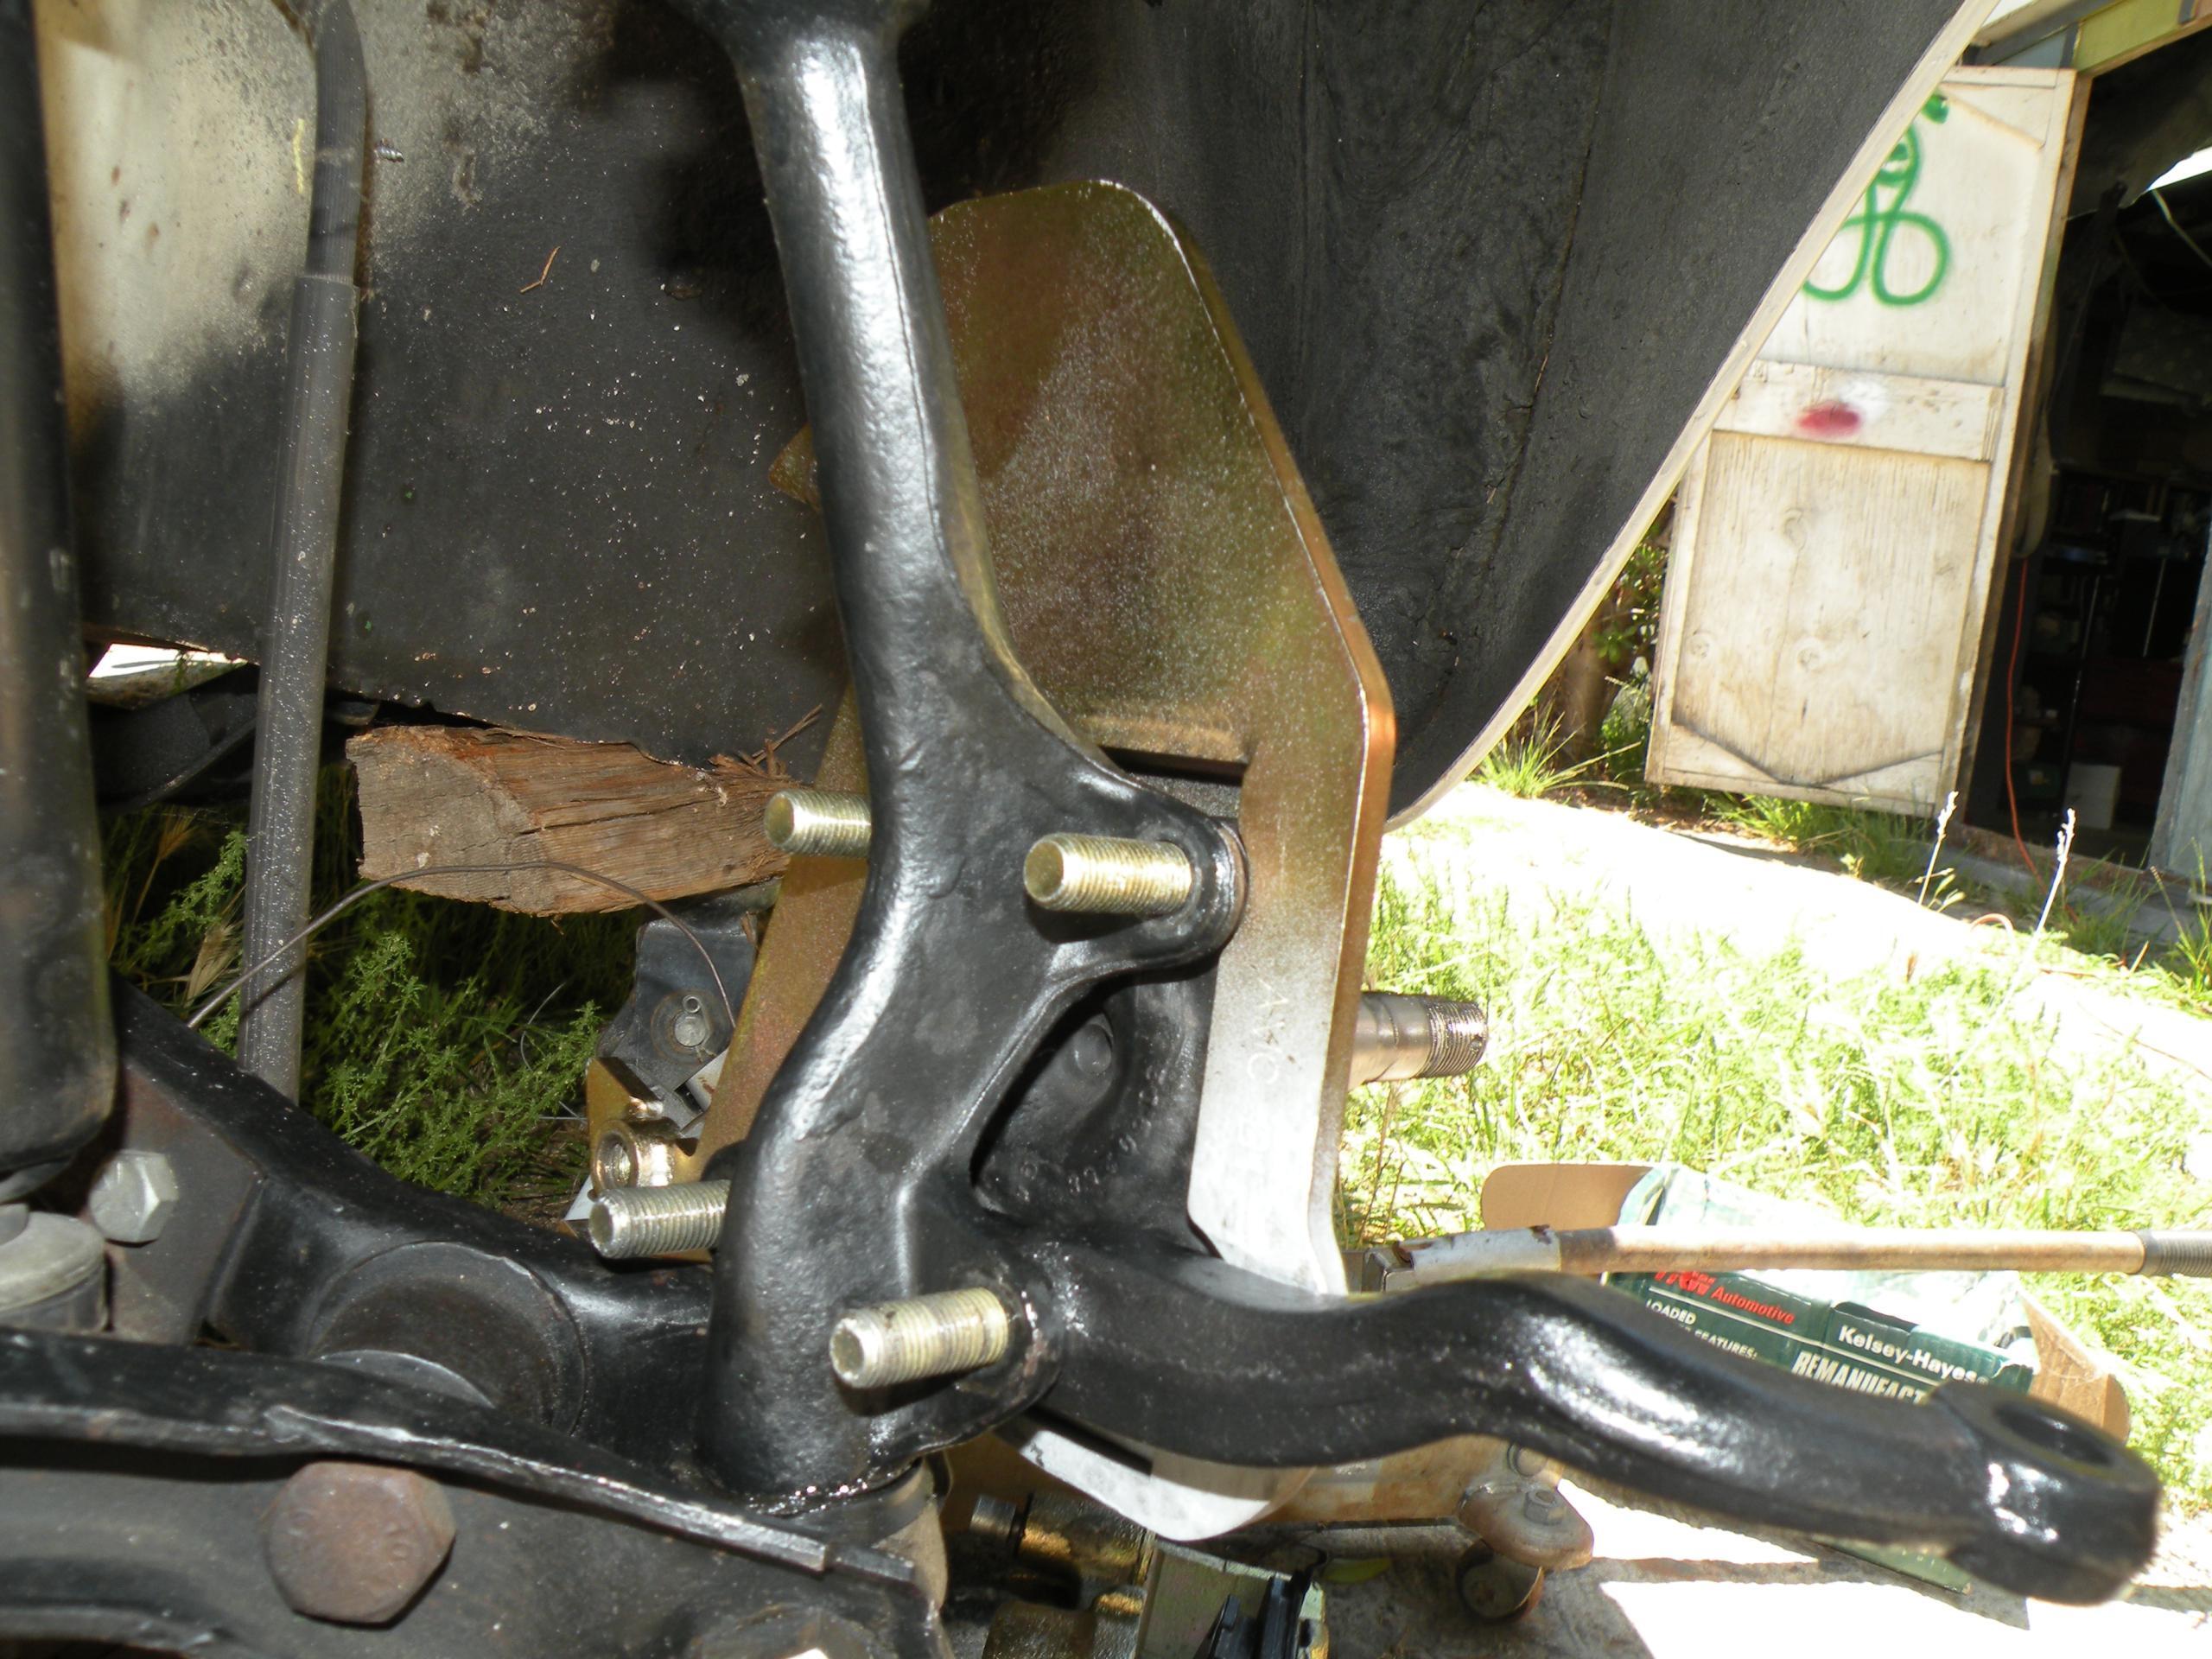
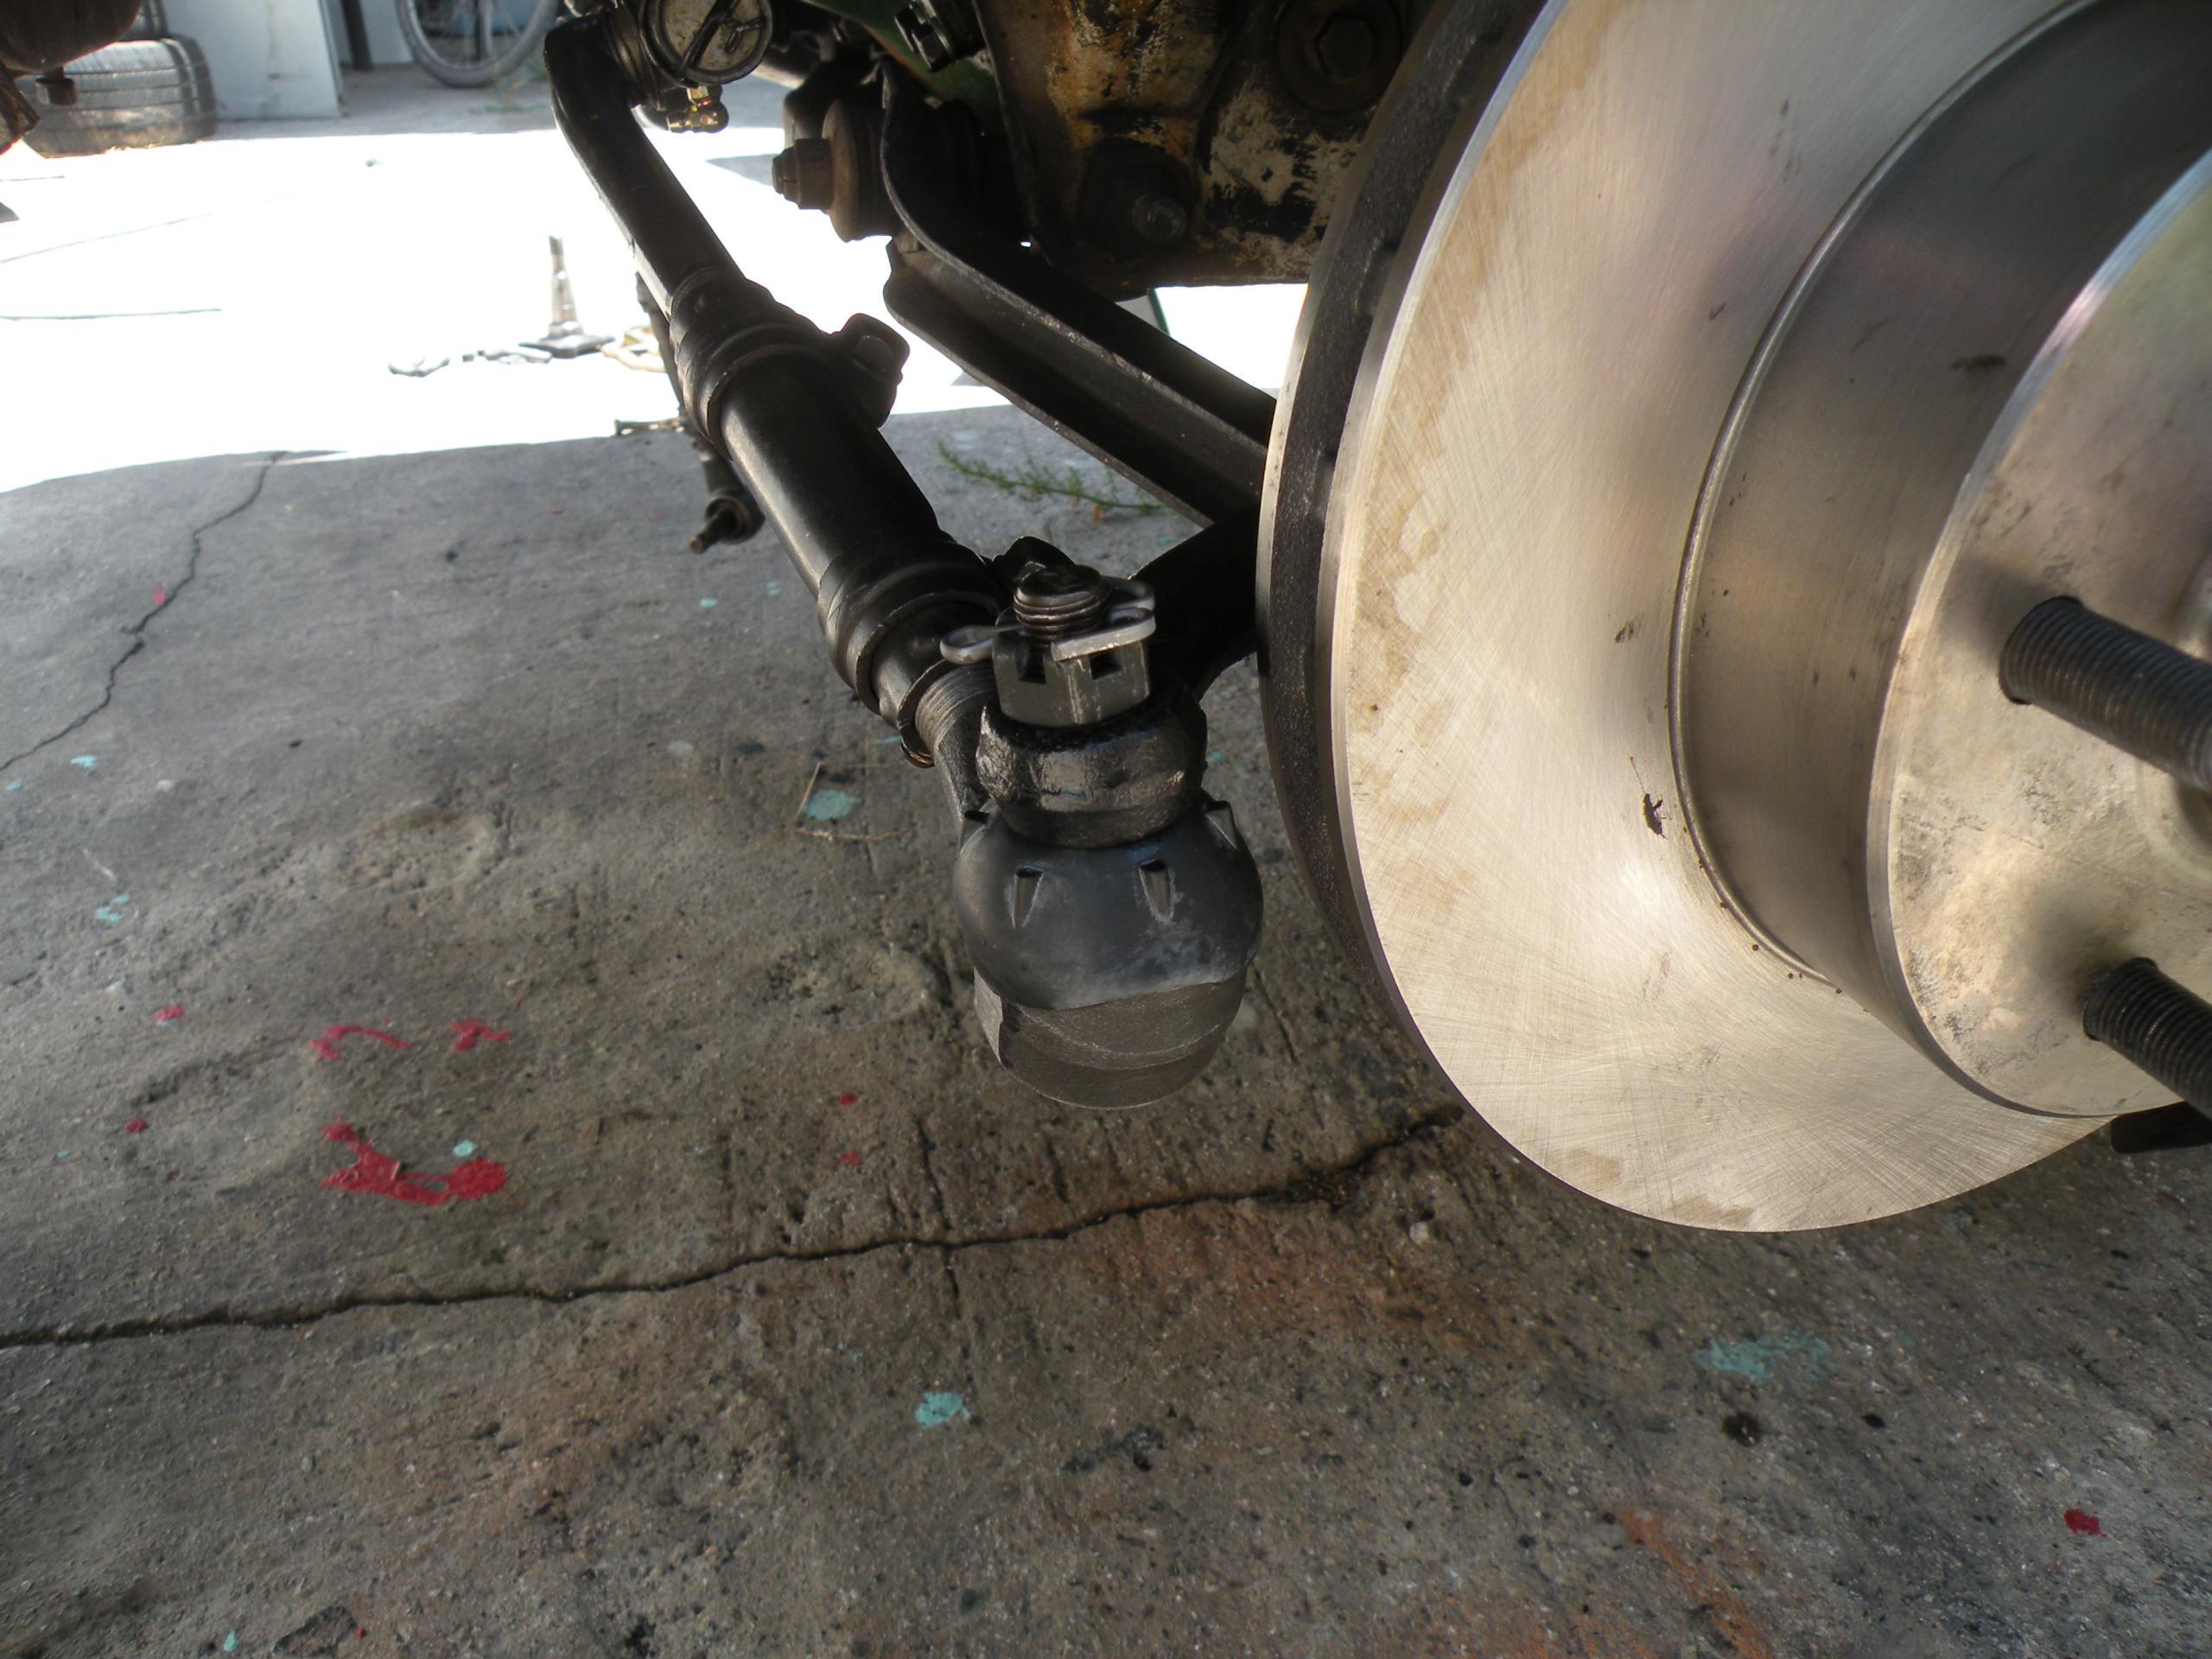
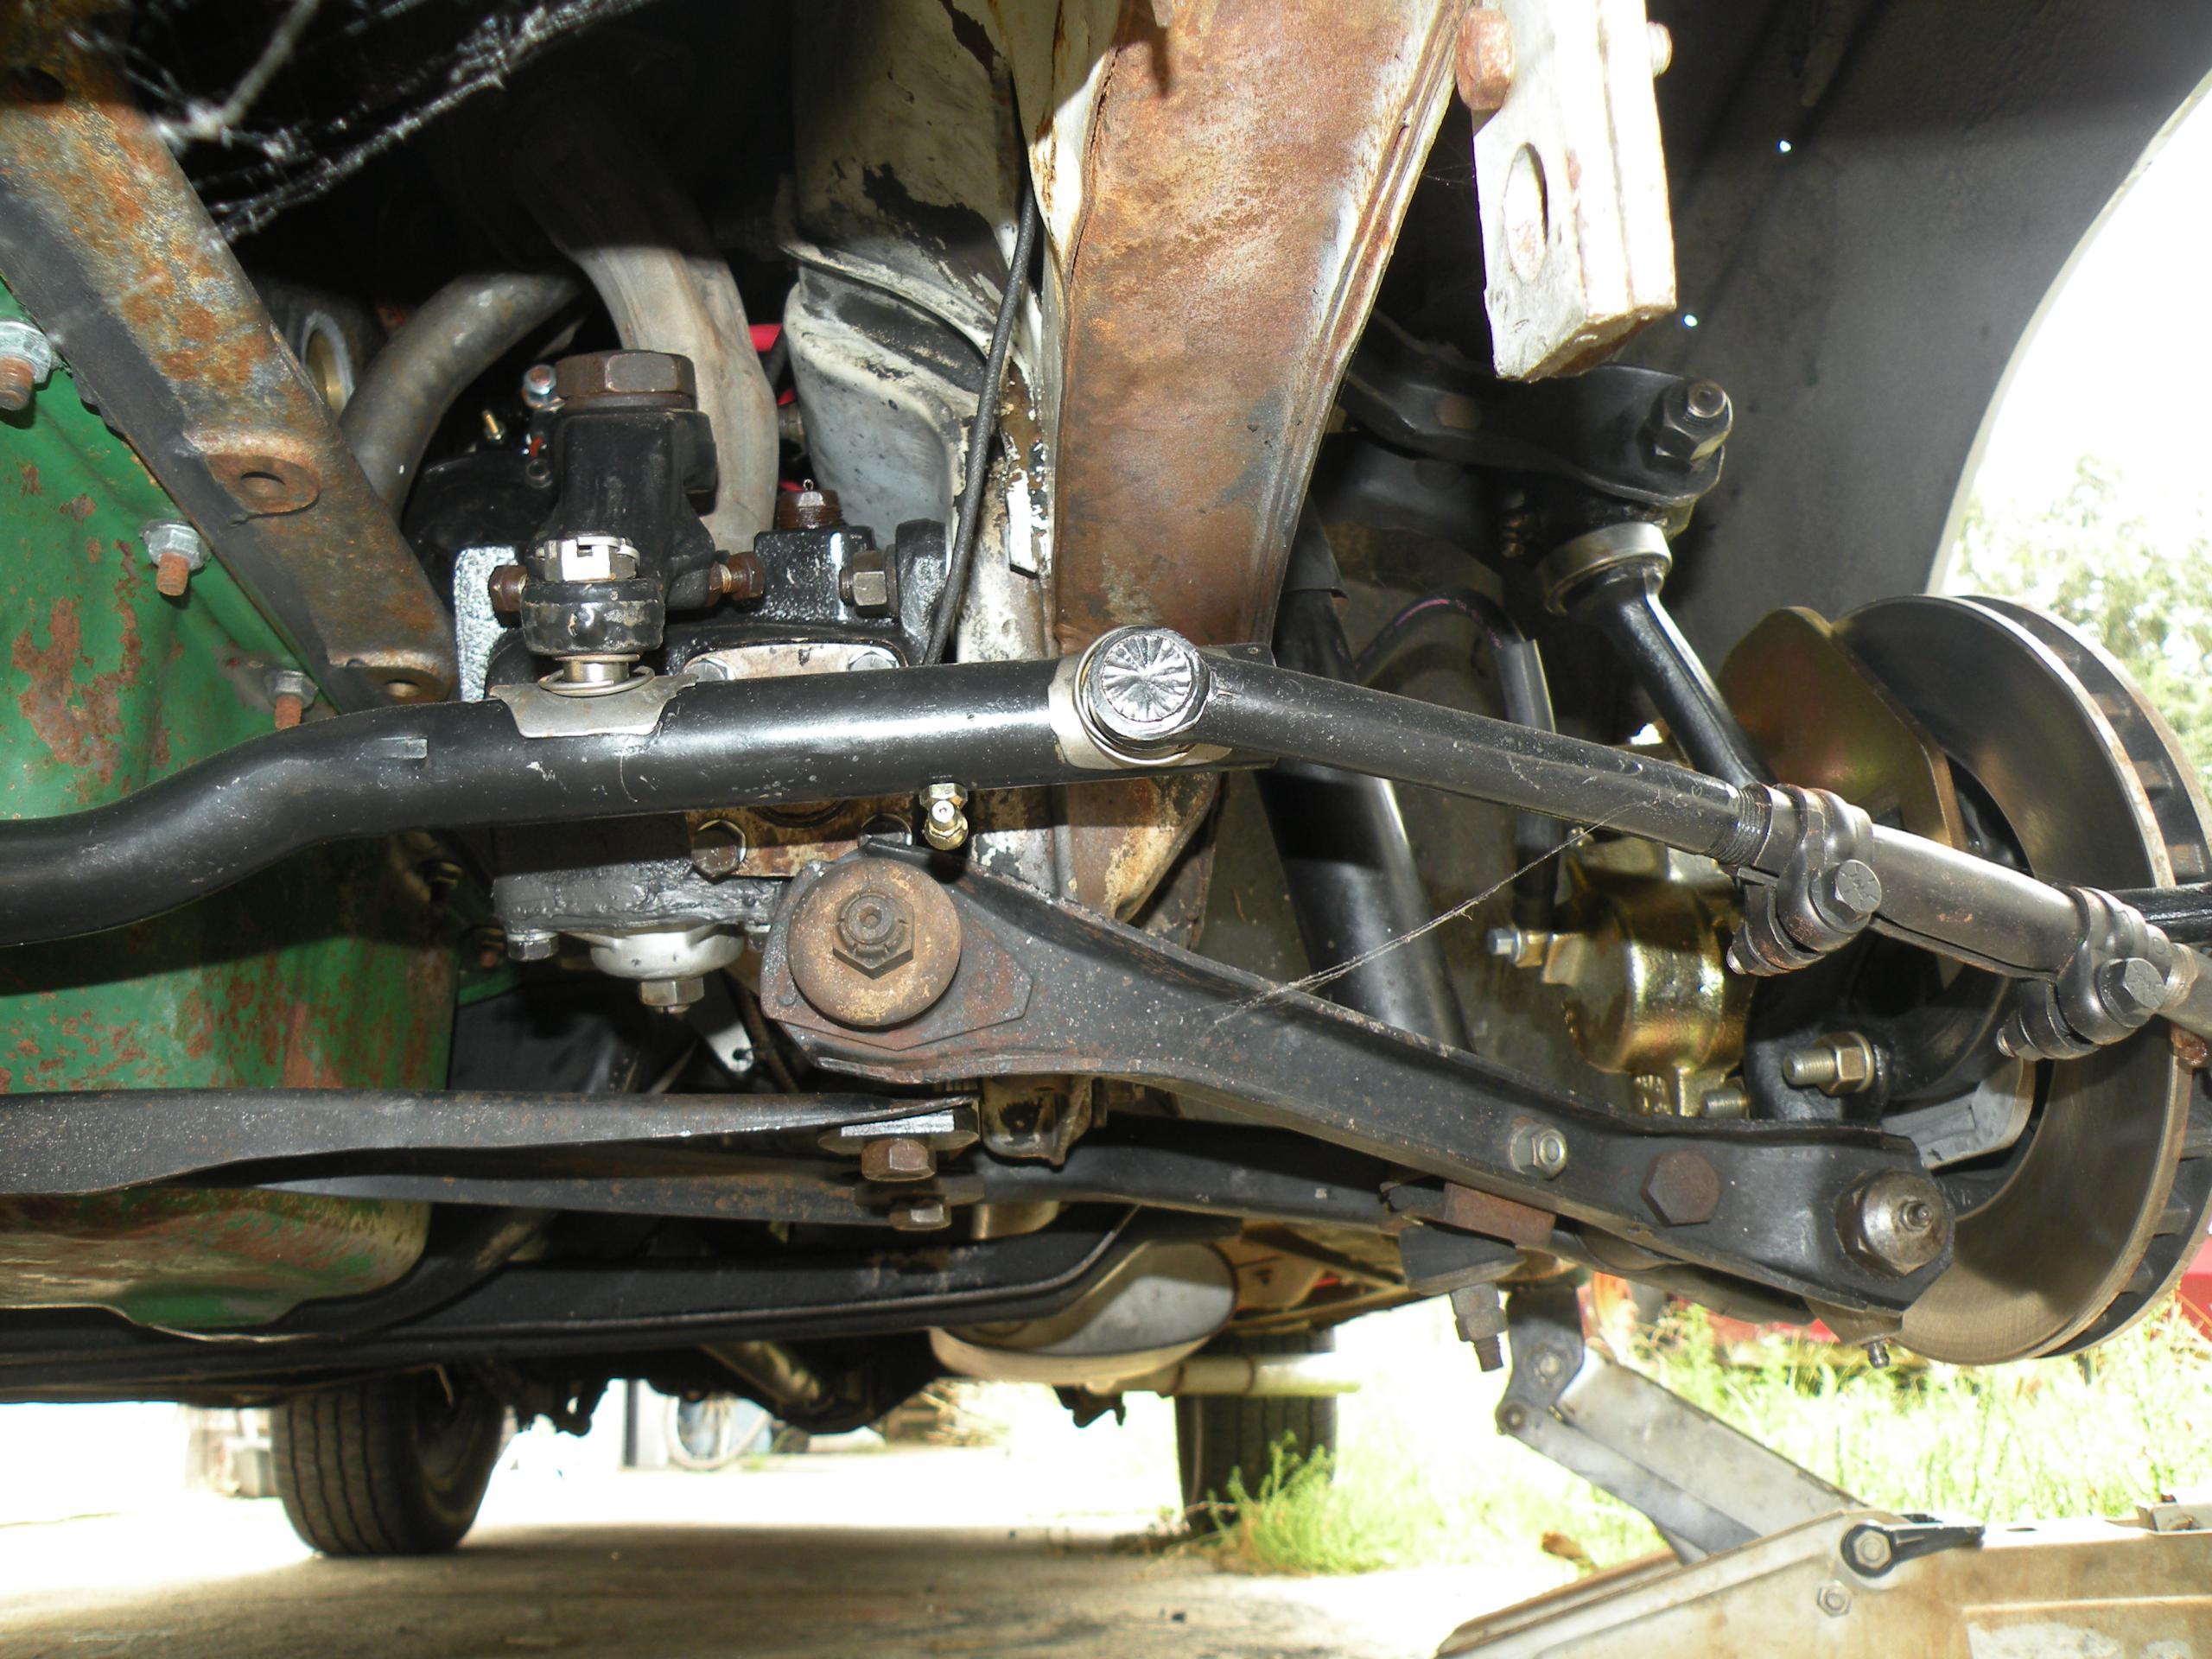
Here are some general views of the suspension after assembly. At this point all of the suspension parts are “new” (2007 or later) with the shock mount modification and lower arm strength increase, and the custom (lubricatable!) upper arm pivot visible. Note the stacked 1/2″ washers to increase camber range substantially outside factory range; for 1950’s/1960’s roads the spec was 0 to positive camber! I run about 1 degree negative, and without the washers, the alignment shop has to stick in a huge stack of precarious shims.
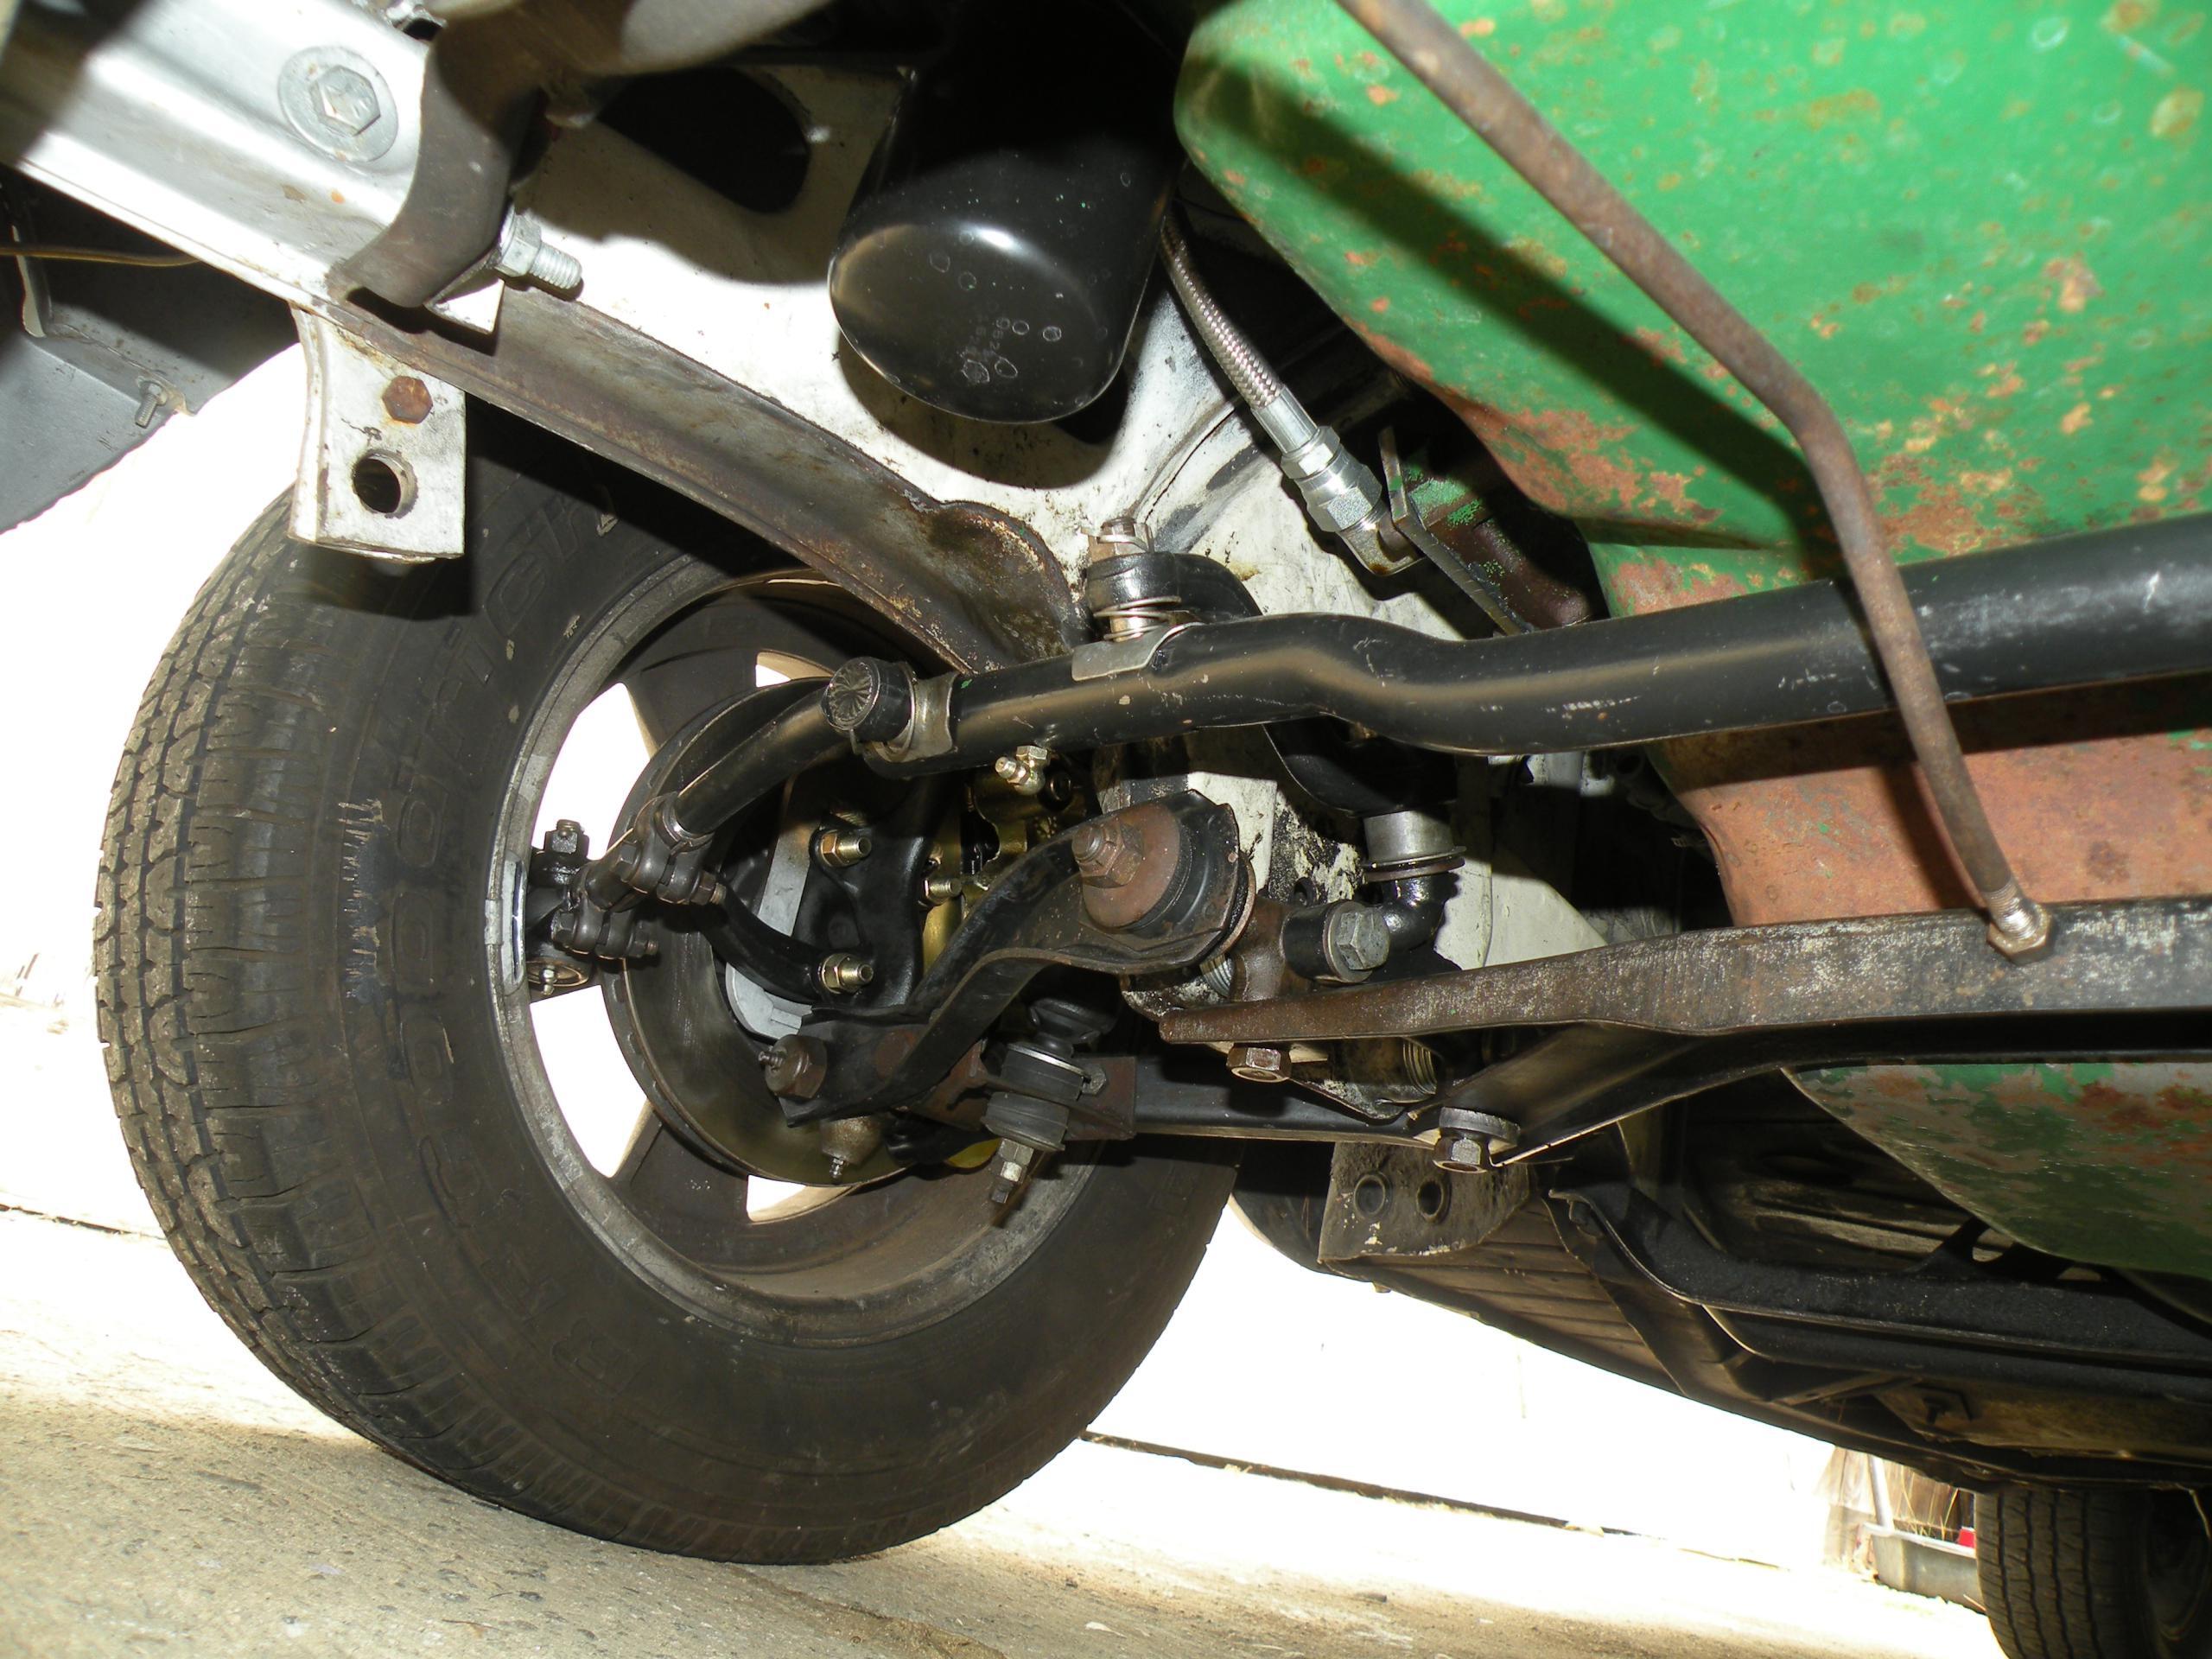
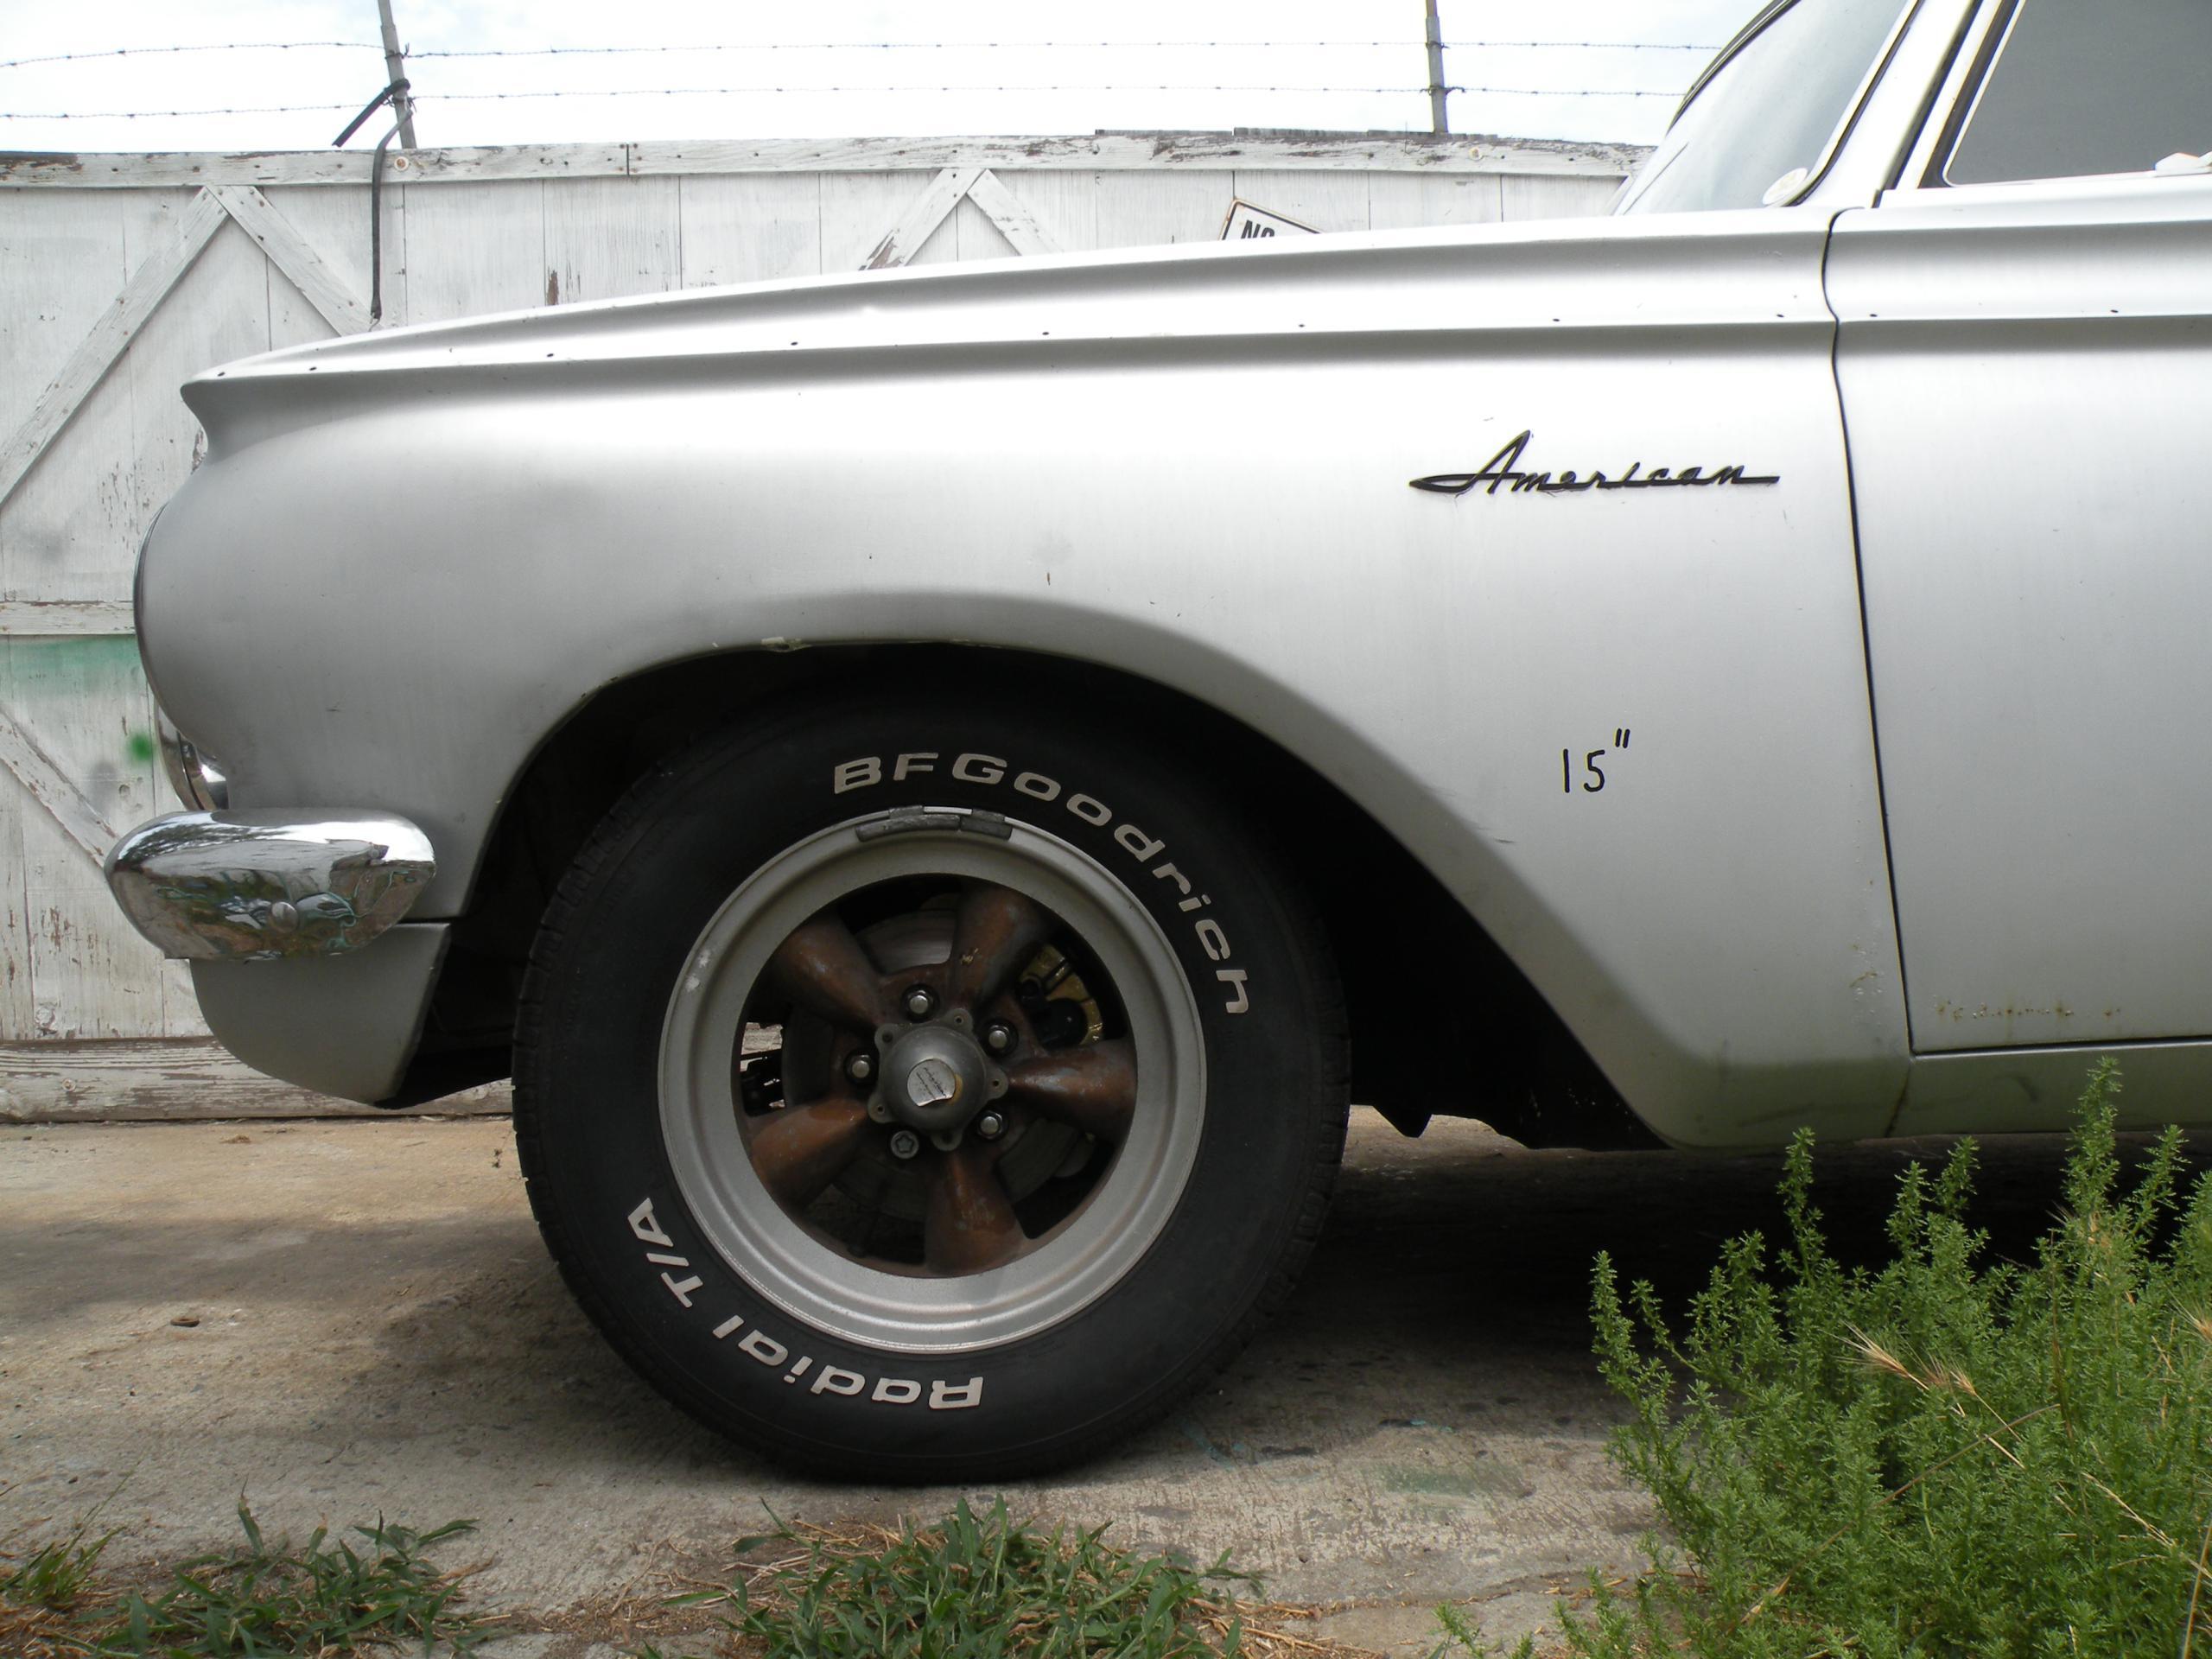
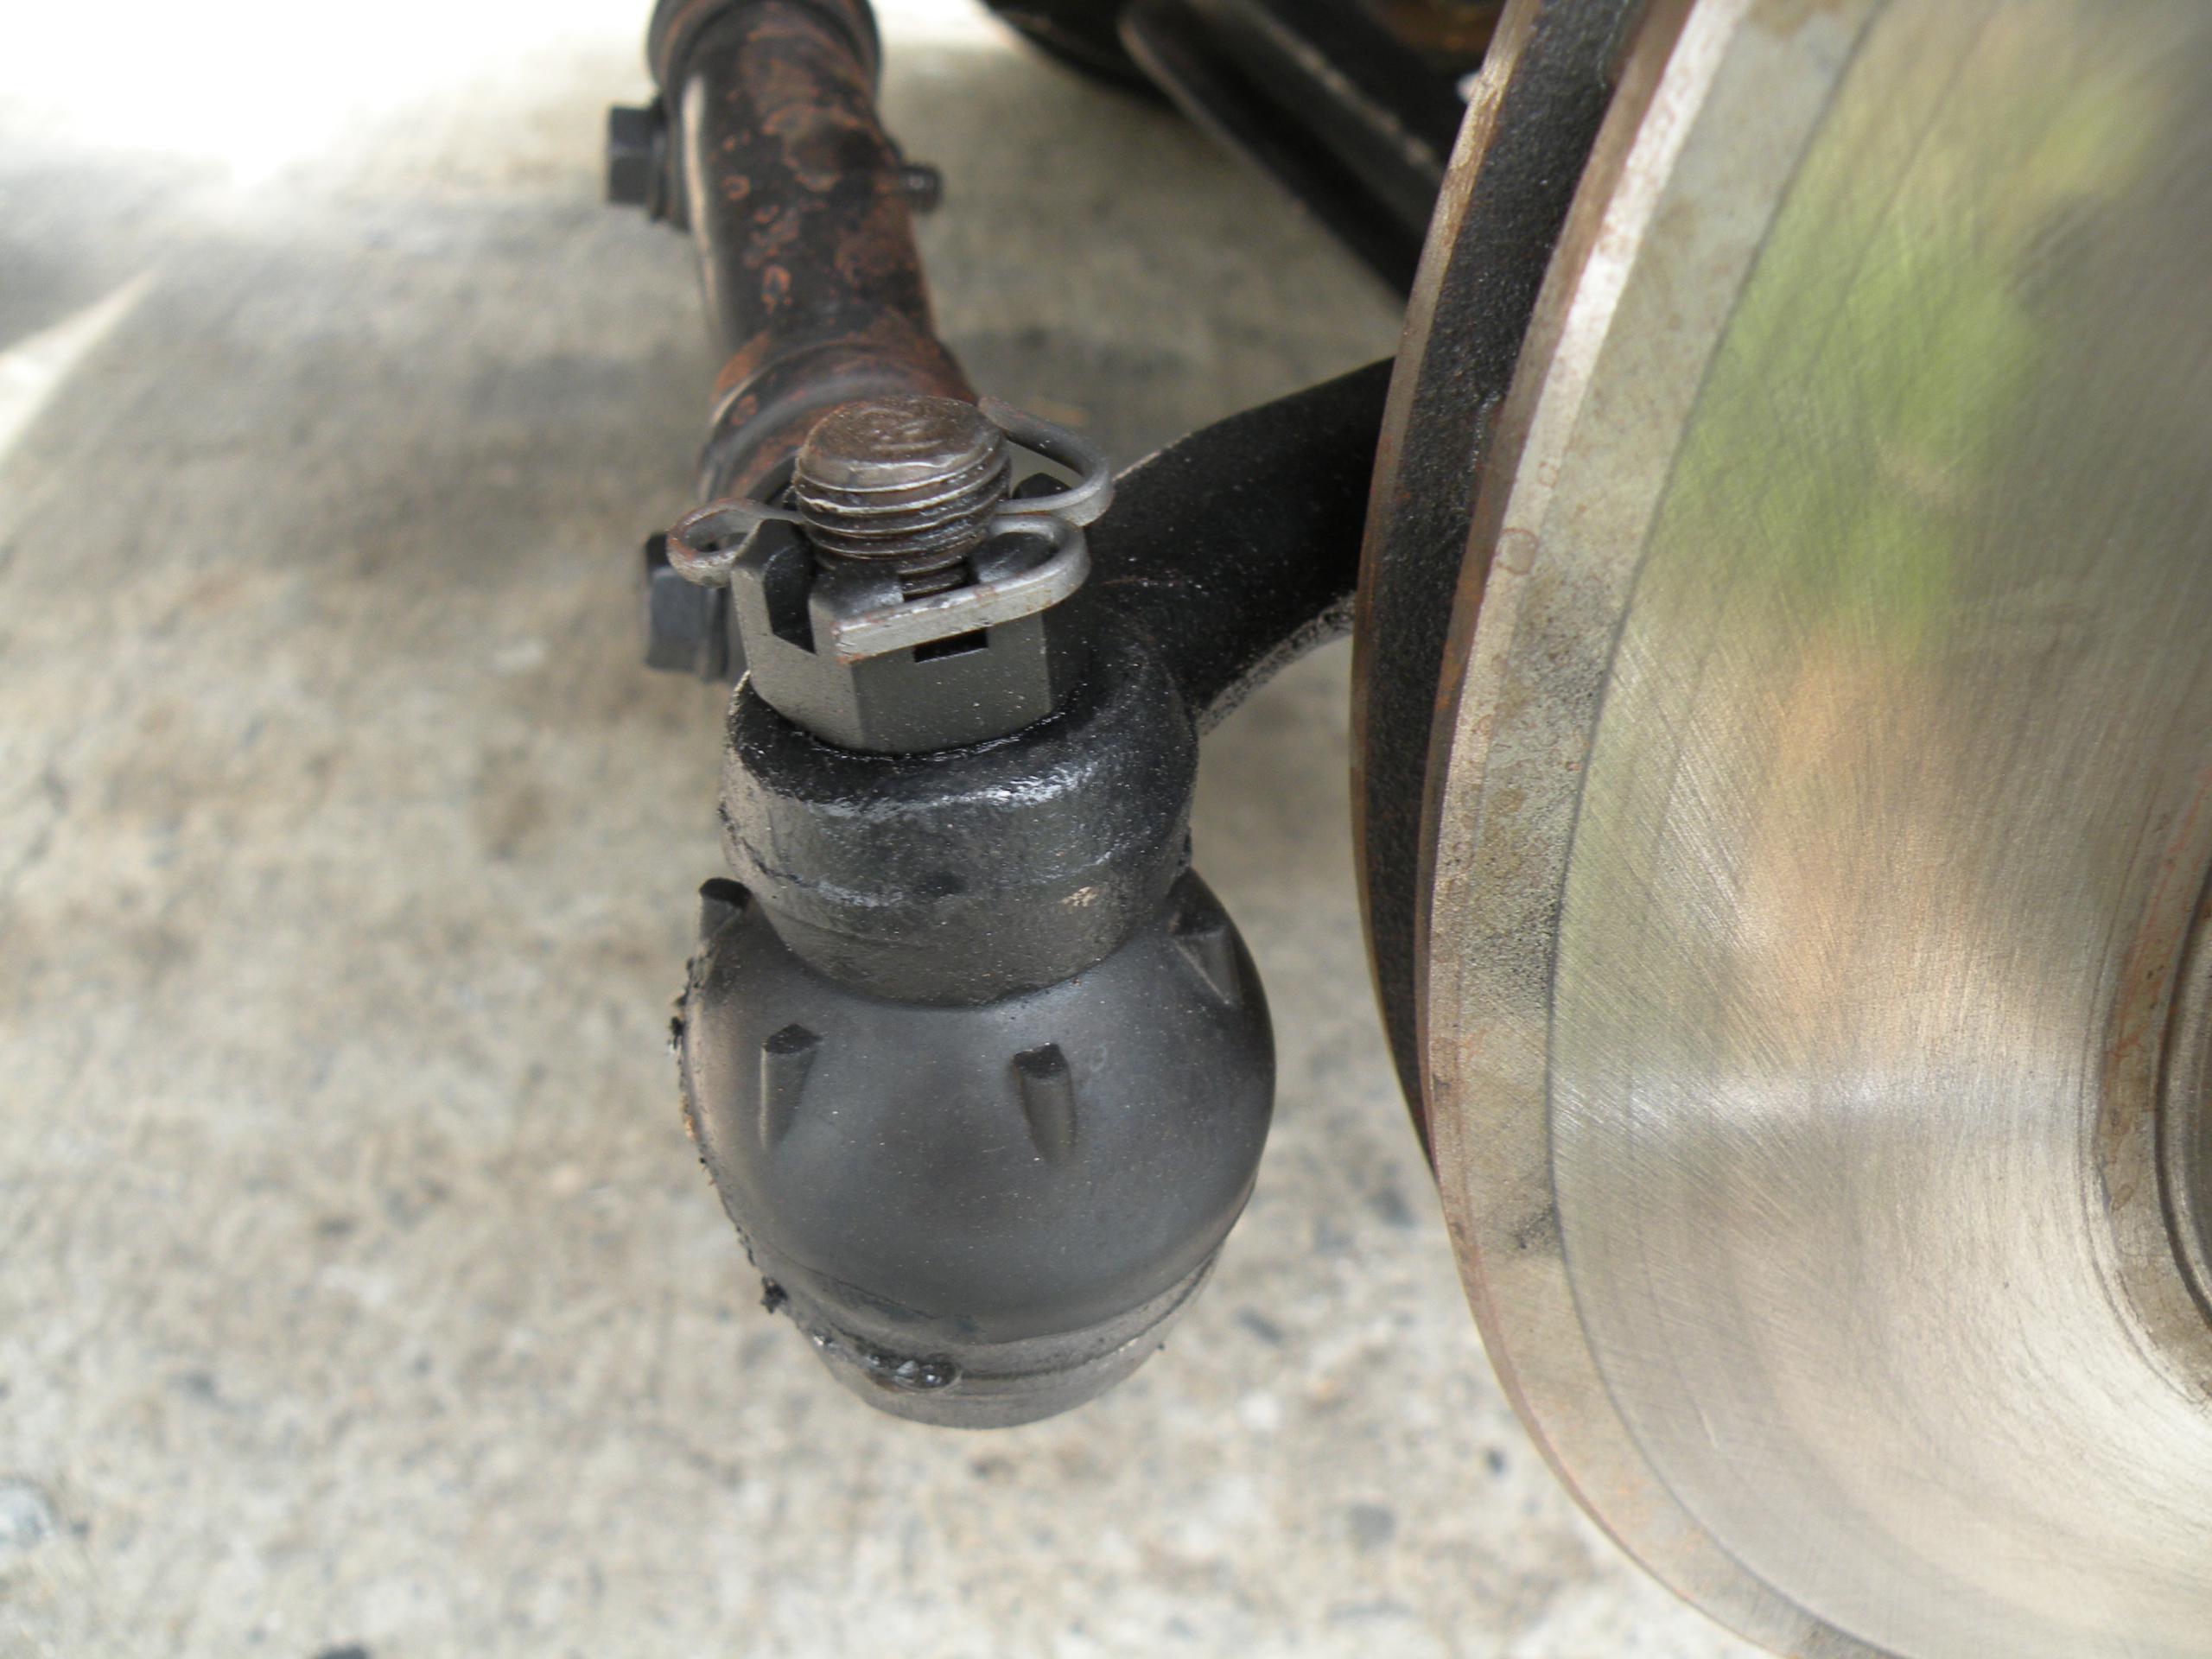
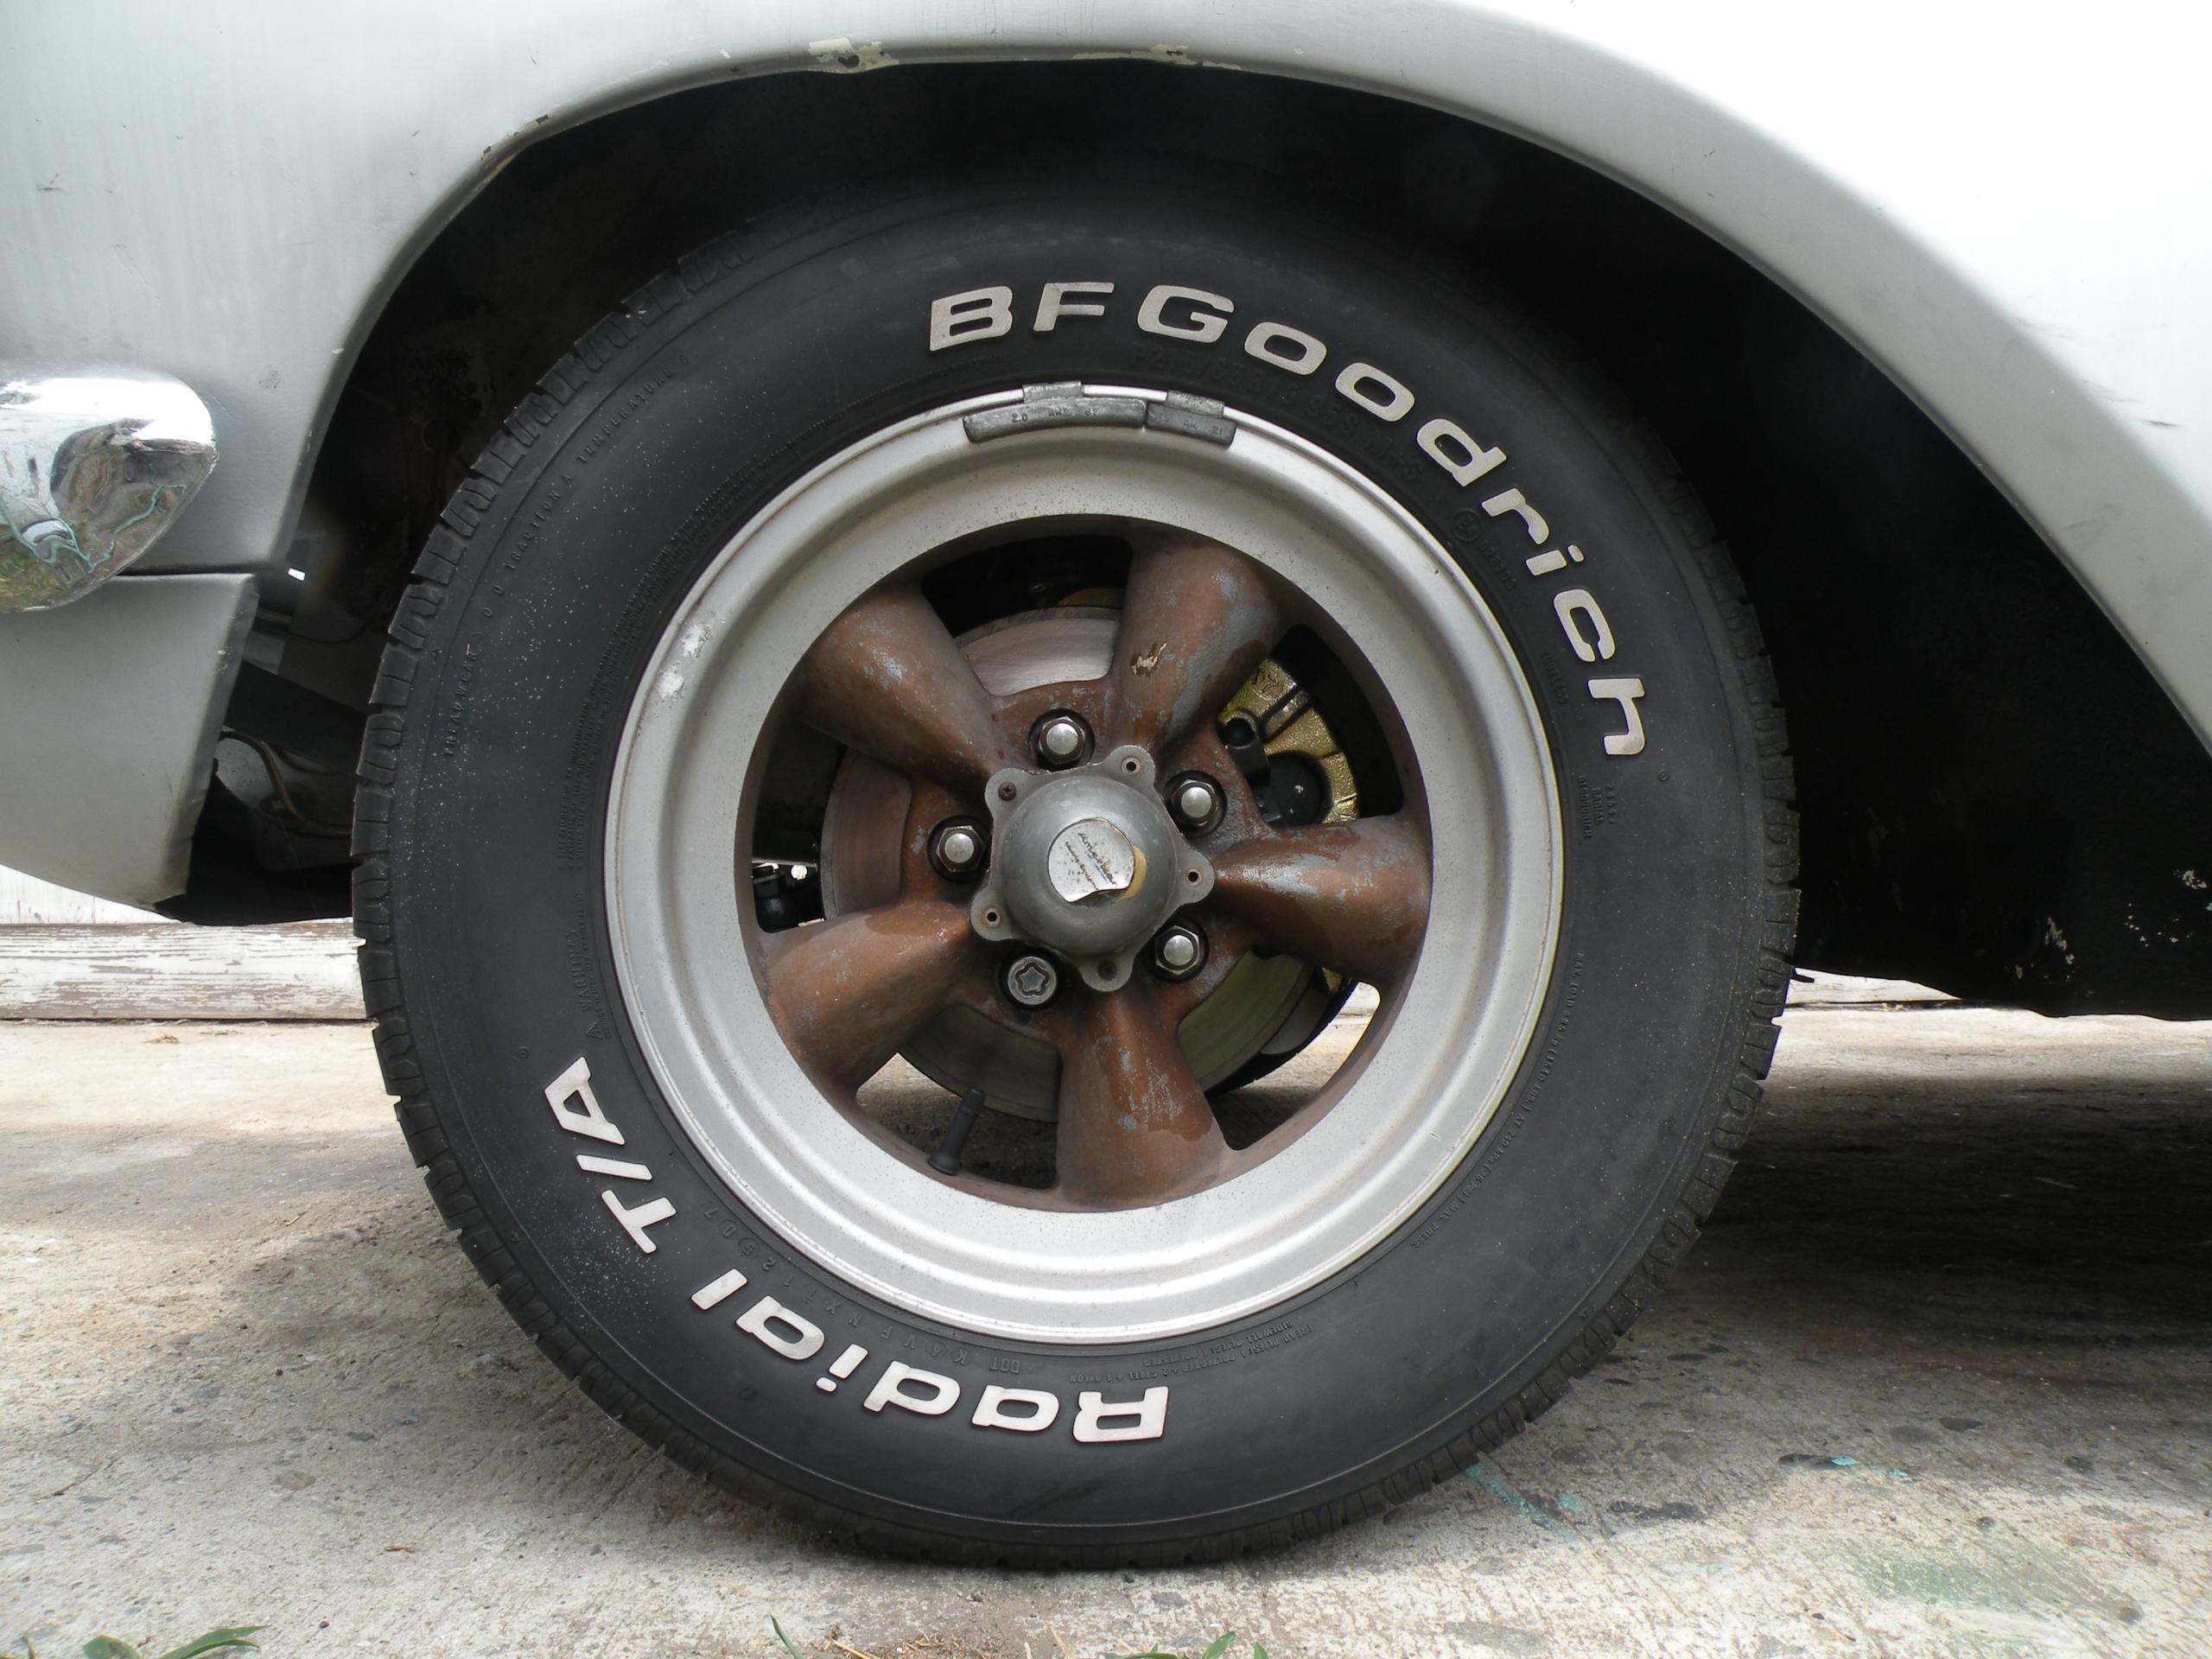
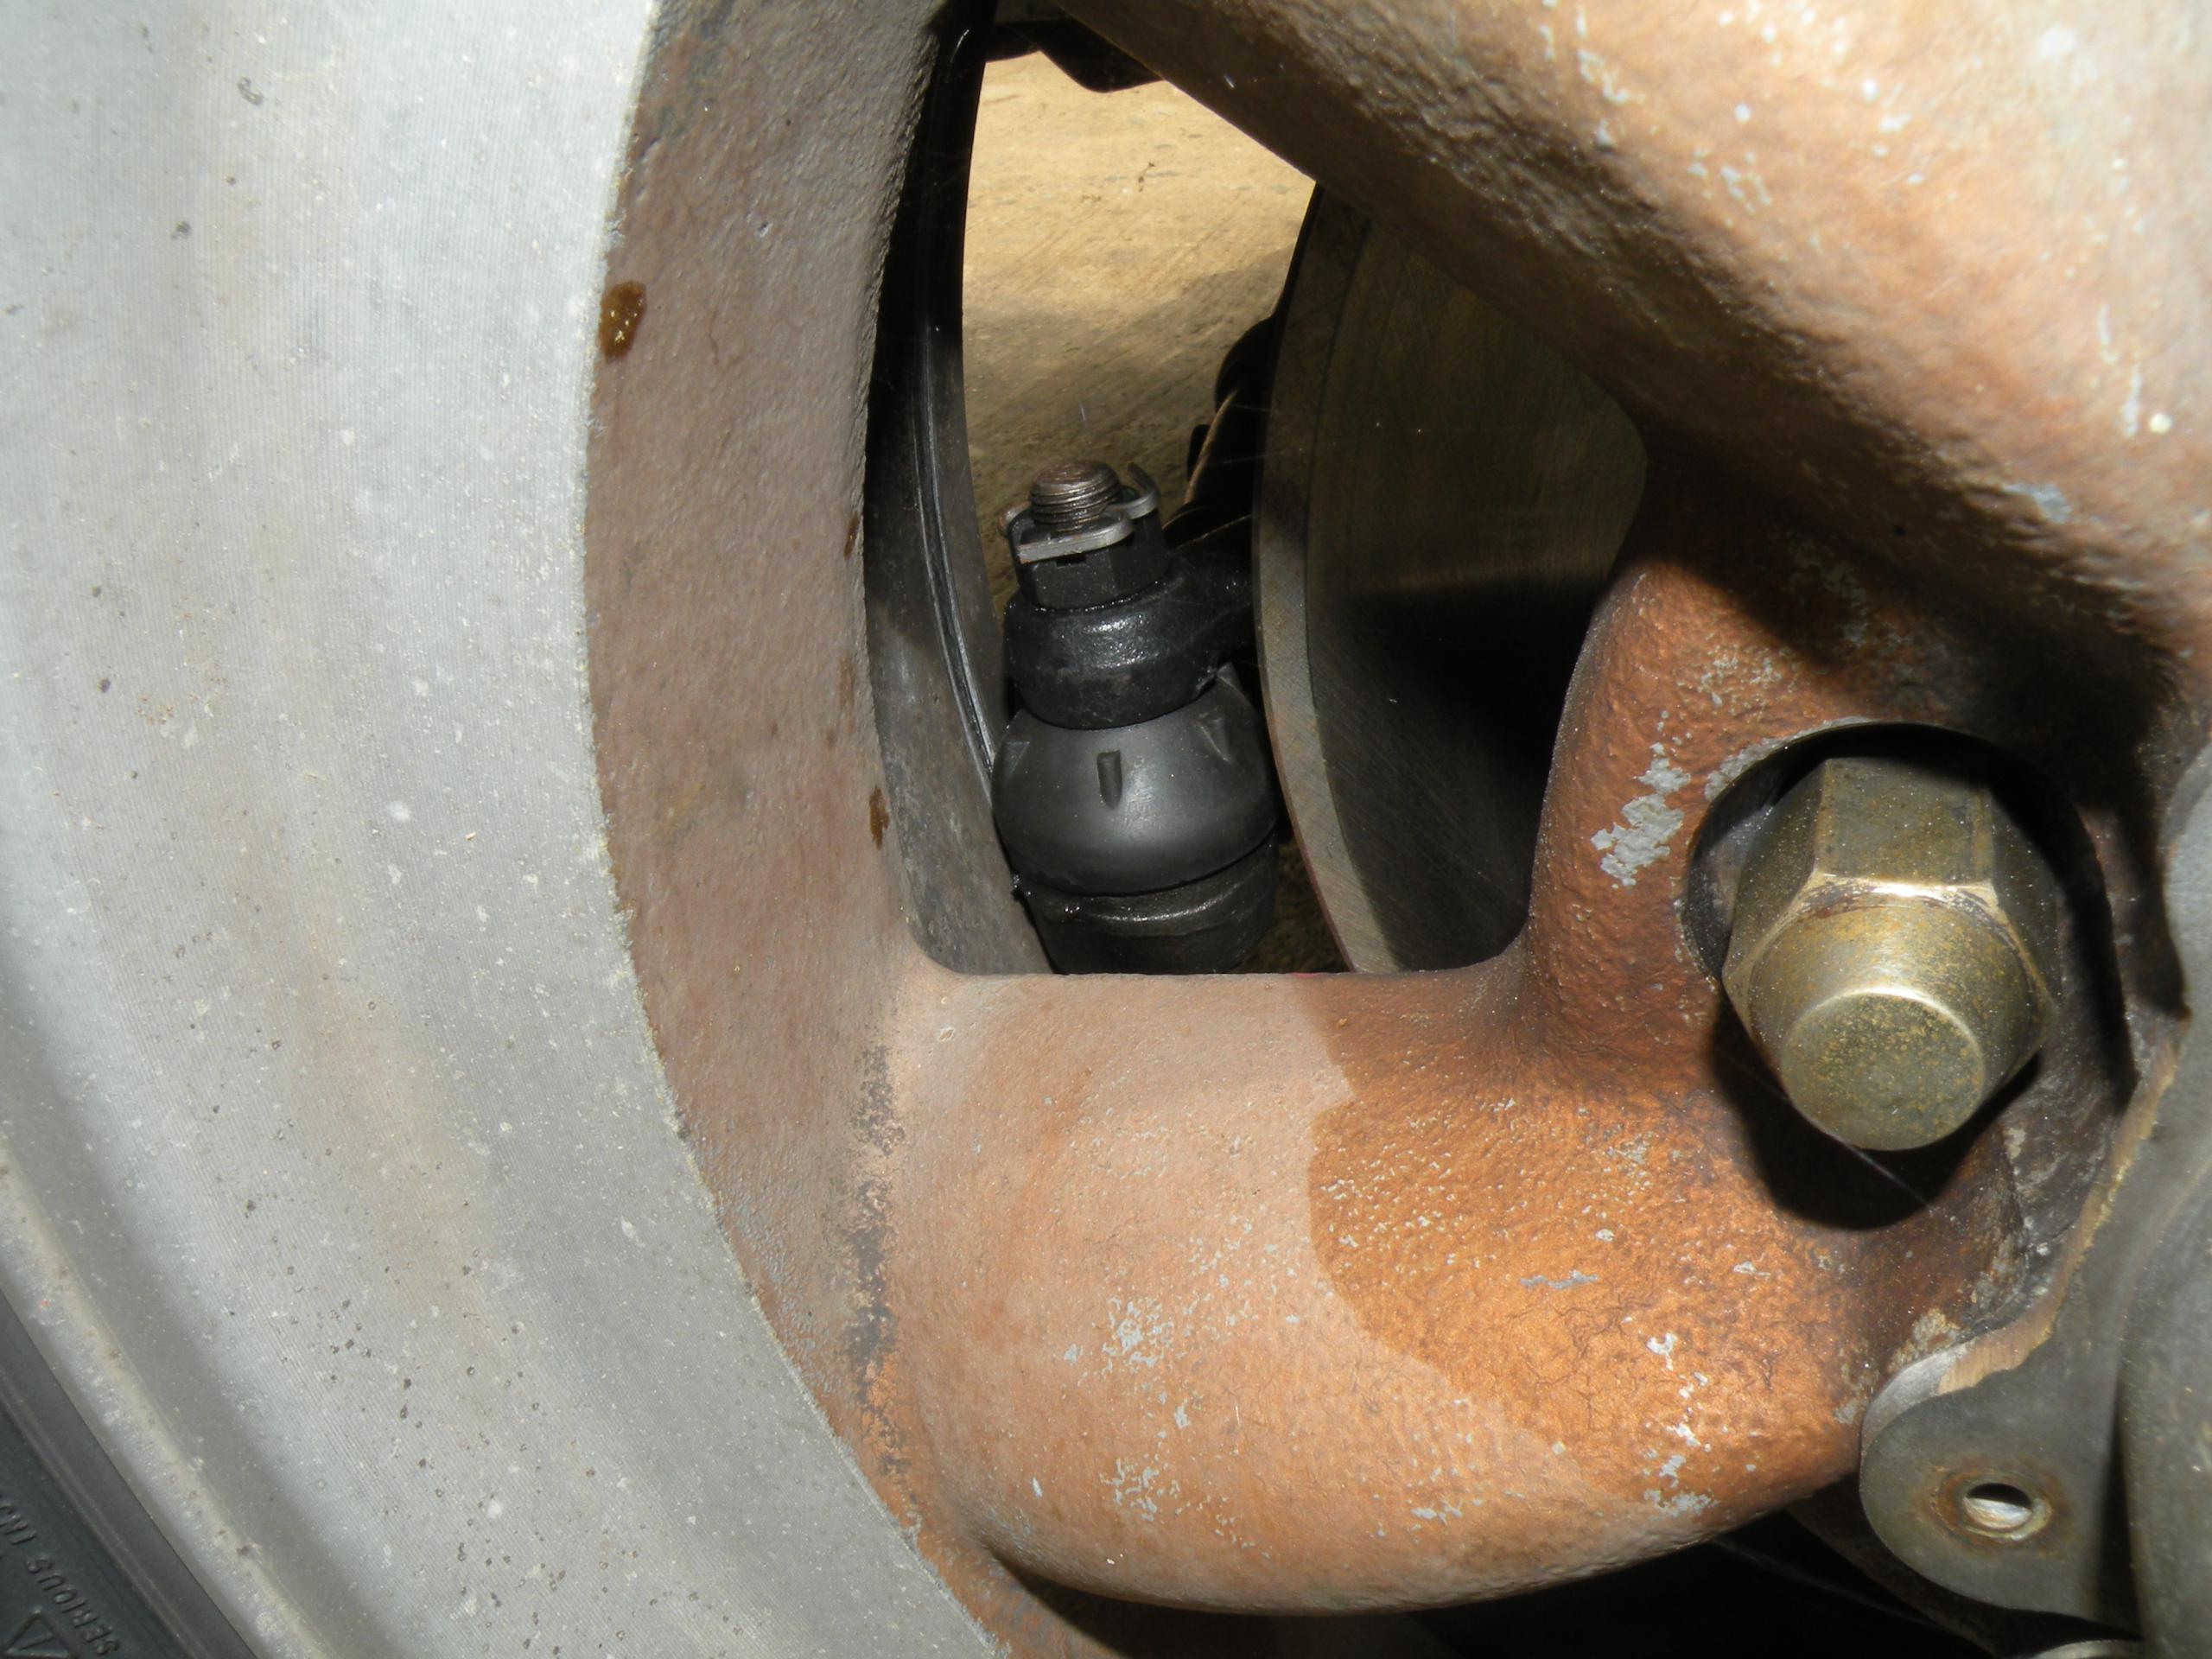
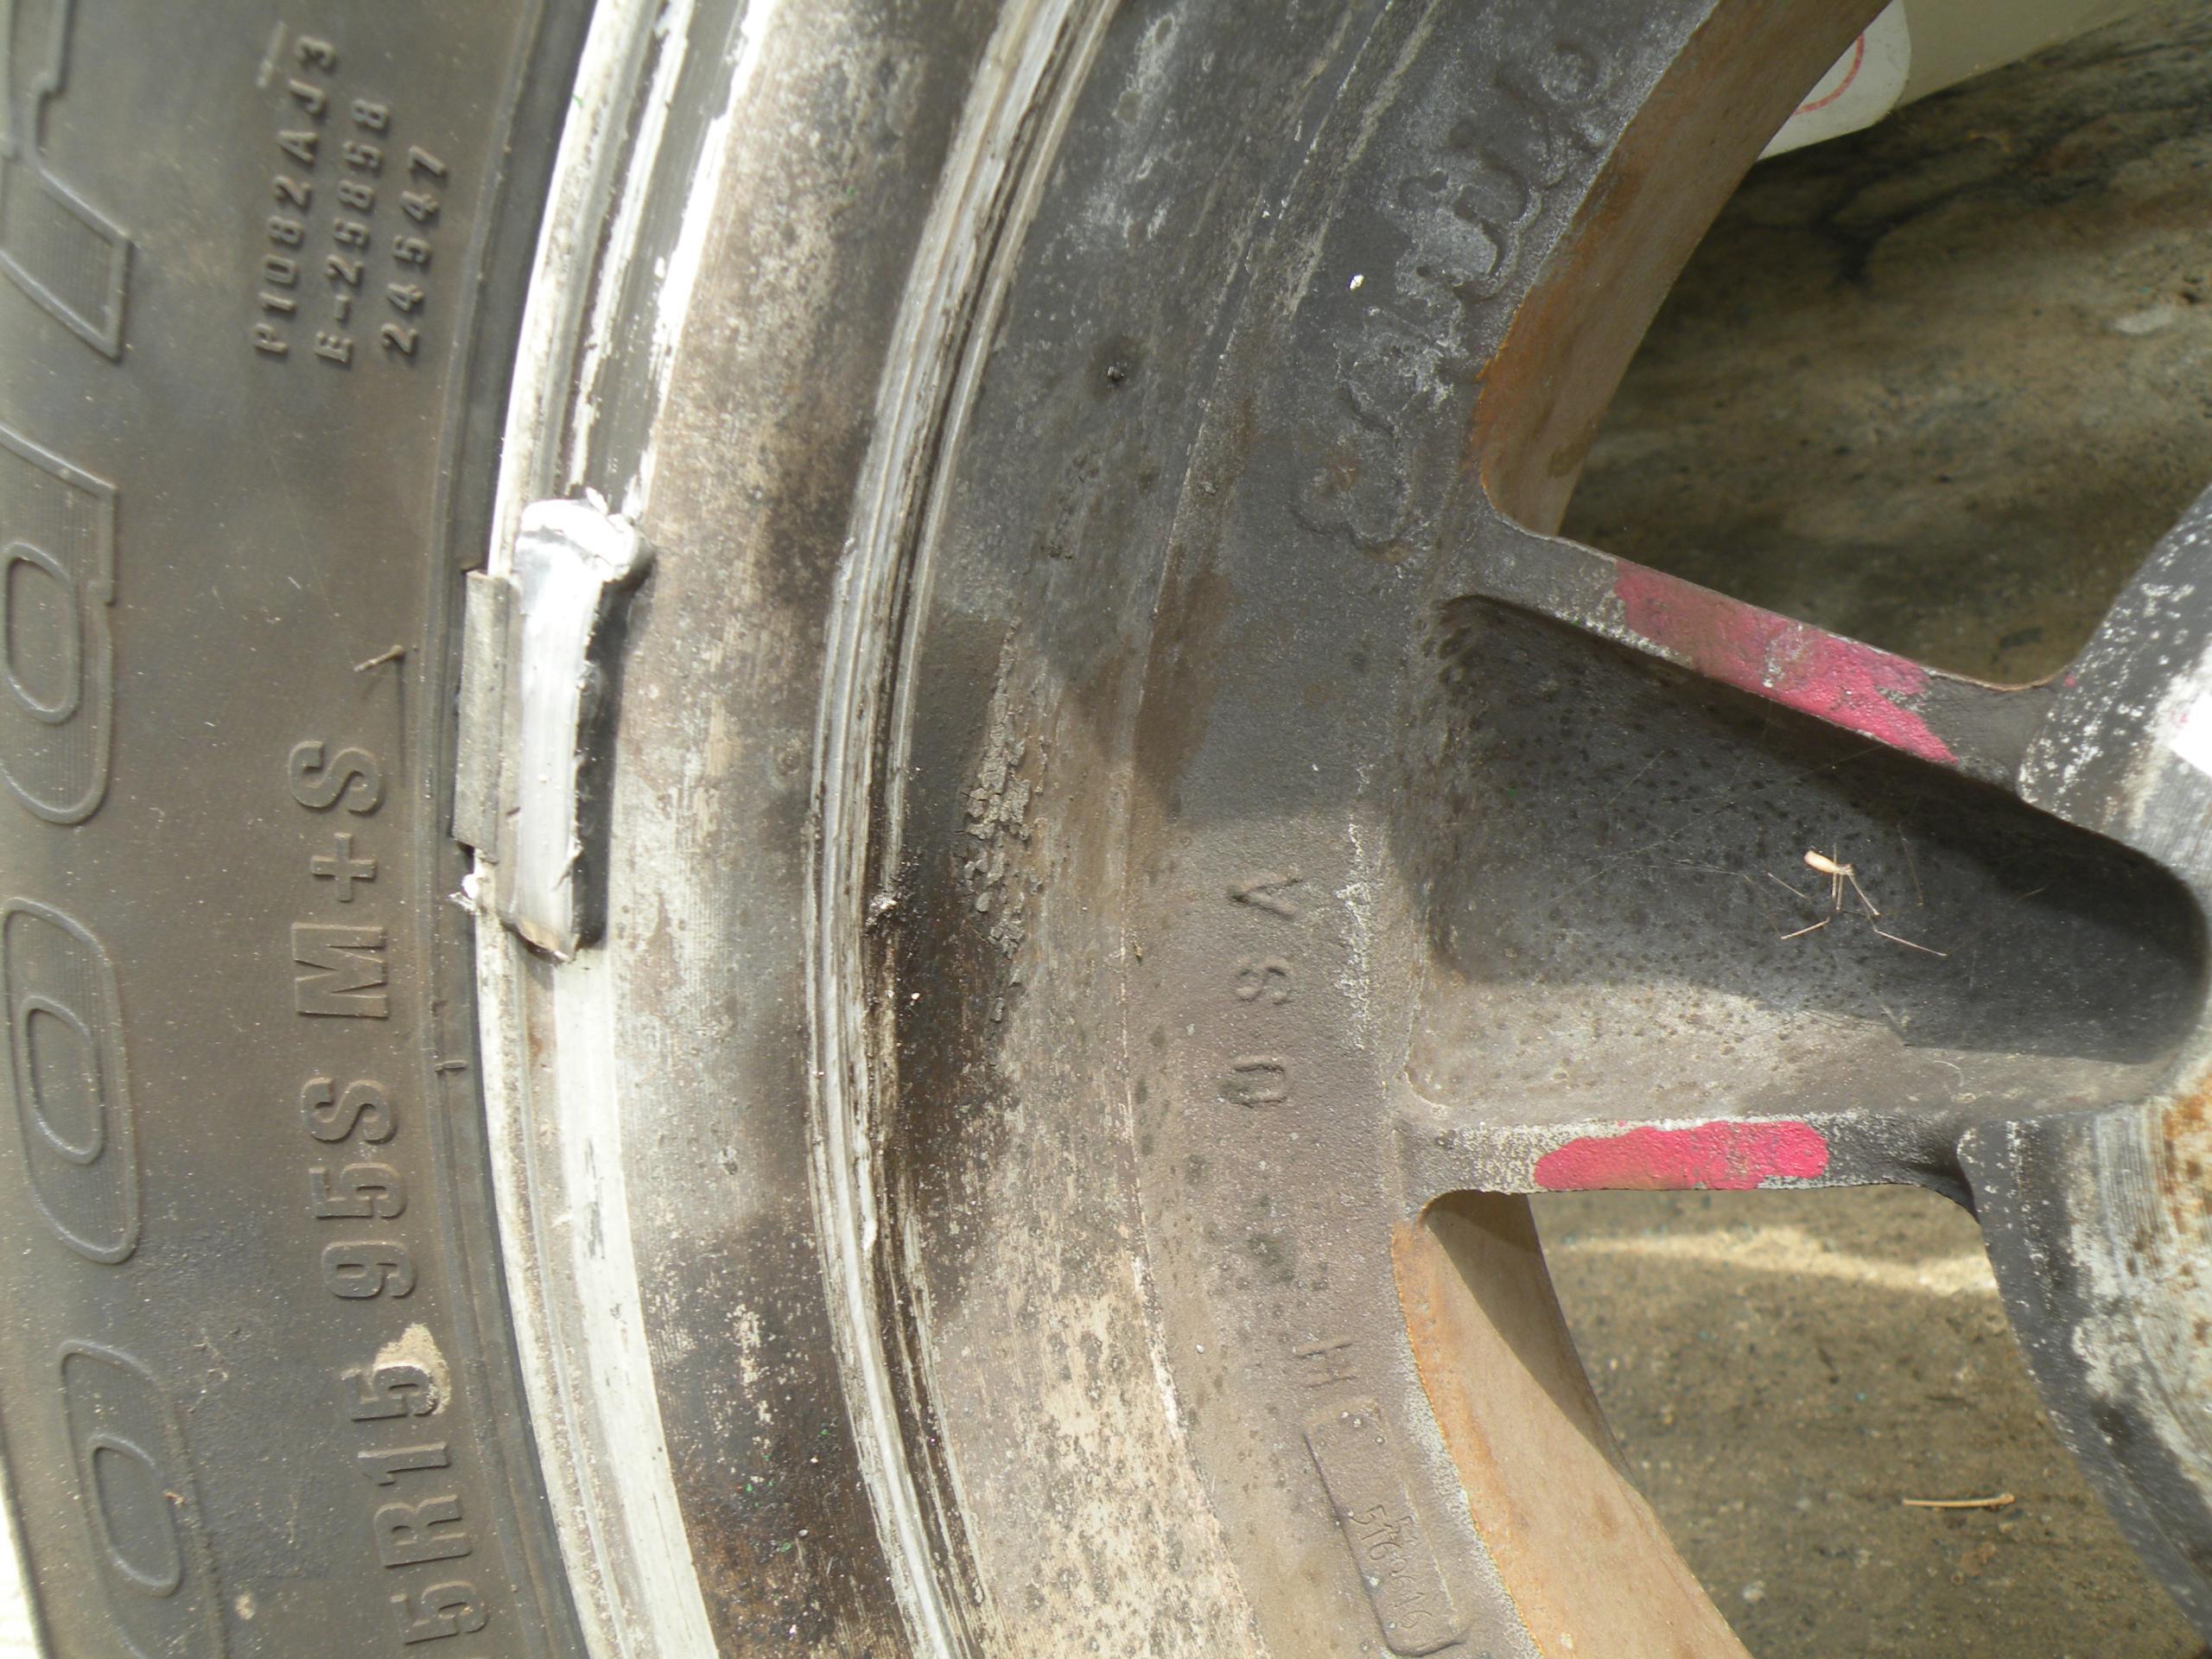
Nice! Discs visible through the spokes of vintage (new when I bought ’em in 1982!) Torque Thrust D’s! Alas, the stupid weird steering arm puts the tie rod end inside the rim. Custom 16″ steel wheels have been ordered and likely installed by the time you read this. The selection of tires for 15″ is terrible, and there are many 16″ 50 series tires today.
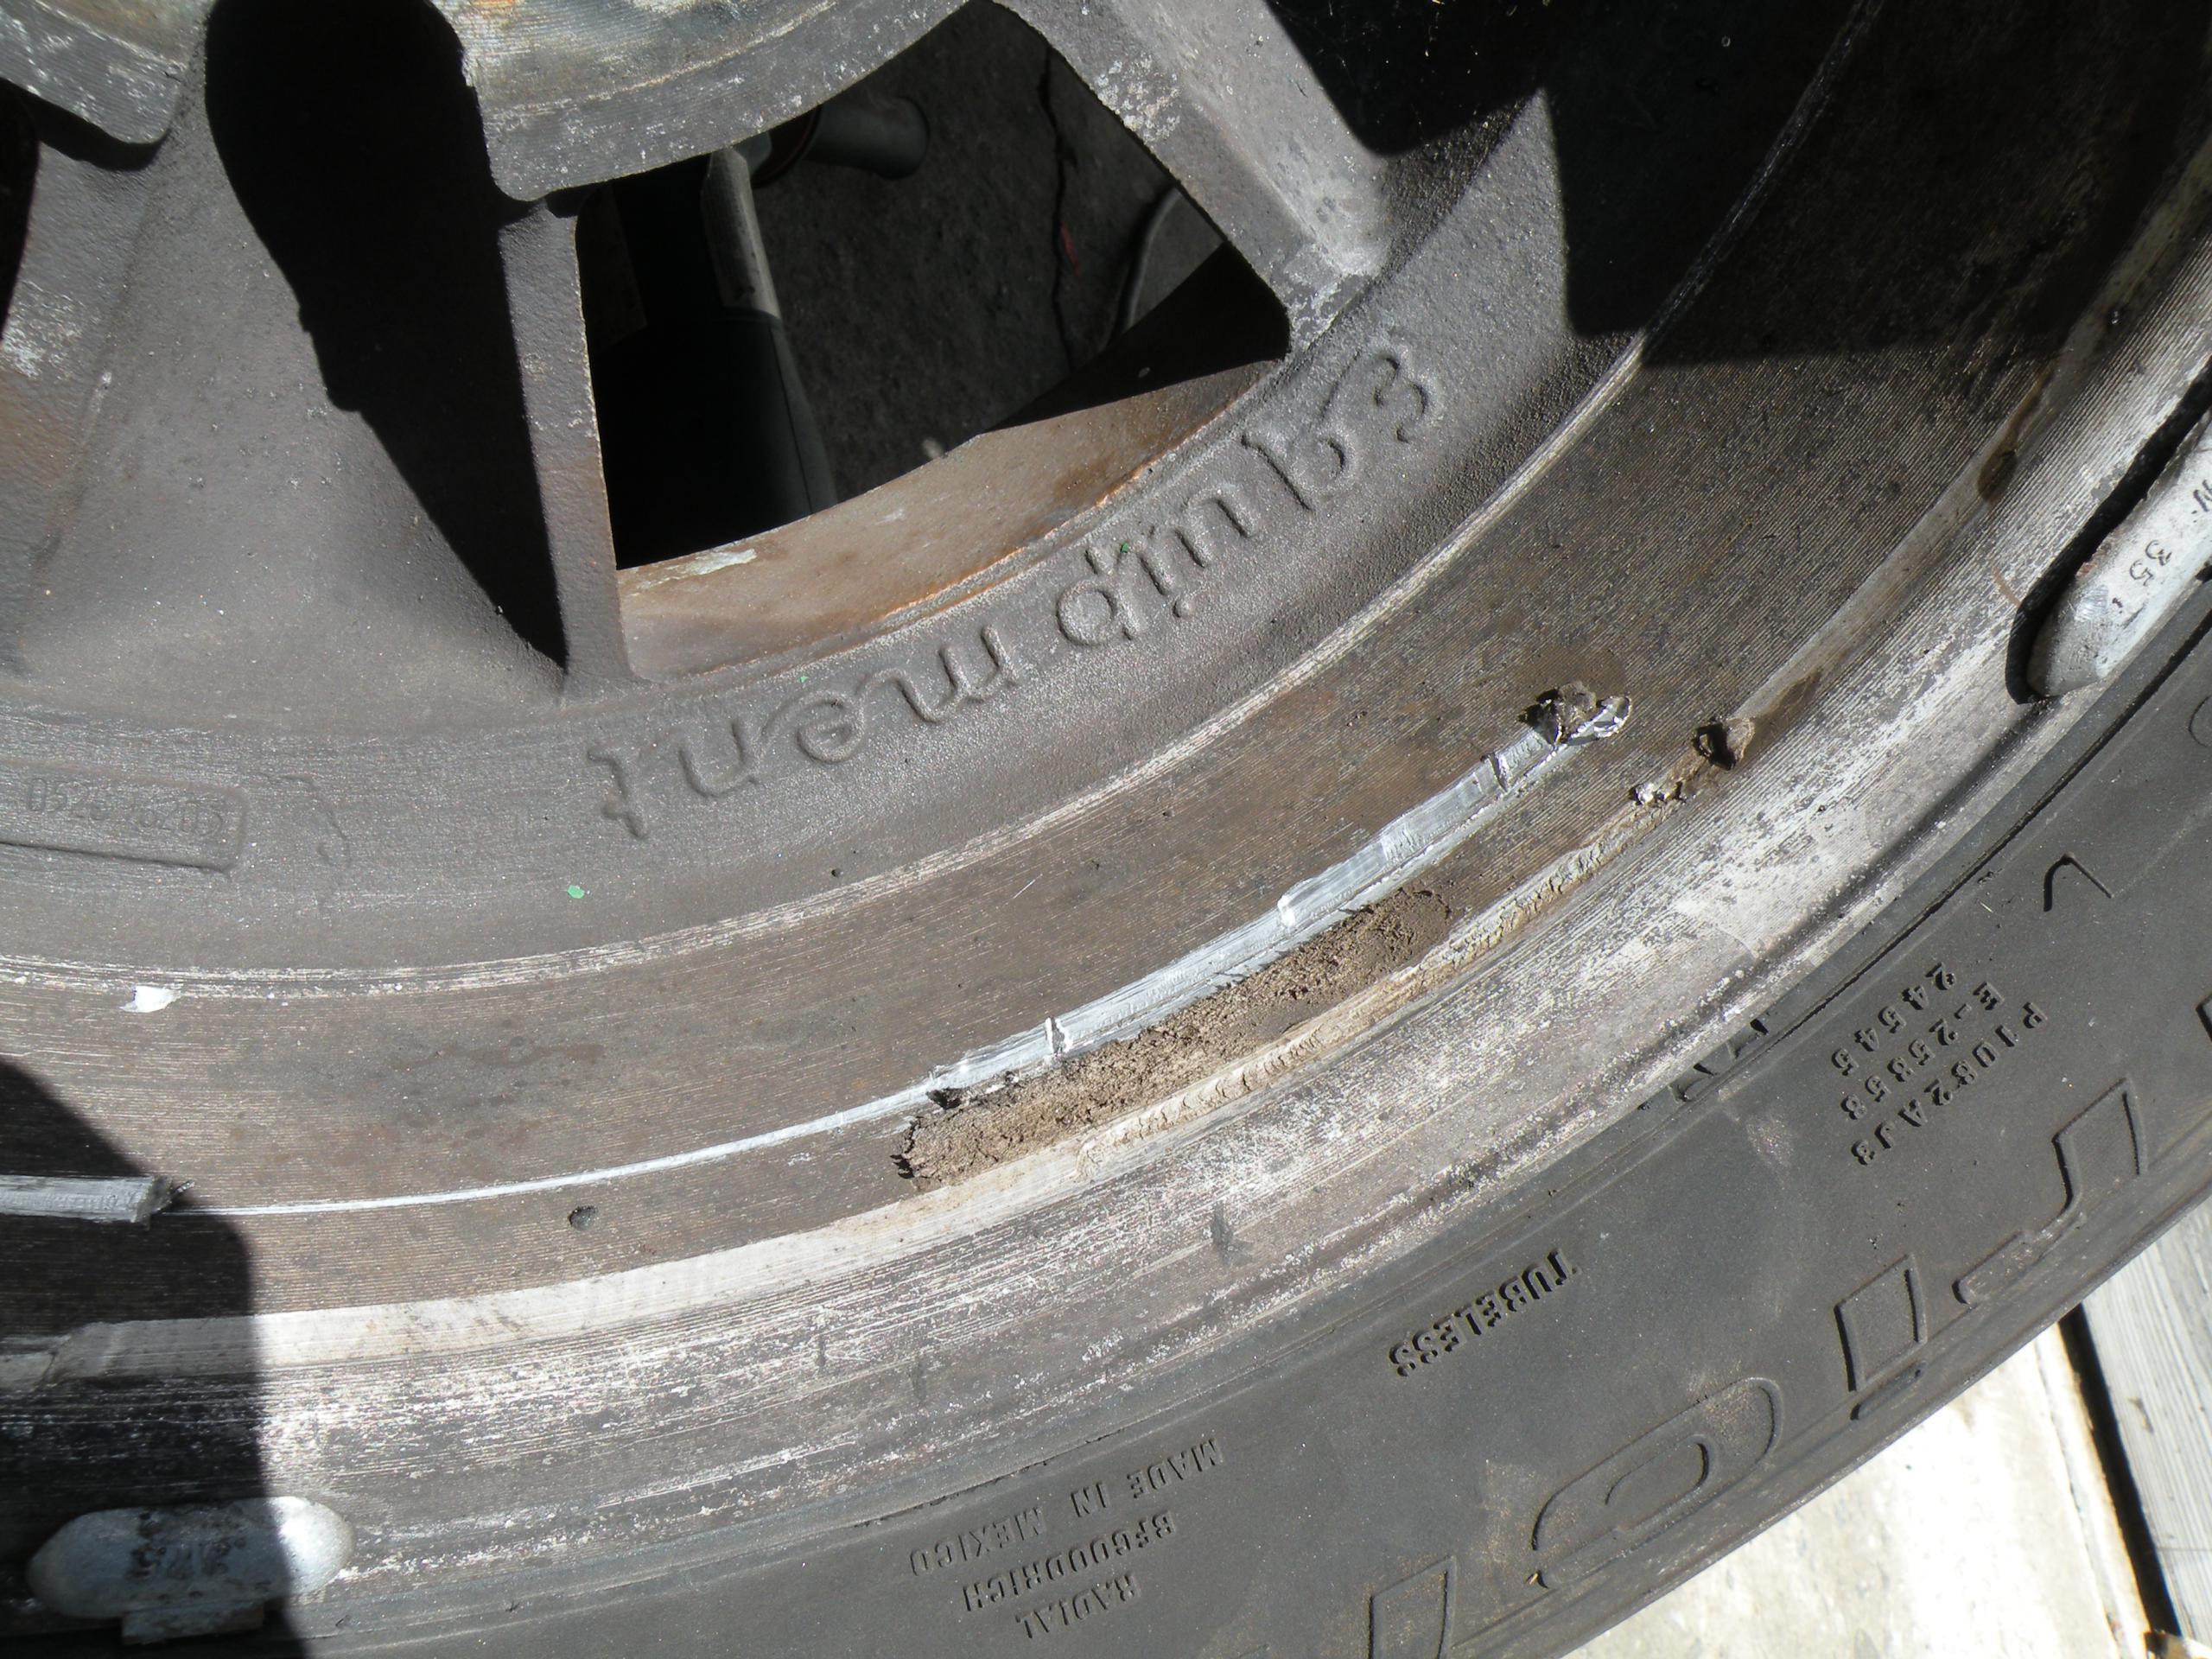
15-inch steel wheels from WheelVintiques (aftermarket smoothies) just barely work; your mileage may vary. The Torque Thrust D’s do not
fit, as the alloy casting is thicker and squarer, where the stamped steel wheel is curved. Test this very carefully before driving off! Roll the car forward, and reverse, turning the steering wheel lock to lock. Mine were OK straight-ahead, but turned only halfway they scraped badly, and in reverse, the tie rod end rotated a tiny bit and locked up the wheel. If done at more than a few inches a second this would break parts.
Deprecated: File Theme without comments.php is deprecated since version 3.0.0 with no alternative available. Please include a comments.php template in your theme. in /home3/amcmagc1/public_html/wp-includes/functions.php on line 6114
Leave a Reply