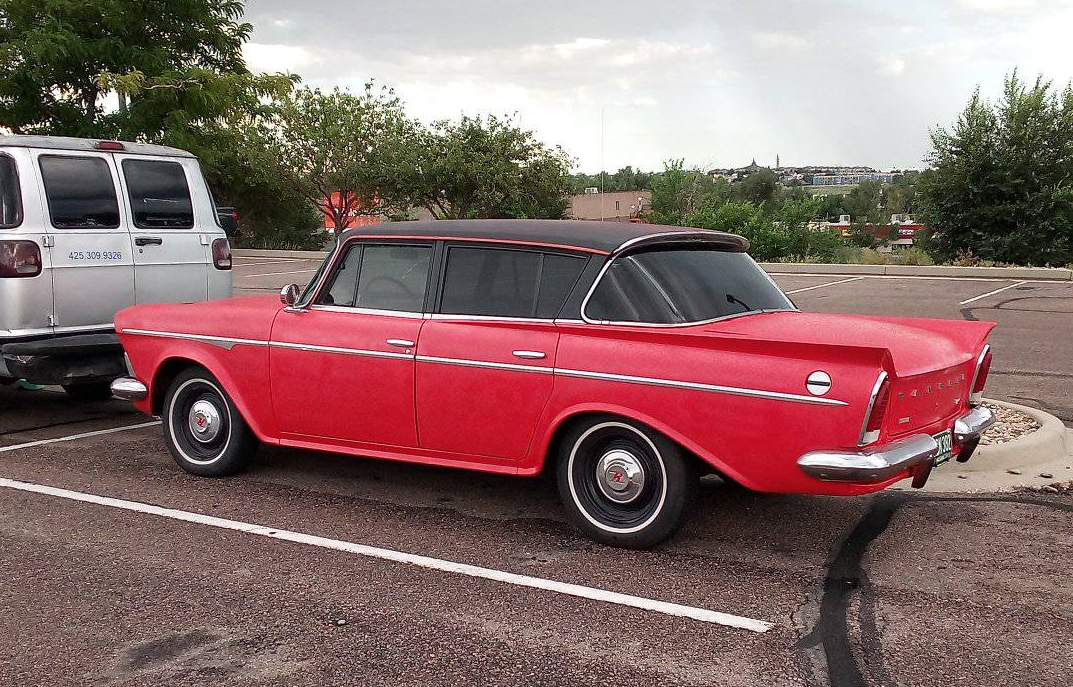
1960 Rambler (big car) 232 Engine Swap
By Christopher George Buckner, from Facebook posts, AMC Rambler Classic group, 19 NOV 2024
Edited into article by Frank Swygert, 03-25-2026 – added info in italics
I was going to try to rebuild the 196 in my car, but it was way expensive. With the 232 I get more power, better parts availability, hydraulic lifters, full flow oil filter, and better cylinder coolant flow. Plus I keep it all AMC. The bell housing bolt pattern is the same for the 1964-71 199/232 (and 71 only 258) as the 195.6 the car originally came with, so I get to keep manual three speed overdrive transmission as well. A little fabrication was required, but nothing any backyard mechanic couldn’t pull off with hand tools.
My engine came from a 1970 AMC Hornet. I adapted the Holley carburetor and generator from the Rambler 195.6 to the 232. I had to re-work the throttle linkage. I separated the pieces and chose good mounting locations. I believe I had to shorten the top rod, maybe I could have just got a carb spacer. I made a bracket to hold the overdrive kick-down switch in the correct location.
I couldn’t find a pilot bushing combination that matched so I got the factory Rambler one and pressed it into a 20 or 30 mm that I found which fit the 232 pilot hole. The pilot shaft is a bit worn so the new one fits sloppy but when I pressed it in it compressed a bit, which made the fit perfect. Alternatively I could have got a machine shop to make one, I just got lucky and found something that will work.
(Frank) NAPA has a great assortment of pilot bushings for the AMC six, mostly listed under Jeep applications. A bushing at least close to the right size may be found there, wither a larger outer diameter/correct inner that can be turned down or correct outer/smaller inner that can be bored out. If you can find a NAPA with the paper catalogs the search would be easier, it’s a bit hard on the computer! Also check with Jeep suppliers. The big pilot assortment listings for Jeeps is due to the number of engine swap combos Jeep enthusiast have done over the years.
I used a Triumph TR6 clutch disc, $60 on e-Bay and no need for a functional core. I like that the friction area is smaller so I won’t beat my transmission up as much, I’m at the old T-96s power limit. It fits the T-96 input shaft perfectly.
I put the clutch disc on the shaft with the pressure plate behind it then mounted the transmission to the engine. The detachable lower half bell housing let me torque the pressure plate after install. Sort of like when installing an automatic transmission with the engine in the car — torque converter goes on trans and is bolted to the flexplate after installing.
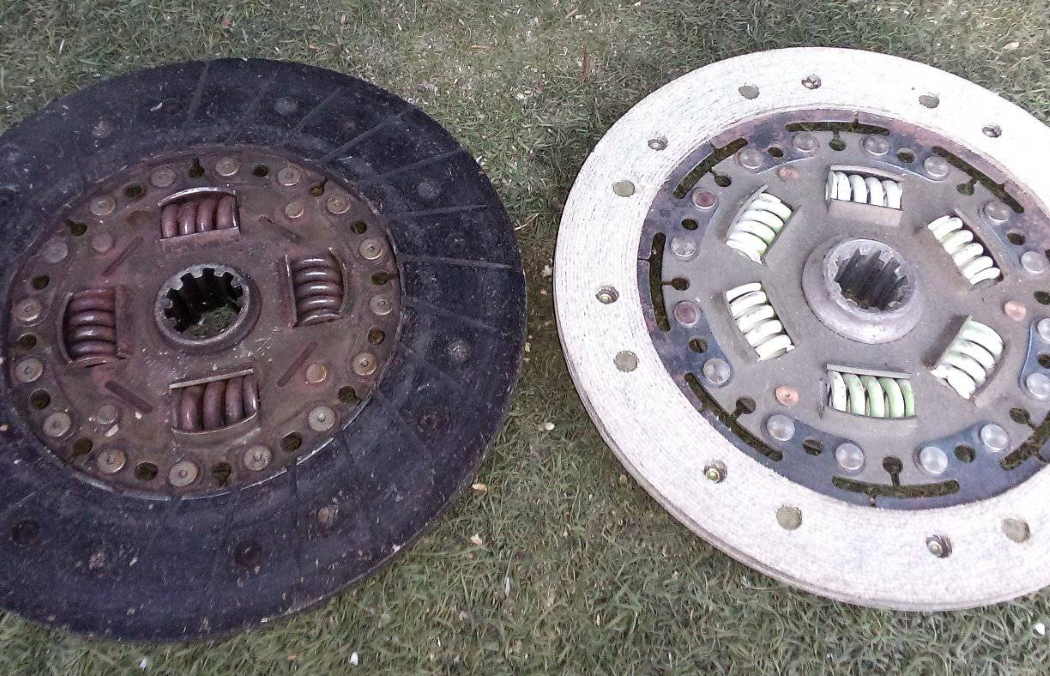
Original Rambler 196 clutch disc on left, Triumph TR6 disc on right
While the 1970 232 shares the same bell housing pattern with the 1956 I did have to drill out the locating dowel pin holes to 9/16 from 1/2 inch. I don’t know how many times I pulled it out and put it back in thinking it was the clutch hanging up, but that was the problem.
(Frank) The starter may be a problem also, but easily fixed. The 196 bell housing has the starter holes slightly higher than the 232 bell housing, which causes interference when using the 196 bell with the 232 engine. A little bit of grinding and slotting the holes in the starter mounting flange fixes the problem. It has to come down the circumference about 3/8″ by elongating holes and taking a bit off starter housing. Get the 232 bell if you can but you would also need the 232 flywheel because the ring gear diameter is 1/2″ larger. If there is a clearance issue with the throttle linkage a Prestolite starter fits easier than a Delco.The 1964 196 starter is a Prestolite and the solenoid sits upright. On the Delco starter the solenoid is canted over about twenty degrees, which leaves a little more room for the gas pedal linkage. It may be easier to switch to a throttle cable, much easier to fabricate mounts and the pedal can come from just about any modern car from the late 70s up. The pedal screws to the firewall and hangs down rather than mounting to the floor. You just need to drill a hole in the firewall for the cable to snap into. Most use a square hole, so drill smaller and use a file to make the corners. On the other end a bracket can easily be formed to hold the end of the cable.
For motor mounting I found some 40° engine frame brackets for a 64-65 Mustang V-8. I bolted these on top of a 2-1/2″ square tube with about an inch and a half leg to reach the rim, about six inches long total. The stud on the bracket goes down into the tubing, the 232 rubber mount stud in the hole. Make sure the tubing isn’t so long that that it interferes with the steering linkage. The 56-62 big Ramblers used the four point engine mount system, but the suspension crossmember is strong enough to support the engine. The brackets can be fabricated, but they can be purchased here: https://www.cjponyparts.com/engine-frame-bracket-pair-260-289-mustang-1965/p/EFB4/. Of course other Mustang suppliers will have them.
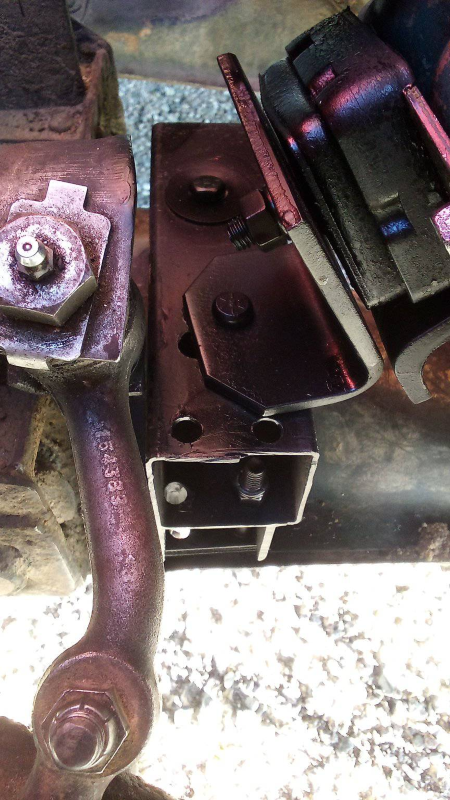
Mustang motor mount plates on top of square tubing
![]()
Top view of motor mounts showing clearance for pitman arm
(Frank) The reason AMC didn’t support the engine on the crossmember is that in the early to mid 50s oil filters were still optional on most US makes. The engines were supposed to use non-detergent oil so that any particles in the oil would settle into the pan when the engine was shut off and cooled down. There was a space between the oil pickup and bottom of the pan for the sediment. The pan was supposed to be pulled off and cleaned at intervals (usually every 5,000-10,000 miles). This meant that there had to be easy access to the oil pan, so the engine was supported by the chassis and not the suspension crossmember — if there was one. The 58-63 American (and 50-55 Nash Rambler) has a K brace of stamped steel that bolts on, much lighter than the 56-62 big car crossmember. Other manufacturers also used light stamped braces on some models.
The 199/232/258 is about 4-5’ longer than the 195.6. I had to hammer back the firewall just a bit (but not enough to interfere with the heater) and brought the radiator forward, all the way to the hood latch support. I mounted the radiator on the front side of the supports instead of the rear. I used longer bolts and tubular spacers between the radiator flanges and supports. When putting the longer engine in the 64-65 American most swap the mounts on the radiator form left to right, which moves the radiator forward about an inch and a half. I’m not sure that’s quite enough in the big cars, but it would mean shorter spacers and bolts. I have an AMC aluminum radiator.
The radiator sits a little bit raked back – the supports on the bottom are a little longer than the supports on the top. I also had to use a shorter shaft water pump made for a CJ-5 with 232. Note that the CJ-7 pump won’t work, it MUST be a 72-83 CJ-5 232/258 water pump! The 1965 American with 232 also used a short shaft water pump, but the CJ-5 pump is more readily available. You will need the water pump pulley as well. I needed a little spacer under the pulley to bring it out to the same plane as the other, just a washer thickness. I went with a Flex-A-Lite 14†nylon flex fan with about a half inch spacer. This moves more air than the stock fan and clears everything.
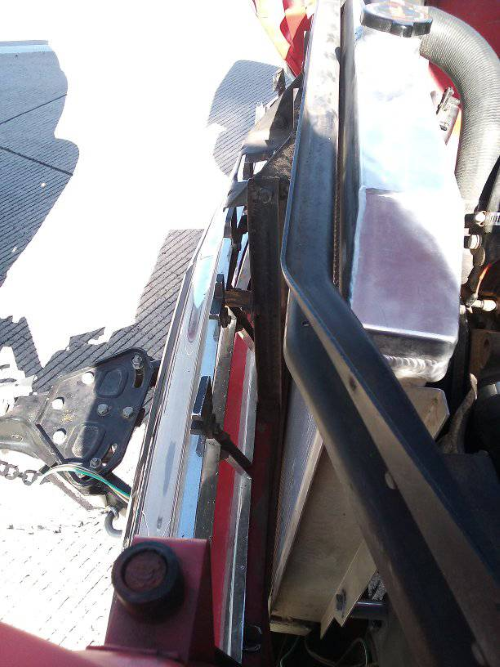
Radiator is mounted as far forward as possible. Like the 64-65 American with 232, this leaves no room behind the grille for an air conditioner condensor. If you ordered the 232 with AC in a 1965 American you got a 195.6 – AC overruled the 232.
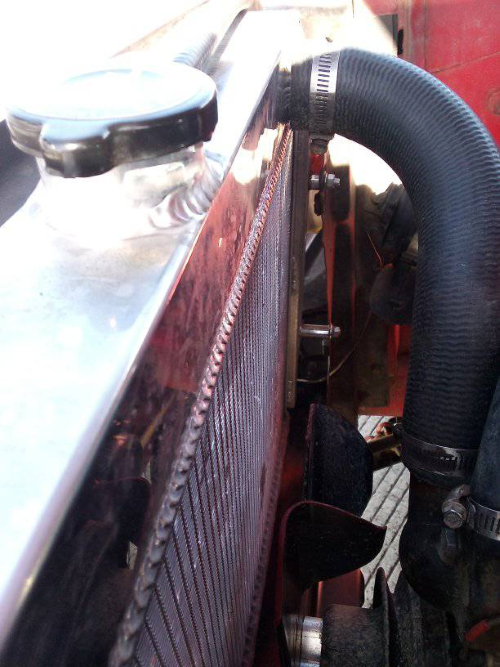
Here you can see the spacers used to mount the radiator and the Felx-A-Lite nylon flex fan and spacer. Airflow is greatly increased over the little stock 195.6 fan, no need for a shroud.
(Frank) Christopher didn’t mention the radiator brand, but it appears to be a commonly used Champion EC403 two core. AMC used virtually the same 24-1/8″ wide by 15-7/8″ tall core in every passenger car model. There were two and three core and the side mounting flanges and tanks varied some by model and year, but they will all physically interchange with just a few modifications. 71-86 Jeep CJ radiators (AMC built) are close enough to work at 24″ by 15-5/8″ (earlier CJ radiator cores are 17-1/4″ by 16-1/2″). Full size Jeeps use the same core but the tanks are bigger, making the overall height about 1-1/2″ taller. I had to modify the lower support on my 63 Classic to use a J-19 three row radiator. Champion radiators were $220 (two core) to $260 (three core) in March 2026. AMC aluminum radiators can sometimes be found for as little as $150 on E-bay (March 2026). https://championradiators.com/collections/amc-radiators.
Alloy Works also makes aluminum AMC radiators: https://www.alloyworksplus.com
I mounted a three inch cone air filter on the end of the oil bath air cleaner. I like the old look of the oil bath air cleaner and it fits the carb. I added the cone to bring up the oil bath filtering efficiency.
The 232 fuel pump was kind of high pressure for the little carb so I added a pressure regulator. In addition to the 50 micron pre-pump fuel filter I use 10 micron filter between the pump and carb.
I put the PCV on the ported vacuum of the carburetor. The manifold vacuum port is running the wipers.
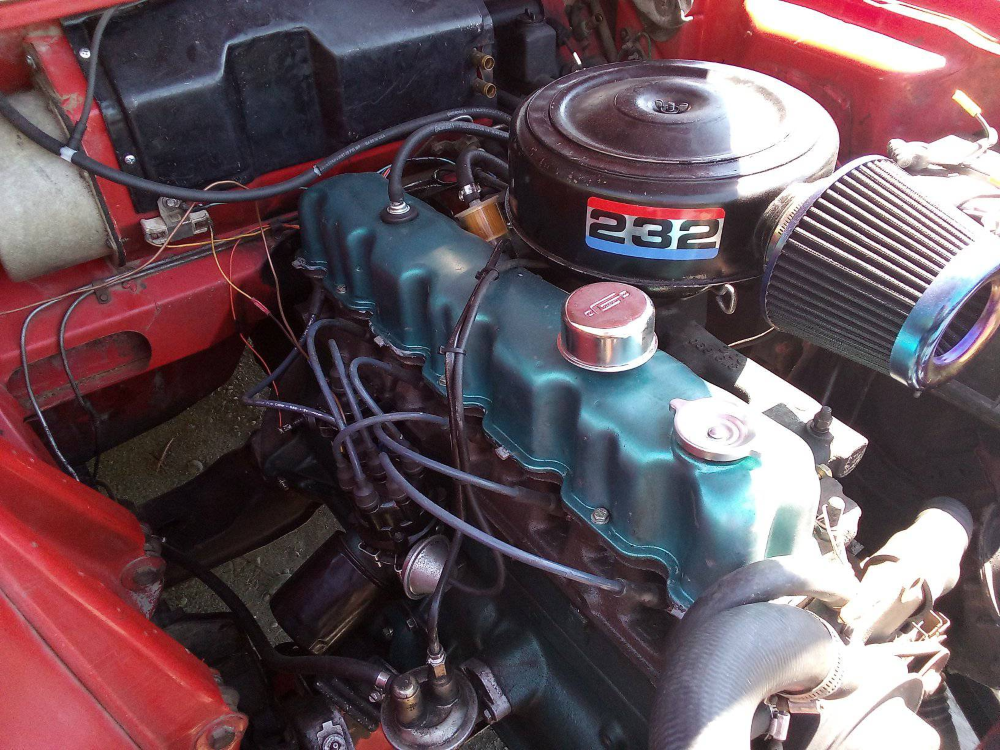
232 fully installed and running! Note the cone “prefilter” on the original 1958 oil bath breather.

Top view of throttle linkage, PCV and fuel line routing. Note the fuel pressure regulator and finer fuel filter. That PCV line looks like it’s going into the choke heat riser – that will have to be changed as there is no vacuum to pull fumes through the PCV valve. Probably not enough heat to operate the choke either.
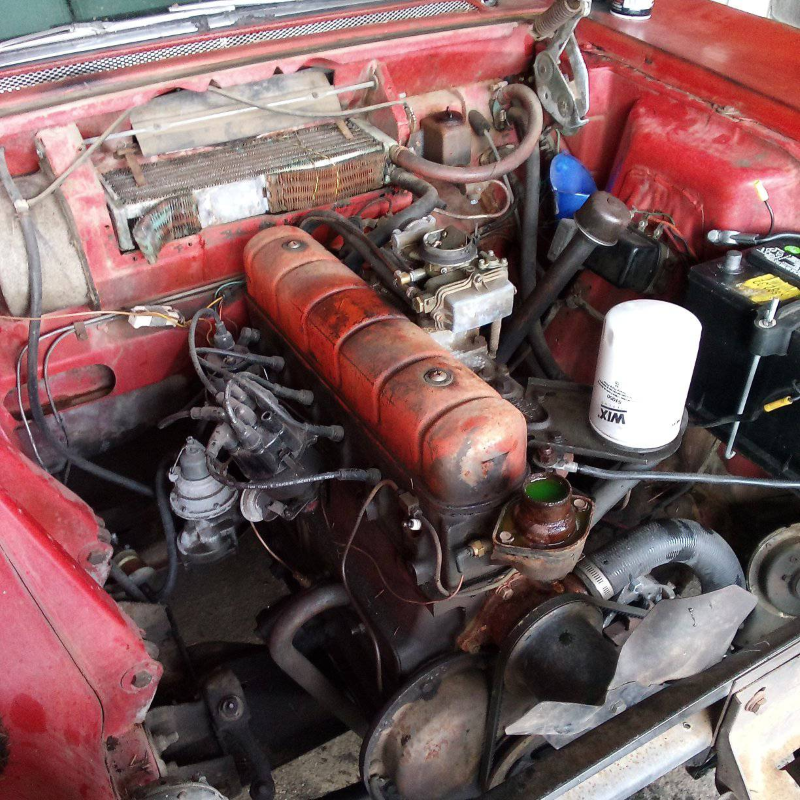
Just for comparison, here is the original 195.6 still in the car. Obviously he heater core cover has been removed.